Part Studios
![]()
![]()
![]()
這個主題說明使用 Part Studio 建立零件的功能與機制,以及如何自訂工具列。
Onshape Part Studio 是一個用來建立與編輯零件、曲面與草圖的容器。Part Studio 是在文件的一個分頁之中,通常是由特徵工具列、特徵清單與包含模型的圖形區域所組成。Part Studio 不是一個模型,而是一個設計環境,可於其中設計需要共享通用參考的零件。請參考下方的說明:
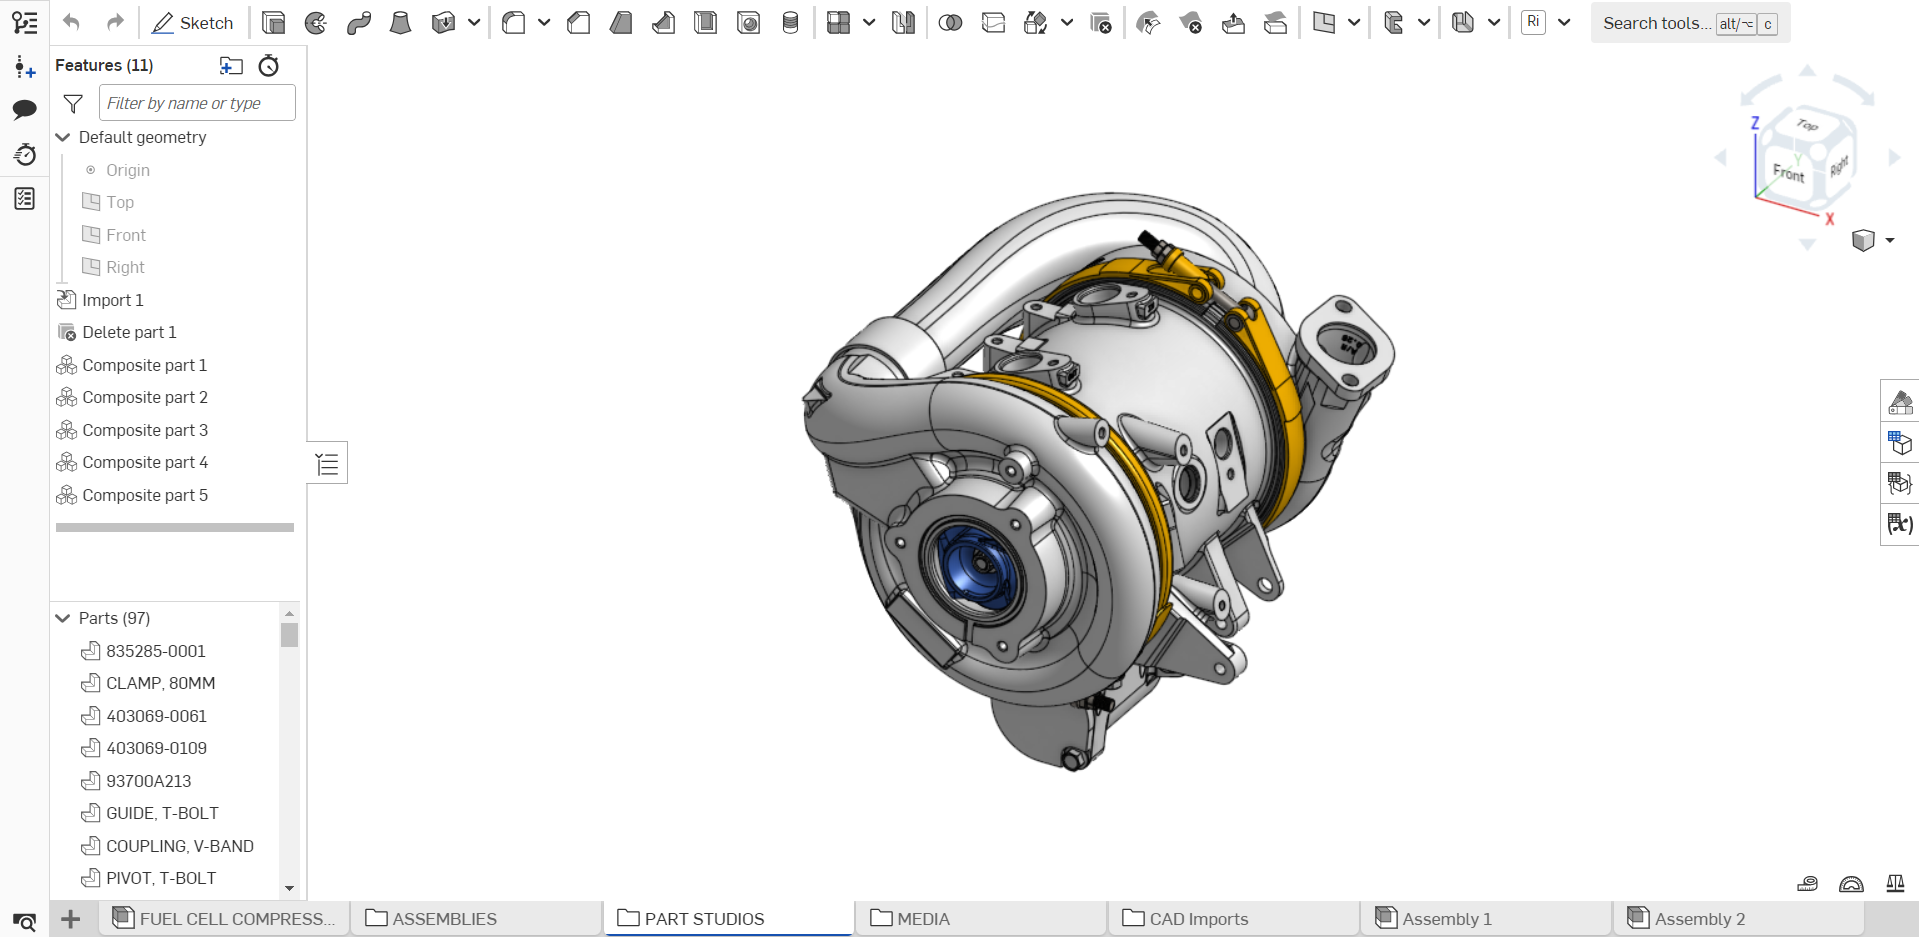
- Onshape 文件最上方的邊界處 (導覽列) 包含了文件名稱 (以粗體顯示),使用中工作區的名稱則出現在其右方。
- 特徵清單 (在視窗左側) 包含預設的幾何,以及您所建立的所有特徵。粗體橫條是回溯控制棒,可以重新調整控制棒的位置來產生在該清單位置的特徵清單。在這個面板底部的是「零件/曲線/曲面」清單 (通常稱為「零件」清單),可以摺疊這些清單以增加使用上的便利性。
- The filter
 and search bar enable you to filter your search by name, type, folder, or part. Click
  to open a dropdown menu with various filter options:
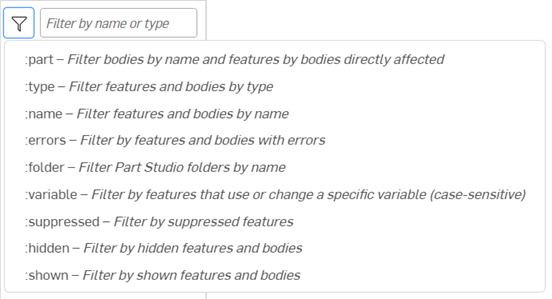
Enter a partial part/feature name or type to show matching parts and features. Use a special command (prefixed with a colon : ) for further control:
- :part search string - Show matching bodies by name and features by bodies that directly affect those bodies.
- :type search string - Show features and bodies with matching type
- :name search string - Show features and bodies with matching name
- :errors search string - Show features and bodies with errors
- :folder search string - Show Part Studio folders with matching name
- :variable search string- Show features that use or change a variable (case-sensitive)
- :suppressed search string - Show suppressed features
- :hidden search string - Show hidden features and bodies
- :shown search string - Show non-hidden features and bodies
For example, :part part 1 will display Part 1, Part 10, Part 11, Part 12, etc., and all features that directly affect those bodies.
- 在白色空間 (或圖形區域) 中有預設的幾何、原點及平面。
- 視窗底部的分頁管理員區域:所有的 Part Studios、Assemblies、Drawings、匯入的圖片及其他檔案。可以拖曳這些分頁來調整位置,每個分頁有其各自的環境選單 (按滑鼠右鍵來存取)。
使用在分頁列中的這些圖示:
 分頁管理員 - 開啟「分頁管理員」面板,您可於其中搜尋分頁、選擇多個分頁 (例如為發行選擇)、更新分頁以及存取分頁屬性。詳細資訊請參考 文件面板。
 插入新元素 - 從要建立新分頁之處開啟功能表,包括:Part Studio、組合件、工程圖、Feature Studio、資料夾。使用這個功能表同時會開始檔案的匯入與加入協力廠商的應用程式。
按一下「特徵」清單右側的「特徵與零件」圖示 ![]() 來完全摺疊清單。再按一下圖示即可重新開啟清單。
來完全摺疊清單。再按一下圖示即可重新開啟清單。
當視窗較小時,草圖工具的大小會被調整為 ![]() 。
。
關於草圖繪製的詳細資訊,請參考草圖工具。
對於效能的最佳實踐是,不應在單一的 Part Studio 中建構整個組合件的零件。只有需要共用相同參考的零件應該在同一個 Part Studio 中。在組裝零件的時候,您可以使用來自多個 Part Studio 的零件,甚至可來自不同文件中。
當您在需要在眾多零件間分享共用的幾何參考時,請使用衍生零件或關聯中功能來維持來自其他 Part Studio 中幾何間的關係,同時保有個別較小的 Part Studio。
若要進一步了解在 Part Studio 中建立多個零件的詳細資訊,您可用自己的步調跟著 Multi-Part Part Studios (需要有 Onshape 帳戶) 的課程操作。
Part Studio 工具列
在 Part Studio、工程圖或組合件分頁中使用 S 鍵來存取捷徑列。

草圖工具捷徑列的範例。在您的帳戶喜好設定中自訂捷徑列。
您可以在 Part Studio、組合件與 Feature Studio 中自訂 Onshape 工具列 - 下方顯示的是在 Part Studio 中:
- Hover anywhere in the toolbar and right-click, then select Customize toolbar...
![在工具列上移動游標暫留,按右鍵然後選擇 [自訂工具列...] 的範例](Resources/Images/concepts/customizeTB-2.png)
This activates the ability to edit the toolbar:

- 工具在工具列中會以工具組的形式強調顯示;您可以將這些工具組拖曳置放到工具列中的新位置上:

- 將一個工具圖示拖曳到「新工具組」方塊中來建立一個新的工具組,「新工具組」方塊會在您開始拖曳圖示時出現:

- 將個別的工具從工具列中拖出然後放置在「工具」方塊中,這樣可以將工具從工具列中移除 (您永遠可以將工具拖曳置放回工具列中)。下方顯示拖曳操作的過程:
-

拖曳完成之後:

- 按一下 [儲存] 來儲存您的變更,或按一下 [取消] 來關閉而不儲存。也可以按一下 [重設為預設] 來復原該類型工具列 (Part Studio、組合件或 Feature Studio) 的所有變更,將工具列還原回 Onshape 原始的順序與內容。
當工具是群組中的一部分時,您必須移動整個群組。一旦移動整個群組後,您可以根據需要將個別的工具移回工具列中。若要改變整個群組,請選擇 [重設為預設],這樣會重設整個工具列。
Part Studio 環境選單
在 Part Studio 分頁上按滑鼠右鍵來存取環境選單:
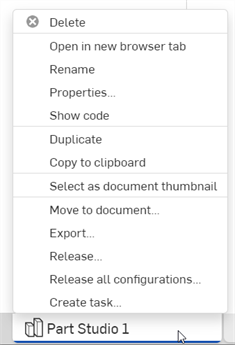
- 刪除 - 即使是使用中的,也可以刪除 Part Studio (或任何分頁)。無法刪除最後剩下的分頁。
- 在新瀏覽器分頁開啟 - 在新的瀏覽器分頁中開啟這個 Part Studio
- 重新命名 - 重新命名這個 Part Studio
- 屬性 - 存取提供關於 Part Studio 資訊的「屬性」對話方塊。在對話方塊中,您可以提供整個 Part Studio 的中繼資料,或以各個零件為基礎提供中繼資料:
![從 Part Studio 環境選單中存取 [屬性]](Resources/Images/sketch-tools/part-studio-properties.png)
使用 Part Studio 名稱旁的「發行」圖示來開始建立一個發行套件 (如果您是公司或企業的成員,並且有建立發行套件的權限)。
反灰 (非啟用) 的屬性是在帳戶管理中的公司屬性內定義並從中移入的。詳細資訊請參考管理公司 > 屬性。
若要調整對話方塊的大小,請從左/右或上/下拖曳邊緣。
- 顯示程式碼 - 開啟顯示有 FeatureScript 的面板。
- 複製 - 產生這個 Part Studio 立即的副本。會直接將副本貼入至原始的 Part Studio 中。副本與原始文件並無關聯。
- 複製到剪貼簿 - 複製到剪貼簿 - 複製一個 Part Studio 到剪貼簿上以將其貼入至另一個文件中。開啟另一個 Onshape 文件,按一下
 (插入新元素),然後選擇貼上分頁來將複製的分頁貼至一個不同的文件中。
 - 更新連結的文件 - 如果適用的話,允許您更新至所連結文件的特定版本。
- 選取為文件縮圖 - 選擇這個 Part Studio 的圖片來做為在文件頁面中的預設文件縮圖。
- 建立 Part Studio x 的工程圖 - 自動建立整個 Part Studio (僅限實體/零件) 的工程圖。會在文件中建立一個新的工程圖分頁。
- 移動至文件 - 將 Part Studio 移動到新或現有的文件中,會在此操作的過程中建立新的文件。如果在原始文件中的任何分頁使用了零件,則會在兩個文件間建立一個連結`,且會在「特徵」 清單中以這些圖示表示:
 代表存在一個連結;
 表示文件有新的版本。若要更新至較新的版本,按一下圖示來開啟「參考管理員」。
 - 匯出 - 將在 Part Studio 中的零件以不同的格式匯出,其中有下載處與保留在個別的 Onshape 分頁中的選項。
- 發行 - 建立這個 Part Studio 的發行套件。
- 發行所有組態 - 對於可建立發行套件的使用者,這個指令會開啟「發行候選」對話方塊,其中已將所有組態預先載入至發行套件中 (可支援多達 100 個組態)。僅為有單一「清單輸入」的組態提供這個選項。如果有多個「清單輸入」,或是使用了「核取方塊」或「組態變數」輸入,則無法使用這個指令選項。在開啟對話方塊之後(於環境選單中按一下 [發行] 指令後),您隨時可以將組態加入至發行套件中。
- 建立工作 - 建立可指派給其他使用者 (或目前使用者) 的工作,工作可參考零件並有到期日。系統會通知被指派工作的使用者關於該工作。您可以從任何 Onshape Part Studio、組合件與工程圖分頁,以及在「分頁」管理員清單中的分頁上使用環境選單來建立工作。
編輯與重設零件屬性
當在 Part Studio 中時,您可以使用零件的環境選單來存取特定零件的屬性。在「零件」清單中的零件名稱上按右鍵,然後選擇 [屬性] 來開啟「屬性」對話方塊:
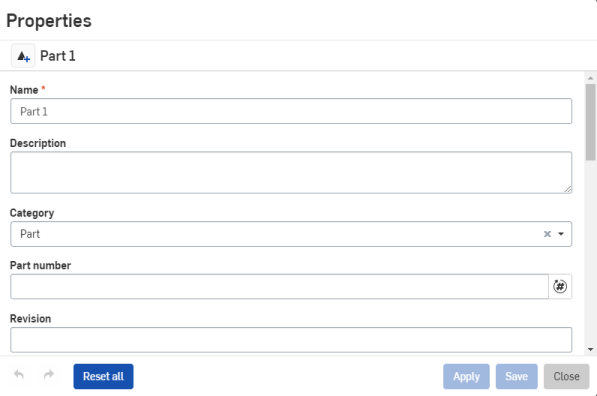
根據需要編輯屬性。您可以使用零件名稱旁的「發行」圖示來建立一個發行 (如果您有權限的話)。使用左下角的復原/取消復原按鈕來在對話方塊中復原或取消復原編輯。
使用 全部重設 按鈕來清除一個或多個選取零件的所有可編輯零件屬性 (注意到當 Part Studio 是於最上層被選取時,「全部重設」按鈕不是啟用的)。「全部重設」執行多於表面上看起來的操作:如同工具提示所示 (移動游標暫留),此按鈕會重設您在對話方塊中看不到的某些屬性 (外觀、材料、鑲嵌品質),並不像是僅手動清除欄位一般,而是也會完全清除掉所有手動的套用。如果適用的話,會允許自訂特徵計算的值 (一般會被手動的套用所覆寫) 生效。
如果您有經組態的屬性,「全部重設」不會對這些屬性產生任何作用。
下方是「屬性」對話方塊中的預設欄位。如果您在帳戶管理中已有組態設定好的屬性,可能會有此處未略述的額外欄位出現:
-
零件清單名稱 - 顯示來自零件清單的不可編輯零件名稱。如果其下方的「名稱」欄位有所變更,這個名稱會自動更新。
-
名稱 - 可編輯的零件名稱。
-
說明 - 對零件的說明或註解。
-
類別 - 將零件分組至一或多個標準或自訂的類別中。根據預設,系統會將零件分組到 Onshape part 類別中。僅能在 Professional 或 Enterprise 帳戶中編輯類別。
-
零件編號 - 零件的獨特識別數字碼。可以手動輸入零件編號,或是以發行管理過程的一部分來自動套用。詳細資訊請參考設定修訂版與零件編號的喜好設定。
-
修訂版 - 零件修訂版的獨特英數字元識別碼。可以手動輸入修訂版,或是以發行管理過程的一部分來自動套用。詳細資訊請參考設定修訂版與零件編號的喜好設定。
-
狀態 - 與發行管理相關的零件狀態。狀態可是「進行中」 (預設)、「待決中」、「已拒絕」、或「已發行」。僅在版本之中且關閉發行管理時才能編輯這個欄位。
-
廠商 - 如果有與零件相關的廠商,請於此處輸入廠商名稱。
-
專案 - 如果有與零件相關的專案,請於此處輸入專案名稱。
-
產品線 - 如果有與零件相關的產品線,請於此處輸入產品線名稱。
-
材料 - 一個唯讀的欄位。如果有材料與所選的零件相關,會顯示在這個欄位中。如果沒有指定材料,則會顯示未指定。詳細資訊請參考指定零件材料。
-
標題 1/2/3 - 零件的額外說明描述欄位。使用的範例像是在工程圖中如果「說明」屬性未在工程圖內適當地換行,系統會使用此處的標題來與預設工程圖範本標題區塊的三個列對應。
-
非修訂版管理的 - 當核取時,零件是不受修訂版管理的;零件是處在發行管理的過程之外。
-
從所有 BOM 中排除 - 核取時會將零件從所有材料表中全面排除。
-
測量單位 - 選擇零件的測量單位,預設是英吋。
若要調整對話方塊的大小,請從左/右或上/下拖曳邊緣。
根據預設,新建立的文件會包含一個空白的 Part Studio 與組合件。Part Studio 是用來定義零件的,其中提供了特徵清單 (參數式的歷程記錄)。一個特徵清單可主導多個零件的形狀。使用草圖工具來建立 2D 幾何,然後在 Part Studio 中以這些草圖使用特徵工具來建立 3D 模型 (或零件)。
在 Part Studio 螢幕中最上方的是導覽列。導覽列會根據您裝置的螢幕寬度或方位提供數個不同的工具。
由於螢幕寬度而無法容納在其中的工具會出現在文件資訊面板中。
返回文件頁面

若要關閉文件並回到文件頁面中,請輕觸左上角的箭頭。
版本

若要建立不可變的版本與分支版本來產生新的工作區,請輕觸左上方的版本圖示。
詳細資訊請參考版本管理員。
歷程記錄
檢視文件歷程記錄上的每個變更點,並可回復至該歷程中的任何時間點上:
- 輕觸左上角的圖示。
在較小的螢幕上,存取文件資訊面板,然後從該處選擇歷程記錄:
- 輕觸更多的圖示。

- 選擇歷程記錄。
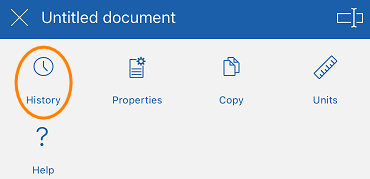
詳細資訊請參考歷程記錄。
評論

要與合作人員溝通,請輕觸右上角評論的圖示。
在較小的螢幕上,存取文件資訊面板,然後從該處選擇評論 :
- 輕觸更多的圖示。

- 選擇評論。
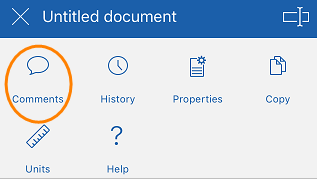
詳細資訊請參考評論。
合作人員

要查看與您協同合作的人員並存取跟隨模式,請輕觸右上角合作人員的圖示。
只有當您與某人進行即時合作時,合作人員的圖示才會出現。
說明

要存取說明,或像是影片、意見反應、與關於等的其他資源,請輕觸右上角的圖示。
在較小的螢幕上,存取文件資訊面板,然後選擇「說明」:
- 輕觸更多的圖示。

- 選擇說明。
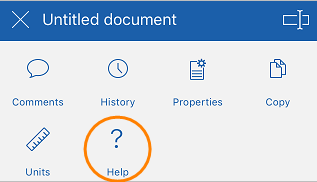
選擇下列項目之一:
- 說明 - 檢視您所使用裝置的說明文件。
- 影片 - 開啟說明文件中的影片頁面。
- 意見反應 - 提出問題、送交 bug 或改善建議。
- 關於 - 查看您所執行的 Onshape 版本。
文件資訊面板

存取文件資訊面板可讓您使用無法容納在導覽列中的工具 (如上方所列),並可使用下方列出的其他工具。
若要存取文件資訊面板,請輕觸右上角的更多圖示。
文件資訊面板開啟,可從此處選擇下列的項目:
- 屬性 - 檢視文件屬性。
- 複製 - 建立您所在工作區的副本。
- 單位 - 檢視與設定文件的預設測量單位 (像是長度、角度與質量單位等)。
- 文件名稱 - 輕觸右上角的編輯圖示來編輯文件的名稱。
- 文件說明 - 輕觸新增說明來加入或編輯文件的說明。
- 共享 - 輕觸共享的圖示來將文件與個人、團隊、Company 或 Onshape 支援人員共享。您也可以將文件設為私有的或公開的。
草圖工具
![]()
輕觸新草圖工具圖示來選擇平面並開始新草圖。
在有草圖開啟的情況下,輕觸新草圖工具圖示來檢視所有的草圖工具。
詳細資訊請參考草圖工具。
特徵工具
![]()
輕觸特徵工具的圖示來檢視所有的特徵工具。
詳細資訊請參考特徵工具。
測量與質量屬性

輕觸測量工具來測量任何選取的圖元。
詳細資訊請參考測量工具。

輕觸質量屬性工具來檢視所選零件的屬性。
詳細資訊請參考質量屬性。
特徵清單
![]()
- 輕觸特徵清單控制點來開啟特徵清單。
- 輕觸並水平或垂直拖曳來調整特徵清單的大小。
詳細資訊請參考特徵清單。
旋轉鎖定

輕觸 3D 旋轉鎖定的按鈕來鎖住旋轉圖形區域的功能。在您嘗試拖曳圖元的情況下,此功能是相當有用的。
詳細資訊請參考 3D 旋轉鎖定。
視角立方體

輕觸視角立方體來使用可選的視角清單。
詳細資訊請參考視角立方體。
平面與原點
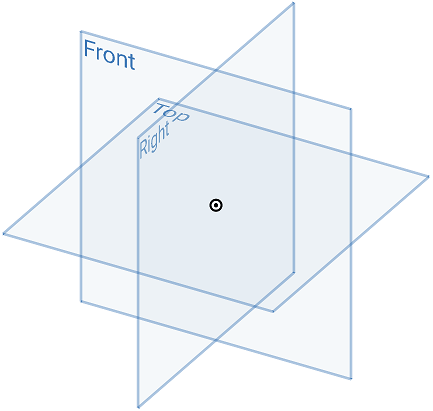
- 根據預設,每個 Part Studio 中有三個平面 (Top、Front、Right) 與一個原點,做為繪製草圖或建立特徵時的參考點。
- 您可以建立任意數量的平面。
- 您可以從特徵清單內的檢視來隱藏預設的平面與原點,但無法刪除這些項目。
- 您可以隱藏所有的平面與零件。
分頁

當您開啟文件時,最近開啟的分頁會是啟用的。
輕觸朝上的>形箭號 (箭頭朝上) 來開啟建立分頁的功能表。
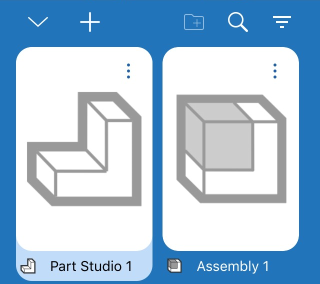
- 輕觸來啟用它。當您切換分頁時,會提交任何開啟中的特徵。
- 向左或向右滑動來在清單間水平捲動。
- 依據組合件或 Part Studio 來篩選分頁。
- 根據名稱來搜尋 Part Studio 或組合件。
- 建立、重新命名、複製、與刪除 Part Studio 或組合件。文件可以擁有的 Part Studios 或組合件分頁數量並無限制。
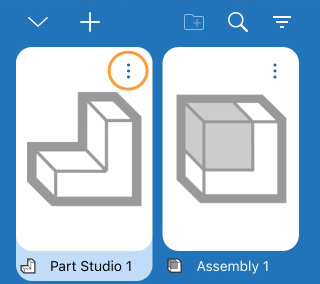
複製會在文件中新增 Part Studio 的一個複製。
如果 Part Studio 或組合件是文件中唯一的分頁,您無法刪除它。
一個文件必須至少有一個 Part Studio 或組合件 (至少有一個分頁)。
組織管理分頁
過分頁列上的資料夾來管理分頁。使用省略號功能表來建立資料夾:
- 在開啟功能表之後,輕觸選擇。
- 這樣會選擇目前的分頁並將其包括在資料夾中,會在其他的分頁中放置核取記號以讓您可以選擇。
- 選擇要包括在資料夾中的其他分頁。
- 輕觸
 圖示。
圖示。 - 提供資料夾的名稱。
- 輕觸建立資料夾。
- 會建立資料夾,其中有所選的分頁,會開啟顯示資料夾所以可以看見其中的內容:
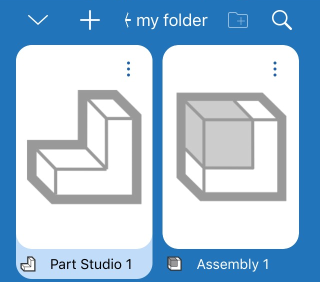
當資料夾是啟用時,分頁列僅顯示該資料夾中的分頁,所有其他的分頁會以「所有分頁」的圖示來表示:
![]()
選擇所有分頁的圖示 (上方圖形中從左邊過來的第二個圖示) 以再次顯示所有的分頁。
在任何資料夾上使用環境選單來執行在該資料夾上的操作,包括:
- 重新命名 - 編輯資料夾名稱。
- 選擇 - 選擇一個資料夾,然後建立另一個資料夾以放置該資料夾。
- 拆開 - 刪除資料夾並將分頁放回其原始的位置。
根據預設,新建立的文件會包含一個空白的 Part Studio 與組合件。Part Studio 是用來定義零件的,其中提供了特徵清單 (參數式的歷程記錄)。一個特徵清單可主導多個零件的形狀。使用草圖工具來建立 2D 幾何,然後在 Part Studio 中以這些草圖使用特徵工具來建立 3D 模型 (或零件)。
在 Part Studio 螢幕中最上方的是導覽列。導覽列會根據您裝置的螢幕寬度或方位提供數個不同的工具。
由於螢幕寬度而無法容納在其中的工具會出現在文件資訊面板中。
返回文件頁面

若要關閉文件並回到文件頁面中,請輕觸左上角的箭頭。
版本

若要建立不可變的版本與分支版本來產生新的工作區,請輕觸左上方的版本圖示。
詳細資訊請參考版本管理員。
歷程記錄

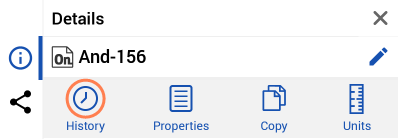
檢視文件歷程記錄上的每個變更點,並可回復至該歷程中的任何時間點上:
- 輕觸更多的圖示來存取文件資訊面板。
- 輕觸歷程記錄。
詳細資訊請參考歷程記錄。
評論

要與合作人員溝通,請輕觸右上角評論的圖示。
詳細資訊請參考評論。
合作人員

要查看與您協同合作的人員,請輕觸右上角合作人員的圖示。
詳細資訊請參考協同合作。
只有當您與某人進行即時合作時,合作人員的圖示才會出現。
說明

要存取說明,或像是影片、意見反應、與關於等的其他資源,請輕觸右上角的圖示。
選擇下列項目之一:
- 說明 - 檢視您所使用裝置的說明文件。
- 影片 - 開啟說明文件中的影片頁面。
- 意見反應 - 提出問題、送交 bug 或改善建議。
- 關於 - 查看您所執行的 Onshape 版本。
文件資訊面板

存取文件資訊面板可讓您使用無法容納在導覽列中的工具 (如上方所列),並可使用下方列出的其他工具。
若要存取文件資訊面板,請輕觸右上角的更多圖示。
文件資訊面板開啟,可從此處選擇下列的項目:
- 屬性 - 檢視文件屬性。
- 複製 - 建立您所在工作區的副本。
- 單位 - 檢視與設定文件的預設測量單位 (像是長度、角度與質量單位等)。
- 文件名稱 - 輕觸右上角的鉛筆圖示來編輯文件的名稱。
- 文件說明 - 輕觸鉛筆的圖示來加入或編輯文件的說明。
- 共享 - 輕觸共享的圖示來將文件與個人、團隊、Company 或 Onshape 支援人員共享。您也可以將文件設為私有的或公開的。
草圖工具
![]()
輕觸新草圖工具圖示來選擇平面並開始新草圖。
在有草圖開啟的情況下,輕觸新草圖工具圖示來檢視所有的草圖工具。
特徵工具
![]()
輕觸特徵工具的圖示來檢視所有的特徵工具。
詳細資訊請參考特徵工具。
測量與質量屬性

輕觸測量工具來測量任何選取的圖元。
詳細資訊請參考測量工具。

輕觸質量屬性工具來檢視所選零件的屬性。
詳細資訊請參考質量屬性。
特徵清單
![]()
- 輕觸特徵清單控制點來開啟特徵清單。
- 輕觸並水平或垂直拖曳來調整特徵清單的大小。
詳細資訊請參考特徵清單。
旋轉鎖定
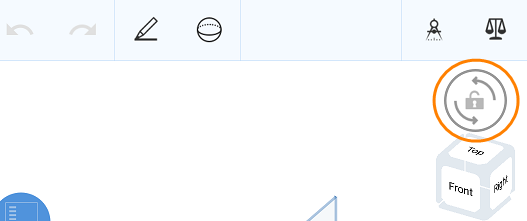
輕觸 3D 旋轉鎖定的按鈕來鎖住旋轉圖形區域的功能。在您嘗試拖曳圖元的情況下,此功能是相當有用的。
詳細資訊請參考 3D 旋轉鎖定。
視角立方體
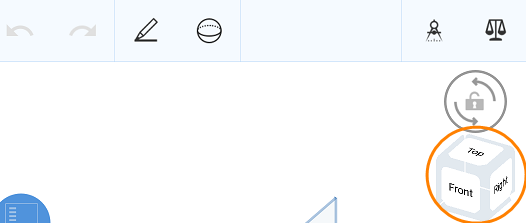
輕觸視角立方體來使用可選的視角清單。
詳細資訊請參考視角立方體。
平面與原點

- 根據預設,每個 Part Studio 中有三個平面 (Top、Front、Right) 與一個原點,做為繪製草圖或建立特徵時的參考點。
- 您可以建立任意數量的平面。
- 您可以從特徵清單內的檢視來隱藏預設的平面與原點,但無法刪除這些項目。
分頁

當您開啟文件時,最近開啟的分頁會是啟用的。
輕觸朝上的>形箭號 (箭頭朝上) 來開啟建立分頁的功能表。
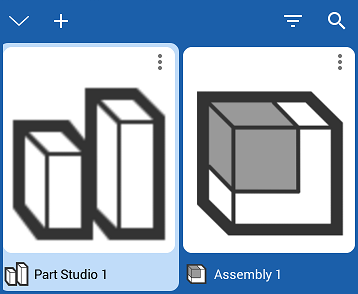
- 輕觸來啟用它。當您切換分頁時,會提交任何開啟中的特徵。
- 向左或向右滑動來在清單間水平捲動。
- 依據組合件或 Part Studio 來篩選分頁。
- 根據名稱來搜尋 Part Studio 或組合件。
- 建立、重新命名、複製、與刪除 Part Studio 或組合件。文件可以擁有的 Part Studios 或組合件分頁數量並無限制。
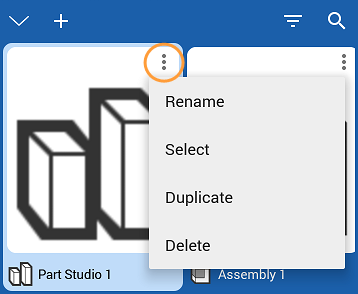
複製會在文件中新增 Part Studio 的一個複製。
如果 Part Studio 或組合件是文件中唯一的分頁,您無法刪除它。
一個文件必須至少有一個 Part Studio 或組合件 (至少有一個分頁)。
關於在「學習中心」的其他資源,請用自己的步調跟著 Introduction to Part Design (需要有 Onshape 帳戶) 與 Part Design Using Part Studios (需要有 Onshape 帳戶) 的課程操作。