![]()
![]()
![]()
在一特定零件 (或所選零件群組) 上使用環境選單,您不僅可以自訂零件色彩,也可以指定材料 (因此有密度),也可以指定自訂的密度而不指定材料。Onshape 會提供一個材料資源庫供您使用,您也可以新增 (或移除) 您自訂的材料資源庫。
您可以使用環境選單來將一個材料指定給零件 (或所選零件群組)。當指定零件材料時,質量屬性工具同時顯示與密度相關的資訊。
指定零件材料:
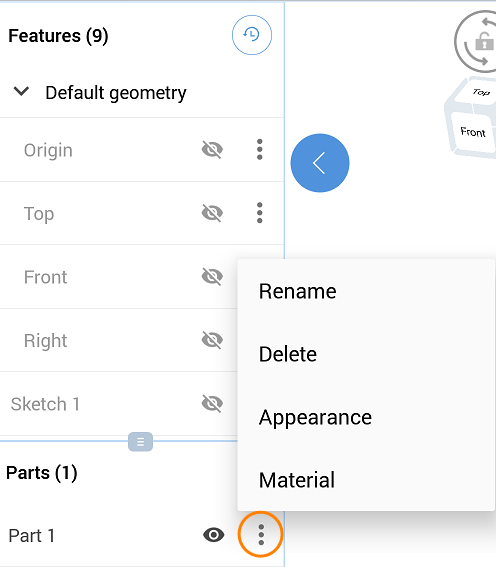
- 選擇一個零件 (或零件群組),按右鍵來開啟環境選單然後選擇指定材料:
![在零件清單環境選單中強調顯示 [指定材料] 選項的螢幕擷取畫面](Resources/Images/concepts/assignmaterial-contextmenu.png)
- 選擇 [資源庫] 分頁。
- 從第一個下拉式功能表中選擇一個材料資源庫 (如果有的話,預設會顯示 Onshape 材料資源庫):
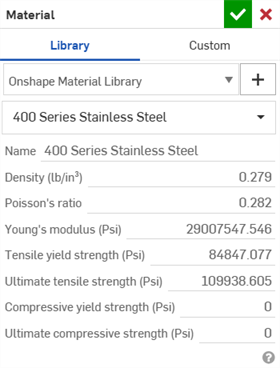
- 從第二個下拉式功能表中選擇一個材料。
請注意,每個材料都列出密度值。
- 按一下
 。
。
當指定材料時,請注意:
- 沒有指定材料的零件有零質量。
- 顯示的單位是目前文件的單位。
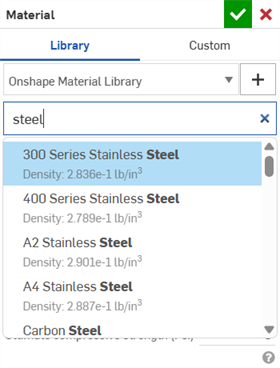
- 您可以在搜尋方塊中輸入名稱或類別來搜尋材料:
-
在您將材料指定給零件之後,該零件的環境選單選項即會變為編輯材料。
-
零件「屬性」對話方塊會顯示一個唯讀欄位,表示與零件相關的材料。詳細資訊請參考編輯與重設零件屬性。
您可以在「材料」對話方塊的「自訂」分頁中將自訂材料名稱與相對應的特性指定給一個零件 (或選取的零件群組)。
指定自訂材料與特性給零件:
- 選擇一個零件 (或零件群組),按右鍵來開啟環境選單然後選擇指定材料。
- 選擇 [自訂] 分頁。
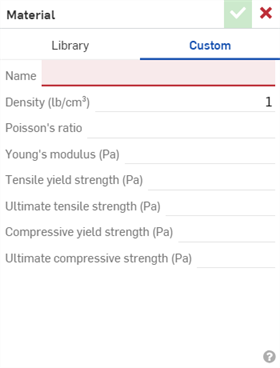
- 輸入可用自訂特性的值:
名稱
密度
蒲松比
楊氏模數
抗拉降伏強度
終極抗拉強度
抗壓降伏強度
終極抗壓強度
- 按一下核取記號圖示 (
 )。
)。
系統會使用指定的值來計算質量屬性。請注意,並不會儲存材料「名稱」與值來在日後供其他零件使用,但如果需要,您可以為其他零件輸入相同的資訊。
您可以將材料資源庫新增至您的 Onshape 帳戶中並與其他使用者共享。對於 Company 帳戶,公司管理員可新增材料資源庫,之後若管理員核取「我的帳戶」中「Company 喜好設定」內的核取方塊,材料資源庫就自動可讓公司的所有成員使用。
新增自訂材料資源庫的主要工作流程如下:
- 匯出來自 Onshape 的 Onshape 材料資源庫 (使用此資料庫的格式,僅編輯其內容)。
- 將資源庫匯出至試算表編輯工具中,然後加以編輯以包含您想要的資訊,最後匯出檔案。
- 將資源庫匯入至新的 Onshape 文件中。
- 將文件與其他人共享以供其使用。
更詳細的操作說明如下。
匯出 Onshape 材料資源庫
- 當在您的 Onshape 帳戶中時,搜尋「公開」篩選器以找出 std.mat 文件,或是使用這個連結:
Onshape 標準材料資源庫 (std.mat)
- 開啟文件。
- 在 std.mat 分頁上按右鍵,然後選擇匯出。
分頁會以 CSV 檔案 (UTF-8 格式) 匯出。
將資源庫匯入至試算表、編輯然後匯出
- 試算表編輯器中開啟所匯出 Onshape 材料資源庫的 CSV 檔案。請注意,檔案必須是 UTF-8 格式的。
- 需要保留第一列做為需要的欄位名稱:「類別」、「名稱」、「密度」。
- 根據需要編輯列來記錄您自訂的材料。
您可以建立多個自訂材料資源庫來幫助您的使用者管理材料。
您可以按一下欄名稱旁的下拉清單來指定試算表中您喜好的測量單位。
- 使用新名稱儲存試算表。
- 將編輯器中的試算表以 CSV 檔案 (UTF-8 格式) 匯出。
匯入經編輯的資源庫至 Onshape 中
- 在您的 Onshape 帳戶中建立一個新文件。文件的名稱為何並不重要,因為名稱不會用做為資源庫的名稱;會使用分頁的名稱做為資源庫的名稱。
- 如下所示,在新文件中按一下

 來建立另一個分頁 (以保存材料資源庫)。
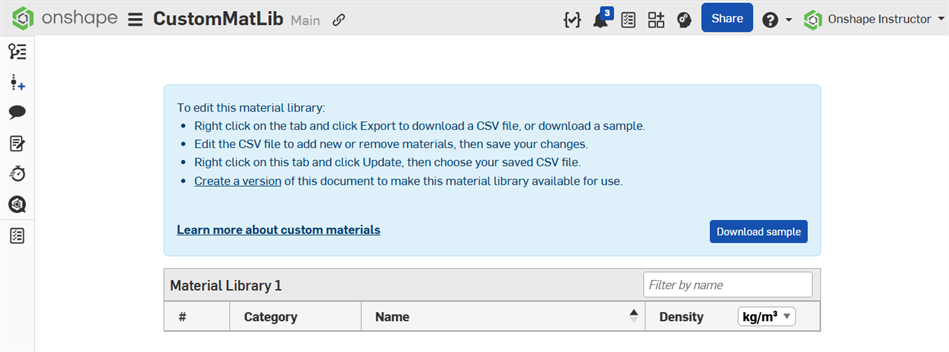
- 在新的材料資源庫分頁上按右鍵,然後選擇更新。
- 在對話方塊中選擇自訂的材料資源庫 CSV 檔案(UTF-8 格式),然後按一下開啟。
-
會顯示檔案的內容。如果是正確的檔案,請按一下 確定。
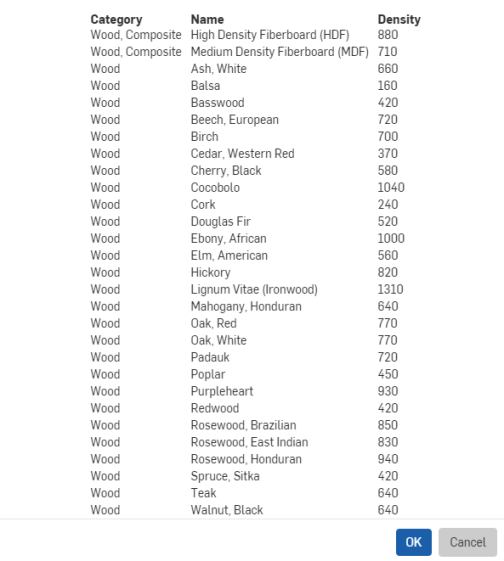
如果不是正確的檔案,按一下取消並從上方的步驟 2 重新開始。
- 按一
 來建立這個文件的一個版本 (命名版本名稱然後按一下 [建立])。
 - 刪除文件中不需要的分頁,請保留「材料資源庫」分頁。
- 將分頁重新命名為您要使用的資源庫名稱,這也是顯示在「材料」對話方塊中的名稱。
如果需要,與其他使用者共享資源庫
與其他使用者共享新資源庫的存取權限:
- 按一下 分享。
- 選擇要共享文件 (此處即是資源庫) 的個人、團隊或 Company。
- 最低的許可權限必須是「檢視」。
- 請其他使用者參考上方管理自訂材料資源庫中的加入材料資源庫的部分,以獲得操作的說明。
即便尚未將新材料資源庫加入至您的「喜好設定」中,您仍可以透過「材料」對話方塊來使用資源庫:
- 當在 Part Studio 中有幾何的情況下,在零件或零件名稱上按右鍵,然後選擇指定材料。
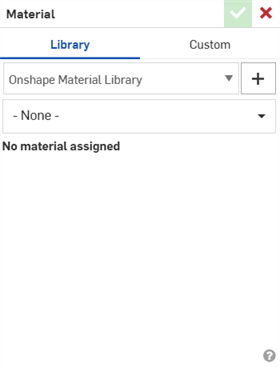
- 按一下資源庫名稱旁的加號圖示
 。
。 - 使用篩選器來在您可存取的材料資源庫中搜尋:
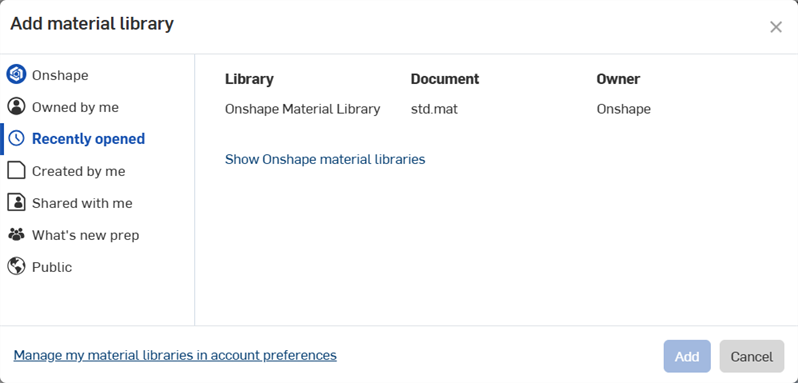
如果需要,按一下欄標題來排序該欄。
- 按一下 新增。
- 請注意到「材料」對話方塊中的新資源庫名稱。
Onshape 會提供一個預設的材料資源庫供您使用,您也可以建立、新增並移除材料資源庫。
新增材料資源庫
若要新增材料資源庫,您必須要能夠存取採用建立新材料資源庫步驟新增的資源庫。
如果材料資源庫文件已與您共享 (您在該文件上需要有「檢視」的許可權限),您可以就將材料資源庫加入到您帳戶的「喜好設定」清單中。
- 在 Onshape 視窗的右上角按一下您的名字。
- 選擇我的帳戶。
- 選擇左邊的喜好設定分頁。
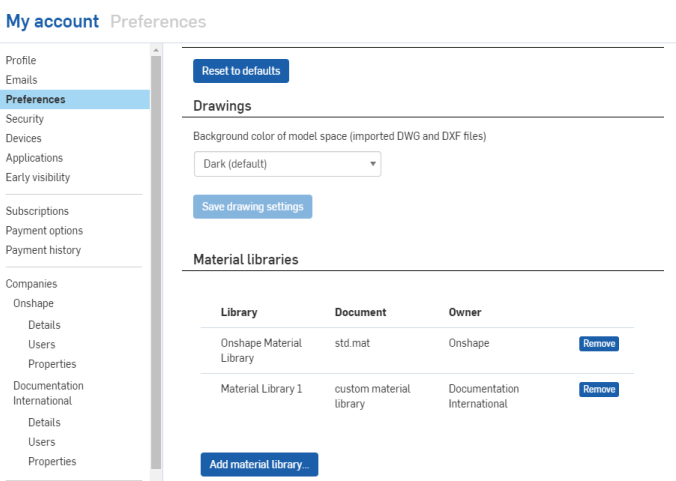
- 捲動至所出現網頁的最下方來查看材料資源庫:
-
按一下新增材料資源庫按鈕。
- 在「新增材料資源庫」對話方塊中,使用篩選器來幫助您找出要新增的材料資源庫。
- 選擇材料資源庫,然後按一下新增。
新的材料資源庫會加至「喜好設定」頁面中的清單內。您可以在所有有存取權限的其他文件中經由「材料資源庫」對話方塊存取新的資源庫。
移除資源庫
請注意,「移除」的操作會立即生效,並不需要確認移除。
- 在您帳戶設定的喜好設定分頁中,捲動至頁面下方來查看材料資源庫。
- 按一下您要移除資源庫旁的移除按鈕。
如果需要,您可以移除 Onshape 材料資源庫,若要再加回來,請使用這個文件:Onshape 標準材料資源庫 (std.mat)
更新材料資源庫
如果您要在已加入至您 Onshape 帳戶的自訂材料資源庫中新增或移除材料:
- 請在材料資源庫 CSV 檔案 (UTF-8 格式) 中做出變更並加以儲存。
- 在 Onshape 中,開啟包含自訂材料資源庫的文件 (一個分頁)。
- 在自訂材料資源庫分頁上按右鍵,然後選擇更新。
- 選擇更新的 CSV 檔案,然後按一下 確定。
- 建立一個版本來讓共享此文件的所有使用者可存取其中的變更。
並不會通知使用者關於材料資源庫的變更,但使用者可立即存取更新後的版本。不會使用資源庫的變更來更新已套用有材料的零件。如果指定的特定材料有所變更,必須將材料重新套用至零件上,變更才會生效。
關於「學習中心」的其他資源,請參照此處的技術簡報文章:Best Practices for Managing Custom Libraries (需要有 Onshape 帳戶)。
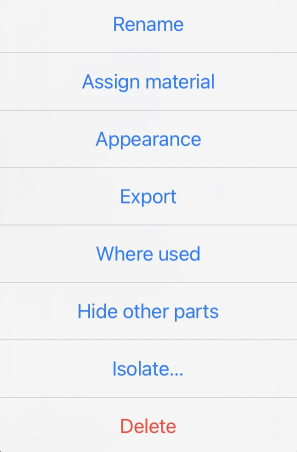
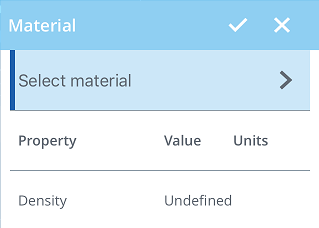
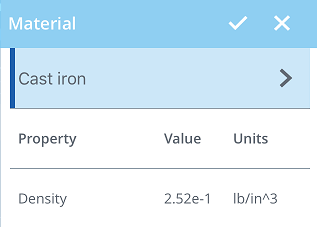
![選擇 [材料] 來開啟「材料」對話方塊](Resources/Images/m-UI/MaterialProperties2.png)
