Part Studios
![]()
![]()
![]()
This topic explains the functionality and mechanics of using Part Studios to create parts as well as how to customize the toolbars.
An Onshape Part Studio is a container used to create and edit parts, surfaces, and sketches. The Part Studio lives in a tab within a document and generally consists of the Feature toolbar, the Feature list, and the graphics area containing the model. The Part Studio is not a model, rather it is a design environment meant for designing parts that need to share common references. See below for reference:
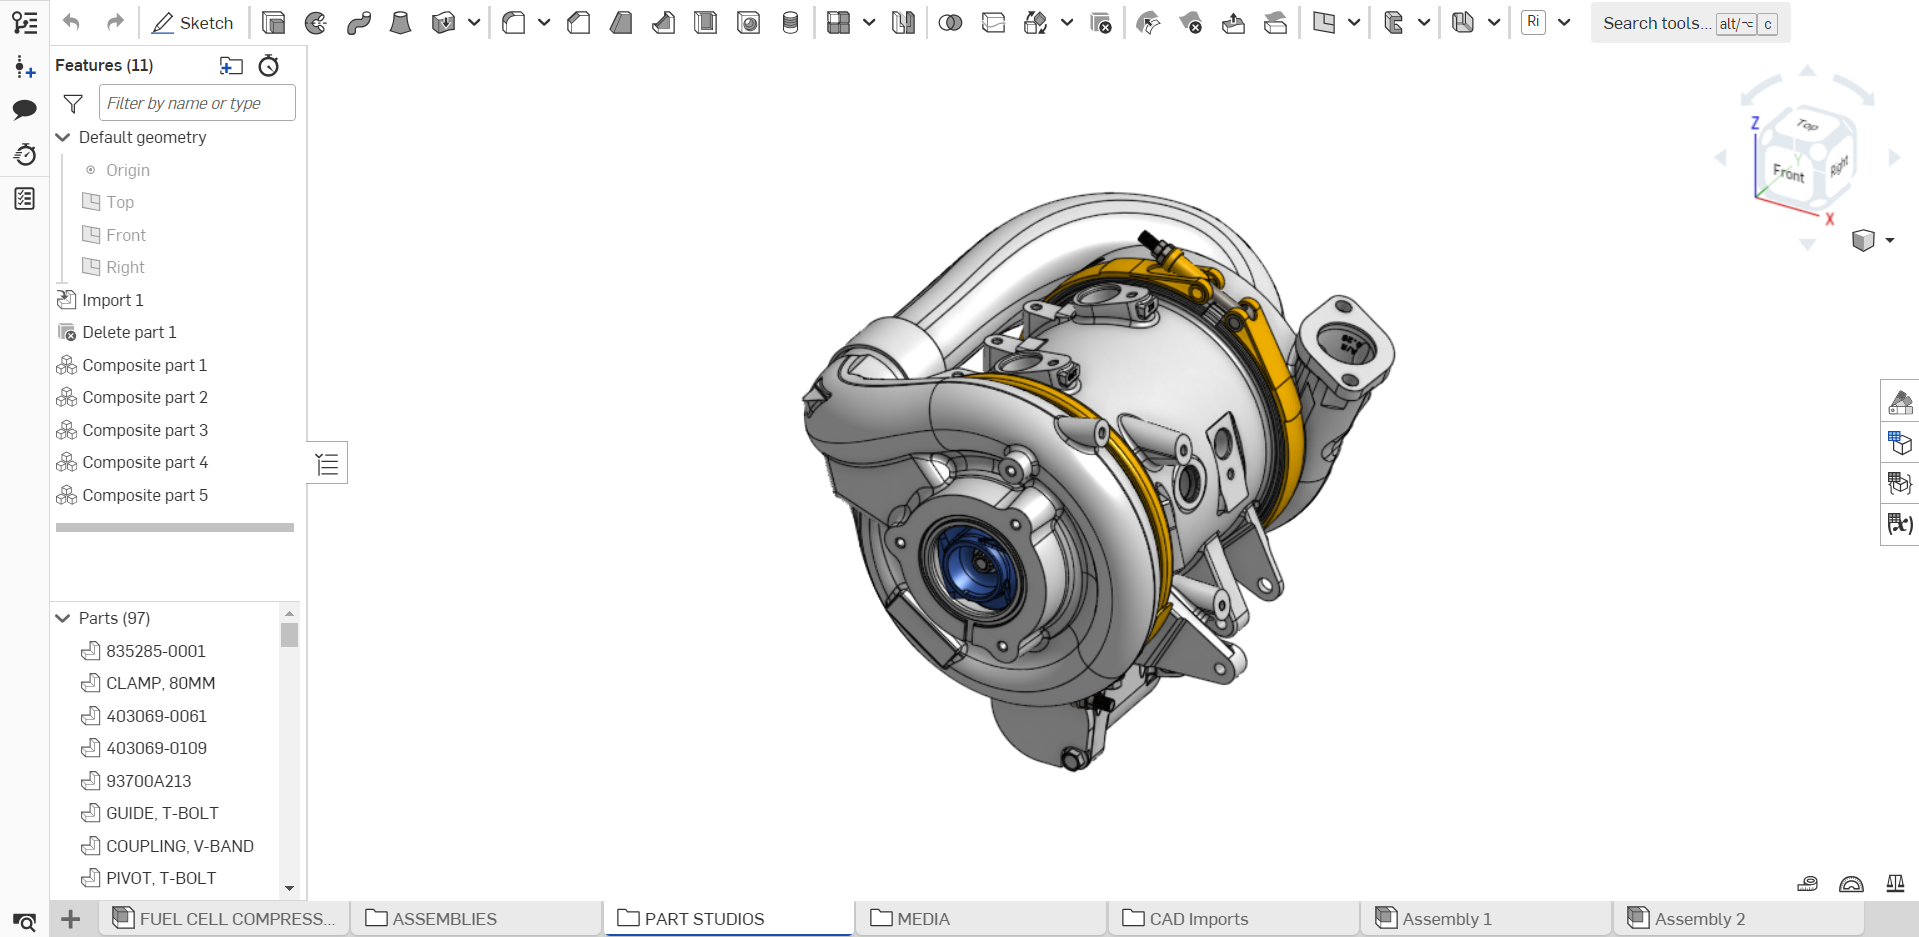
- The top margin (Navigation bar) of the Onshape document contains the name of the document (in bold) and the active workspace name to its right.
- The Feature list (on the left of the window) contains the default geometry as well as any features you create. The thick bar is the Rollback bar and has the ability to be repositioned to generate the Feature list up to its location in the list. At the bottom of this panel is the Parts/Curves/Surfaces lists (referred to commonly as the Parts list). These lists are collapsible for your convenience.
-
The filter
 and search bar enable you to filter your search by name, type, folder, or part. Click
 to open a dropdown menu with various filter options:
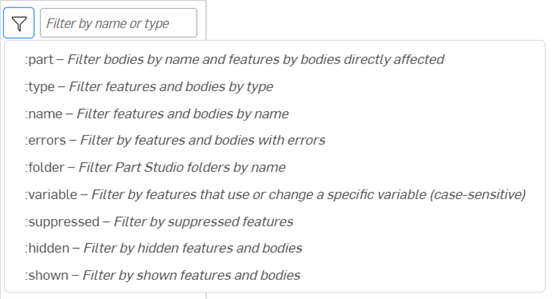
Enter a partial part/feature name or type to show matching parts and features. Use a special command (prefixed with a colon :) for further control:
- :part search string - Show matching bodies by name and features by bodies that directly affect those bodies.
- :type search string - Show features and bodies with matching type
- :name search string - Show features and bodies with matching name
- :errors search string - Show features and bodies with errors
- :folder search string - Show Part Studio folders with matching name
- :variable search string- Show features that use or change a variable (case-sensitive)
- :suppressed search string - Show suppressed features
- :hidden search string - Show hidden features and bodies
- :shown search string - Show non-hidden features and bodies
For example, :part part 1 will display Part 1, Part 10, Part 11, Part 12, etc., and all features that directly affect those bodies.
- Inside the white space (or graphics area) is where you find the default geometry, origin and planes.
- The
Tab manager
area at the bottom of the window: all Part Studios, Assemblies, Drawings, imported images and other files. These tabs can be dragged for repositioning, and each has its own context menu (RMB to access).
Use these icons on the Tab bar:
 Tab manager
- Opens the Tab manager panel, where you can search for tabs, select multiple tabs (for release, for example), update tabs, and access tab properties. See Document panel for more information.
  Insert new element
- Open the menu from which to create a new tab, including: Part Studio, Assembly, Drawing, Feature Studio, folder. Use this menu to also initiate a file import and add a third-party application.
Click the Features and parts icon
![]() on the right side of the Feature list to collapse the list entirely. Click the icon again to reopen the list.
on the right side of the Feature list to collapse the list entirely. Click the icon again to reopen the list.
When the window is smaller, the Sketch tool is resized to
![]() .
.
For more information about sketching, see Sketch Tools.
As a best practice for performance, parts for the entire assembly should not all be modeled in a single Part Studio. Only the parts that must share common references should be in the same Part Studio. When it is time to assemble parts, you can use parts from multiple Part Studios, even from different documents in the same Assembly.
Should you have a need to share common geometric references between a large number of parts, use the
Derived part
or the
In context
feature to maintain relationships between geometries from other Part Studios which enable keeping individual Part Studios smaller.
To learn more about creating multiple parts in one Part Studio, you can follow the self-paced course here: Multi-Part Part Studios (Onshape account required).
Part Studio toolbars
Access the shortcut toolbar with the S key while in a Part Studio, Drawing or Assembly tab.

An example of a sketch tool shortcut toolbar. Customize your shortcut toolbars in your Account preferences.
You can customize the Onshape toolbars in Part Studios, Assemblies and Feature Studios - shown below in a Part Studio:
- Hover anywhere in the toolbar and right-click, then select Customize toolbar...

This activates the ability to edit the toolbar:

- Tools are highlighted in tool sets within the toolbar; you can drag and drop these tool sets to new locations on the toolbar:

- Create a new tool set by dragging a tool icon to the New toolset box that appears when you begin to drag the icon:

- Drag and drop an individual tool out of the toolbar to the Tools box to remove it from the toolbar (you can always drag and drop it back onto the toolbar). Shown below during the drag operation:
-

After drag is completed:

- Click Save to save your changes, Cancel to close without saving, or Reset to default to undo all changes in that type of toolbar (Part Studio, Assembly, or Feature Studio) and restore the toolbar to Onshape original order and content.
When tools are part of a group, you must move the entire group. Once an entire group is removed, you can select individual tools to move back to the toolbar, if desired. To reform the entire group, select Reset to default, which will reset the entire toolbar.
Part Studio context menu
Right-click on a Part Studio tab to access the context menu:
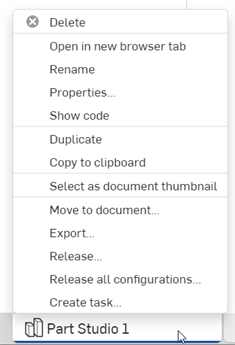
- Delete - the Part Studio (or any tab), even if it is active. The last remaining tab cannot be deleted.
- Open in new browser tab - Open this Part Studio in a new browser tab
- Rename - Rename this Part Studio
- Properties
- Access the Properties dialog to provide information about the Part Studio. In the dialog, you are able to provide meta data for the entire Part Studio, or on a part-by-part basis:
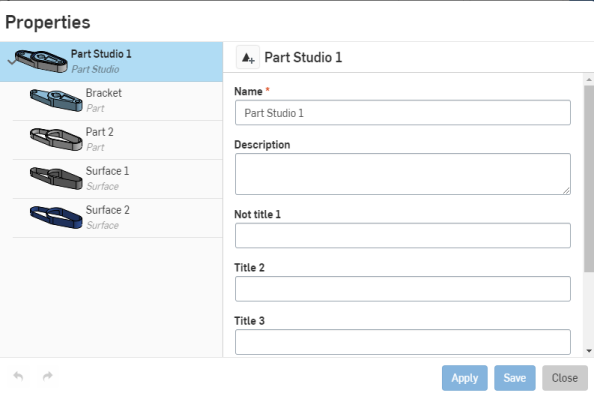
Use the Release icon next to the Part Studio name to initiate creating a release package (if you are a member of a company or enterprise, and have permissions to create release packages).
Properties that are grayed out (inactive) are defined and populated through the Company’s properties in Account management. See Manage Companies > Properties for more information.
To resize the dialog, drag an edge from left/right or up/down.
- Show code - Open a panel with the FeatureScript displayed.
- Duplicate - Make an immediate copy of this Part Studio. Copies are pasted directly to the original Part Studio. Copies have no association with the original.
- Copy to clipboard
- Copy a Part Studio to the clipboard in order to paste into another document. Open another Onshape document, click
 (Insert new element) and select Paste tab to paste the copied tab into a different document.
- Update linked document - Allows you to update to a specified version of a linked document, if applicable.
- Select as document thumbnail - Select the image of this Part Studio as the default document thumbnail on the Documents page.
- Create drawing of Part Studio x - Automatically create a drawing of the entire Part Studio (solid bodies/parts only). This creates a new Drawings tab in the document.
- Move to document
- Move the Part Studio to a new or existing document, creating the new document during this operation. If any part is used in any tab of the original document, a
link
between the two documents is created and represented in the Feature list with these icons:
 a link exists;
 a new version of the document is available. To update to a newer version, click the icon to open the Reference Manager.
- Export - Export parts in the Part Studio in a variety of formats with options of where to download or keep in a separate Onshape tab.
- Release - Create a release package for this Part Studio.
- Release all configurations - For users who have the ability to create release packages, this command opens the Release candidate dialog with all configurations pre-loaded into the release package (up to 100 configurations are supported). This option is only available for configurations with a single List input. The command option is not available if there are multiple List inputs, or if Checkbox or Configuration variable inputs are used. You can always add configurations into the release package once the dialog is open (after clicking the Release command from the context menu).
- Create task - Create a task that can be assigned to another user (or the current user), that can reference a part, and have a due date. Users specified in a task are notified of the task. You can create tasks from any Onshape Part Studio, Assembly, and Drawing tab, and from the Tab manager, through the context menu on a tab in the list.
Editing and resetting part properties
When in a Part Studio, you can access properties for a particular part through the context menu for the part. Right-click the name of the part in the Parts list and select Properties to open the Properties dialog:
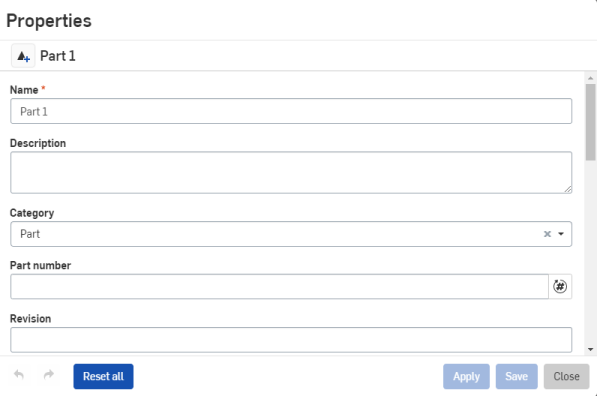
Edit the properties as preferred. Use the Release icon next to the part name to create a Release (if you have permissions to do so). Use the Undo/Redo buttons in the bottom left corner to undo or redo an edit in the dialog.
Use the Reset all button to clear all editable part properties of the selected part or parts (the Reset all button is not active when the Part Studio is selected at the top level). Reset all does more than it appears at first: As the tooltip indicates (on hover), it will also reset some properties you can't see in the dialog (appearance, material, tessellation quality), and, unlike just clearing out the fields manually, it fully clears all manual applications as well. This allows values calculated by custom features, if any, (which are normally overridden by those manual applications) to take effect.
If you have configured properties, Reset all has no effect on those properties.
Following are the default Properties dialog fields. If you have configured properties set up in Account management, there may be additional fields present that are not outlined here:
-
Part list name - Displays the non-editable part name from the Parts list. This name is automatically updated if the Name field below it is changed.
-
Name - The editable part name.
-
Description - An explanation or notation for the part.
-
Category - Groups the part into one or more standard or custom categories. By default, parts are grouped into the Onshape part Category. Category is only editable in Professional or Enterprise accounts.
-
Part number - Unique identification number for the part. A part number is manually entered, or is automatically applied as part of the Release management process. See Setting revision and part number preferences for more information.
-
Revision - Unique alphanumeric identification for the part's revision. A revision is manually entered, or it is automatically applied as part of the Release management process. See Setting revision and part number preferences for more information.
-
State - The status of the part as it relates to Release management. States are In progress (default), Pending, Rejected, or Released. This field is only editable in a version and when Release management is turned off.
-
Vendor - Enter a vendor name, If one is associated with the part.
-
Project - Enter a project name, if one is associated with the part.
-
Product line - Enter a product line name, If one is associated with the part.
-
Material - Read-only field. If a material is associated with the selected part, it is displayed in this field. If no material is assigned, Unassigned is displayed. See Assigning materials to parts for more information.
-
Title 1/2/3 - Additional descriptive fields for the part. One usage example is within Drawings, in the event the Description property does not properly wrap on the drawing. The titles are used to correspond to three rows in the default Drawing templates' title block.
-
Not revision managed - When checked, the part is not revision managed; it is outside the Release management process.
-
Exclude from all BOMs - When checked, the part is excluded from all Bill of Materials globally.
-
Unit of measure - Select a unit of measure for the part. Default is Inch.
-
Mass -Displays the part's mass. Before mass is displayed or subsequently editable, a material must be applied to the part.
To resize the dialog, drag an edge from left/right or up/down.
Newly created documents contain an empty Part Studio and Assembly by default. A Part Studio is used to define parts and has a Feature list (parametric history). One Feature list drives the shape of multiple parts. Use Sketch tools to create 2D geometry, and use Feature tools to create 3D models (or parts) from those sketches, all within a Part Studio.
In a Part Studio, along the top of the screen is the navigation bar. The navigation bar holds a number of tools that varies based on your device's screen width or orientation.
Any tools that do not fit due to screen width will be found in the Document information panel.
Return to the Documents Page

To close the document and return to the documents page, tap the arrow in the upper left corner.
Versions

To create immutable versions and branch versions to create new workspaces, tap the Versions icon in the upper left.
See Version Manager for more info.
History
To view every point of change in the history of the document and restore to any point in that history:
- Tap the icon in the upper left.
On a smaller screen, access the Document information panel and then select History from there:
- Tap the More icon.

- Select History.
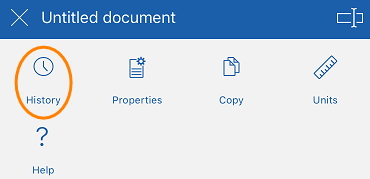
See History for more info.
Comments

To communicate with collaborators, tap the Comments icon in the upper right.
On a smaller screen, access the Document information panel and then select Comments from there:
- Tap the More icon.

- Select Comments.
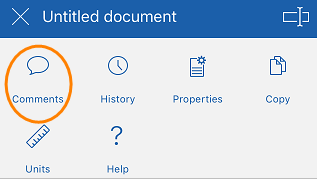
See Comments for more info.
Collaborators

To see who you are collaborating with and to access Follow mode, tap the Collaborators icon in the upper right.
See Collaboration and Follow mode for more info.
The Collaborators icon is only available when you are collaborating with someone in real time.
Help

To access the Help and other resources such as Videos, Feedback, and About, tap the icon in the upper right.
On a smaller screen, access the Document information panel and then select Help:
- Tap the More icon.

- Select Help.
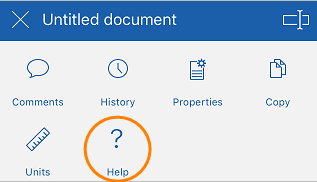
Select one of the following:
- Help - to view the documentation for the device you are using.
- Videos - open the videos page of the documentation.
- Feedback - ask a question, log a bug, or log an improvement.
- About - see which version of Onshape you are running.
Document information panel

Access the Document information panel which allows you access to any tools (listed above) that do not fit in the navigation bar as well as some other tools listed below.
To access the Document information panel, tap the More icon in the upper right corner.
The Document information panel opens. From here, select from the following:
- Properties - to view document properties.
- Copy - to make a copy of the workspace you are in.
- Units - to view and set default measurement units for the document (such as length, angle, and mass units).
- Document name - tap the edit icon in the upper right corner to edit the document name.
- Document description - tap Add description to add or edit the document description.
- Share - tap the share icon to share the document with individuals, Teams, Companies, or Onshape support. You are also able to set your document to Private or Public.
Sketch tools
![]()
Tap the New Sketch tool icon to select a plane and start a new sketch.
With a sketch open, tap the New Sketch tool icon to view all of the sketch tools.
See Sketch tools for more info.
Feature tools
![]()
Tap the Feature tools icon to view all of the Feature tools.
See Feature tools for more info.
Measure and Mass Properties

Tap the Measure tool to measure any selected entities.
See Measure tool for more info.

Tap the Mass Properties tool to view the properties of selected parts.
See Mass Properties for more info.
Feature list
![]()
- Tap the Feature list handle to open the Feature list.
- Touch and drag horizontally or vertically to adjust the size of the Feature list.
See Feature list for more info.
Rotate lock

Tap the 3D Rotate lock button to lock the graphics area rotate feature. This is particularly helpful when trying to drag an entity.
See 3D Rotate Lock for more info.
View Cube

Tap the View cube to access a list of view to choose from.
See View Cube for more info.
Planes and Origin
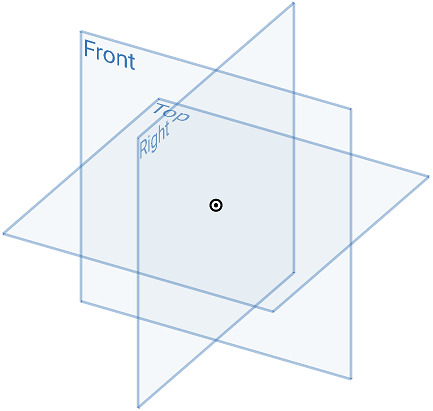
- Every Part Studio, by default, has three planes (Top, Front, Right) and an Origin to be used a reference points when sketching or creating a feature.
- You have the ability to create as many planes as you like.
- You have the ability to hide the default planes and Origin from view via the Feature list, but you are not able to delete them.
- You have the ability to hide all planes and parts.
Tabs

When you open a document, the most recently opened tab is active.
Tap the up-facing chevron (up arrow) to open the Create tab menu.
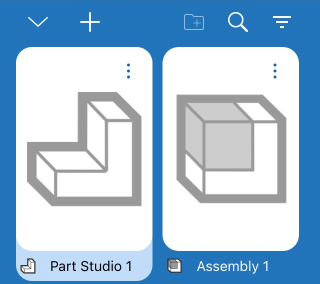
- Tap a tab to activate it. When you switch tabs, any open feature will be committed.
- Swipe left or right to scroll, horizontally, through the list.
- Filter tabs by Assembly or Part Studio.
- Search for a Part Studio or Assembly by name.
- Create, rename, duplicate, and delete a Part Studio or Assembly. There is no limit to how many Part Studios or Assemblies a document may have.
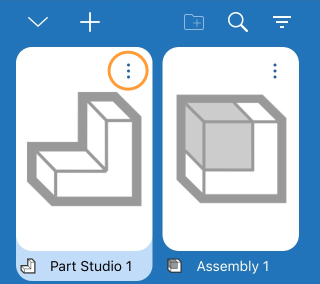
Duplicate adds a copy of a Part Studio within the document.
You can not delete a Part Studio or Assembly if it is the only tab in the document.
A document must have at least one Part Studio or Assembly (at least one tab).
Organizing tabs
Organize tabs with folders on the Tab bar. Use the ellipsis menu to Create a folder:
- After opening the menu, tap Select.
- This select the current tab to be included in the folder, and puts a check mark on other tabs so you can select them.
- Select any other tab to be included in the folder.
-
Tap
 icon.
icon.
- Supply a name for the folder.
- Tap Create Folder.
- The folder is created, with the selected tabs inside it, and displayed opened so you can see the contents:
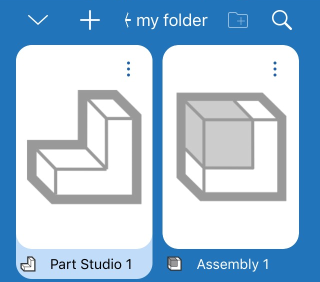
When a folder is active, the Tab bar displays only the tabs in that folder; all other tabs are represented by the All tabs icon:
![]()
Select the All tabs icon (second icon from the left, above) to display all tabs again.
Use the context menu on any folder to act on that folder, including:
- Rename - Edit the folder name.
- Select - Select a folder to then create another folder in which to place that folder.
- Unpack - Delete the folder and place the tabs back in their original position.
Newly created documents contain an empty Part Studio and Assembly by default. A Part Studio is used to define parts and has a Feature list (parametric history). One Feature list drives the shape of multiple parts. Use Sketch tools to create 2D geometry, and use Feature tools to create 3D models (or parts) from those sketches, all within a Part Studio.
In a Part Studio, along the top of the screen is the navigation bar. The navigation bar holds a number of tools that varies based on your device's screen width or orientation.
Any tools that do not fit due to screen width will be found in the Document information panel.
Return to the Documents Page

To close the document and return to the documents page, tap the arrow in the upper left corner.
Versions

To create immutable versions and branch versions to create new workspaces, tap the Versions icon in the upper left.
See Version Manager for more info.
History

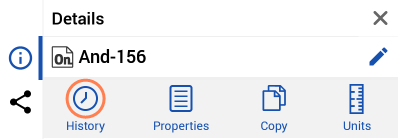
To view every point of change in the history of the document and restore to any point in that history:
- Tap the More icon to access the Document information panel.
- Tap History.
See History for more info.
Comments

To communicate with collaborators, tap the Comments icon in the upper right.
See Comments for more info.
Collaborators

To see who you are collaborating with, tap the Collaborators icon in the upper right.
See Collaboration for more info.
The Collaborators icon is only available when you are collaborating with someone in real time.
Help

To access the Help and other resources such as Videos, Feedback, and About, tap the icon in the upper right.
Select one of the following:
- Help - to view the documentation for the device you are using.
- Videos - open the videos page of the documentation.
- Feedback - ask a question, log a bug, or log an improvement.
- About - see which version of Onshape you are running.
Document information panel

Access the Document information panel which allows you access to any tools (listed above) that do not fit in the navigation bar as well as some other tools listed below.
To access the Document information panel, tap the More icon in the upper right corner.
The Document information panel opens. From here, select from the following:
- Properties - to view document properties.
- Copy - to make a copy of the workspace you are in.
- Units - to view and set default measurement units for the document (such as length, angle, and mass units).
- Document name - tap the pencil icon in the upper right corner to edit the document name.
- Document description - tap the pencil icon to add or edit the document description.
- Share - tap the share icon to share the document with individuals, Teams, Companies, or Onshape support. You are also able to set your document to Private or Public.
Sketch tools
![]()
Tap the New Sketch tool icon to select a plane and start a new sketch.
With a sketch open, tap the New Sketch tool icon to view all of the sketch tools.
Feature tools
![]()
Tap the Feature tools icon to view all of the Feature tools.
See Feature tools for more info.
Measure and Mass Properties

Tap the Measure tool to measure any selected entities.
See Measure tool for more info.

Tap the Mass Properties tool to view the properties of selected parts.
See Mass Properties for more info.
Feature list
![]()
- Tap the Feature list handle to open the Feature list.
- Touch and drag horizontally or vertically to adjust the size of the Feature list.
See Feature list for more info.
Rotate lock
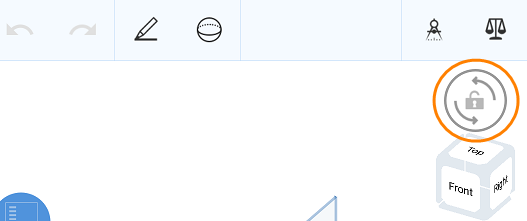
Tap the 3D Rotate lock button to lock the graphics area rotate feature. This is particularly helpful when trying to drag an entity.
See 3D Rotate Lock for more info.
View Cube
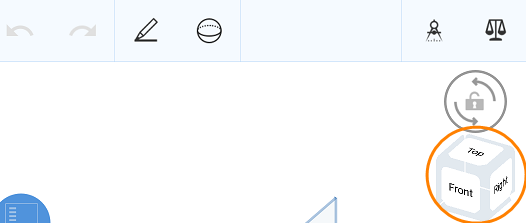
Tap the View cube to access a list of view to choose from.
See View Cube for more info.
Planes and Origin

- Every Part Studio, by default, has three planes (Top, Front, Right) and an Origin to be used a reference points when sketching or creating a feature.
- You have the ability to create as many planes as you like.
- You have the ability to hide the default planes and Origin from view via the Feature list, but you are not able to delete them.
Tabs

When you open a document, the most recently opened tab is active.
Tap the up-facing chevron (up arrow) to open the Create tab menu.
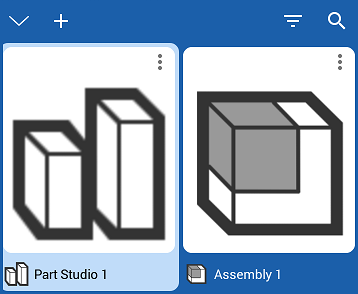
- Tap a tab to activate it. When you switch tabs, any open feature will be committed.
- Swipe left or right to scroll, horizontally, through the list.
- Filter tabs by Assembly or Part Studio.
- Search for a Part Studio or Assembly by name.
- Create, rename, duplicate, and delete a Part Studio or Assembly. There is no limit to how many Part Studios or Assemblies a document may have.
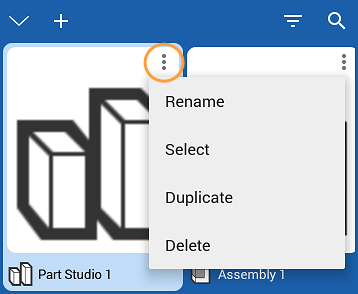
Duplicate adds a copy of a Part Studio within the document.
You can not delete a Part Studio or Assembly if it is the only tab in the document.
A document must have at least one Part Studio or Assembly (at least one tab).
For additional Learning center resources, follow the self-paced courses here: Introduction to Part Design (Onshape account required) and Part Design Using Part Studios (Onshape account required).