![]()
![]()
![]()
Feature tools create, modify, or manipulate 3-dimensional geometry to create new parts, modify existing ones, or generate construction tools for later use.
The Feature toolbar
![]()
Access the Feature shortcut toolbar with the S key while in the graphics area (with no open dialog):

Customize the Feature shortcut toolbar through your Onshape account Preferences page.
To learn more about customizing the toolbars of Part Studios, Assemblies, or Feature Studios, see Part Studios.
Steps
- Generate the requisite base geometry for your intended Feature tool (see information on individual Feature tools for relevant requirements).
- Select your Feature tool of choice.
- Select geometry as required.
- Input parameters.
- Select direction and any additional options.
- Visualize changes using the Preview slider.
-
Click
 to generate the feature or
 to cancel.
Search tools
Shortcut: alt/opt+c
![]()
In Onshape, you have the ability to search for tools in the Feature toolbar as well as the Assembly toolbar and Sketch toolbar: see Sketch tools, Feature tools, and Assemblies for more information on those specific topics.
Tips
- The Escape key exits a tool selection.
- Use the Preview slider to check the potential result to make sure it's what you intend. Slide right to see more, slide it to the left to see less.
- Use the Final button to view your model from the perspective of the bottom of the Feature List, after all calculations are made. This may help you see the final result of editing you may be doing towards the top of the Feature List and how it affects the final outcome.
- Use the Undo/Redo buttons while you are editing to revert an action or reinstate an action made while the sketch or feature is open.
- Use the Undo/Redo buttons after closing a sketch or edit dialog to revert an editing session, or subsequently reinstate the changes made during that editing session.
Feature tools create, modify, or manipulate 2D and 3D geometry to create new parts, modify existing ones, or generate construction tools for later use.
At the top of your opened document is the main toolbar:

Tap each icon on the toolbar to access the following options:
-
Undo/Redo (
 /
/ )
) -
New Sketch (
 ) and sketch tools if inside a sketch
 -
Feature tool categories (
 /
/ /
/ /
/ /
/ /
/ ). Tap the dropdown arrow to access the feature tools under each category. Then tap to select a Feature.
 -
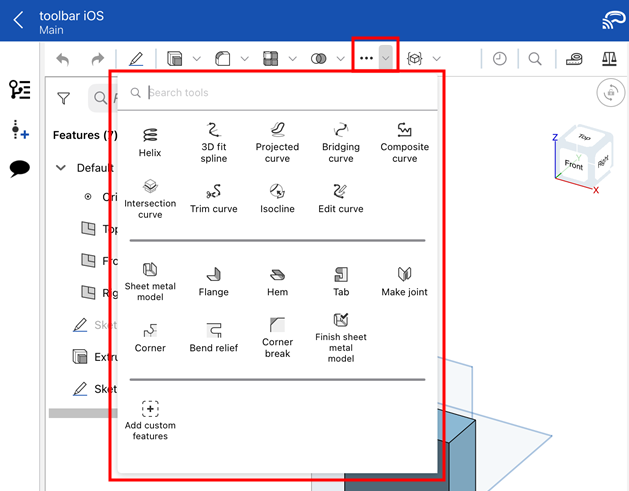
Additional feature tools, accessed from the overflow menu (
 ):
):
-
Recently used tools (
 ):
):
-
Measure tool (
 )
)
Get started
- Generate the requisite base geometry for your intended Feature tool (see information on individual Feature tools for what each tool requires).
- Select a Feature tool.
- Select required geometry.
- Input parameters.
- Select direction and any additional options.
- Visualize your changes using the preview slider.
- Select the check to generate the feature or select the x to cancel.
Tips
- Use the Preview slider to check the potential result of the feature to make sure it's what you intend. Slide right to see more, slide left to see less.
- Use the Final button to view your model from the perspective of the bottom of the Feature list, after all calculations are made. This may help you to see the final result of editing you may be doing towards the top of the Feature list and how it affects the final outcome.
- Use the Undo|Redo buttons while you are editing to revert an action or reinstate an action made while the sketch or feature is open.
- Use the Undo|Redo buttons after closing a sketch or edit dialog to revert an editing session, or subsequently reinstate the changes made during that editing session.
Example
- With a part in your Part Studio, tap the Shell tool.

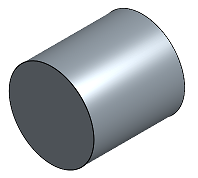
- Shell requires that you select one or more part faces to remove in order to hollow out the part.
You have the ability to either select the tool and then the face to shell, or the face to shell and then the tool.
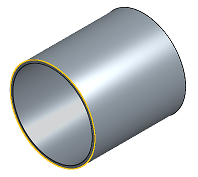
If you select the tool first then as soon as you select the face to remove, it is removed.
If you select the face to remove first then as soon as you select the tool, it is removed.
- Specify the wall thickness (the system supplies a default). You are able to select the unit of your choice as well.
- Use the Opposite direction toggle to specify whether the wall thickness should be applied to the inside of the part face or the outside.
- Move the Preview slider to the left to visualize the part before the feature is applied.
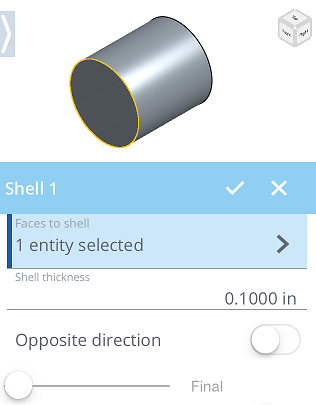
- Move the Preview slider to the right to visualize the part after the feature is applied.
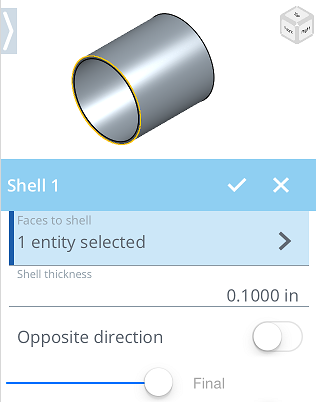
- Tap the check to accept or tap the x to close without committing any changes.
Feature tools create, modify, or manipulate 2D and 3D geometry to create new parts, modify existing ones, or generate construction tools for later use.
At the top of your opened document is the main toolbar:
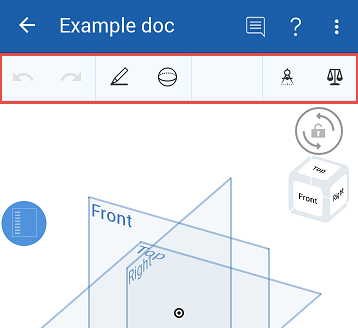
The main toolbar has Undo/Redo buttons to the left, Sketch and Feature tool icons to the right of the Undo/Redo buttons, and the measure tool to the right.
Tap the Feature tools icon to view all of the Feature tools:
![]()
Tap to select a Feature tool.
Get started
- Generate the requisite base geometry for your intended Feature tool (see information on individual Feature tools for what each tool requires).
- Select a Feature tool.
- Select required geometry.
- Input parameters.
- Select direction and any additional options.
- Visualize your changes using the preview slider.
- Select the check to generate the feature or select the x to cancel.
Tips
- Use the Preview slider to check the potential result of the feature to make sure it's what you intend. Slide right to see more, slide left to see less.
- Use the Final button to view your model from the perspective of the bottom of the Feature list, after all calculations are made. This may help you to see the final result of editing you may be doing towards the top of the Feature list and how it affects the final outcome.
- Use the Undo|Redo buttons while you are editing to revert an action or reinstate an action made while the sketch or feature is open.
- Use the Undo|Redo buttons after closing a sketch or edit dialog to revert an editing session, or subsequently reinstate the changes made during that editing session.
Example
- With a part in your Part Studio, tap the Shell tool.


- Shell requires that you select one or more part faces to remove in order to hollow out the part.
You have the ability to either select the tool and then the face to shell, or the face to shell and then the tool.

If you select the tool first then as soon as you select the face to remove, it is removed.
If you select the face to remove first then as soon as you select the tool, it is removed.
- Specify the wall thickness (the system supplies a default). You are able to select the unit of your choice as well.
- Use the Opposite direction toggle to specify whether the wall thickness should be applied to the inside of the part face or the outside.
- Move the Preview slider to the left to visualize the part before the feature is applied.
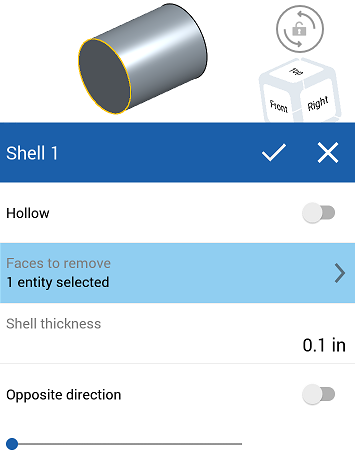
- Move the Preview slider to the right to visualize the part after the feature is applied.
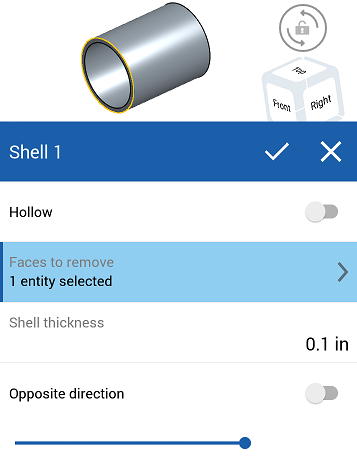
- Tap the check to accept or tap the x to close without committing any changes.