Company/Classroom/Enterprise Settings - Categories
![]()
Only available for
Create categories in Onshape to extend the properties of the standard Onshape object types in the system to include more targeted and relevant metadata to be applied based on design, engineering, and manufacturing processes.
To navigate to your Categories settings in Onshape, click on your Account user icon (![]() ) in the top right corner of your Onshape window. This opens a dropdown menu. Click Company/Classroom/Enterprise settings.
) in the top right corner of your Onshape window. This opens a dropdown menu. Click Company/Classroom/Enterprise settings.
Click Categories in the list on the left side of the page:
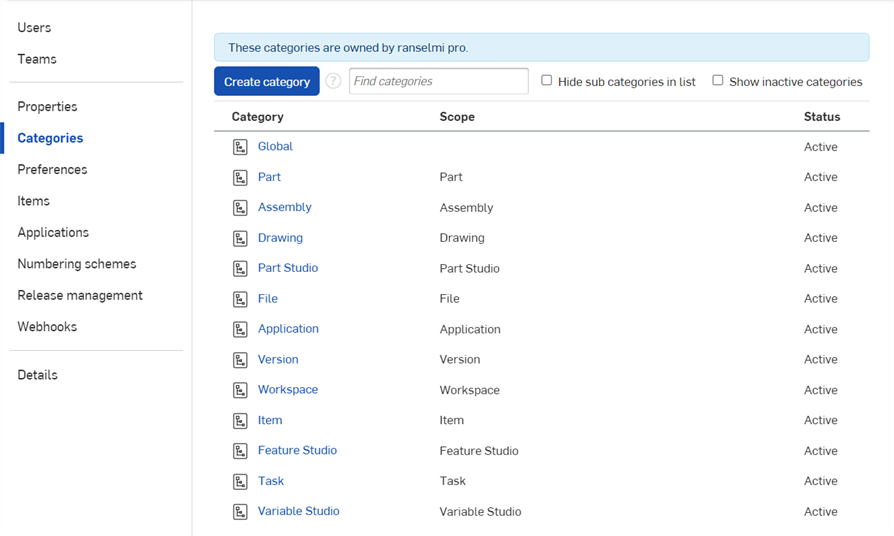
Company settings > Categories
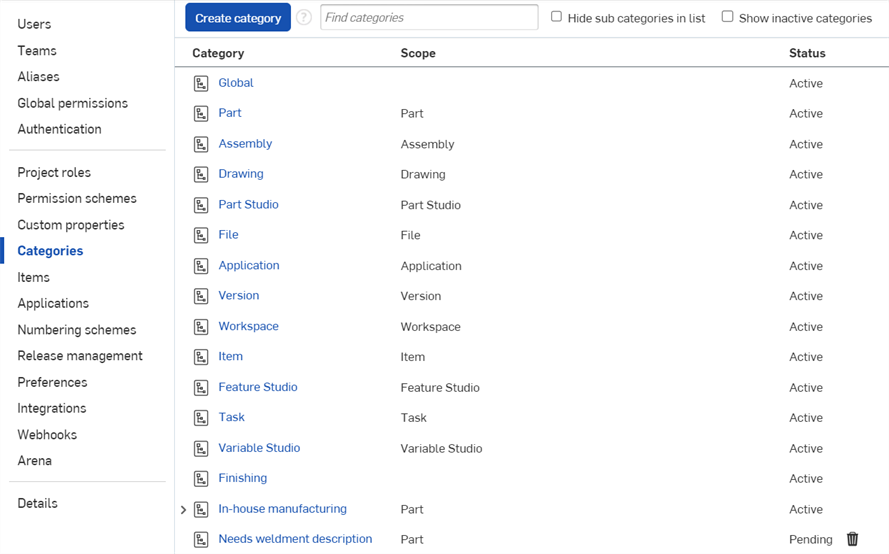
Enterprise settings > Categories
Creating categories in Onshape provides the ability to extend the properties of the standard Onshape object types in the system to include more targeted and relevant metadata to be applied based on design, engineering, and manufacturing processes.
Before creating categories for the first time, you can prepare by checking your PLM, or other appropriate system, for important metadata you want to be able to represent within Onshape.
Categories work in conjunction with custom properties, to group those custom properties into reasonable and useful information. Once categories are defined, you can see the custom properties within your Properties dialogs for all Onshape objects to which the category is applied.
For an additional Learning center resource, follow the technical briefing article here: Getting Started with Categories (Onshape account required).
A company or enterprise manufactures a product that is a combination of a part designed and produced in-house and parts ordered from a third party vendor. When working with off-the-shelf parts from a vendor, you may care about only a handful of properties like Vendor name, Vendor part number, and perhaps things like weight and cost.
However, when working with parts manufactured in-house, the list of properties will likely be entirely different. These properties may include information like Start date, Approved date, Manufacturing method, Length, and more.
This is where Onshape categories come into play. With categories, you can assemble the properties you really care about and need, so they are grouped together in all Properties dialogs within Onshape as "newly created category". Once this is selected, the properties within the Category are listed first in the dialog, making them easier to find and fill out.
To create a category:
- Navigate to Company/Classroom/Enterprise settings.
- Select
Categories. Onshape has standard existing categories for Onshape objects, including: Global, Part, Assembly, Drawing, Part Studio, File, Application, Version, Workspace, and Item. The Scope of these (and all) categories are listed in the next column. The Scope refers to the Onshape objects the properties within the categories apply to.

- Click the Create category button at the top of the page.
- Select a Scope, that is, the types of Onshape objects to which this category may be applied. Note that selecting a Scope is not required.
- Assign a Name for the category.
- Select a Publish state: Active = visible by and available to all users; Pending = Saved but unavailable for use; Inactive = No longer available for use. You can mark a category as Pending, then go back later and make it Active.
- Supply a Description of the category, if desired.
- Select any Parent categories, existing categories from which you want this new category to inherit properties. Assigning a parent category to a category carries properties assigned to the parent category over to the category. This is useful when the new category uses all of the properties that are already assigned to the parent category, but requires a few extra properties specific to the new category.
- Select the Properties (custom properties), that you want this category to include. These are the properties that will display whenever Properties of the object are displayed or edited.
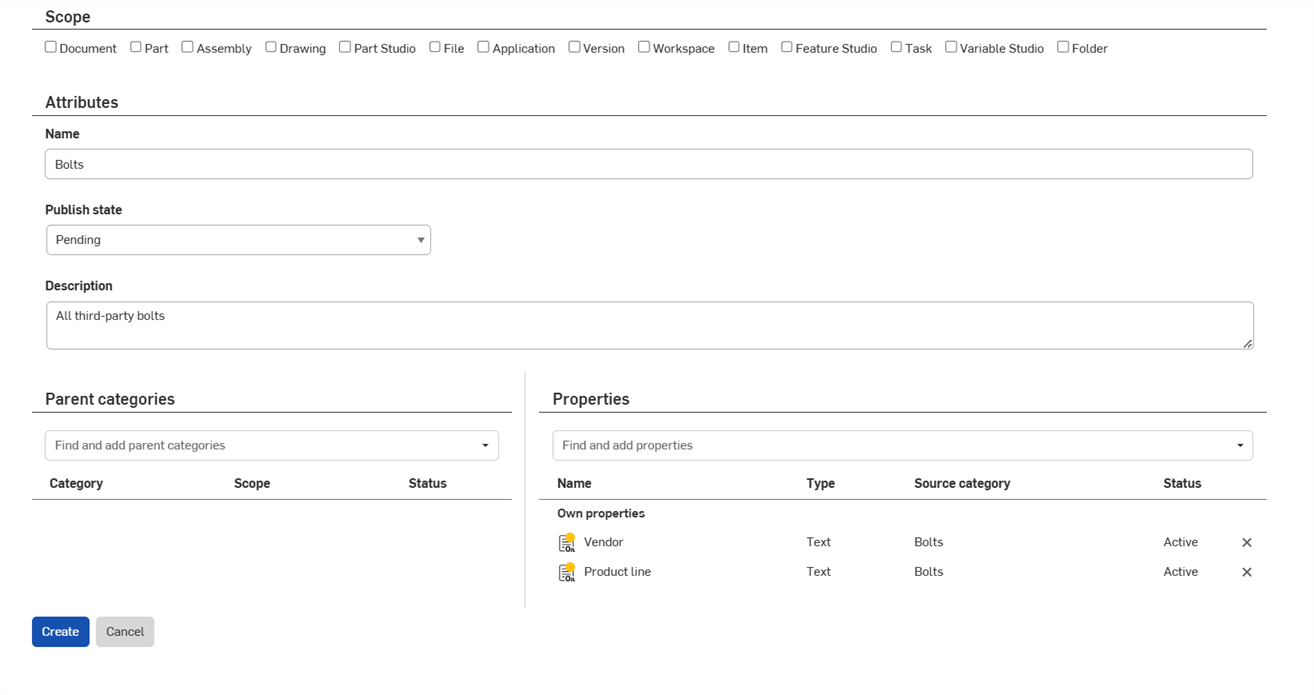
- Click Create to create the new category.
The new category is listed on the main Categories page. Categories are also available in the Advanced search dialog, in the Add criteria dropdown.
Categories can also inherit from a parent category, if you wish. These nested categories inherit the properties of the parent, and also allow you to add properties that are unique to that sub-category. One example for using inherited properties would be a category for parts that are manufactured in-house. This parent category could have all the common properties across multiple parts like part number, release state, and date approved. You can then create sub-categories under that "in-house" category for each type of part you manufacture, like: sheet metal, injection molded, machined, and welded, and then have those categories contain properties unique to those types of products and their processes.
The only difference when creating a sub-category, is to select a Parent category:
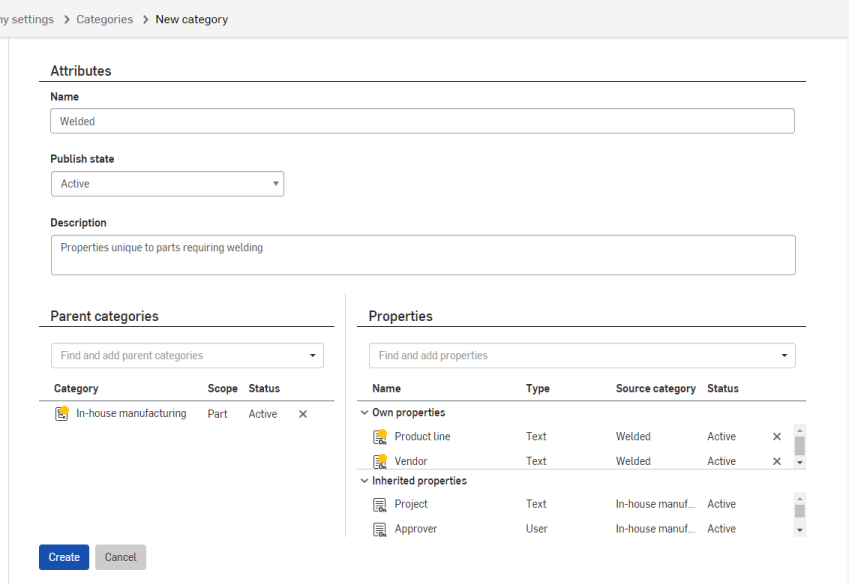
The Parent category of the new category being created, above, is "In-house manufacturing" and its properties are listed as "Inherited properties" under Properties
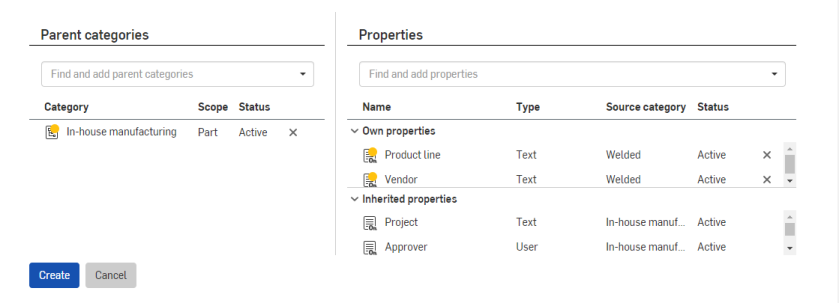
You would also select specific properties for the sub-category, shown above as Product line and Vendor
Once you click Create, the sub-category is listed on the Categories page. You can view it in the list, just as any other category, and you can also expand the parent category and view it there:
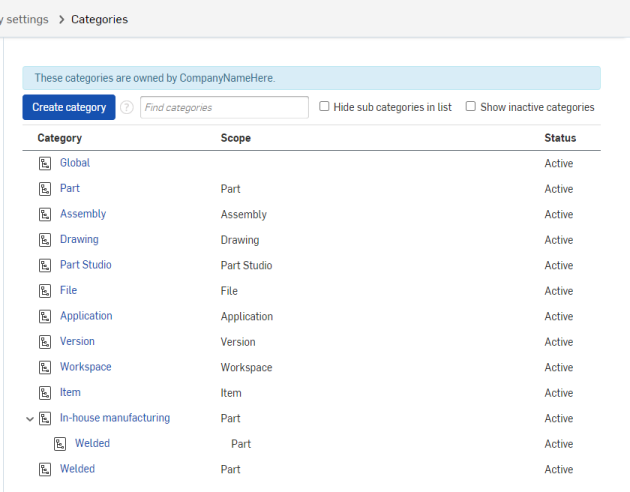
The Welded category shown indented below "In-house manufacturing" is the same category shown last in the list, above
You can select one or the other of the entries for a sub-category and the other entry is also highlighted; this makes subcategories easier to find, as shown below:

To view the list of categories without sub-categories listed, place a check in the Hide sub categories in list checkbox at the top of the interface.
