![]()
![]()
![]()
Using the context menu for a specific part (or group of selected parts) you can customize not only the color of the part, but also assign a material (and thereby, a density), as well as specify a custom density without assigning a material. Onshape provides a material library for your use, and you are also able to add (or remove) your own custom material libraries.
You can assign a material to a part (or group of selected parts) through the context menu. When material is assigned to a part, the Mass properties tool then also displays density-related information.
To assign material to a part:
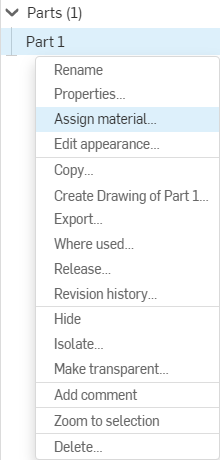
- Select a part (or group of parts), right-click to open the context menu and select
Assign material:
- Select the Library tab.
- Select a material library from the first drop down menu (the Onshape Material Library is displayed by default, if present):
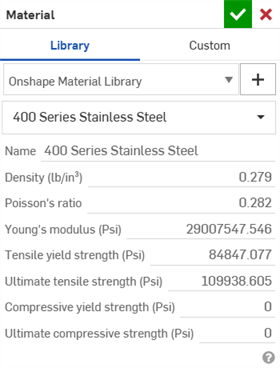
- Select a material from the second drop down menu.
Note that each material has a density value listed with it.
-
Click
 .
.
When assigning materials, note that:
- Parts with no material assigned have zero mass.
- Units are shown in the current document units.
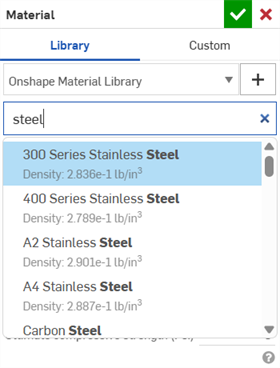
- You can search for a material by entering the name or category in the search box:
-
Once you have assigned a material to a part, the context menu option for that part will change to Edit material.
-
The Part properties dialog displays a read-only field indicating the material associated to the part. See Editing and resetting part properties for more information.
You can assign a custom material name and corresponding attributes to a part (or group of selected parts) through the Custom tab in the Material dialog.
To assign a custom material and attributes to a part:
- Select a part (or group of parts), right-click to open the context menu and select Assign material.
- Select the Custom tab.
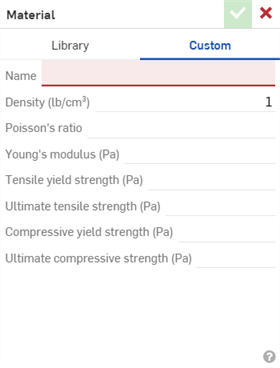
- Enter values for the available custom attributes:
Name
Density
Poisson's ratio
Young's modulus
Tensile yield strength
Ultimate tensile strength
Compressive yield strength
Ultimate compressive strength
-
Click the checkmark icon (
 ).
).
The values specified are used to calculate Mass properties. Note that the material Name and value are not stored for future use with other parts, but you can enter the same information for other parts if you wish.
You can add material libraries to your Onshape account and share it with other users as well. For company accounts, the company admin is able to add the material library, and it automatically becomes available to all company members once the admin checks the box on the Company > Preferences page in My account.
The main workflow for adding a custom material library is:
- Export the Onshape material library from Onshape (use the format of this library and simply edit the contents).
- Import the library into a spreadsheet editing tool and edit it to contain the information you want. Export the file.
- Import the library into a new Onshape document.
- Share the document with others so they may also use it.
More detailed instructions follow.
Export the Onshape material library
- While in your Onshape account, search the Public filter for the std.mat document, or use this link:
Onshape standard material library (std.mat)
- Open the document.
- Right-click on the std.mat tab and select Export.
The tab is exported as a CSV file (in UTF-8 format).
Import the library into a spreadsheet, edit, and export
- Open the CSV file of the exported Onshape material library in a spreadsheet editor. Note that the file must be in UTF-8 format.
- Leave the first row as the necessary column names: Category, Name, Density.
- Edit the rows as desired to record your custom materials.
You can create multiple custom material libraries to aid in organizing materials for your users.
You are able to specify your preferred units of measurement in the spreadsheet by clicking the dropdowns next to the column names.
- Save the spreadsheet with a new name.
- Export the spreadsheet as a CSV file (in UTF-8 format) from the editor.
Import the edited library to Onshape
- Create a new document in your Onshape account. The name is irrelevant because the name of the document is not used for the name of the library; the name of the tab is used for the name of the library.
- In the new document, click

 to create another tab, shown below (to hold the material library).
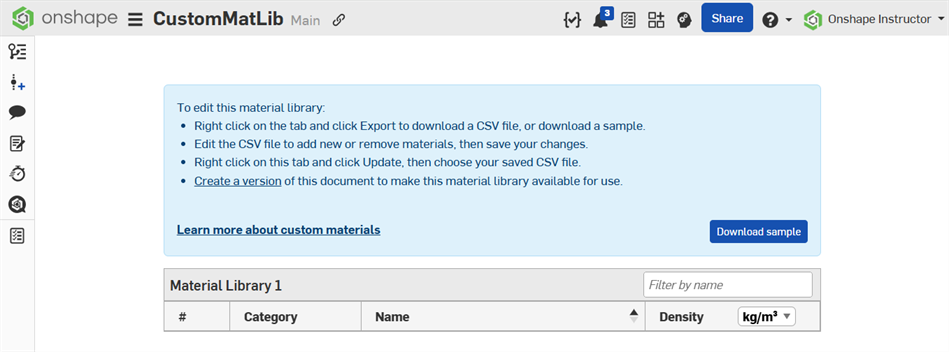
- Right-click on the new Material Library tab and select Update.
- In the dialog, select the custom material library CSV file (in UTF-8 format), and click Open.
-
The file contents is displayed, if this is the correct file, click OK.
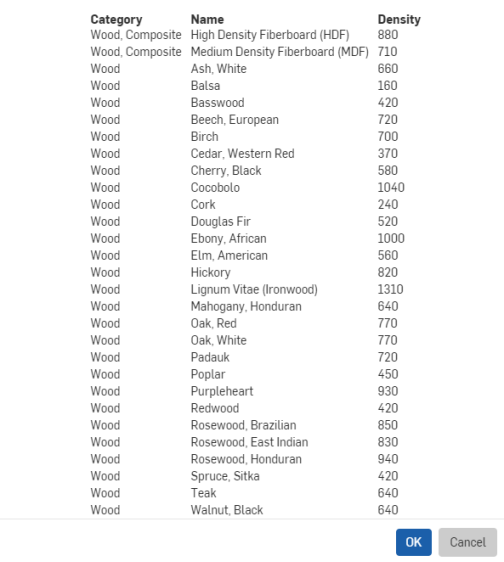
If it's not the right file, click Cancel and restart at step 2, above.
-
Click
 to create a version of this document. (Give the version a name and click Create.)
- Delete unnecessary tabs from the document, leaving just the Material Library tab.
- Rename the tab to be what you want the library name to be and appear as in the Material dialog.
Share the library with others, if desired
To share access to the new library with other users:
- Click Share.
- Select the individuals, Team, or company to share the document (and thereby the library) with.
- The minimum permission must be View.
- Refer the other users to Adding a material library in Managing custom material libraries, above, for instructions.
Even if the new material library has not been added to your Preferences, you are still able to use it through the Material dialog:
- While in a Part Studio with geometry present, right-click the part or part name and select
Assign material.
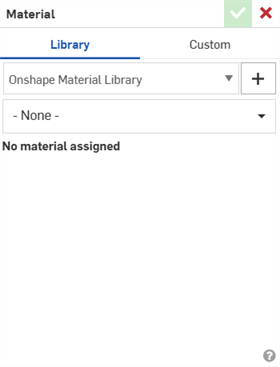
-
Click the plus sign icon
 next to the library name.
- Use the filters to search through the material libraries available to you:
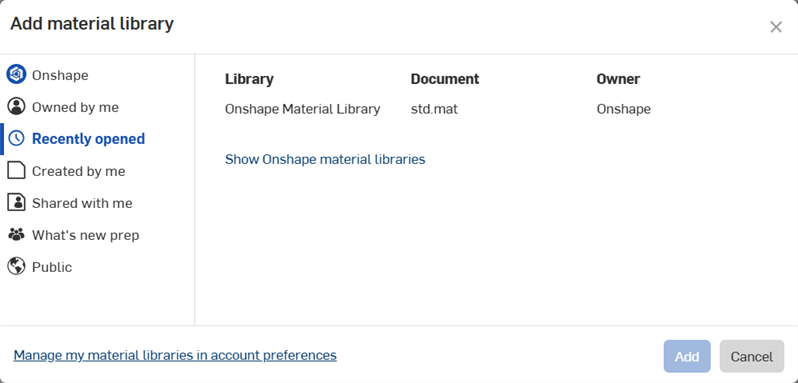
Click a column header to sort by that column, if desired.
- Click Add.
- Notice the new library name in the Material dialog.
Onshape provides a default material library for your use, and you are also able to create, add, and remove material libraries.
Adding a material library
To add a material library, you must have access to a library added through the steps in Creating new material libraries.
If a material library document has been shared with you (you need View permission on that document), you can simply add the material library to your Preferences list in your account settings.
- Click your name in the top right corner of the Onshape window.
- Select My account.
- Select the Preferences tab on the left.
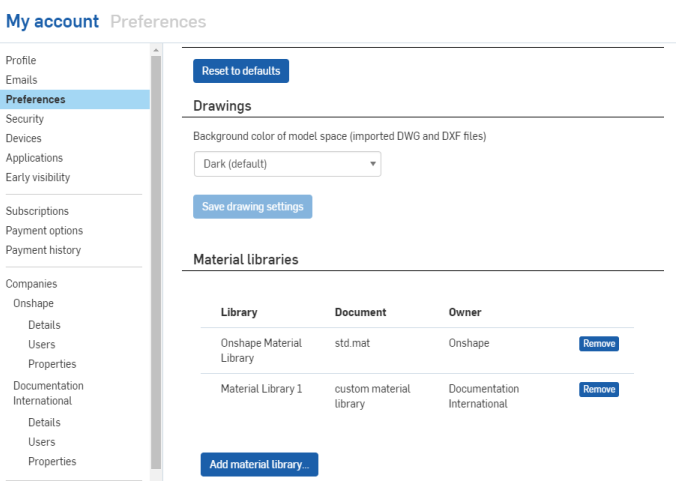
- Scroll to the bottom of the displayed page to see Material libraries:
-
Click the Add material library button.
- In the Add material library dialog, use the filters to help find the material library you wish to add.
- Select the material library and click Add.
The new material library is added to the list on the Preferences page. This new library will be available through the Material library dialog in all other documents to which you have access.
Removing a library
Be aware that the Remove action is immediate. No confirmation is required.
- On the Preferences tab of your account settings, scroll to the bottom of the page to Material libraries.
- Click the Remove button next to the library you wish to remove.
You can remove the Onshape material library if you wish. To add it back, use this document: Onshape standard material library (std.mat)
Updating a material library
If you need to add or remove materials from a custom material library that has already been added to your Onshape account:
- Make the necessary changes in the material library CSV file (in UTF-8 format) and save it.
- In Onshape, open the document containing the custom material library (as a tab).
- Right-click on the custom material library tab and select Update.
- Select the updated CSV file and click OK.
- Make a version to make the changes available to all users the document has been shared with.
Users are not notified that the material library has changed, but have immediate access to the updated version. Any parts to which a material have been assigned are not updated with any changes made to the library. If a particular material specification has been changed, the material has to be reapplied to the part in order for changes to take effect.
In a Part Studio, you can assign a material (and thereby, a density) to a Part. You are also able to assign an appearance (color and/or transparency) to a part.
Assigning materials to parts
You can assign a material to a part or group of parts. When material is assigned to a part, the Mass Properties Tool then displays density-related information.
To assign material to a part:
- Select a part in the Feature list and select the corresponding overflow menu:
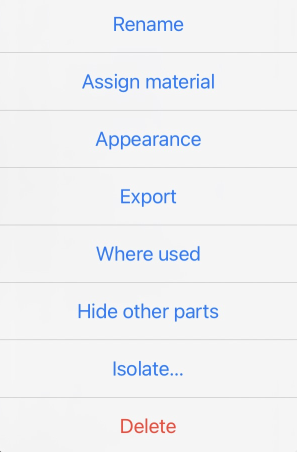
- Click
Assign material
to open the Material dialog:
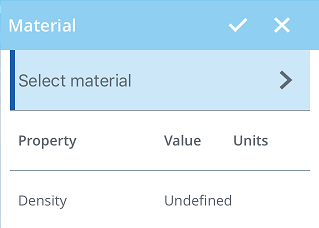
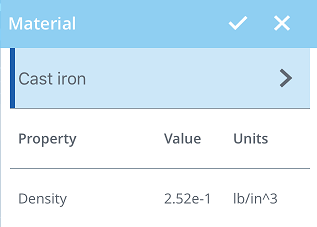
- Select the drop down within the dialog, and scroll and tap to select a property.
After you select a property, the property values are shown in the dialog.
In a Part Studio, you can assign a material (and thereby, a density) to a Part. You also can assign an appearance (color and/or transparency) to a part.
Assigning materials to parts
You can assign a material to a part or group of parts. When material is assigned to a part, the Mass Properties Tool then displays density-related information.
To assign material to a part:
- Select a part in the Feature list and select the corresponding overflow menu:
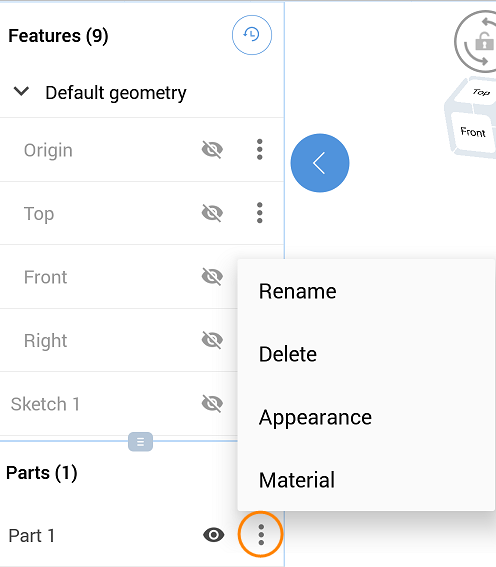
- Select
Material
to open the Material dialog:
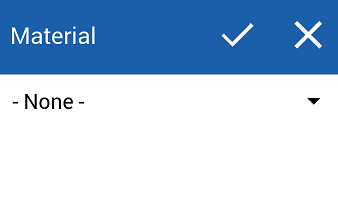
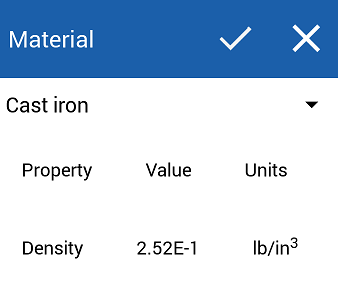
- Select the drop down within the dialog, and scroll and tap to select a property.
After you select a property, the property values are shown in the dialog.
For an additional Learning center resource, follow the technical briefing article here: Best Practices for Managing Custom Libraries (Onshape account required).