![]()
![]()
![]()
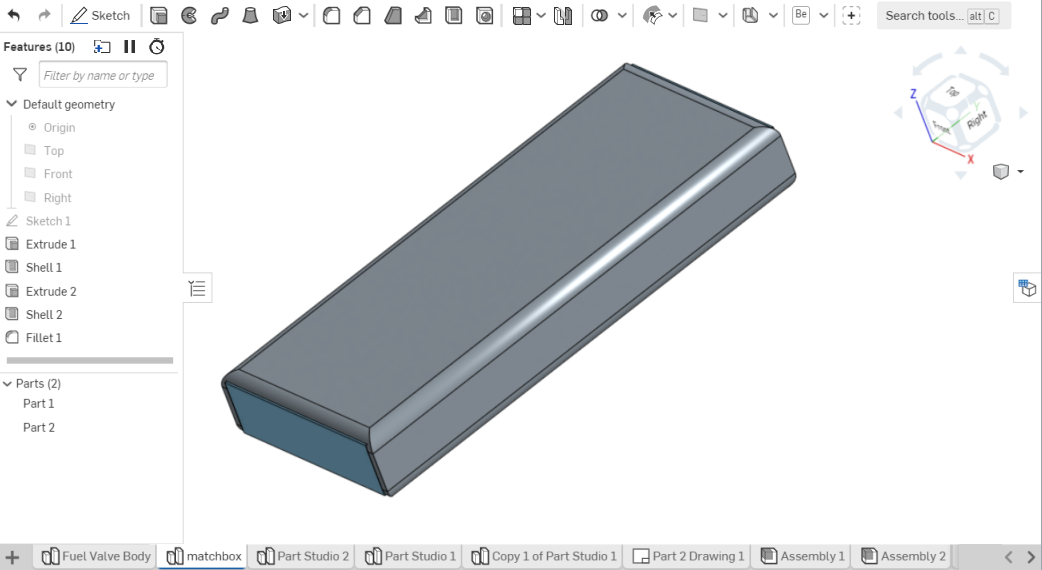
Visualization of toolbar locations, Part Studio interface, and default settings.
Toolbars
Located at the top of the page, these toolbars change based on the current workflow. There are 5 main toolbars:
- The Document toolbar

Click the Help menu question mark icon on the right side of the toolbar to access supporting information such as online Help, videos, tutorials, FeatureScript documentation, and keyboard shortcuts. You can also find links to the Onshape Forum, a What’s New posting, and a mechanism to give feedback. See Document toolbar for more information.
- Feature toolbar

There is an additional Document panel which is aligned vertically along the left side of the workspace. See Document panel.
- Sketch toolbar
Open by selecting Sketch on the Feature toolbar.

- Assembly toolbar

- Drawing toolbar

Toolbar tips
-
Vertical division lines indicate tool groups. Some tools in these groups use dropdown arrows to indicate additional tools are available in a dropdown list. Click the arrow to access the additional tools.
-
The last used feature or tool moves to the top of the tool group on the toolbar. For example, If you apply an Enclose feature that is accessed under the Thicken dropdown, it will move above Thicken at the top of the toolbar. Exiting and reopening the document resets the tools to their default locations (in this example, Thicken would move above Enclose).
-
Depending on your device screen resolution and browser view percentage, icons can collapse into different groups. The lower your screen resolution and higher your browser view percentage, the more compact the toolbar becomes, with more tools found under dropdown groups.
-
If you cannot locate a tool or feature on a toolbar, use Search tools (not available from the Document or Drawings toolbar).
Part Studio interface

- Default geometry
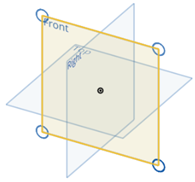
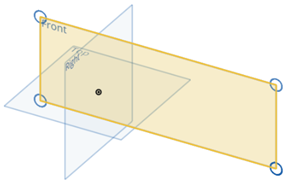
- Includes Origin, Top plane, Front plane, Right plane; hover over an entity in the Feature list and then use the
 to toggle hide/view. Resize planes: select to activate drag handles, then drag to desired size:


- Graphics area - Displays the active Part Studio, Assembly, or other tab.
- Feature list and Rollback bar - In Part Studios: a parametric history of work, containing a Rollback bar to view work at a certain point in the history. In Assemblies, the Feature list contains the Assembly tree structure, Mates, Groups, and Mate connectors. See Feature and Part Lists, Part Studio and Assembly for more information.
- Selection - Works as a toggle, click to select and click again to deselect. No need to use function keys for multiple selections. See Selection for more information.
- Dialogs - Mechanism for creating and editing features. A solid blue field requires selection in the graphics area (click on a sketch, region, part, etc). A field outlined in blue requires keyboard input. See Dialogs for more information.
- Undo and Redo - Undo and redo; undo the last successful action, redo the last undone action; available per user, per tab, per session.
- Context menus - Available for all features and tab (right-click on the feature or tab). See Context Menus for more information.
- Error indicators - Color-coded feedback, messaging, constraint icons. See Error Indicators for more information.
Browser
- Error messages - Pop-up messages alert you when your browser has encountered an error. See Error Messages for more information.
Theming
Switch your Onshape theme between light or dark modes. See Theming.