Dialogs
![]()
![]()
![]()
Dialogs are used wherever user input is required.
When a document is shared with View-only and Copy permissions, or a user is a Light user without permission to edit, a dialog can still be opened for viewing in the user interface. Keep in mind that no fields will be available for editing.
A typical dialog looks and works like this:
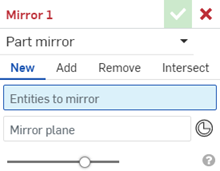
There are two types of input accepted into dialogs: selections made in the graphics area or feature list, and keyboard input such as numeric values:
- Fields that are highlighted in blue are populated when you make a selection in the graphics area and in the Feature list.
- Fields that are outlined in blue (and not highlighted) are populated with keyboard input, usually numeric values.
Onshape provides visual representation of the possible states of selected entities. For example:
|
Healthy selection input |
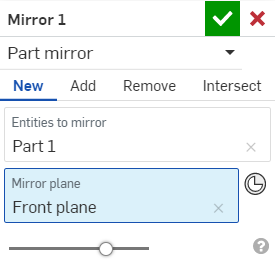
|
| Selection suppressed before opening dialog |

|
| Selection suppressed after opening dialog (missing from dialog) |
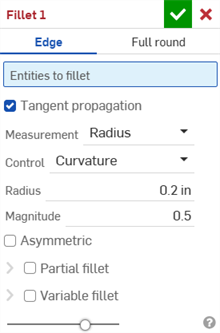
|
Once the dialog is accepted or rejected, the actions performed when the dialog was open are removed from the Undo|Redo list.
Click in a field to set focus.
Hover in the title box to activate the Edit icon
![]() . Click
. Click
![]() to edit the feature name. (Alternatively, right-click on the feature in the Feature list and select Rename from the context menu.)
to edit the feature name. (Alternatively, right-click on the feature in the Feature list and select Rename from the context menu.)
Use the Enter key to accept the dialog and close it, use Shift+Enter to accept the dialog, close it, and reinvoke the same function with the dialog empty.
Use the mouse to move or resize the dialog box.
Selection lists inside the dialog box expand automatically to accommodate for longer lists. Manually resize the selection list to be shorter with your mouse to toggle off the automatic expanding. (To toggle automatic expanding back on, manually resize the list to be long again.)
Before a selection is made in the graphics area:

After a selection is made in the graphics area:
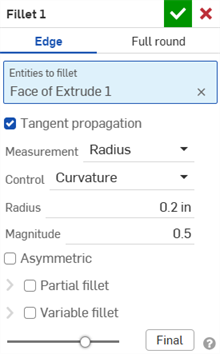
When creating or editing a feature, the preview (the model in the graphics area) is usually displayed as a blend of the model before and after the feature. The Preview slider is an opacity control that lets you adjust the display opacity of the feature along a scale of 0% (before the feature is applied) and 100% (after the feature is applied).


When you edit a feature, by default Onshape displays the model rolled back to its state when that feature was created, hiding all later features. The Final button displays the final result while you are still editing the feature. If you are editing the last feature, there is no Final button in the dialog, since you are already seeing the final result.
Clicking the Final button shows the part in its Final state with the current editing applied.
Dialogs are used wherever user input is required, both in Part Studios and in Assemblies. Dialogs appear and work similarly on both Android and iOS platforms. A typical dialog looks and works like this:
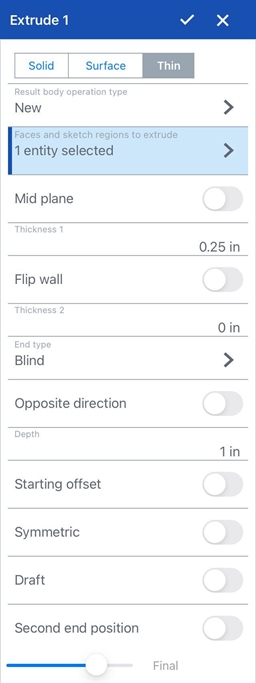
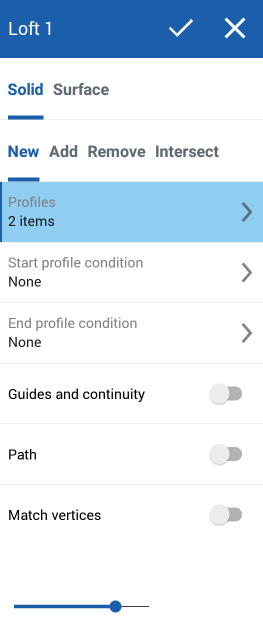
A typical iOS dialog box for an Onshape feature, above left, and a typical dialog Android dialog box, above right
To accept a feature, save changes, and close the dialog, select the checkmark.
To reject a feature and close the dialog without saving, select the x.

By default a dialog will extend to full length. To collapse the dialog completely, tap the top section (or title bar) of the dialog. Tap again to expand it. To adjust the size of the dialog, touch the top and drag to desired length. Once you have specifically adjusted the size, that is where the dialog will expand to when you tap the top section.
If the dialog is too small to display all of the information, swipe vertically inside the dialog to scroll up or down.
Selection lists inside the dialog box expand automatically to accommodate for longer lists. Manually resize the selection list to be shorter by dragging to toggle off the automatic expanding. (To toggle automatic expanding back on, manually resize the list to be long again.)
Tap a box to select an option. When selected, boxes appear grey.
A field highlighted in blue indicates that a selection from the graphics area is required. A grey line of text at the top of the field will explain what type of selection needs to be made. (For example, this particular dialog for Extrude calls for a face and/or sketch region to extrude to be selected.) Once a selection from the graphics area has been made, the field states how many entities have been selected and an arrow appears.

Tap the arrow to view the list of selected entities. The list appears.
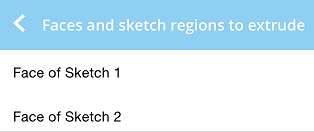
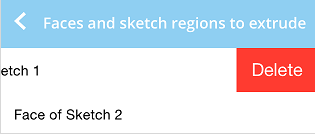
Swipe left on a selection to reveal a delete option. Tap delete to remove that selection.
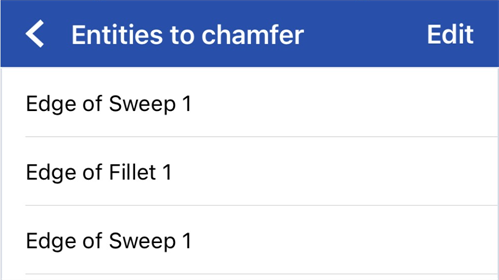
Bulk select items for deletion, tap Edit at the top right of the list:
Make your selections and tap the trash can icon on the top left:
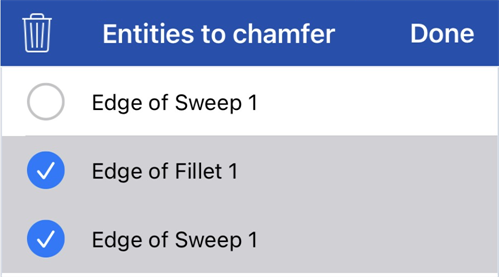
Tap Done.
Reordering items
In some instances, you can reorder the items in a list. Look for the reorder icon (two arrows in opposite directions, as shown below):
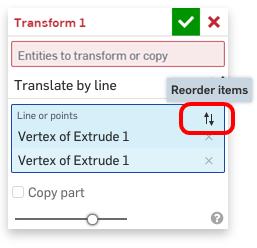
Tap the icon, then use the handles that appear to the right of the item to tap and drag the item to another location in the list. Currently, this functionality is supported in the Transform tool, 3D Fit Spline tool, Boolean tool, and Mates (excluding Tangent mate).
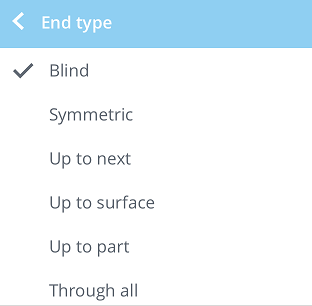
A box with an arrow and no blue highlighting requires a selection from a list. Tap the arrow to view the list and tap to make a selection from the list.

A checkmark will indicates the selection made.
Tap a number to open the number pad.

Use the number pad to input a value.
See Numeric Fields for more information.
Tap anywhere in a field with a toggle switch to activate/deactivate the option. A grey switch indicates the option is off. A blue switch indicates the option is on.
For example. Opposite direction is a toggle option found in an Extrude dialog.


The preview slider is an opacity control that lets you adjust the display opacity of the feature along a scale of 0% (before the feature is applied) and 100% (after the feature is applied).
When you edit a feature, by default Onshape displays the model rolled back to its state when that feature was created, hiding all later features. The Final button displays the final result while you are still editing the feature. If you are editing the last feature, the final button in the dialog is not present since you are already seeing the final result.

When a numerical input is required for anything in Onshape, a number pad will appear. Use the number pad to enter a numeric value, change the unit of measurement used, or delete a dimension. Use the green check to accept and save the value entered and close the number pad. Use the red x to close the number pad without saving and return to the graphics area.
External keyboards are compatible with the number pad. You can input a value, use the arrow keys, and backspace. You can even accept the entered value and close the number pad with Return.
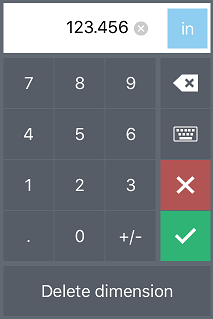
Using the number pad
- Tap the small, circled x in the number display area to clear the current value.
- Tap the button to the right of the number display area to select a unit of measurement for the value.
- Tap the backspace button to backspace one character at a time.
- Tap the keyboard button to open the device's keyboard to enter values or expressions.
When you tap the keyboard button the number pad minimizes and the device's keyboard expands. Use the keyboard to enter values or expressions. Entering an unsolvable expression results in a red outline around the numeric field and a deactivated checkmark button. Correct the entered expression or tap the red x to close the keyboard and revert to the initial value. See Numeric fields for more information.
- Tap the red x button to cancel a value and close the number pad without saving.
- Tap the green checkmark button to accept a value, close the number pad, and save.
- Tap Delete to delete the selected dimension from the entity.