My Account - Preferences
![]()
![]()
![]()
Displays preference settings for your account, such as language, startup page, units, mouse controls, toolbars, keyboard shortcuts, and more.
This page is where you set your user account Preferences. For information on setting your Company/Enterprise-wide Preferences, see Company/Enterprise settings - Preferences.
To navigate to your Preferences settings in Onshape, click on your Account user icon (![]() ) in the top right corner of your Onshape window. This opens a drop down menu. Click My account.
) in the top right corner of your Onshape window. This opens a drop down menu. Click My account.
Click Preferences in the list on the left side of the page:
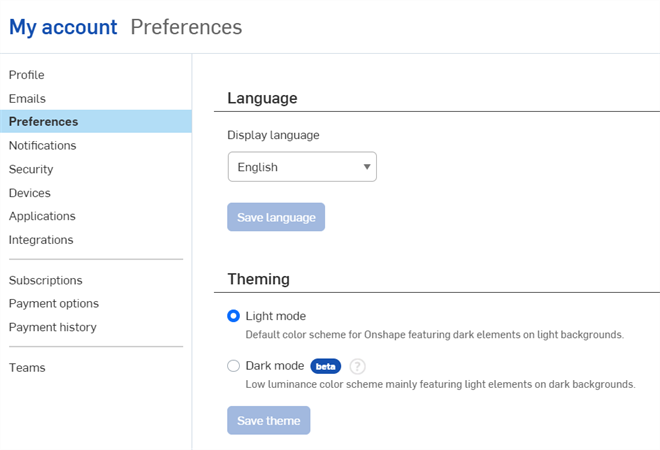
Specify preference for the following Onshape settings:
Select your preferred language from the dropdown. When you click Save language, Onshape automatically signs you out and you must sign in again to view the language change.
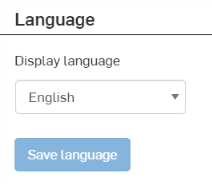
This is an ongoing effort; you may see terms that are not yet translated.
The default Date type property format depends on your chosen language:
| Language | Default Date type property format |
| English | MM/DD/YYYY |
| French, German, Italian, spanish | DD/MM/YYYY |
| Chinese (Simplified), Chinese (Traditional), Japanese, Korean | YYYY/MM/DD |
Company/Educator/Enterprise plan Administrators can change this Date type format. See Property settings for information.
-
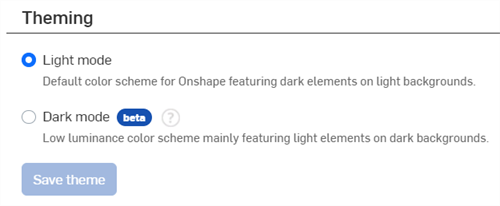
Light mode - Default color scheme for Onshape featuring dark elements on light backgrounds.
-
Dark mode
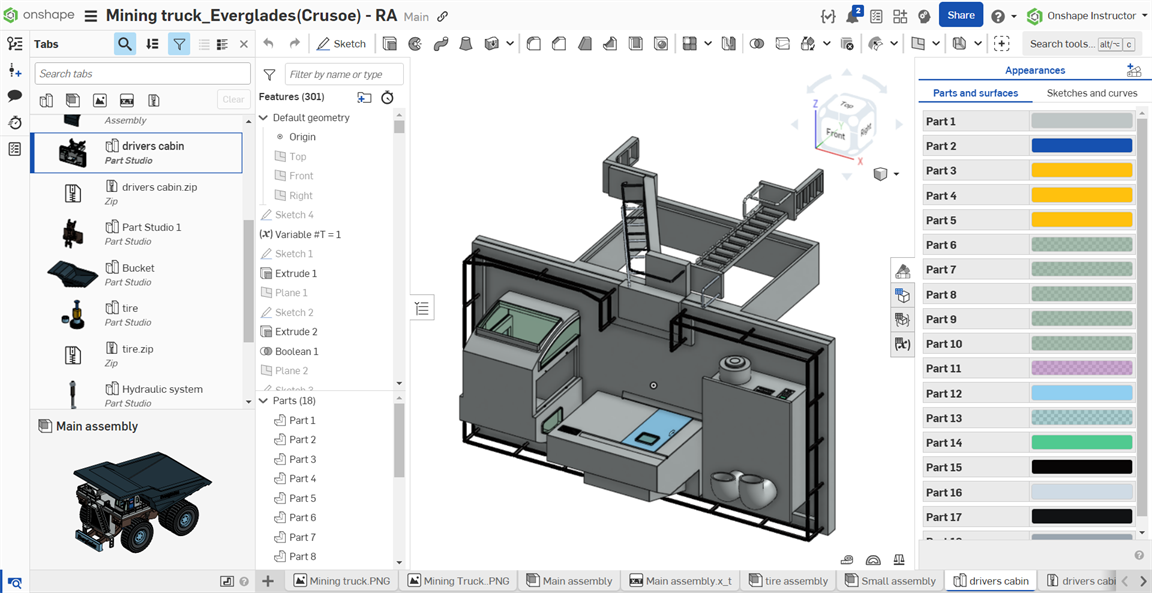
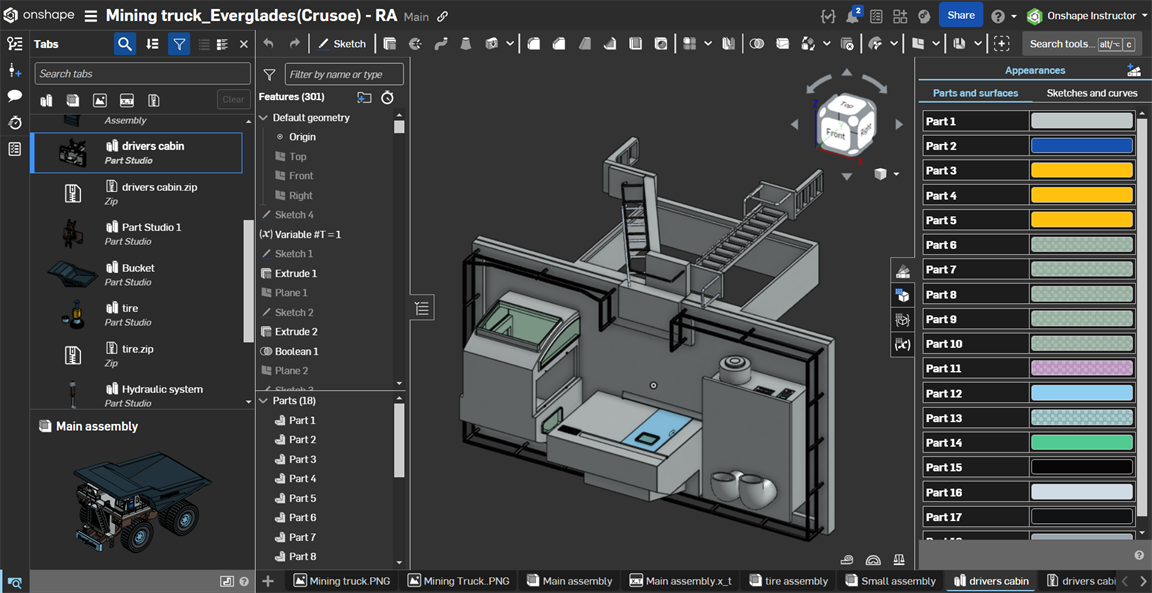
 - Low luminance color scheme mainly featuring light elements on dark backgrounds. Dark mode is a limited feature available in Part Studios, Render Studios, Assemblies, and the App Store. It is currently not available in Drawings, PCB Studio and Enterprise analytics, though the toolbars and menus surrounding the main graphics area are displayed in dark mode.
By default a period is used to signify a decimal separator in numeric fields. Optionally, check Use comma as decimal separator to use a comma as the decimal separator. Then click the Save decimal format button.
When this option is checked and commas are used as decimal separators, a space must be added between array values in an expression (for example: [1, 4, 9, 16][#i], and not [1,4,9,16][#i]).
Select your preferred landing page from the dropdown. When you click Save startup page. If a company or enterprise administrator sets a different Startup page for the company/enterprise account, this setting takes precedence.

The units of measurement and precision set here are used in all your Onshape documents, unless specifically overridden in a dialog (by entering units of choice) or by setting the default units per workspace through the workspace's Document menu > Workspace units. You can also select from a 12 hour or 24 hour time format here.
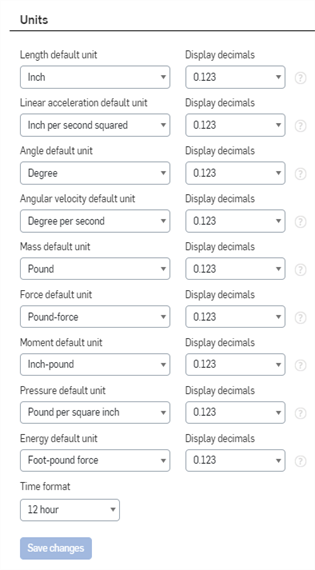
Onshape defaults to inch, degree, pound, and three decimal places for units of measure for all documents and encompasses all measurements in Part Studios, Assemblies, and Drawings; all values displayed in sketch dimensions as well as the default input units for all features.
Unit preference changes only apply to new documents, existing documents will remain the same.
The decimal place settings:
- Are currently available on browser only
- Are currently applied to the feature dialogs, sketch dimensions, and manipulator dialogs
- Work with the Measure tool and Mass properties tool
- The Measure tool will display values in scientific notation when the display precision is not sufficient.
- The Mass properties tool will display error in measurement; see Mass Properties Tool for more information.
- Impacts the display only; values are rounded internally
- Are not used for computation
- Are used internally to determine the number of decimal places to display, regardless of how many places are entered; if more than the specified number are entered, they will be visible when the field is selected for edit.
- Do not affect any external files imported
Overriding default settings
In addition to setting default units for all documents you create (through this Preferences tab), you may also change and specify default units for a specific workspace in a document through the Document Menu.
Despite default settings, Onshape allows you to specify a different unit of measure in any numeric field; the value is converted to the default unit automatically. For example, if the default unit is inches, you may still specify a different unit type (for example "10mm") in a numeric field.
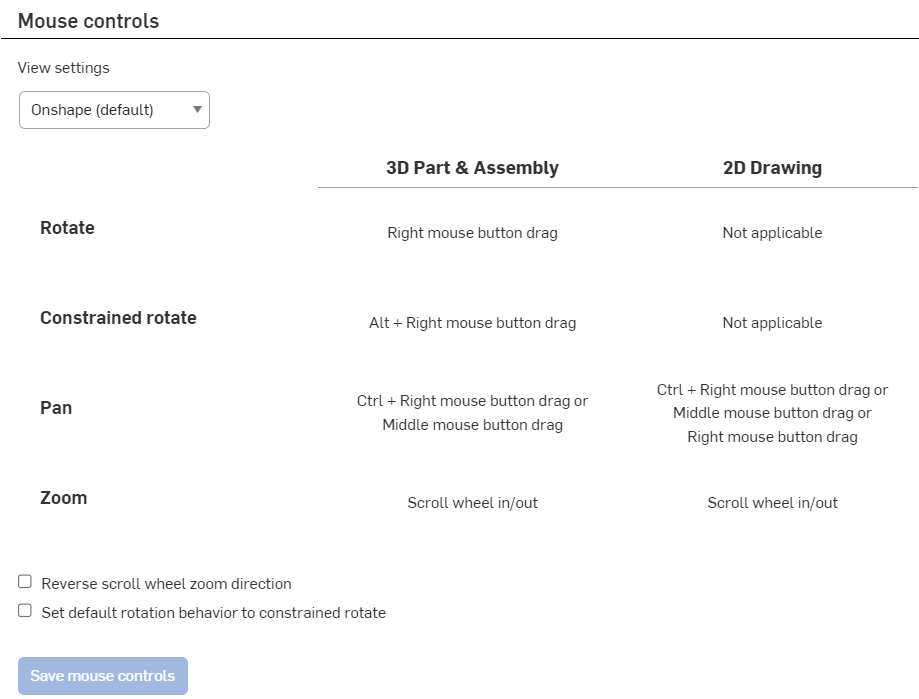
You have the option to keep the default settings for mouse mappings, or select a familiar traditional CAD system’s default settings. These settings also control mouse mappings for Drawings.
Onshape supports 3Dconnexion devices including the SpaceMouse. See your SpaceMouse instructions for information on how to set up your mouse with Onshape.
Create device profile preferences here, including rendering at high resolution pixel density. This profile may be used on any device.
Associate the profile and the browser/device by selecting a particular profile on a particular machine or browser through this interface. Select a profile for each machine and each browser used on a machine.
-
Match pixel density:
-
Automatic (default) - Onshape determines the resolution needed for rendering.
-
On - Render at the resolution of the display.
-
Off - Do not render at the resolution of the display. Graphics will be rendered at a lower resolution.
-
Creating a profile:
- Click Create profile.
- Enter a name for the profile and click Create.
- Select the preferred setting for matching pixel density.
- Click Save profile settings.
Deleting a profile:
- Select the profile from the dropdown.
- Click
Delete profile.
Note that this action may not be undone.
- Click OK to confirm the deletion, or Cancel.
Display instance list properties - When checked, the part number, revision, and state properties of the instance appears in the Instances list on the right side in the Assembly:
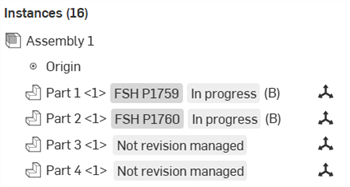
Assembly Instances list displaying list properties (In progress and Not revision managed)
Customize the keyboard shortcuts and hotkeys available for General tools, Sketch tools, Drawing tools, 3D View tools, Part Studio tools, and Assembly tools.
For more information on how to customize Keyboard shortcuts and hotkeys, see Keyboard shortcuts.
Customize the shortcut toolbars available for Sketch tools, Feature tools, Assembly tools, and Drawing tools. Select the toolbar to customize; check the tools to include and uncheck the tools to exclude from the menu. If you do not customize the toolbar, each time Onshape is updated, the default toolbar may change. Once customized, your customizations take precedence over any defaults.
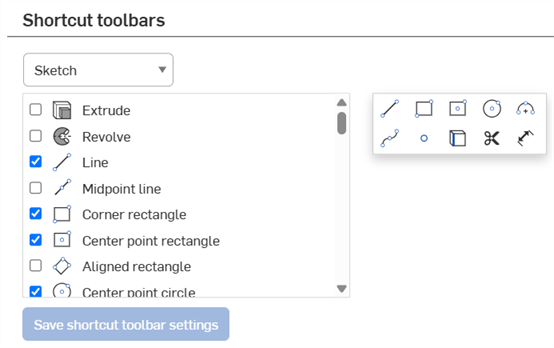
- There are no limits to the number of tools you are able to include.
- The order of tools in the toolbar is determined by the order in the list (currently).
- Use the S key to invoke the toolbar; use the Esc key to close the toolbar. The toolbar appears near the mouse pointer.
Click Reset to defaults to restore any customized (Sketch, Part Studio Feature, and Assembly) toolbars to their default settings. Shortcut toolbars are not reset.
Set background color of model space for imported DWG and DXF files.

Create and add custom material libraries, remove unnecessary libraries, and make libraries available to all users within a company. For more detailed information, see Customizing Parts: Materials.
Add custom export rules based on object type, category, and file format to automatically generate metadata-driven file names when exporting objects.
-
Click Add export rule.
-
Select a Scope, that is, the type of part for which this export rule will apply: Part, Assembly, Drawing, Part Studio, or File.
-
Optionally, select a previously-defined Category. If a category is selected, the export rule applies to all applicable objects within that category. If no category is selected, the export rule applies to all objects in all categories. The category available corresponds to the selected scope.
Only one rule may be created per category.
-
Select a file format (or all file formats).
-
Specify a convention for the file name. This convention is used for all file names for the applicable objects and specified file format.
Some default Onshape properties, and all custom properties, can be used in export rule conventions. See Export Rule Conventions for a partial list.
Rules can also be applied to part faces (when being exported to DXF and DWG), sheet metal flat patterns, and can include sheet reference for a part in a drawing when the property is the part property associated with the drawing on the primary sheet (using ${reference.<property>}).
Standard yearly users cannot create new custom properties and thus cannot create rules that use user-generated custom properties since users can only create new custom properties if they are associated with companies or enterprises.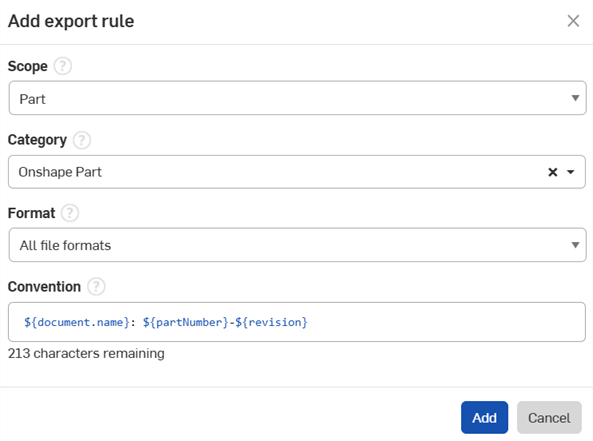
To use custom properties in an export rule:
-
Navigate your user menu > Company/Enterprise settings.
-
Click Custom Properties.
-
Click Create custom property:
-
Specify a name for the property. The name should be unique among Onshape and custom properties. When testing for uniqueness, Onshape uses the Company name and the name of the property.
-
Optionally, set a Display name. If a Display name is set, the name is referenced when creating the rule. If no Display name is set, the Name is used.
-
Select a property type: Text, Boolean, Integer, Double, Date, List, User, or Value with units.
When defining lists and values, you can copy/paste values or enter them separately. You can also specify display names (they may not duplicate the Value, however). You can reorder the values with drag/drop, and select whether each is active/inactive at any time.
-
The initial Publish state is Pending (not yet available to users). The Publish state must be Active to use the custom property in export rules.
-
Under the Categories section, if there is an existing Category to add the property to, add that here. Otherwise, proceed to the next step.
-
-
While in the Company/Enterprise settings, click Categories.
-
Click Create category:
-
Select a Scope (Part, Assembly, Drawing, Part Studio, or File).
-
Fill out the required fields.
-
Publish State must be Active for the Category to be available for the export rules.
-
Optionally, under Parent categories, add a category to act as a parent category (for the child to inherit properties from).
-
Under Properties, add the desired custom property. This may be an existing/default property or a newly created property from the previous steps.
Valid properties include:
-
Document name property
-
Export format property
-
Resolution property
-
Units property
-
STL format property
-
Export timestamp property
-
Properties of the item being exported (depending on its category)
-
Properties of the workspace/version it’s being exported from
-
For drawings, properties of the part/assembly it references
-
-
-
Once created, follow the basic workflow, and select the corresponding Scope, Category, Format and under Convention, add the rule of the custom property just created.
Provide users the following permissions:

-
Non-geometric item authoring - Add users here to allow them to edit Non-geometric Item properties. Click Save to have the changes take effect.
-
Standard content authoring - Add users here to allow them to edit Standard content properties. Click Save to have the changes take effect.
When an enterprise is making use of Onshape release management tools, individual users who may be asked to approve releases can delegate that approval. This is convenient for planned absences as any user has the ability to specify another user to be notified of pending release candidate approval requests and given permission to act on the request. Upon specification of a delegate, the user or team members named as delegate are notified of the assignment. The user who is delegating the approval responsibility sees a message every time they sign in or refresh an Onshape session:

Delegated approval requests are not able to be delegated to another user. For example, if User-A delegates approval to User-B, and User-B delegates approval to User-C, User-C will get approval requests that specified User-B, but not approval requests that specified User-A.
To specify a user as your delegate:
- Open the User menu in the top right corner of the window.
- Select My account.
- On the My account page, select Preferences.
- Scroll down to Release management.
- Check the box next to Delegate approval to another user or team.
- Supply the team name or email of the user (or click in the box to select from a list of known teams/users).

When something is released, both the user who delegated and the team/user who is delegated receive a notification.
To access the area in which you change account preferences for all users:
-
Tap the
 hamburger menu in the upper-left corner of the screen, then tap My account. This brings you to your account settings page:
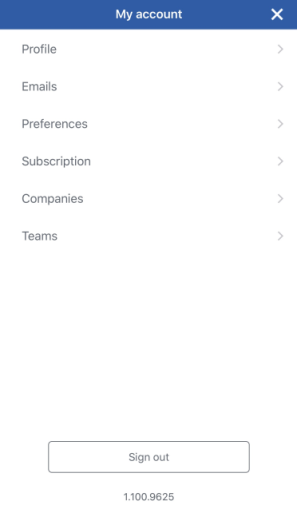
The My account settings page as seen on an iOS device.
- From there, tap Preferences to open your account Preference settings page.
There are a few preference settings you can make on behalf of the Enterprise account:
- To require users to use specific, approved drawing templates that you have loaded/created in Onshape.
- To enable an enterprise-owned, shared materials library to be accessible by all enterprise users.
For information and instruction on creating your own drawings templates and making them available to your users, see the Learning Center's Technical Brief Best Practices for Creating Native Onshape Drawing Templates.
For information on adding custom materials libraries, see Customizing Parts: Materials.