Onshape Primer
The total estimated time of completion is 50 minutes.
Use this primer to become familiar with Onshape's terms, tools, and some of the more common workflows that Onshape has re-engineered to be simpler and more powerful than other systems. This primer steps you through setting up your Onshape profile, understanding the user interface, and the basics of creating and assembling parts. In many lessons, at the left of the screen are some helpful tips that are useful; refer to them at any time. At the top of all the lessons, there is an estimated time of completion right above the description of the lesson.
You can step through one lesson at a time, in sequential order, or use this list to jump to your preferred starting place. We recommend starting from the beginning so you don't miss any important information.
- Setting Your Preferences
- Creating Parts
- Defining and Constraining Sketches
- Viewing, Selection, and Shortcuts
- Importing and Editing a Part
- Measuring and Mass Properties
- Working with Versions
- Working with Branches
- Merging Branches
Before you start the Primer, there are some things that are worth knowing.
Onshape supports these browsers:
- Google Chrome
- Mozilla Firefox
- Safari (Mac OS only)
- Opera
Internet Explorer is currently not supported.
Supported Android versions
Onshape minimally requires version 8 (Oreo).
To check what version of Android your device has installed, go to your settings and check the About or General section.
Supported iOS versions
Onshape minimally requires the latest version of iOS 18 or iPadOS 18.
To check what version of iOS your device has installed, go to Settings > General > About > Version.
Supported iOS devices
- iPhone 8 and above
-
iPhone SE (2nd generation and above)
- iPad Mini (5th generation and above)
- iPad Air (3rd generation and above)
- iPad Pro (1st generation and above)
If you'd like to bookmark Help pages on the iOS platform, you can use your app settings on your iOS device and set Open Help in browser to on. When you access the help via Onshape, it will then open in a browser, where you can create bookmarks of specific topics or pages.
Onshape supports keyboard shortcuts and mouse support when using peripherals.
Graphics Performance
Devices with older GPUs and older implementations of OpenGL ES 2.0 sometimes lack the necessary capabilities to run Onshape's 3D graphics. This most often happens on devices with a Mali 400 GPU.
When using devices with older GPUs or implementations of OpenGL ES 2.0 an error message will alert you when you open a Part Studio or an Assembly. The error message offers a link to more information as well as a link to continue.
If you elect to proceed after receiving the error message, you will likely notice graphics glitches or a blank, white screen. Eventually, the app may crash.
Why doesn't it work?
The Onshape graphics library uses Vertex Array Objects (VAOs). VAOs are supported natively in OpenGL ES 3.0 and above, but are not supported in the OpenGL ES 2.0 library. Often, implementations of OpenGL ES 2.0 contain extensions that support VAOs, but the support of these extensions is not guaranteed by Android and depend on the service of the manufacturer.
By default, Onshape allows a device with OpenGL ES 2.0 or higher to install the application but it is not until the app is running on a device that it can detect if the device has the necessary capabilities or extensions.
How can I fix this?
Use a device that supports, at the very least, OpenGL ES 2.0 with Vertex Array Object extensions.
A device running the latest version of Android does not necessarily support OpenGL ES 3.0. We recommend that you avoid running Onshape on devices with a Mali 400 or Mali 450 GPU, as these are unable to render 3D graphics properly.
It is recommended that you use a device that runs OpenGL ES 3.
How do I find out what GPU I have?
The most direct way to find out what GPU your device uses is to search for your device and/or serial number on the Internet. For example; you might try browsing or searching for your device on a website such as gsmarena.com or phonearena.com.
We suggest that you run the 64-bit version of browsers on operating systems that can run both 64-bit and 32-bit (for example Windows, Linux).
Context menus are everywhere
Use a right mouse button (RMB) click on an entity to invoke its context menu. Context menus contain commands for that entity in the current context. Context Menus exist for entities in the graphics area, entities in Feature lists, Parts lists, and Drawings, as well as Onshape constructs such as tabs. Right-click throughout the interface to discover Context Menus.
View cube and view tools
Change the view of your workspace inside a Part Studio or Assembly with the View cube. Click the View cube, located in the upper right corner of the graphics area, to choose from a list of different viewing options. Select one to change your view of the graphics area or to change the view settings of your entities.
Use the smaller cube below the View cube to access the View tools which allow you not only shortcuts to standard model views like isometric, Dimetric and Trimetric, but also contains commands to display the model in various visual ways, observe Zebra stripes (Under the Curvature visualization menu), Draft analysis, and Apply section views.
See View Navigation and Viewing Parts for more information on different views.
Onshape allows the same functionality on a mobile device as it does on a web browser. However, because of the unique, touch-based interface of smart phones and tablets, there are some basic and important gestures you need to know. (The orange markings below represent touch actions in the interface.)
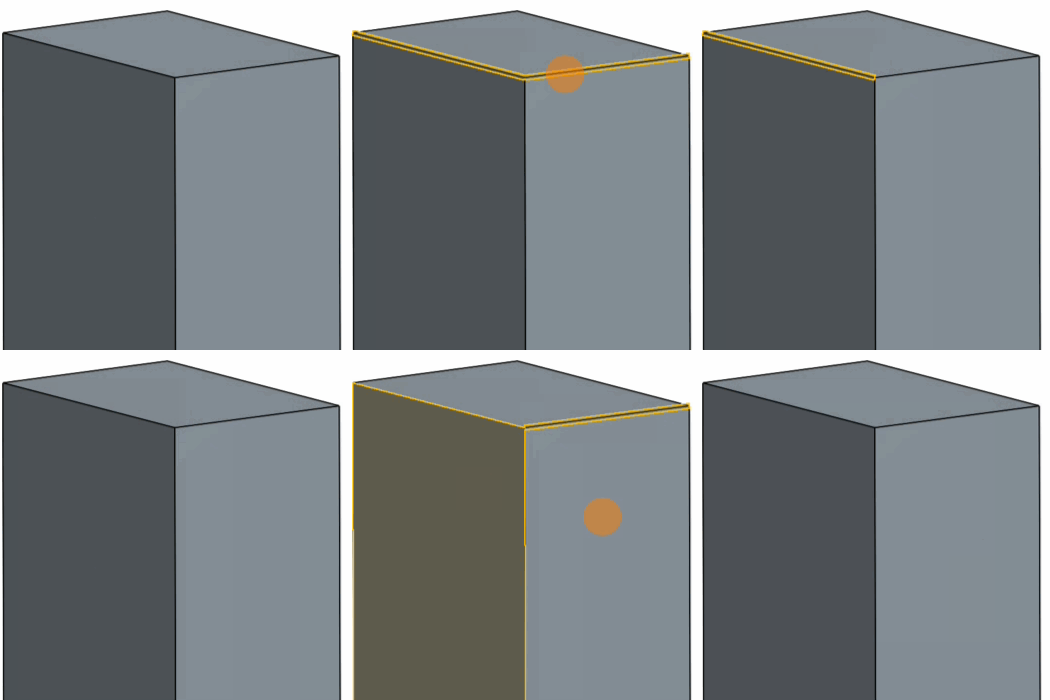
Select
Tap to select or deselect an entity or tool. Double tap to deselect all selections.
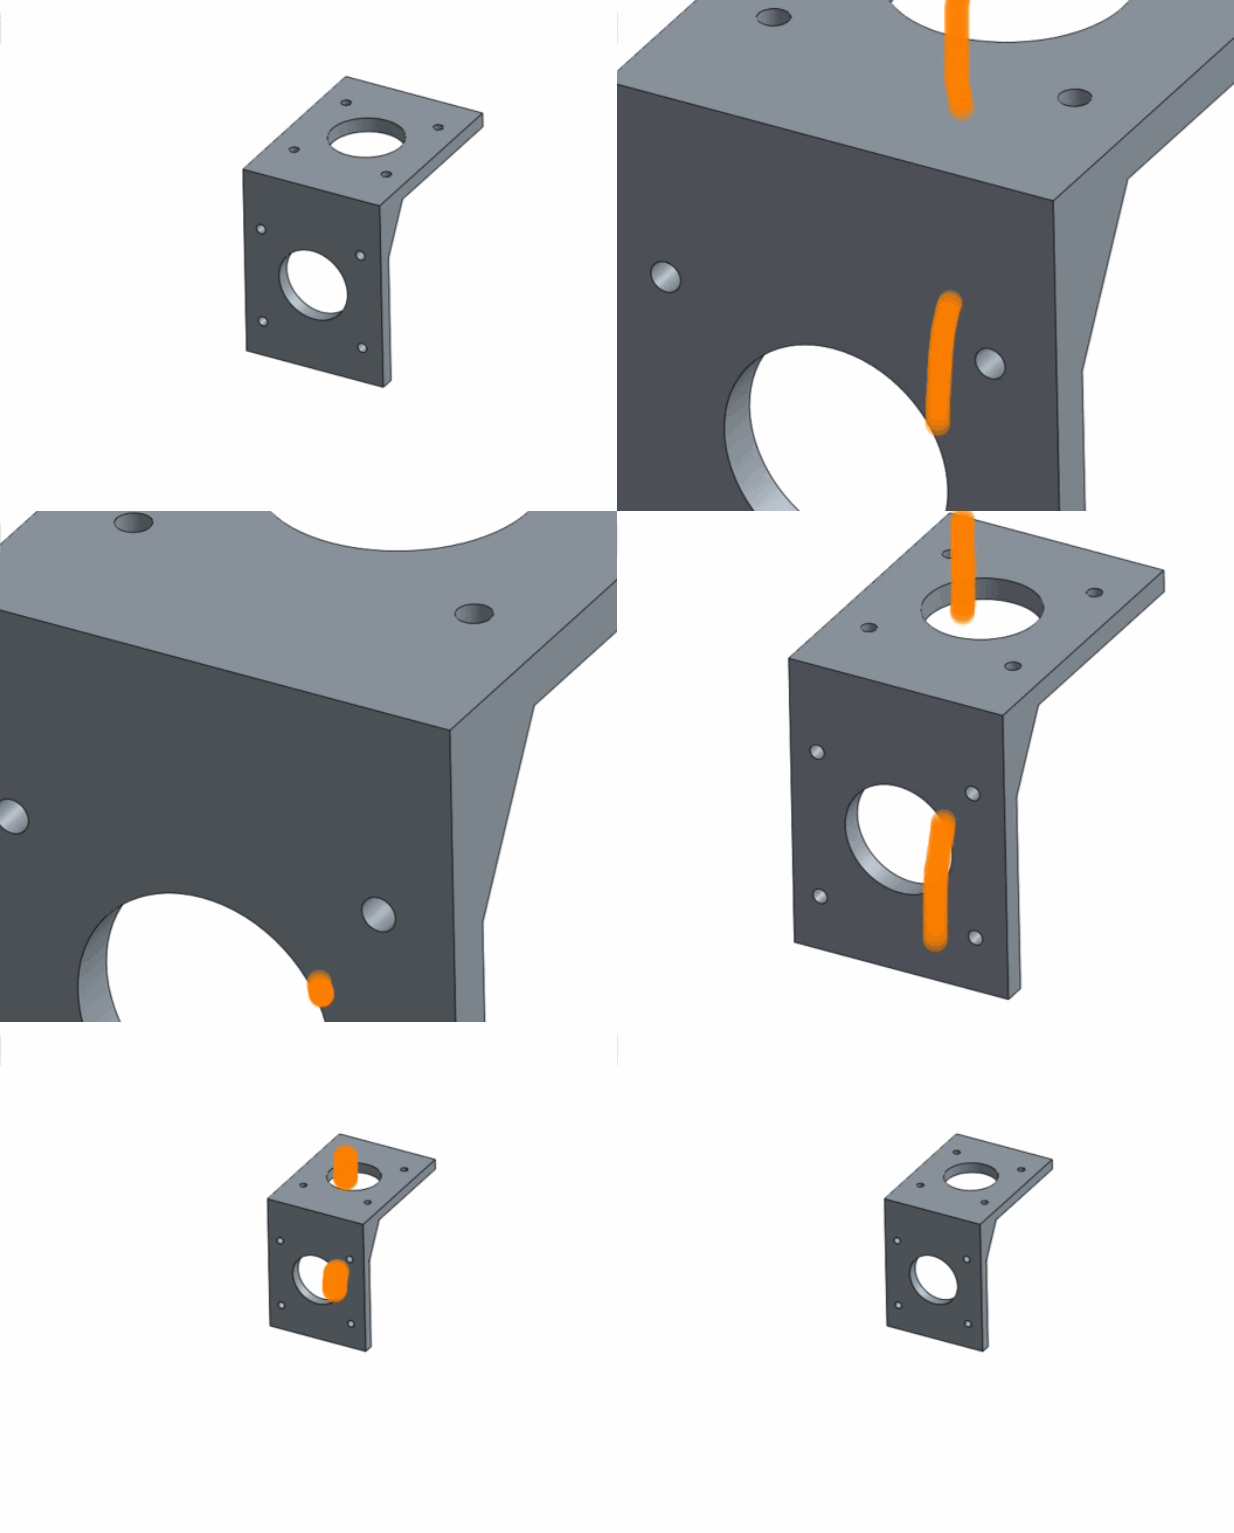
Zoom
Pinch to zoom in or out.
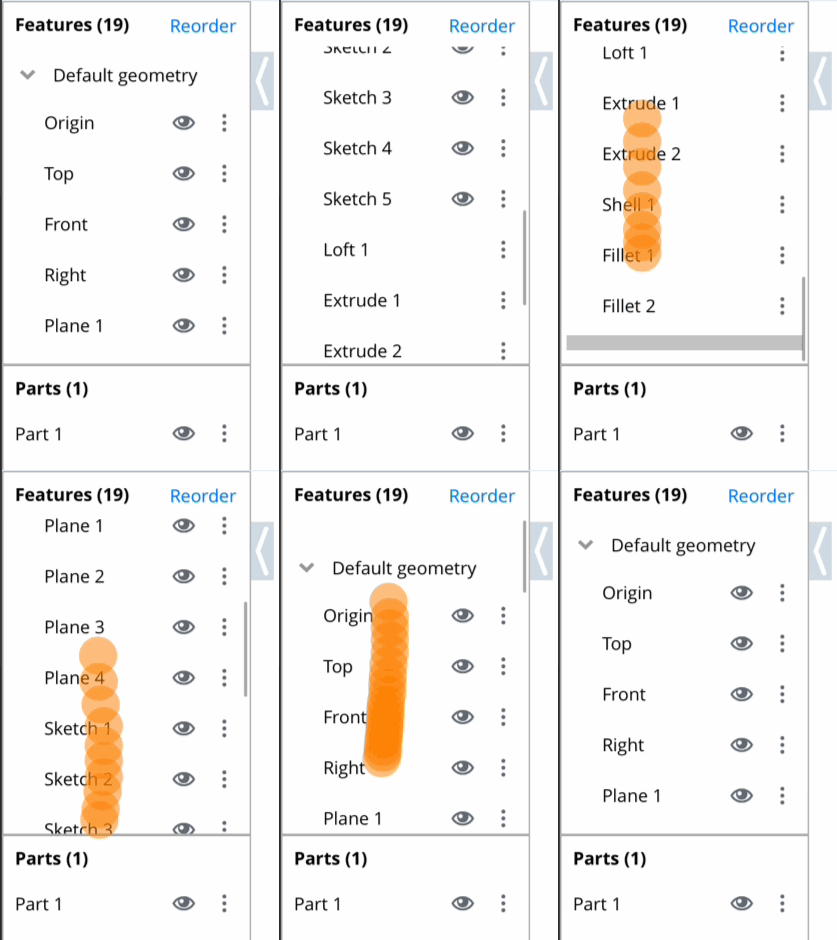
Scroll
Swipe to scroll through a Feature list or dialog.
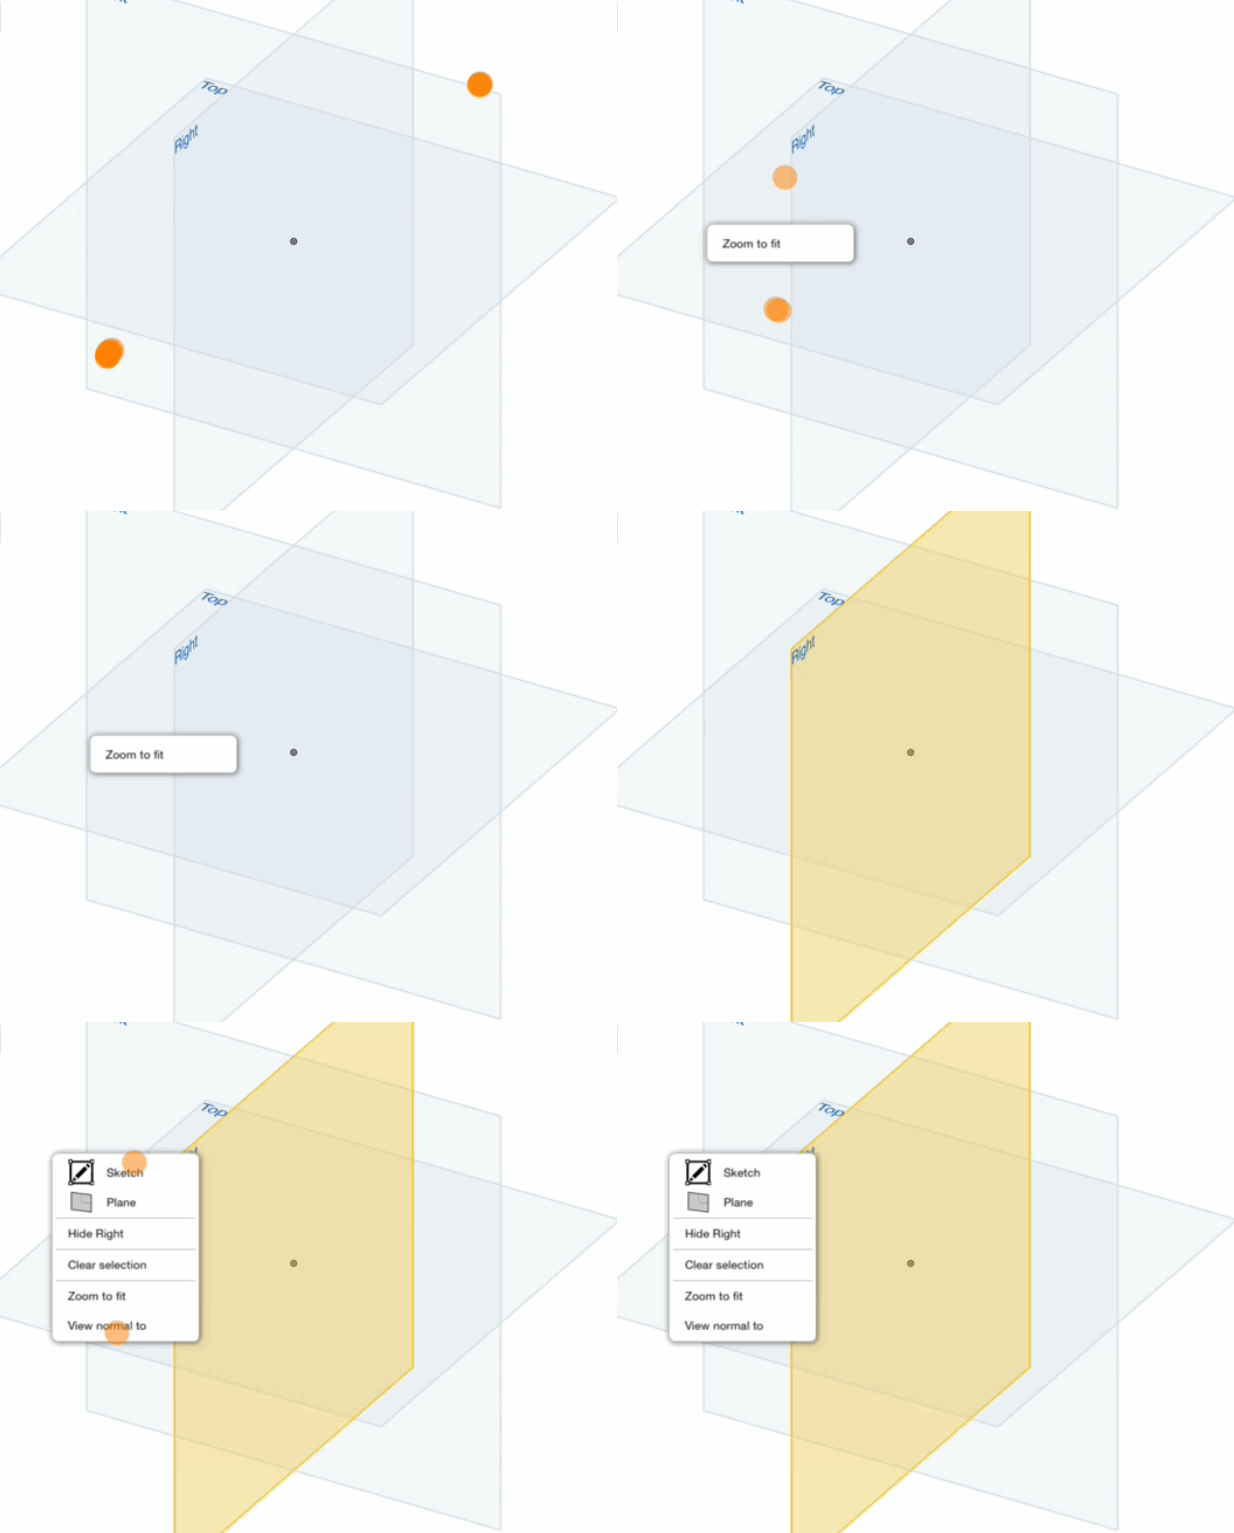
Open Context menu
Two-finger tap to open Context menus.
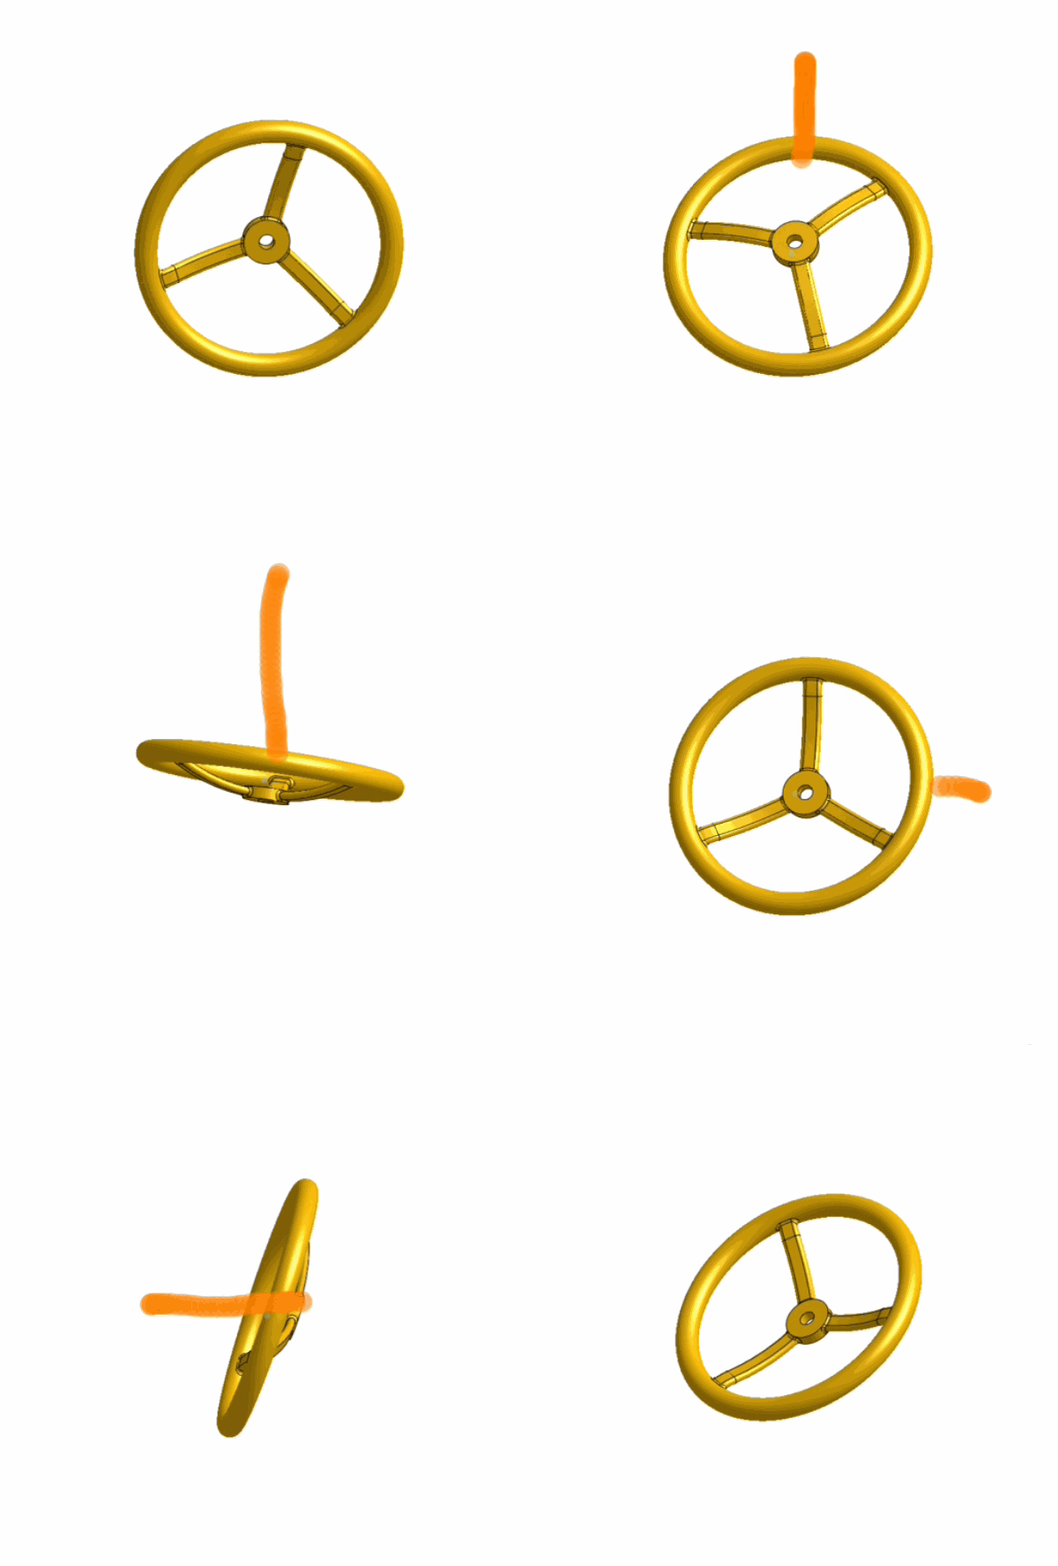
3D rotate
Drag a single finger in the graphics area to 3D rotate.
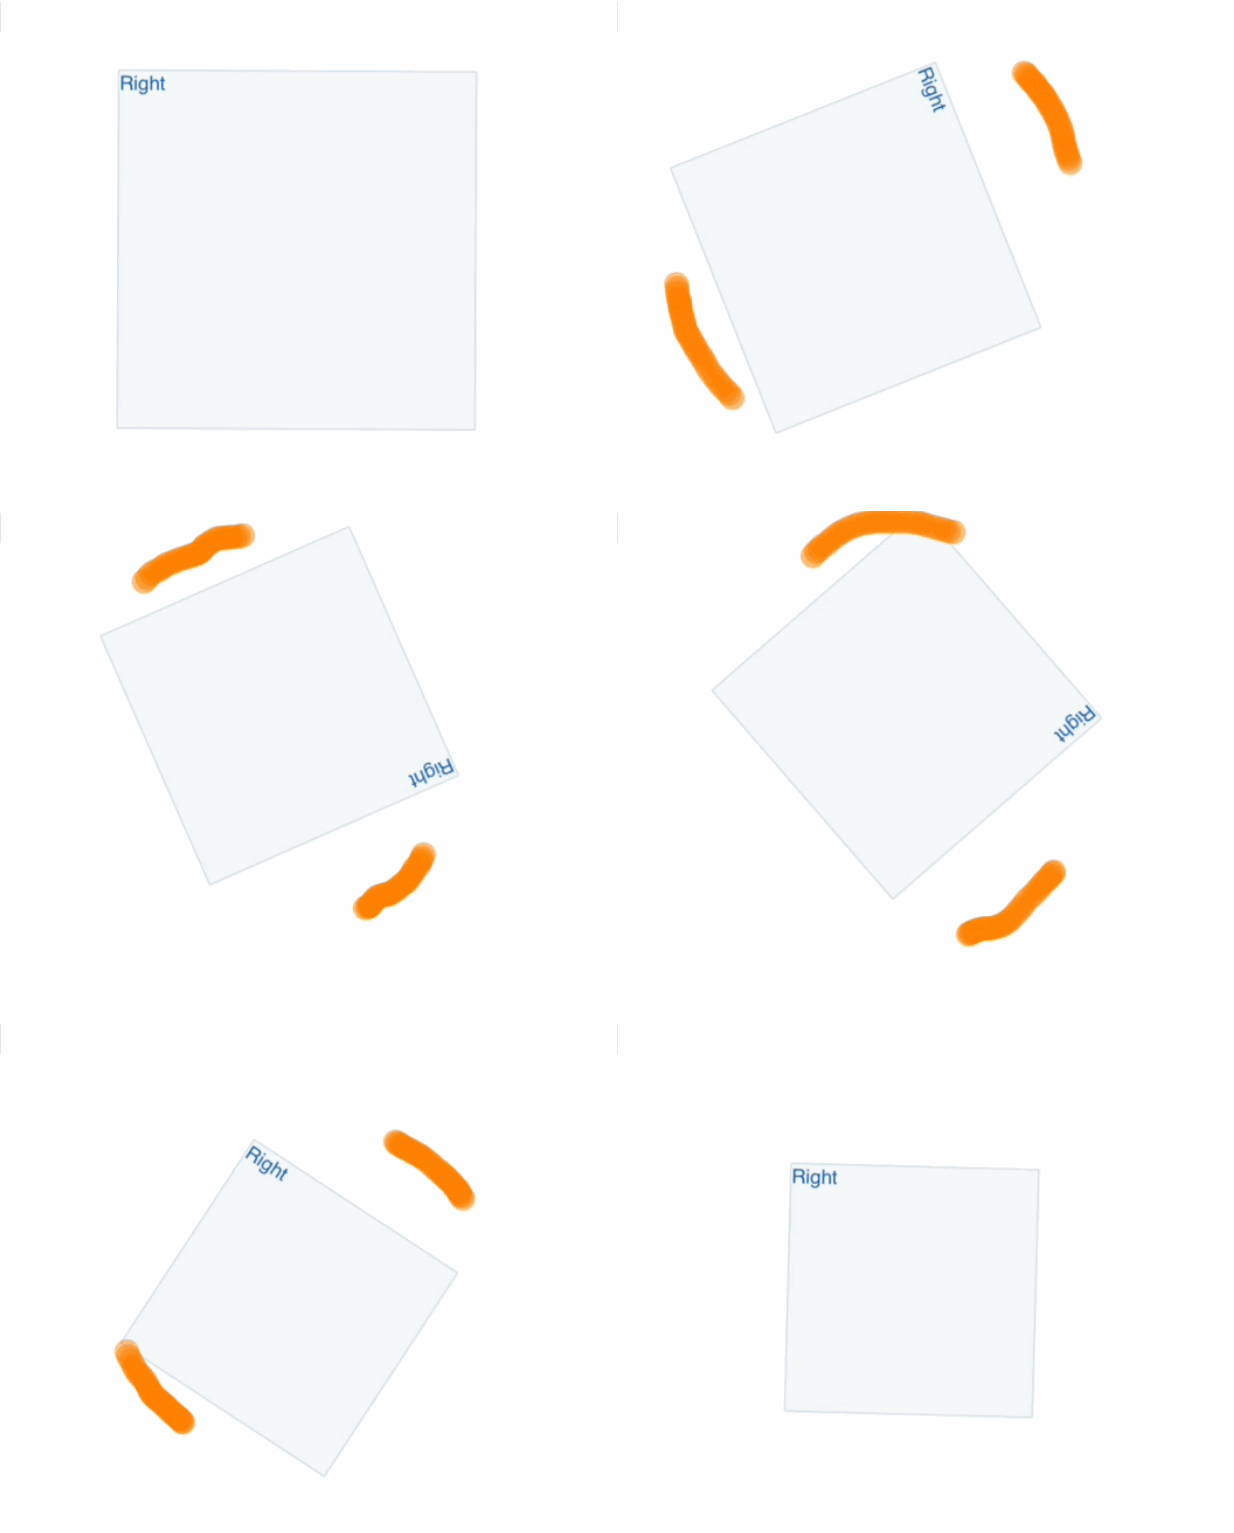
2D rotate
Two-finger twist in the graphics area to 2D rotate.
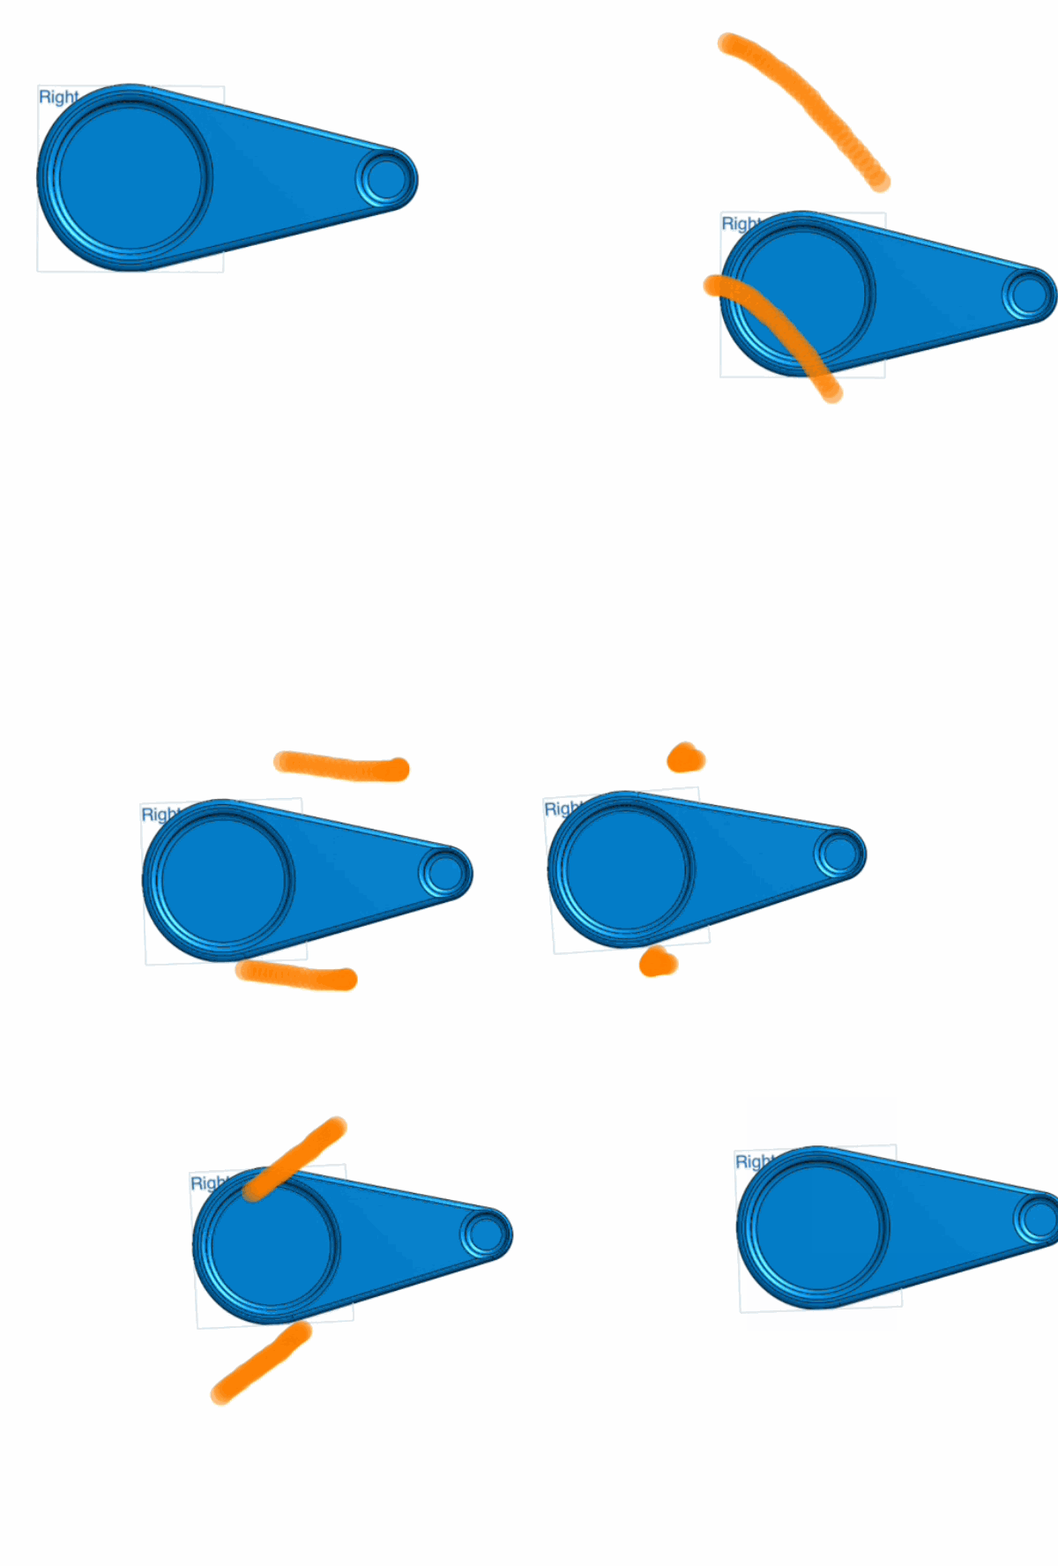
Pan
Two-finger drag to pan the graphics area.
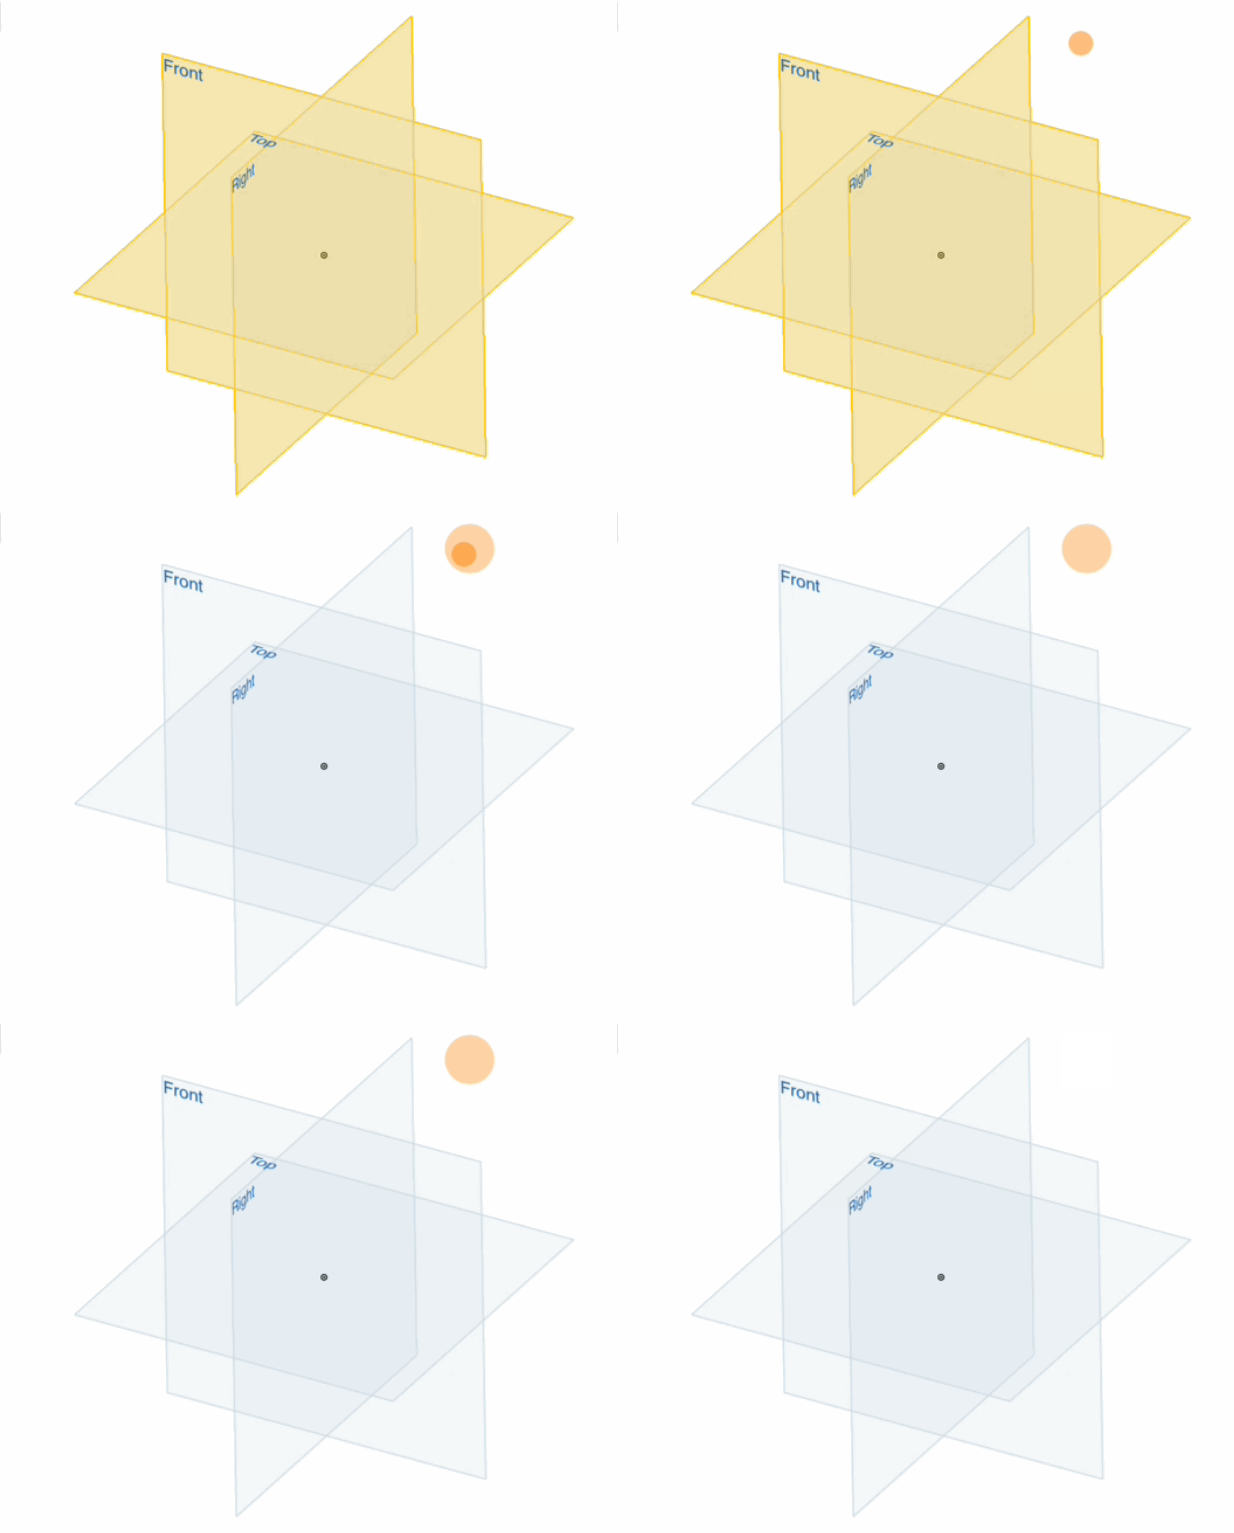
Deselect all
Double-tap in the same spot to deselect all selections.
Precision selector
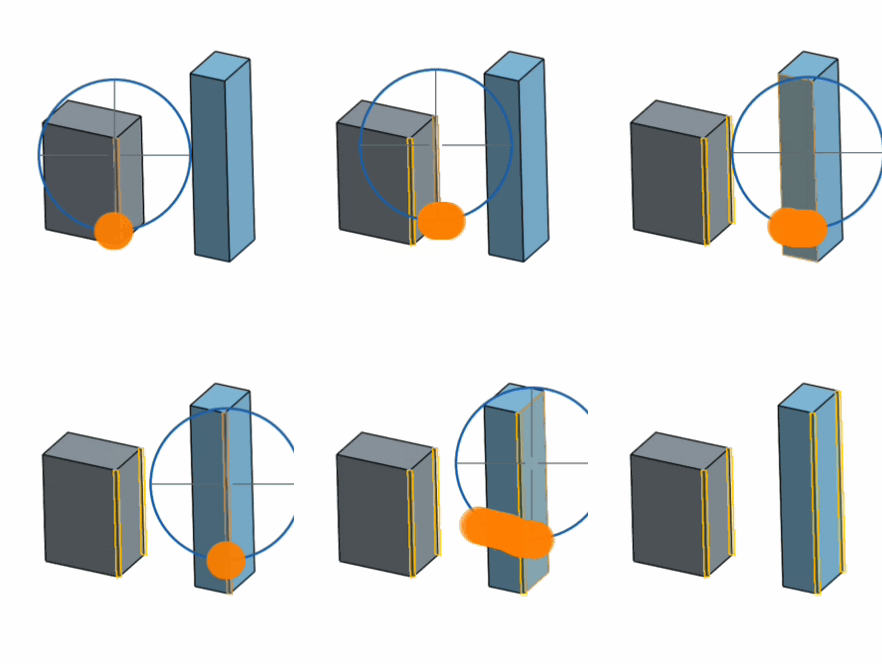
Touch and hold in the graphics area to call the Precision selector. Use crosshairs to pinpoint selection. To select: Release finger when crosshairs are lined up with desired selection entity (when desired entity is highlighted).
See User Interface Basics > Selection for more information.
Stylus
Onshape Mobile supports the use of a stylus such as the Apple Pencil.
Use the stylus for any one-finger gesture such as select, deselect, scroll, 3D rotate, and precision select (all mentioned above). The actions to complete the gestures with a stylus are exactly the same as those with a finger except for Precision selector.
The Apple Pencil also supports the Scribble setting in iOS.
Precision selector with stylus
While using the stylus to precision select, press harder to temporarily zoom. Once you release to make a selection, the zoom returns to normal:
Contact Support tool
Click Contact Support (if you have a professional subscription) or Report a bug (if you have a free subscription), located in the ![]() drop down or along the side of our Documentation topics to provide feedback, report bugs, and contact support.
drop down or along the side of our Documentation topics to provide feedback, report bugs, and contact support.
![]()
For additional Learning center resources, follow the self-guided course here: Self-Guided Onshape Bootcamp (Onshape account required). You can also follow this self-paced course: Introduction to Parametric Feature-Based CAD (Onshape account required) and register for:Navigating Onshape (Onshape account required). You can also view the technical briefing article here: Navigating Onshape for New Users (Onshape account required).