Merging Branches
The estimated time of completion is 5 minutes.
Onshape allows you to merge design changes from one workspace to another using From > To logic. You merge changes from any workspace or version of one branch (the source), to another workspace on another branch (the target, always a workspace).
This lesson covers what to do once you have branches with designs you approve and want to merge those designs together again in one branch.
Preparing to merge branches
When you have a workspace on one branch (what we call a 'source') you can merge it into another branch (what we call a 'target'). The most important information right now is that you will merge into the active workspace. So make sure to have the workspace you want to merge into open and active in the interface.
- Open Versions and history in the Documentation panel, outlined in blue, below.
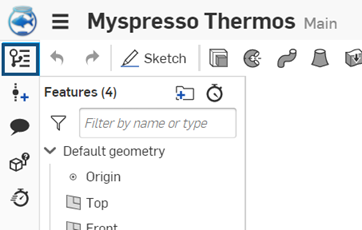
- Onshape recommends first creating a version in the workspace you want to merge (the source workspace). That way you always have that moment in time you can go back to.
The advantage to creating a version is that it won't change if a user continues to work in the workspace.
With the source workspace open in the interface, click the Create version icon and fill in the details in the dialog.
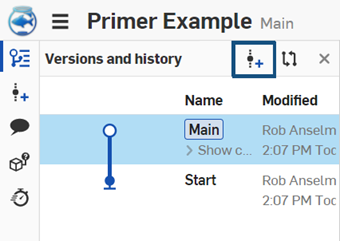
- Once a version is made of the source workspace, go ahead and open the target workspace: the workspace into which you want to merge. (To make a workspace active, select it in the Versions and history graph.)
- With the Versions and history graph open, right-click the source version and select Merge into current workspace.
All changes made in the source version are all merged into the target workspace and immediately visible in the interface.
Tips
- All changes made in the source workspace are merged into the active workspace (the target).
- All merge actions are also recorded in the document history (so it can also be reversed if necessary).
An example
Let's walk through an example of having a design that requires merging a version into a workspace.
This base and widget were created in the Main branch of a document. A version was created, V1, and a branch created from that version, B1.
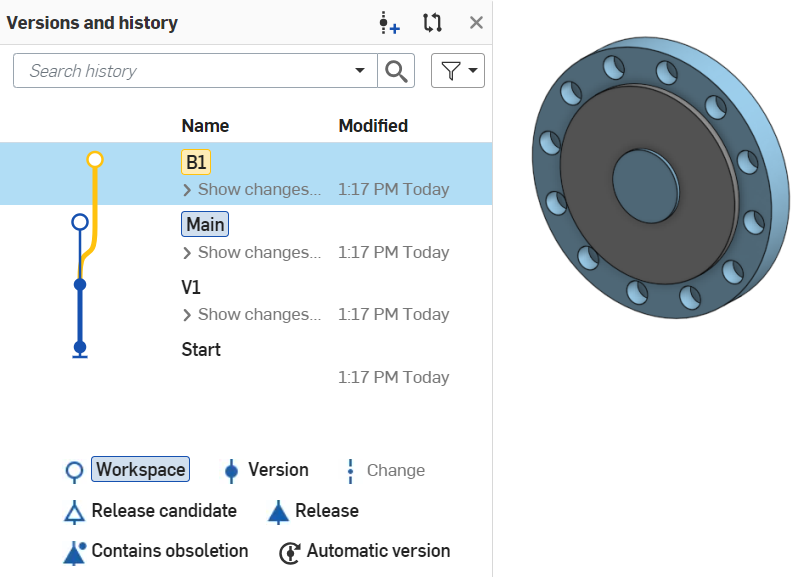
In branch B1, the widget design was then modified as shown below:
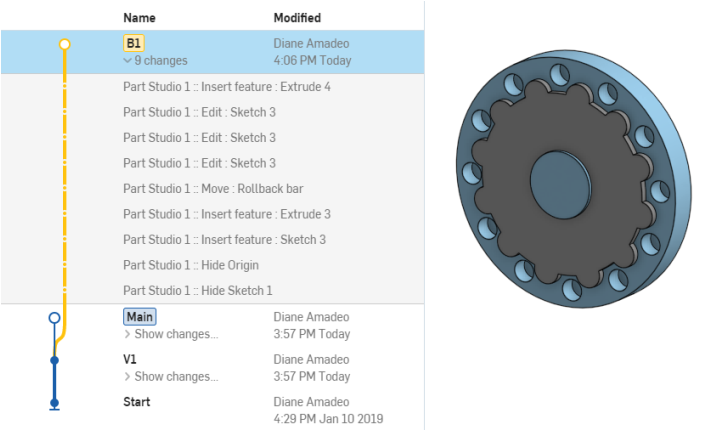
In branch Main, the base design was modified by adding holes in the corners, as shown below:
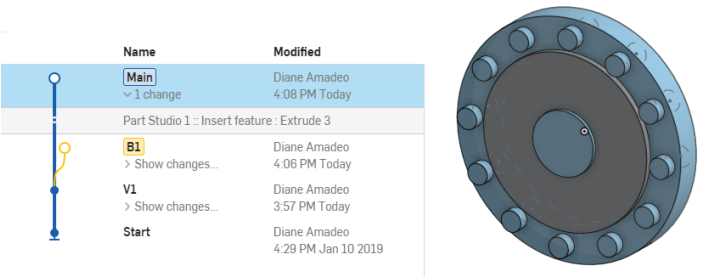
To merge the new widget design in branch B1 into the design in Main, we must:
- Open the workspace of branch Main so it's visible in the interface, and open the Versions and history graph as well:

- Open the Versions and history graph, make sure the Main workspace is selected, and then right-click branch B1:
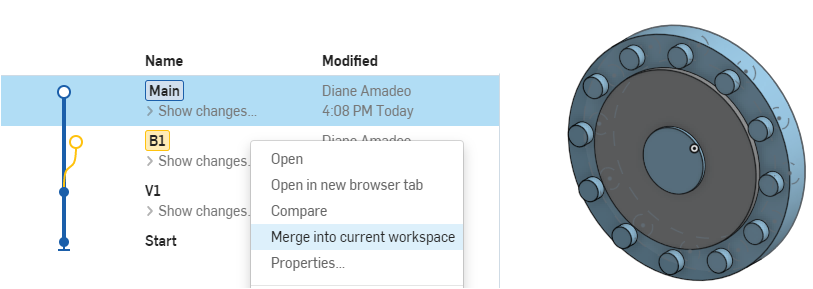
- Select Merge into current workspace. The Merge dialog opens, where you can select the Overall merge strategy and individual tabs to merge:
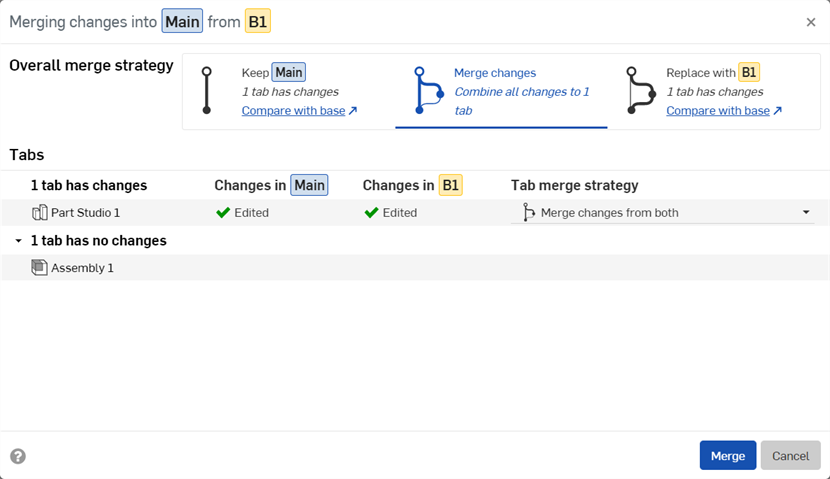
-
Click the Merge button. The current workspace, Main, is updated with the geometry in the workspace of branch B1, including the parametric history of the features from branch B1, resulting in this widget design:
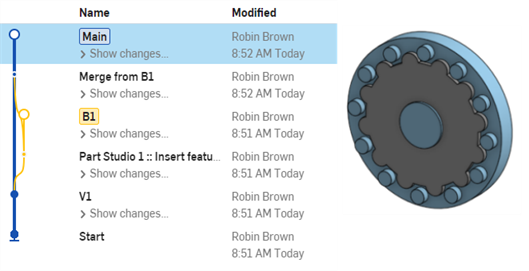
Changes in the source branch overwrite changes in the target branch, even with entities not involving Part Studios and Assemblies (like drawings, images, pdfs etc).
Additional resources
For additional Learning center resources, follow the self-paced course here: Branching and Merging (Onshape account required). You can also follow the technical briefings here: Understanding and Working with a Document’s Historical Data (Onshape account required) and Gitflow Version Management (Onshape account required).