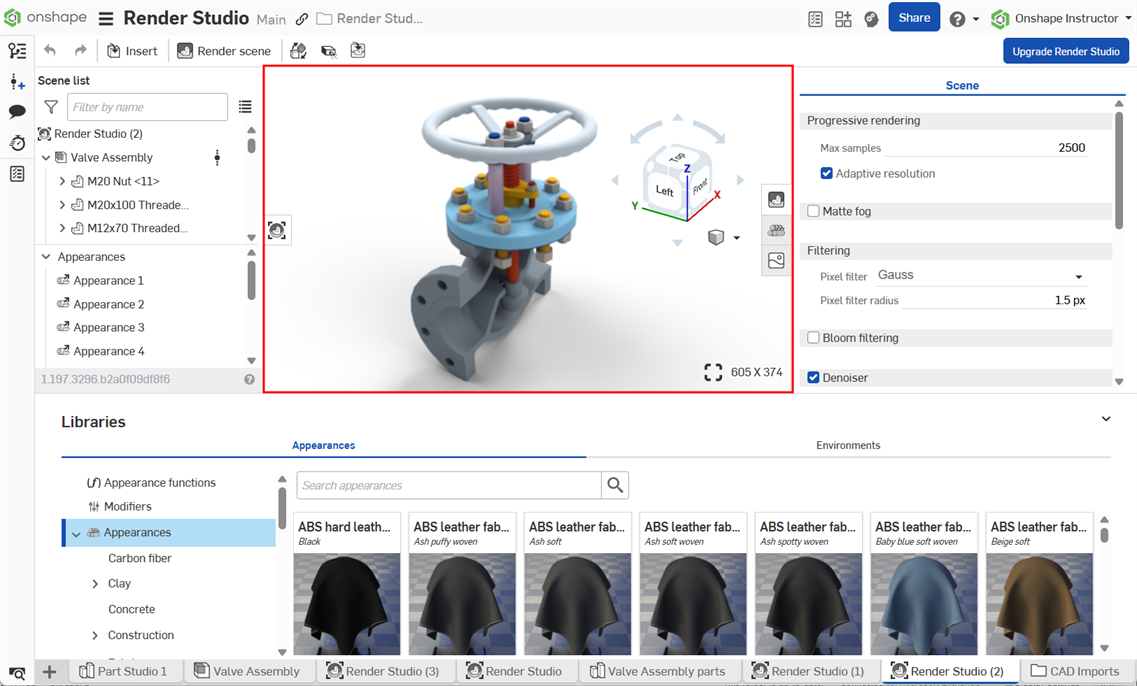
Render Studio 介面
![]()
僅為 提供
下方部分說明 Render Studio 分頁介面中各個部分的操作方式。

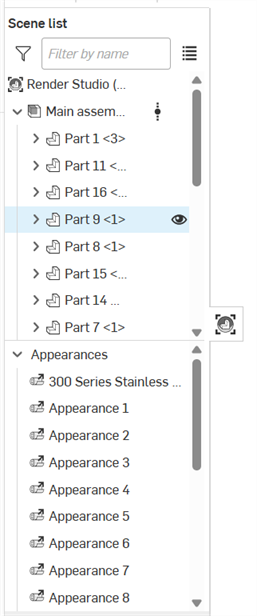
位在頁面的左側,場景清單提供關於目前 Render Studio 場景的零件、Part Studio 和組合件資訊。
當選取了「場景清單」中的一個選項時,在右側的「Scene」、「Appearance」與「Environment」面板中會顯示相關的子功能表與可編輯的參數。關於參數選項的完整清單,請參考 Scene、Appearance 與 Environment 面板的部分。
如果只選取了單一的場景清單項目,「外觀」面板會僅顯示可用的參數。按下鍵盤空格鍵來取消選取所有的項目,然後在「場景清單」中選擇一個項目。
除了 Transform 與 Projector 之外,您可以在場景清單中選取多個個體 (在群組選擇中一起選取)。Transform 與 Projector 是僅能單獨選取的。
「場景清單」分為兩個可捲動的部分:
-
場景清單幾何 (上半部) - 包含場景中的所有幾何,以及任何的 Transforms 與 Projectors。
-
外觀 (下半部) - 包含場景中幾何使用的所有外觀。
若要調整「場景清單」的寬度,將游標移動至面板右邊暫留,當游標變為雙邊箭頭時,按一下並拖曳來調整大小。
詳細資訊請參考 Scene list。
Located at the bottom of the page, the Appearances library contains all the standard attribute combinations that are applied to parts, part faces, or surfaces, to provide a material texture, as well as functions that are applied to appearance parameters:
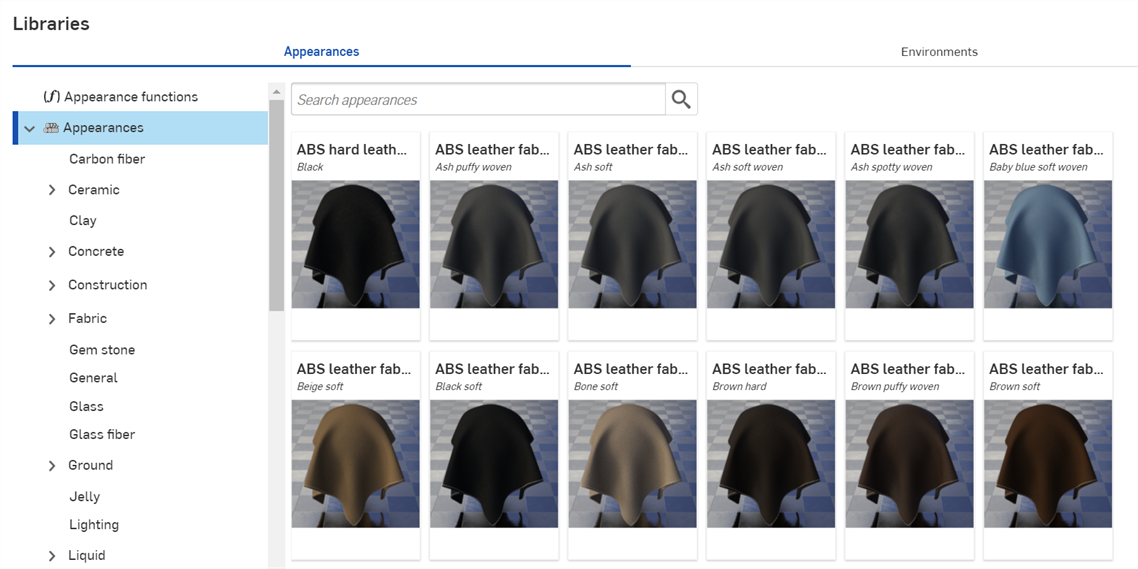
Use the Search appearances field to narrow the appearance results in the library. The Search appearances field only locates appearances within the selected folder. For example, in the image above, if the Ceramic folder is selected, typing a keyword into the Search appearances field and pressing the Enter key shows only results within the Ceramic folder.
Use "and", "+", and "or" operators between words to further refine the search.
Once narrowed by the search, results appear as a thumbnail list on the right side of the Appearances panel. To clear the search, delete the keyword(s) in the Search appearances field and press the Enter key or press the clear field icon (![]() ).
).
To hide/show the Libraries panel, click the expand/collapse toggle (![]() ) at the top right corner of the panel.
) at the top right corner of the panel.
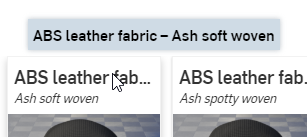
If the entire name of the Appearance is not visible, hover over the name and a tooltip reveals the complete name:
Click the View description toggle (![]() ) at the bottom of the Appearance card (top left image below) to flip it and reveal a short description of the Appearance on the back of the card (top right image below). If the description is too long for the card container, hover your cursor over the text for a moment and the card expands to reveal the full description (bottom image below). Click the View description toggle again to flip the card to the thumbnail on the card front.
) at the bottom of the Appearance card (top left image below) to flip it and reveal a short description of the Appearance on the back of the card (top right image below). If the description is too long for the card container, hover your cursor over the text for a moment and the card expands to reveal the full description (bottom image below). Click the View description toggle again to flip the card to the thumbnail on the card front.
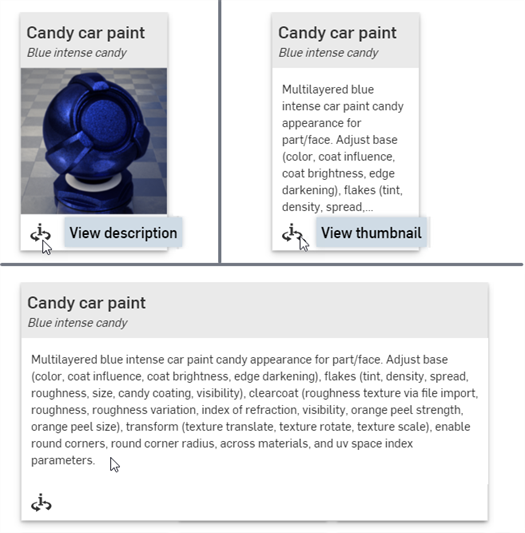
Only one Appearance card can be flipped to the back description at a time. Clicking a second Appearance's View description toggle simultaneously flips the first Appearance's description view to the front (thumbnail) and flips the second Appearance's view to the back (description).
See Render Studio Libraries for a complete list of all appearances and appearance functions.
See Appearance panel for an explanation of the default Appearance parameters.
詳細資訊請參考「Appearances」資源庫。
Located at the bottom of the page, the Environments library contains all the standard environments that are added as the backdrop for the Part Studio, Assembly, and parts in the scene. An environment also provides scene illumination.
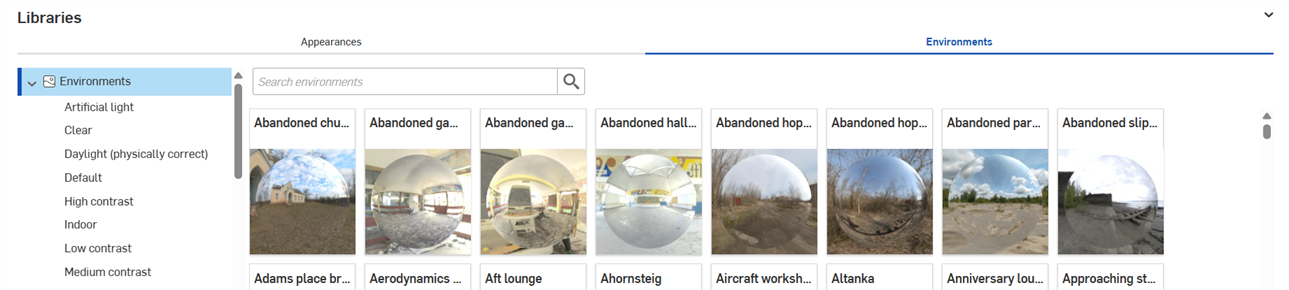
Use the Search environments field to narrow the environment results in the library. Search only locates environments within the selected folder. For example, in the image above, the Artificial light folder is selected. Type a keyword into the Search environments field and press the Enter key. The search is limited to environments inside the Artificial light folder.
Use "and", "+", and "or" operators between words to further refine the search.
Once filtered, results appear as a thumbnail list on the right side of the Environments panel. To clear the search, delete the keyword(s) in the Search environments field and press the Enter key or press the clear field icon (![]() ).
).
To hide/show the Libraries panel, click the expand/collapse toggle (![]() ) at the top right corner of the panel.
) at the top right corner of the panel.
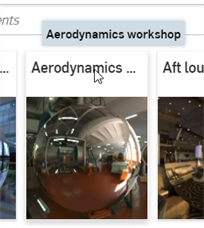
If the entire name of the Environment is not visible, hover over the name and a tooltip reveals the complete name:
See Render Studio Libraries for a complete list of all environments.
詳細資訊請參考「Environments」資源庫。
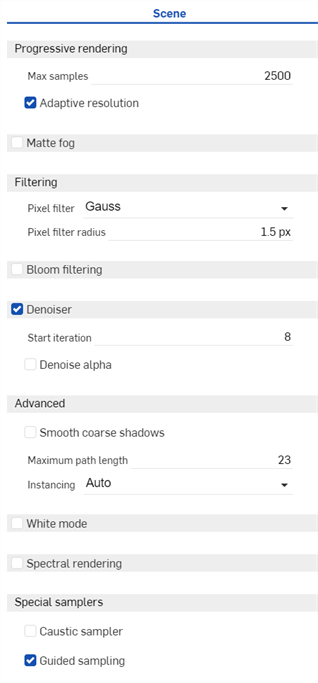
Located at the right of the page, the Scene panel displays an editable list of global parameters for the Scene list. Click the Scene panel icon (![]() ) to open the panel:
) to open the panel:
To adjust the Appearance/Selection panel width, hover the cursor over a panel edge. When the cursor turns into a double-sided arrow, click and drag to resize the panel.
詳細資訊請參考「Scene」面板。
Located at the right of the page, the Appearance panel displays an editable list of parameters for the appearance of the selected object. The Appearance is material-specific (for example, Fabric, Glass, or Masonry), and the available panel parameters change, depending on the selected Appearance.
-
Select an entity (part, face, Part Studio, Assembly, Render Studio, Appearance) in the Scene list or in the graphics area.
-
Click the Appearance panel icon (
 ) to open the panel:
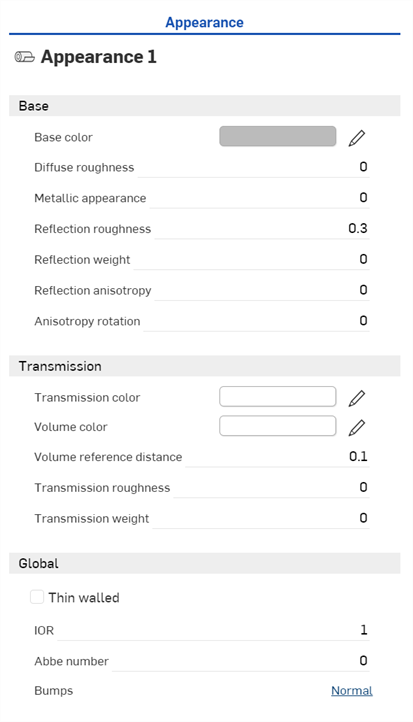
When a Part Studio or Assembly is inserted into a Render Studio, it has a base appearance. The name of the current Appearance is provided at the top of the panel (Appearance 1 in the above example).
詳細資訊請參考「Appearances」面板。
Located at the right of the page, the Environment panel displays an editable list of parameters for the scene environment. The available panel parameters change, depending on the selected Environment.
Click the Environment panel icon (![]() ) to open the panel:
) to open the panel:

詳細資訊請參考「Environments」面板。
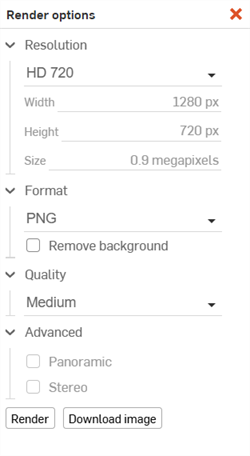
Render options determine how the scene is output to a JPEG or PNG image file. Once scene edits are completed, click the Render scene button (![]() ) on the toolbar to open the Render options dialog:
) on the toolbar to open the Render options dialog:
詳細資訊請參考 Render options。
詳細資訊請參考 Render Studio 範例與資源。