Render Studio Interface - Appearance Panel
![]()
僅為 提供
Located at the right of the page, the Appearance panel displays an editable list of parameters for the appearance of the selected object. The Appearance is material-specific (for example, Fabric, Glass, or Masonry), and the available panel parameters change, depending on the selected Appearance.
-
Select an entity (part, face, Part Studio, Assembly, Render Studio, Appearance) in the Scene list or in the graphics area.
-
Click the Appearance panel icon (
 ) to open the panel:
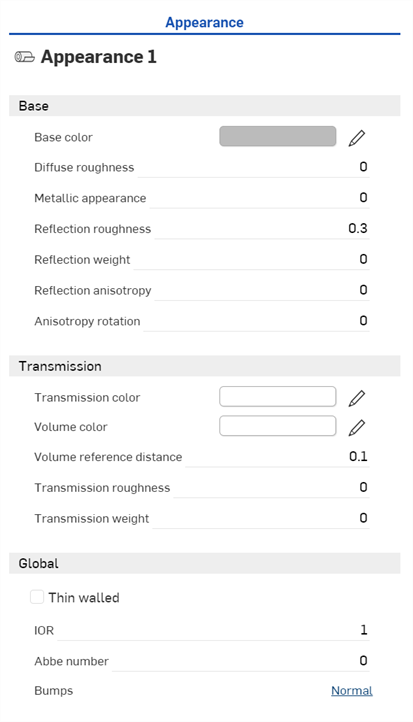
When a Part Studio or Assembly is inserted into a Render Studio, it has a base appearance. The name of the current Appearance is provided at the top of the panel (Appearance 1 in the above example).
預設的外觀參數概述如下:
-
Base
-
Base color - 基本外觀的色彩。
-
Diffuse roughness - 基本外觀粗糙度的值。較高的粗糙度會趨向粉狀的外表。
-
Metallic appearance - 基本外觀的金屬值。1.0 的值會有顏色的反射,並與視圖的方向無關。0.0 的值則會有白色的反射,且是方向相依的。在這個情況中,方向的依存性是基於 IOR (菲涅耳效應)。
-
Reflection roughness - 基本外觀反射粗糙度的值。較高的值會產生比較模糊的反射。
-
Reflection weight - 控制反射的量。
-
Reflection anisotropy - 基本外觀的反射異向性值。較高的值會拉長強光。
-
Anisotropy rotation - 變更異向性的方位。1 的值會 360 度旋轉方位。
-
-
Transmission
-
Transmission color - Color effect for transmission independent of thickness of the entity, similar to stained glass.
-
Volume color - 如果外觀不是「Thin walled」,會在「Volume reference distance」 (m.) 達到「Volume color」。
-
Volume reference distance - If the Appearance is not Thin walled, Volume color is reached a this distance (m.). Enter a typical thickness of entities made of this Appearance here.
-
Transmission roughness - The roughness value of the transmission. Higher values lead to entities seen through the Appearance to appear blurry.
-
Transmission weight - Weighs how much light passes through the entity, compared to its diffuse reflectivity.
-
-
Global
-
Thin walled - Check to enable. Thin walled Appearances do not refract and do not have volume effects. This is good for entities such as soap bubbles or window glass.
-
IOR - 根據體積決定折射。同時會影響非金屬外觀的反射程度。
-
Abbe number - 控制色散。0 的值會關閉色散。色散性的外觀會有介於 25 到 85 之間的阿貝數。
-
Bumps - 透過「外觀」資源庫中的 Bump 函式來將凹凸或法線貼圖附加在外觀上。
-
提示
-
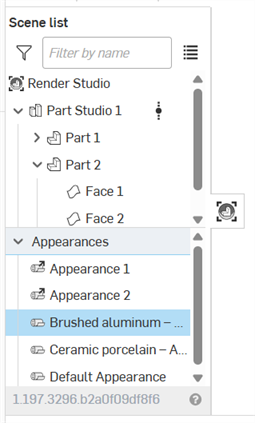
Default Appearance (以及其他用於場景中的外觀) 是位在「場景清單」中「外觀」下拉清單下方:
-
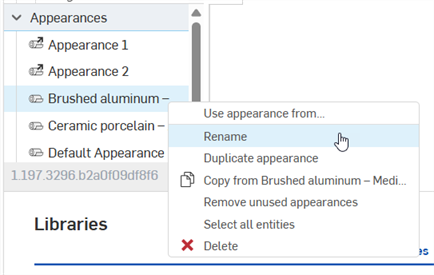
若要重新命名外觀,請在「場景清單」中的外觀上按右鍵,然後選擇 Rename。無法重新命名有連結的外觀。
-
To select all entities that use the current Appearance, right-click on the Appearance in the Scene list and press Select all entities.
-
To assign a Scene list Appearance to a scene list entity, with the Scene list entity selected, right-click on the Appearance in the Scene list and select Assign.
-
若要調整面板的寬度,將游標移動至面板邊緣暫留,當游標變為雙邊箭頭時,按一下並拖曳來重新調整面板的大小。
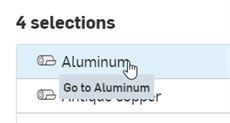
If multiple appearances are selected in the Appearances list (in the Scene list), the Appearance panel lists all Appearances:
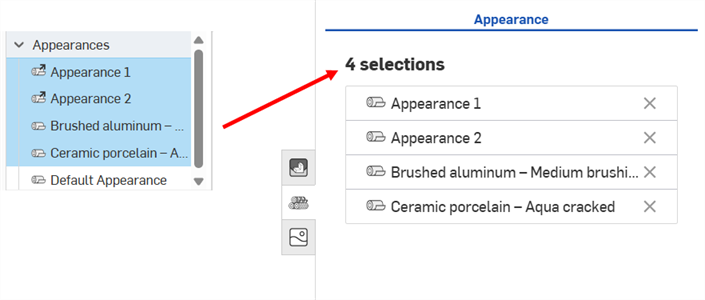
Clicking an Appearance row (shown in the first image below) opens the Appearance in the panel where its parameters can be edited.
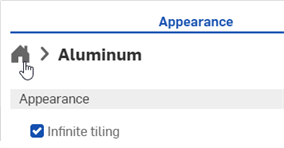
To go back to the selected Appearance list in the Appearance panel click the Home icon (![]() ) shown in the second image below:
) shown in the second image below:
Clicking X to the right of the Appearance name Removes it from the Appearance panel and deselects it in the Appearances list in the Scene list.
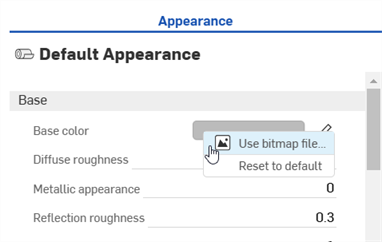
Apply a texture to a parameter in the Appearance panel via the Use bitmap file context menu option.
A texture can only be assigned to appearance parameters that accept them. This context menu is not accessible from all parameters.
-
Right-click on the parameter where the texture should be applied.
-
Select Use bitmap file:
-
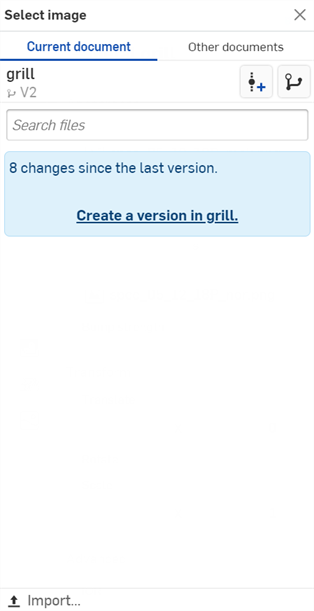
The Select image dialog opens, where you can access the image from a current or other document, or Import an image. In this case, click Import, and select the texture image from your computer:
-
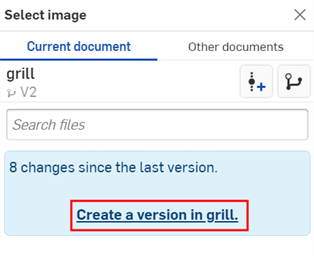
當通知顯示上傳完成時,您還不會在「選擇影像」對話方塊中看到影像。這是因為 Render Studio 場景是匯入時零件、Part Studio 或組合件的快照,而這個影像是匯入之後才帶入至 Onshape 文件中的,因此現在需要一個新的版本才能更新場景。在「選擇影像」對話方塊中按一下在 [Document name] 中建立一個版本的連結:
-
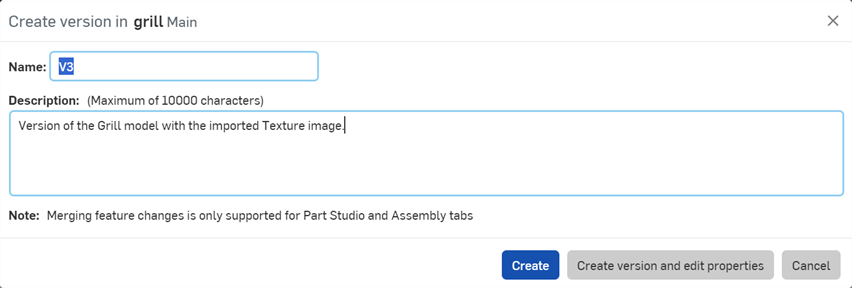
「在 [Document] 中建立一個版本」的對話方塊開啟。輸入版本資訊然後按一下 建立 按鈕:
-
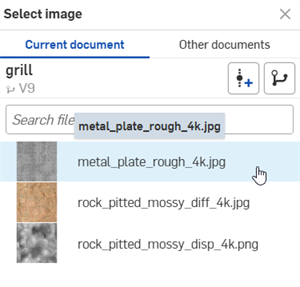
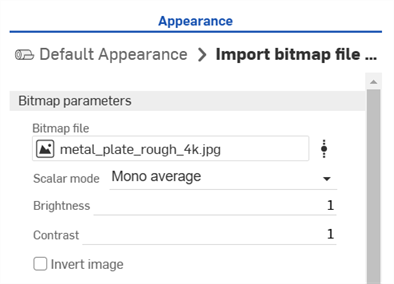
The texture image is now located in the Select image dialog. Click it to apply it to the appearance parameter (first image below). The image is now used for the appearance parameter (second image below):
-
Adjust the Bitmap file's parameters as required (Scalar mode, Brightness, Contrast, Invert image).
如果您在「選擇影像」對話方塊中沒有看到建立版本的連結,請按一下文件面板中的「建立版本」按鈕 (![]() ) 來開啟建立版本對話方塊。請建立新版本,然後關閉並重新開啟「選擇影像」對話方塊。現在即可使用匯入的影像。
) 來開啟建立版本對話方塊。請建立新版本,然後關閉並重新開啟「選擇影像」對話方塊。現在即可使用匯入的影像。
關於上傳檔案的詳細資訊,請參考匯入檔案。
Resetting the parameter to default
To reset the parameter to a default state:
-
Right-click on the Bitmap file and select Reset to default.
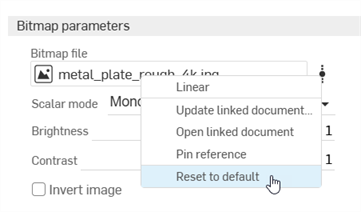
-
The Bitmap file is reset to the default black.png file.
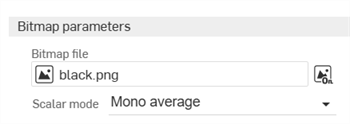
如果使用標準的 Onshape 材料資源庫來將一個材料指定給 Part Studio 中的零件,則在將零件帶入至新場景中時,系統會將材料與 Render Studio 的外觀對應。對應會提供一個初步的 Render Studio 外觀,然後可以在場景中進一步編輯。某些 Render Studio 外觀也會使用零件外觀的色彩 (同時在指定給 Part Studio 中的零件),某些則不會。例如,ABS 材料會根據其外觀色彩為零件著色,Gold (黃金) 材料則會忽略觀的色彩。
如果將玻璃套用至零件上,則除了零件的外觀色彩外,也會匯入零件的透明度。
提示
-
當更新或重新儲存場景時,在 Onshape 1.158 發行版本之前儲存的場景不會以來自 Part Studio 的材料更新其中的零件。
-
如果已在 Part Studio 中更新零件的材料,則在 Render Studio 中更新場景時會使用該材料,條件是之前並未在 Render Studio 中編輯零件的外觀。如果是在 Render Studio 中編輯零件的外觀,則來自 Part Studio 的材料與外觀對應會斷開。
-
當在 Render Studio 場景中開啟零件時,「面外觀」會繼承零件的材料。
-
如果 Part Studio 中的 2 個零件有相同的外觀但有不同的材料,則在 Render Studio 場景中開啟這 2 個零件時,會建立 2 個外觀。
- 如果自訂資源庫中的材料有與 Onshape 材料資源庫中的材料有完全相同的名稱,則也會將其對應至各自的 Render Studio 外觀。
- Unassign a part's appearance or re-link its original Part Studio appearance using the Scene list context menu.
您可以在「場景清單」中檢視所有的場景外觀 (在「外觀」下方)。請參考場景清單組成項目。
若要查看所有的對應,請參考 Part Studio 材料與 Render Studio 外觀對應表格。
詳細資訊請參考 Render Studio 範例與資源。