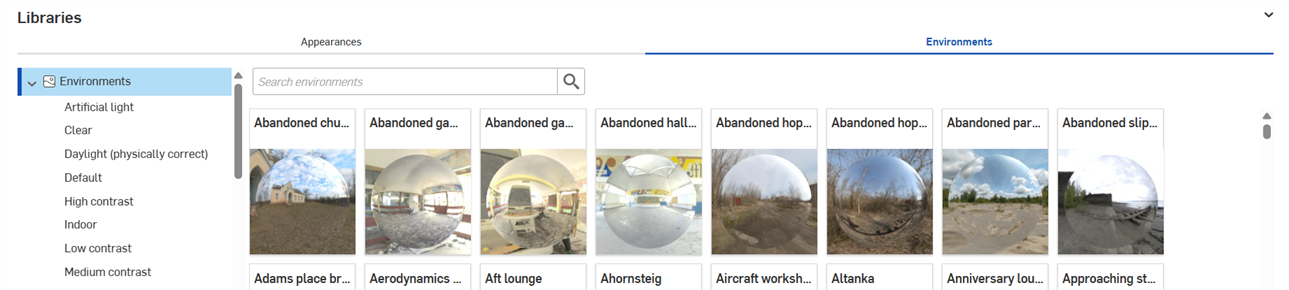
Render Studio 介面 -「Environments」資源庫
![]()
僅為 提供
位在頁面底部的「Environments」資源庫包含各種標準的環境,可加入至 Part Studio,、組合件與零件的場景中做為背景。環境同時提供場景中的照明。
Search
使用「Search environments」欄位來縮小在資源庫中的環境搜尋結果。搜尋會僅找出在所選資料夾內的環境。例如,在上方圖片中選取了「Artificial light」這個資料夾。在「Search environments」欄位中輸入關鍵字,然後按下 Enter 鍵。搜尋會僅限於在「Artificial light」資料夾中的環境。
在字詞之間使用 "and"、"+"、與 "or" 運算子來進一步縮小搜尋範圍。
在篩選之後,結果會以縮圖清單顯示在「Environments」面板的右側。若要清除搜尋,刪除在「Search environments」欄位中的關鍵字,然後按下 Enter 鍵或按下清除欄位圖示 (![]() )。
)。
在水平與垂直資源庫檢視中切換
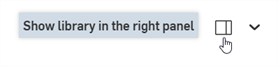
按一下面板右上角的 Show library in the right panel 圖示來在右側面板中顯示資源庫:
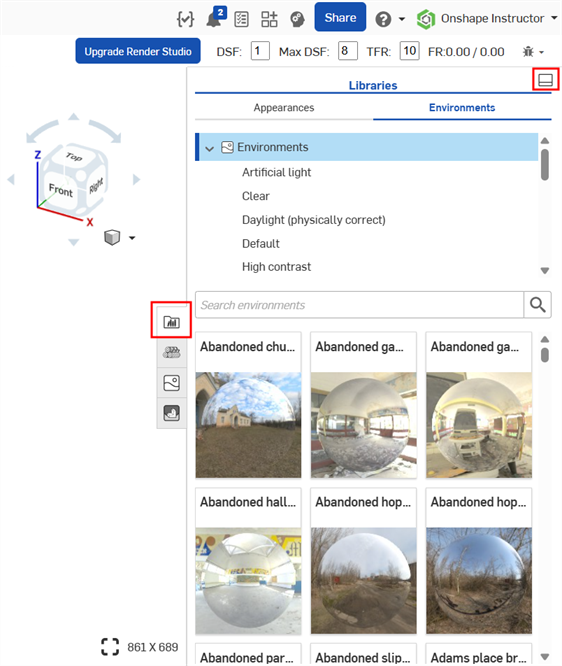
按一下資源庫面板圖示 (![]() ) 來關閉面板。再次點按即可開啟。
) 來關閉面板。再次點按即可開啟。
若要將資源庫放回到其預設的水平位置,按一下面板右上角的 Show library in the bottom panel 按鈕 (上圖中以紅色強調顯示i)。
隱藏/顯示資源庫
若要隱藏/顯示資源庫面板,請按一下面板右上角的展開/摺疊切換 (![]() )。
)。
檢視環境名稱
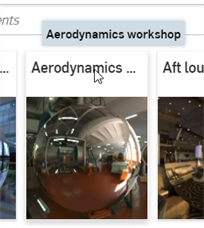
如果沒有顯示環境的整個名稱,請移動游標至名稱上暫留,工具提示會顯示完整的名稱:
關於所有環境的完整清單,請參考 Render Studio 資源庫。
提示
-
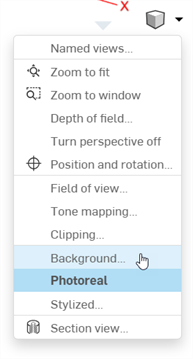
如果看不到環境,請嘗試移除背景。按一下圖形區域中的
 檢視工具圖示,選擇 [背景],然後取消核取「Enable background」。點按右上角的 x 來關閉對話方塊。
 -
若要在場景中隱藏環境,請至檢視工具 > 背景,然後核取「Enable background」。您也可以選擇替代的純色或影像來用為背景。
-
如果在場景中沒有任何光源,和/或場景是全黑的,請將「Environment」面板中的「Lighting intensity」屬性設定為較高的。取決於環境建立者所採用的設定,這個值會有所不同。在大部分的情況中可嘗試 50,000 到 100,000 之間的值。
-
「Environment」面板中的每個環境參數都會有一個相關的工具提示說明。將滑鼠移動至任何參數上暫留一秒即可查看工具提示。
-
若要調整「Appearances/Environments」資源庫面板的高度,請將游標移動至面板邊緣暫留,當游標變為雙邊箭頭時,按一下並拖曳來重新調整面板的大小。
-
設定一個環境背景來取代圖形區域的深色模式主題設定。
-
當加入自訂環境時,請使用 HDRI 圖片以獲得最佳的品質。
加入環境:
-
在「環境」資源庫中選擇要加入至場景中的環境。
-
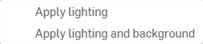
按右鍵並從環境選單中選擇 Apply lighting。這樣僅會將環境光源套用到 Part Studio 或組合件中 (背景仍保留於原處)。或是從環境選單中選擇 Apply lighting and background,這樣會移除背景並將光源及環境套用到場景中:
或者是拖曳環境並將其放置在場景的空白區域上。
提示
-
如果僅套用了的光源,若要在之後移除背景,可在圖形區域中按一下檢視工具圖示 (
),然後選擇 [背景],接著取消核取「Enable background」。按一下對話方塊右上角的 x 來關閉對話方塊。如果場景變為全黑,請回到「Environment」面板中,然後將「Lighting intensity」的值增加到 15,000-20,000 之間或更高 (取決於所使用的環境影像)。 -
如果套用了光源與背景,下次當使用環境選單套用新環境時,則無法使用「Apply lighting」的選項。只有在先使用檢視工具 (
) >「背景」功能表來將背景色彩套用至場景中時才可使用該選項。
當建立場景時會使用預設的環境 (Standard) 與背景 (白色)。如果已加入不同的環境,可執行下列的操作來回到這個預設:
-
選擇「Environments」資源庫,並確定您是在最上方的「Environments」資料夾上。
-
在「Search environments」欄位中輸入 Standard,然後按下 Enter。
-
在「Standard」縮圖上按右鍵,然後選擇 Apply lighting and background (或將環境拖放至場景的背景幕上,而不是在像是零件等的場景圖元上):

系統會使用來自環境的背景色彩。若要選擇性地還原回原始的白色背景:
-
按一下檢視工具功能表 (
),然後按一下背景。 -
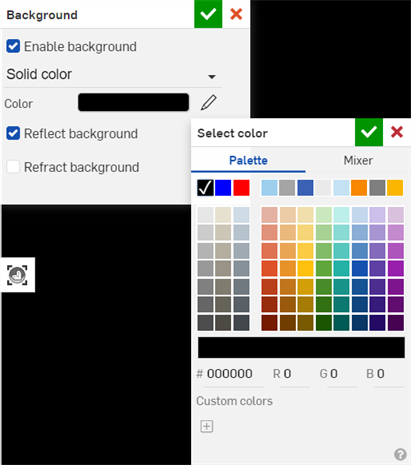
選擇「Enable background」。根據預設,色樣會是白色的 (下方中第一個圖片所示)。如果是不同的顏色,按一下「編輯色彩」圖示 (
 ) 來開啟調色盤 (下方中第二個圖片所示)。輸入白色的 #FFFFFF 十六進位值 (或選擇您要的顏色):
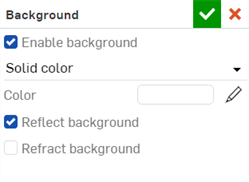
-
按一下對話方塊右上角核取記號圖示 (
 ) 來接受變更並結束對話方塊。
加入自訂的環境到場景中:
-
若要將自訂影像的光源與背景同時套用到您的場景中,按一下圖形區域中的檢視工具圖示 (
),選擇背景,然後取消核取 Enable background。按一下核取記號圖示 () 來接受並關閉對話方塊。接下來跟著下方的其餘步驟操作。如果沒有先執行這個步驟,則僅會將自訂環境影像中的光源套用至場景中。 -
開啟「Environment」面板 (
 )。
)。 -
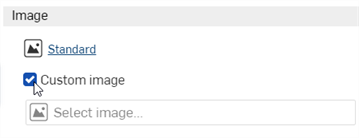
在對話方塊中核取「 Custom image」:
-
「選擇影像」對話方塊開啟,您可於其中選擇一個影像檔案 (.hdr 或 .exr)。執行下列操作之一:
-
從「目前文件」中選擇一個影像
-
按一下其他文件來找出在另一個 Onshape 文件中影像
-
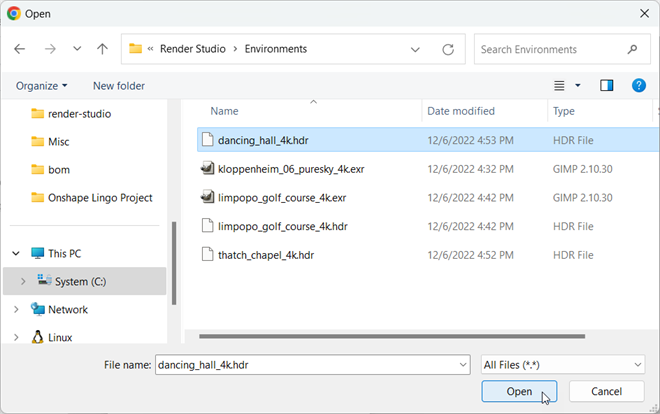
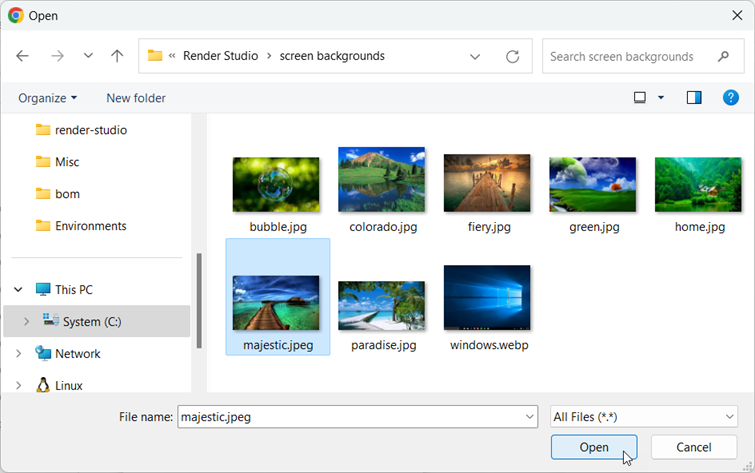
按一下對話方塊底部的匯入連結來從您電腦中找出一個影像。選擇之後按一下開啟按鈕:
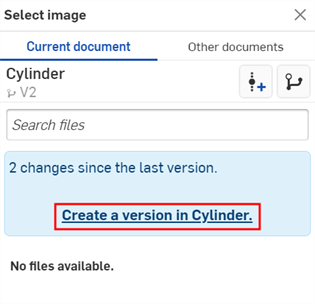
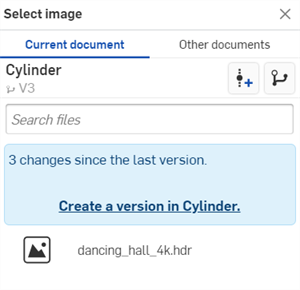
當通知顯示上傳完成時,您還不會在「選擇影像」對話方塊中看到影像。這是因為 Render Studio 場景是匯入時零件、Part Studio 或組合件的快照,而這個影像是匯入之後才帶入至 Onshape 文件中的,因此現在需要一個新的版本才能更新場景。在「選擇影像」對話方塊中按一下在 [Document name] 中建立一個版本的連結:
-
-
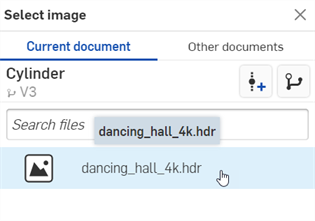
在「選擇影像」對話方塊中,點按影像以選取並將其載入至場景中:
-
如果場景太暗或太黑,請將「Environment」面板中的「Lighting intensity」值增加到 15,000-20,000 之間或更高。這主要是取決於所用的影像而定。

如果您在「選擇影像」對話方塊中沒有看到建立版本的連結,請按一下文件面板中的「建立版本」按鈕 (![]() ) 來開啟建立版本對話方塊。請建立新版本,然後關閉並重新開啟「選擇影像」對話方塊。現在即可使用匯入的影像。
) 來開啟建立版本對話方塊。請建立新版本,然後關閉並重新開啟「選擇影像」對話方塊。現在即可使用匯入的影像。
關於上傳檔案的詳細資訊,請參考匯入檔案。
提示:
-
儘管可以使用 .jpg 或 .png 檔案,但為獲得最佳效果,請使用 HDRI 影像 (.hdr 或 .exr)。
-
關於免費環境的集錦,請造訪 https://polyhaven.com/hdris。
加入自訂的背景到場景中:
-
從檢視工具下拉功能表中選擇背景:
-
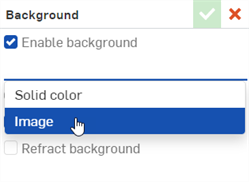
在「背景」對話方塊中,從「Solid color」切換為「Image」:
-
「選擇影像」對話方塊開啟,您可於其中選擇一個影像檔案 (.jpg 或 .png)。執行下列操作之一:
-
從「目前文件」中選擇一個影像
-
按一下其他文件來找出在另一個 Onshape 文件中影像
-
按一下對話方塊底部的匯入連結來從您電腦中找出一個影像。選擇之後按一下開啟按鈕:
當通知顯示上傳完成時,您還不會在「選擇影像」對話方塊中看到影像。這是因為 Render Studio 場景是匯入時零件、Part Studio 或組合件的快照,而這個影像是匯入之後才帶入至 Onshape 文件中的,因此現在需要一個新的版本才能更新場景。在「選擇影像」對話方塊中按一下在 [Document name] 中建立一個版本的連結:
-
- 在「選擇影像」對話方塊中,點按影像以選取並將其載入至場景中:
-
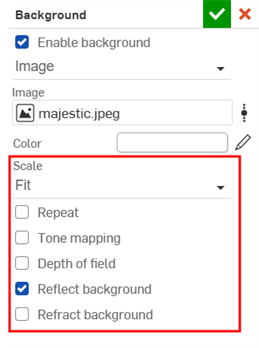
選擇任何其他的選項,像是影像的「Scale」(「Fill」、「Fit」或「Stretch」)、「Tone mapping」、「Depth of field」、「Reflect background」或「Refract background」:
如果您在「選擇影像」對話方塊中沒有看到建立版本的連結,請按一下文件面板中的「建立版本」按鈕 (![]() ) 來開啟建立版本對話方塊。請建立新版本,然後關閉並重新開啟「選擇影像」對話方塊。現在即可使用匯入的影像。
) 來開啟建立版本對話方塊。請建立新版本,然後關閉並重新開啟「選擇影像」對話方塊。現在即可使用匯入的影像。
關於上傳檔案的詳細資訊,請參考匯入檔案。
提示:
-
儘管可以使用 .hdr 或 .exr 檔案,但為獲得最佳效果,請使用 .jpg 或 .png 圖片。
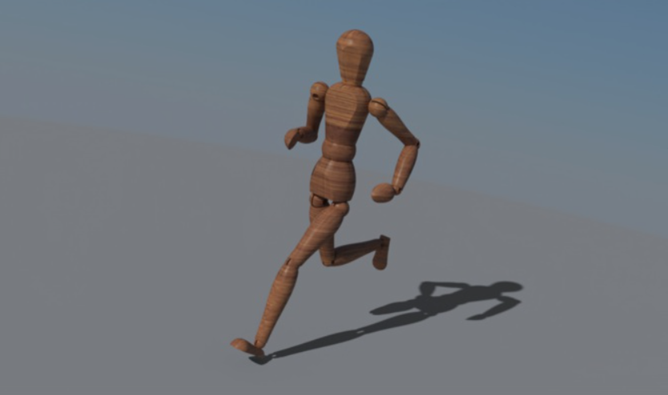
某些環境使用地點和時間來設定太陽的位置以做為光源,這樣會影響場景的光源以及背景。例如:
-
選擇「Environments」資源庫,並確定您是在最上方的「Environments」資料夾上。
-
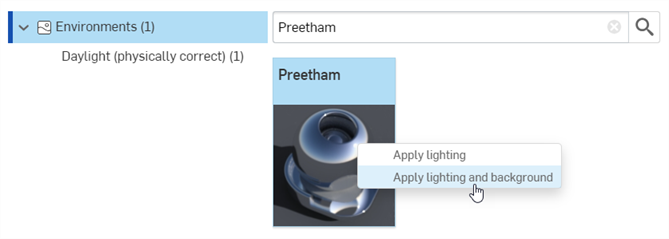
在「Search environments」欄位中輸入 Preetham,然後按下 Enter。
-
在「Preetham」縮圖上按右鍵,然後選擇 Apply lighting and background (或將環境拖放至場景的背景幕上,而不是在像是零件等的場景圖元上):
-
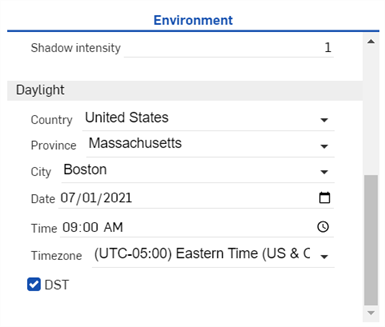
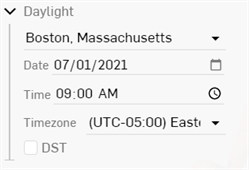
在「Environment」面板中,場景的位置和時間設定是位在底部「Daylight」部分的下方:
-
選擇「City」:New York,「Date」:07/01/2021,「Time」:9:00 AM 與「Timezone」:UTC-05:00。會對應所選地點與時間來呈現的太陽與陰影:
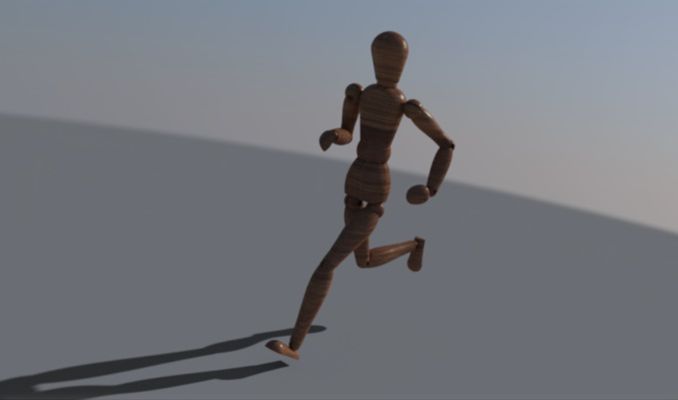
-
改換到同一天的不同時間,例如 4:30 PM,即會顯示日落的景色,光源與陰影也會對應調整:
詳細資訊請參考 Render Studio 範例與資源。