我的帳戶 - 喜好設定
![]()
![]()
![]()
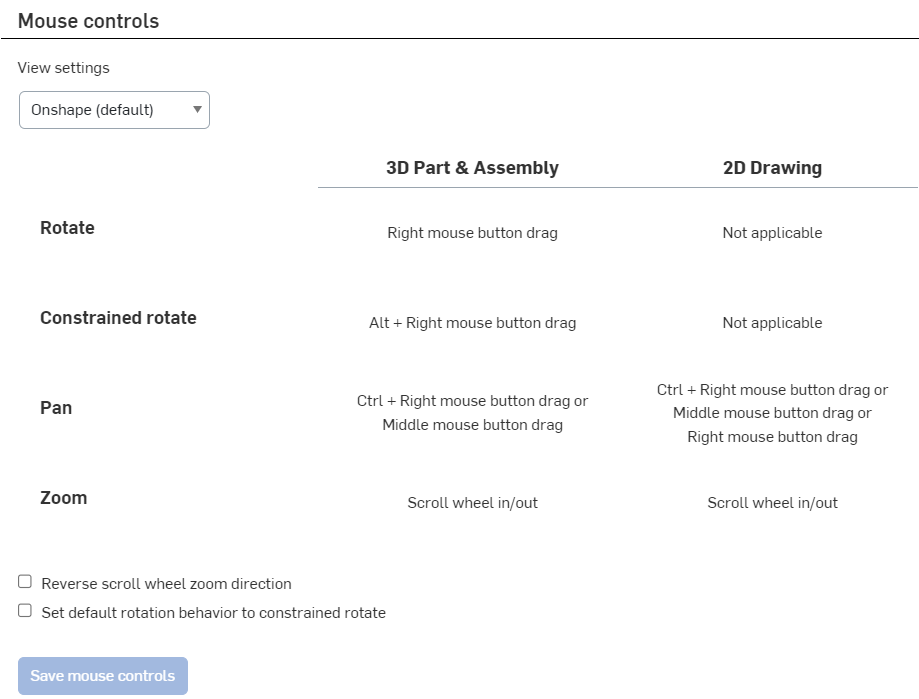
顯示您帳戶的喜好設定,像是語言、啟動頁面、單位、滑鼠控制、工具列、鍵盤快速鍵等設定。
您可以在這個頁面中設定您使用者帳戶的「喜好設定」。關於設定您整個 Company/Enterprise 的喜好設定,請參考Company/Enterprise 設定 - 喜好設定。
若要巡覽您 Onshape 中的「喜好設定」,請按一下 Onshape 視窗右上角的帳戶使用者圖示 (![]() )。這樣會開啟一個下拉功能表,然後按一下 [我的帳戶]。
)。這樣會開啟一個下拉功能表,然後按一下 [我的帳戶]。
按一下頁面左側清單中的 [喜好設定]:
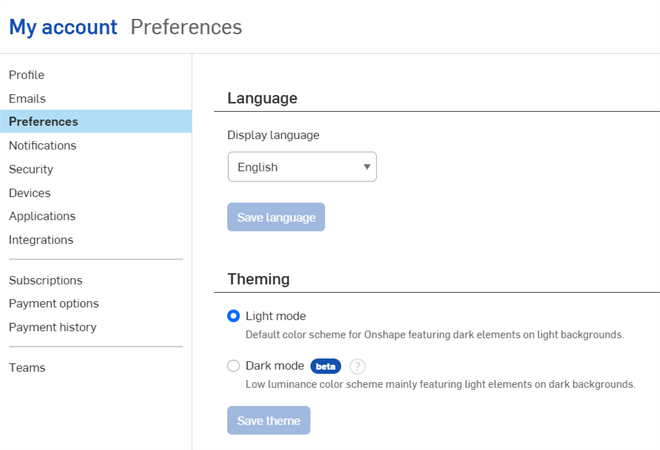
指定下列 Onshape 設定的喜好設定:
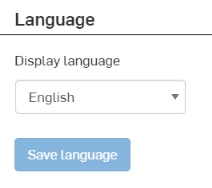
從下拉清單中選擇您偏好的語言。當您按下 [儲存語言] 時,Onshape 會自動將您登出,您必須再次登入才能看到語言的變更。
此功能持續進行改善之中,您可能仍會看到未翻譯的文字。
預設的日期類型屬性格式是取決於您所選的語言:
| 語言 | 預設日期類型屬性格式 |
| 英文 | MM/DD/YYYY |
| 法文、德文、義大利文、西班牙文 | DD/MM/YYYY |
| 中文 (簡體)、中文 (繁體)、日文、韓文 | YYYY/MM/DD |
Company/Educator/Enterprise 計畫的管理員可以變更這個日期類型格式。詳細資訊請參考屬性設定。
-
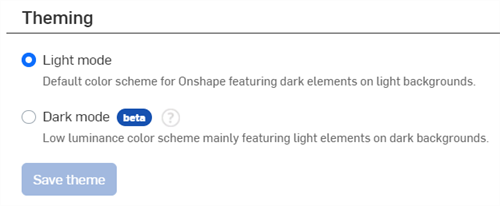
淺色模式 - Onshape 預設的色彩配置會在淡色背景中強調深色的元素。
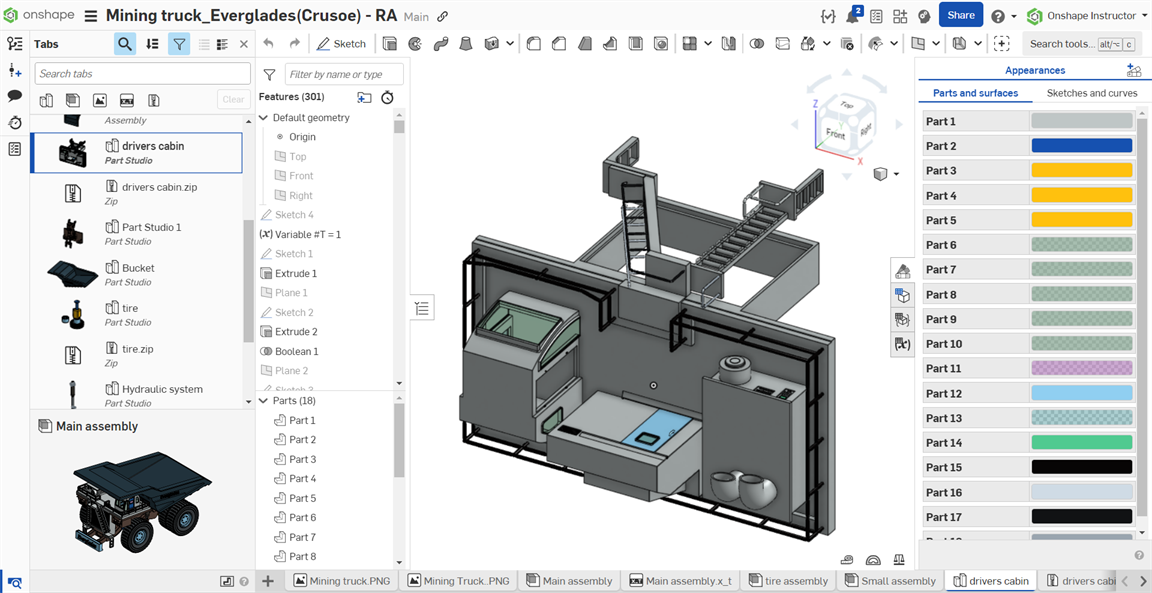
-
深色模式
 - 低亮度的色彩配置主要會在深色背景中強調淡色的元素。深色模式是受限的功能,會在 Part Studios、Render Studios、組合件、與 App Store 中提供。目前無法在工程圖、PCB Studio 與 Enterprise 分析中使用,不過工具列與主圖形區域周圍的工具列會以深色模式顯示。
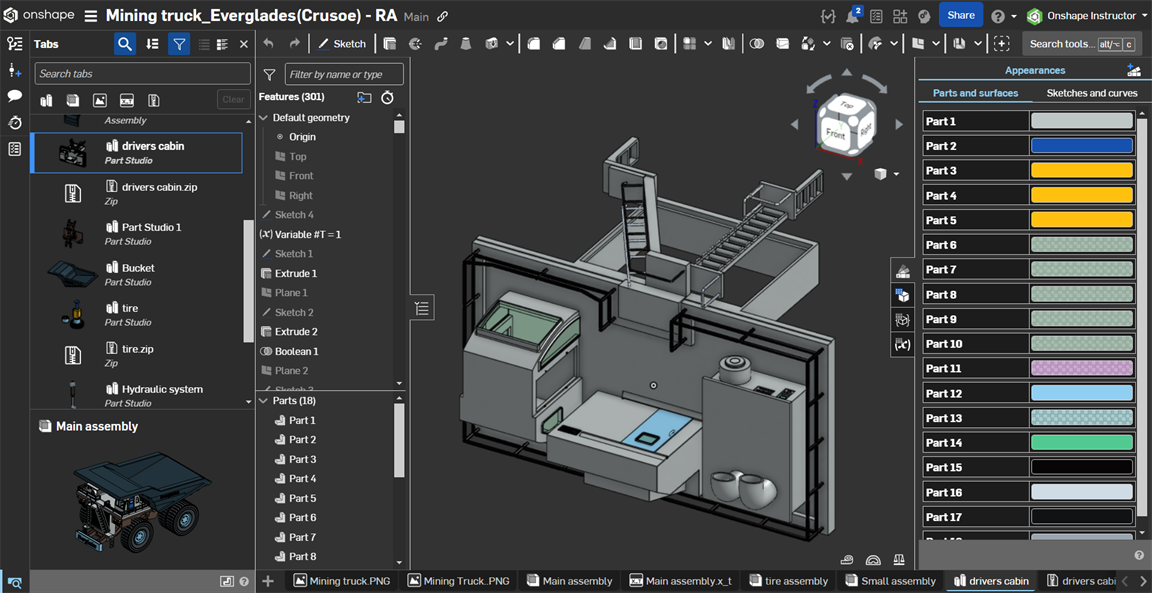
根據預設,系統會在數值欄位中使用英文句號來做為小數分隔符號。可選擇性地核取「使用英文逗號為小數分隔符號」來使用逗號做為分隔符號,然後按一下 [儲存小數點格式] 按鈕。
當核取了這個選項,且將英文逗號使用為小數分隔符號時,必須在表達式的陣列值中加入一個空格 (例如:[1, 4, 9, 16][#i],而不是 [1,4,9,16][#i])。
從下拉清單中選擇您喜好的到達網頁。當您點按 [儲存啟動頁面] 時,如果公司或企業管理員已為 Company/Enterprise 帳戶設定了不同的啟動頁面,則這個設定會有優先權。

此處設定的測量與精度單位用於您所有的 Onshape 文件,除非在對話方塊中有指定要覆寫 (藉由輸入所選的單位來執行),或是經由在工作區文件功能表 > 工作區單位中為每個工作區設定預設單位。您也可以於此處選擇 12 小時或 24 小時的時間格式。
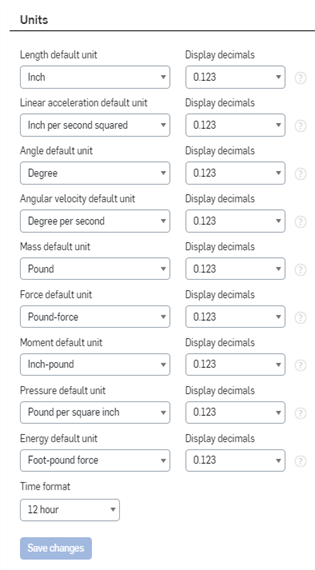
Onshape 對所有文件的預設測量單位是英吋、度、英磅以及三位的小數位數;這包含所有在 Part Studios、組合件與工程圖中的測量;所有顯示在草圖尺寸中的值,以及所有特徵的預設輸入單位。
對單位喜好設定的變更僅適用於新文件,現有的文件仍會維持相同的設定。
小數位數設定:
- 目前僅在瀏覽器中提供
- 目前僅適用於特徵對話方塊、草圖尺寸與操控器對話方塊
- 測量工具與質量屬性工具的操作
- 當顯示精度不足時,測量工具會以科學記號來顯示值。
- 「質量屬性」工具會顯示測量中的錯誤,詳細資訊請參考質量屬性工具。
- 僅影響顯示的狀態;值會於內部被四捨五入
- 不會用於計算中
- 不論所輸入的位數為何,僅於內部使用來決定要顯示的小數位數。如果輸入多於指定的位數,會在選擇欄位來編輯時顯示。
- 不會影響任何匯入的外部檔案。
覆寫預設設定
除了為所有您建立的文件設定預設單位之外 (藉由「喜好設定」分頁),您也可以使用文件功能表來變更與指定文件中某一特定工作區的預設單位。
儘管有預設的設定,Onshape 仍可讓您在任何數值欄位中指定不同的測量單位;系統會自動將值轉換為預設的單位。例如,如果預設的單位是英吋,您仍可以在數值欄位中指定一個不同的單位類型 (例如 10mm) 。
於此處建立裝置的偏好設定,包括:以高解析像素密度渲染。這個設定檔可用於任何裝置上。
在此介面中於一個特定機器或瀏覽器上選擇特定的設定檔來建立設定檔與瀏覽器/裝置之間的關聯。請爲每個機器與用在同一機器上的各個瀏覽器選擇一個設定檔。
-
調整像素密度:
-
自動 (預設) - Onshape 會決定渲染所需的解析度。
-
開啟 - 用顯示的解析度渲染。
-
關閉 - 不要以顯示的解析度渲染。會以較低的解析度渲染圖形。
-
建立設定檔:
- 按一下 建立設定檔。
- 輸入設定檔名稱然後按一下 建立。
- 為調整像素密度選擇偏好的設定。
- 按一下 儲存設定檔設定。
刪除設定檔:
- 從下拉清單中選擇設定檔。
- 按一下 刪除設定檔。
請注意,這個動作無法復原。
- 按一下 確定 來確認刪除,或是按一下 取消。
顯示實例清單屬性 - 核取時,實例的零件編號、修訂版與狀態屬性會出現在組合件右側的「實例」清單中:
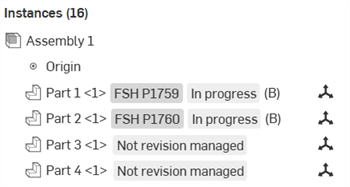
組合件「實例」清單中顯示清單屬性 (「進行中」與「非修訂版管理的」)
按一下 重設為預設 來將任何自訂的 (草圖、Part Studio 特徵與組合件) 工具列恢復為預設的設定。捷徑列並不會重設。
設定所匯入 DWG 與 DXF 檔案模型空間的背景色彩。

根據物件類型、類別與檔案格式來新增自訂的匯出規則,以在匯出物件時自動產生中繼資料驅動的檔案名稱。
-
按一下 [新增匯出規則]。
-
選擇一個「範圍」,也就是這個匯出規則將套用的物件類型:零件、組合件、工程圖、Part Studio、或檔案。
-
選擇性地選取先前定義的「類別」。如果選取類別,則匯出規則會套用至該類別中所有適用的物件上。如果沒有選取類別,則匯出規則會套用至所有類別中。可用的類別是相對應於所選的範圍。
每個類別只能建立一個規則。
-
選擇一個檔案格式 (或所有檔案格式)。
-
指定檔案名稱的慣例。系統會將這個慣例用於適用物件與指定檔案格式的所有檔案名稱上。
某些預設的 Onshape 屬性以及所有的自訂屬性可用做為匯出規則的慣例。部分清單請參考匯出規則慣例。
同時可以將規則套用至零件面 (當匯出為 DXF 與 DWG 時)、鈑金展開圖樣上,且可以包括工程圖中零件的圖頁參考 (當屬性是在主圖頁上與工程圖相關聯的零件屬性時) (使用 ${reference.<property>})。
Standard 計畫的年度使用者因無法建立新的自訂屬性,所以不能夠運用使用者所建立自訂屬性來建立規則。只有與 Company 或 Enterprise 帳戶相關聯的使用者可以建立新的自訂屬性。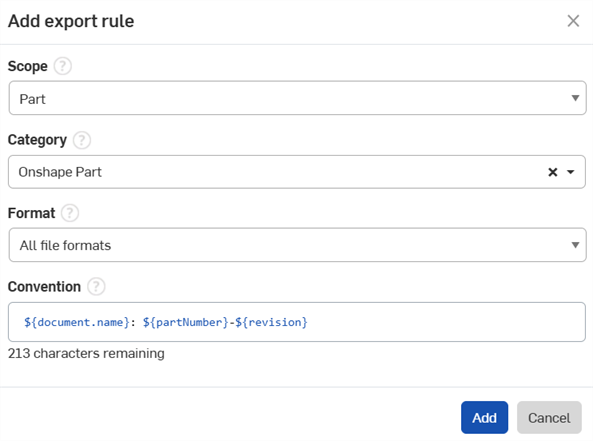
在匯出規則中使用自訂屬性:
-
導覽至您的使用者功能表 > 公司/企業設定。
-
按一下自訂屬性。
-
按一下建立自訂屬性:
-
指定屬性的名稱。此名稱在 Onshape 屬性與自訂屬性之間應是獨一無二的。當測試名稱的獨特性時,Onshape 會使用公司名稱與屬性的名稱。
-
選擇性地設定一個「顯示名稱」。如果有設定「顯示名稱」,則在建立規則時會參考名稱,如果沒有設定「顯示名稱」,則會使用「名稱」。
-
選擇一個屬性類型:「文字」、「布林」、「整數」、「雙重」、「日期」、「清單」、「使用者」或「有單位的值」。
在定義清單與值時,您可以複製/貼上值,或分別輸入值。您也可以指定顯示名稱 (不過可能無法使用重複的值)。您可以使用拖曳/置放來調整值的順序,並隨時選擇每個值是啟用/非啟用的。
-
一開始的發佈狀態是待決中 (尚無法供使用者使用)。發佈狀態必須是啟用的才能在匯出規則中使用自訂屬性。
-
在「類別」部分下方如果已有要加入屬性的現存類別,請於此處加入,否則請繼續下一個步驟。
-
-
在「公司/企業」設定中時按一下類別。
-
按一下建立類別:
-
選擇一個範圍 (零件、組合件、工程圖、Part Studio、或檔案)。
-
填寫必填的欄位。
-
發佈狀態必須是啟用的,「類別」對匯出規則才會是可用的。
-
在「父類別」之下,可選擇性地加入一個類別來做為父類別 (可讓子項目繼承屬性)。
-
在「屬性」之下加入所需的自訂屬性,可以是現存/預設的屬性,或是來自先前步驟所建立的新屬性。
有效的屬性包括:
-
文件名稱屬性
-
匯出格式屬性
-
解析度屬性
-
單位屬性
-
STL 格式屬性
-
匯出時間戳記屬性
-
要匯出項目的屬性 (取決於項目的類別)
-
匯出來源工作區/版本的屬性
-
工程圖中零件/組合件所參考的屬性
-
-
-
在建立之後請根據基本工作流程來操作,然後選擇相對應的「範圍」、「類別」與「格式」,接著在「慣例」之下加入剛建立的自訂屬性規則。
提供使用者下列的許可權限:

-
非幾何項目編寫 - 在此處加入使用者已允許其編輯非幾何項目的屬性。按一下 儲存 來使得變更生效。
-
標準內容編寫 - 在此處加入使用者已允許其編輯標準內容的屬性。按一下 儲存 來使得變更生效。
當企業使用 Onshape 的發行管理工具時,被要求核准發行的個人使用者可以 委派該核准權限。當任何使用者計劃性的缺席時,可方便地指定另一使用者,以讓系統通知該使用者有待決的發行候選請求核准,並給予對要求做出決定的權限。在指定委派時。被指派為代理人的使用者或團隊成員會收到關於此任務的通知。委派核准責任的使用者在每次登入或重新整理 Onshape 工作階段時會看到訊息:

無法將委派核准權限的要求委派給另一個使用者。例如,如果使用者 A 將核准權限委派給使用者 B,使用者 B 將核准權限委派給使用者 C,則使用者 C 將會收到來自使用者 B 指定的核准委派要求,而不是來自使用者 A 的指派。
指定做為您代理人的使用者:
- 開啟視窗的右上角的使用者功能表。
- 選擇 [我的帳戶]。
- 在「我的帳戶」頁面中選擇 [喜好設定]。
- 向下捲動至發行管理
- 核取「委派核准權限給另一個使用者或團隊」旁的方塊。
- 提供團隊名稱或使用者的電子郵件 (或在方塊中點按來從已知的團隊/使用者清單中選擇)。

當發行某個項目時,委派的使用者與被委派的團隊/使用者都會收到通知。
存取您可以為所有使用者變更帳戶喜好設定的部分:
- 輕觸螢幕左上角的
 漢堡式選單,然後輕觸 [我的帳戶]。這樣會將您帶至帳戶設定的頁面:
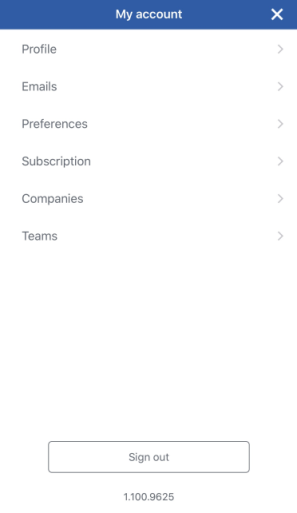
在 iOS 裝置上顯示的「我的帳戶」設定頁面。
- 從該處輕觸 [喜好設定] 來開啟帳戶的「喜好設定」頁面。
您可以代表 Enterprise 帳戶選擇幾個喜好設定:
- 要求使用者採用您於 Onshape 中載入/建立的特定經核可工程圖範本。
- 啟用 Enterprise 帳戶所擁有的共用材料資源庫供 Enterprise 帳戶的所有使用者存取。
關於建立您自己工程圖範本與提供給其他使用者使用的資訊與說明,請參考學習中心 Technical Brief 的 Best Practices for Creating Native Onshape Drawing Templates 主題。
關於新增自訂材料資源庫的詳細資訊,請參考自訂零件:材料。
