Manage Your Onshape Professional Subscription
This functionality is available on Onshape's browser, iOS, and Android platforms.
The Onshape Professional subscription enables you to consolidate billing for multiple users, thereby creating a Company within Onshape: a named, user-visible Onshape entity with consolidated billing, ownership and sharing for a set of Professional subscription users. All company-owned documents are automatically shared with all company members.
The Professional company account also includes access to release management functionality, as well as the ability to create and use custom meta data.
If an existing Free user is listed as belonging to a Professional subscription, that user's plan is automatically upgraded to Professional and included in the company subscription billing. Any Onshape user may be paid for and included in a Professional subscription, and even multiple Professional subscriptions.
All users in a company have view access to the company settings. The owner has the ability to make changes to the company subscription (and app subscriptions) and admins of the company may edit some company settings.
For pricing information, see https://www.onshape.com/en/pricing.
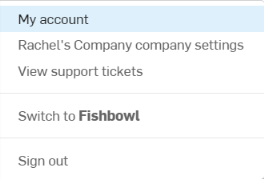
The Account menu, located under your name in the upper-right corner of the interface, allows you to access:
- My account - Where you can manage and maintain your Onshape account, set preferences, notifications settings, security and more, as explained below.
- Action items - View any tasks that have been assigned to you through the Comments dialog. More on tasks, below.
- Company settings - View the account setting for your company
- View support tickets - View any support tickets you have submitted. If you would like to submit a support ticket, look in the Help menu (the icon to the right of your name in the upper-right corner of the interface).
- Sign out - Sign out of and close your Onshape session.

When you select Action items from the account menu, you see page with the following filters on the left:
- Type - Filter by Comment or Release by checking a box
- Role - Choose between filtering through releases or tasks assigned to you or created by you by selecting one of the radio buttons to the left of the filter options.
- Status - Choose between filtering through open releases or tasks or closed releases or tasks by selecting one of the radio buttons to the left of the filter options.
- Sort - Sort your filtered results by Oldest releases and/or tasks first or Newest first by clicking the dropdown arrow under Sort and selecting your preference (Onshape defaults to sorting by Oldest first).
As you select different filters, the results for the corresponding selections will appear in the Action Items list located in the center of the page.

Click your name or Account user icon in the upper right corner on your Onshape window, then click My account to access your Onshape account information.
If you navigated to your account with a document open, click the Return to document link in the upper right corner of the page to return to that document at any time.

To navigate to your Onshape profile, click your Account user icon in the top right corner of your Onshape window. This opens a dropdown menu, from there, click My account.
This automatically brings you to your Onshape user profile.
Onshape automatically records the first and last names you specify during sign up; here you may also enter a personal nickname for display in the system (in the upper right-hand corner of the user interface). Upload a photo to be used next to your user name and on comments, in the Share dialog, and generally wherever lists of user information exists.
Username is the name to be used as your Onshape forum name.
Nickname is the name seen by other users when you collaborate and is also displayed in the upper right corner of your Onshape window.
Bio (Optional) is a brief user biography that can be seen by other users.
Documentation Name is the name used to initial Drawings. The name is also used when creating Release candidates (for Enterprise subscriptions).
Administrators can override a user's Documentation name. See Adding and Administering Users for more information.
Click the Update profile button at the bottom of the page to save your changes.

To navigate to your Emails settings in Onshape, click on your Account user icon in the top right corner of your Onshape window. This opens a dropdown menu, from there, click My account.
This brings you to your profile. From there, click Emails in the list on the left side of the page.
This brings you to your Emails settings.
Specify up to three email addresses with which to access your Onshape account. One address functions as your primary email, used for all Onshape notifications and communications. Change the primary designation at any time after adding at least one more email address to your account.
All email addresses added to the system must be verified. Check the email address for a verification notice from Onshape.
Any email address associated with an account (even those not designated as primary) may not be used to create another Onshape account.
Remove an email from your account by clicking the small x next to the email listing (shown above).
You may use any of the verified email addresses on your account to request a reset for a forgotten password.

To navigate to your Preferences settings in Onshape, click on your Account user icon in the top right corner of your Onshape window. This opens a drop down menu, from there, click My account.
This brings you to your Onshape profile. From there, click Preferences in the left pane.
You can specify your preference for the following settings in Onshape.

Select your preferred language from the dropdown. When you click Save language, Onshape automatically signs you out and you must sign in again to view the language change.
This is an ongoing effort; you may see terms that are not yet translated.

Select your preferred landing page from the dropdown. When you click Save startup page. If a company or enterprise administrator sets a different Startup page for the company/enterprise account, this setting takes precedence.

The units of measurement and precision set here are used in all your Onshape documents, unless specifically overridden in a dialog (by entering units of choice) or by setting the default units per workspace through the workspace's Document menu > Workspace units. You can also select from a 12 hour or 24 hour time format here.
Onshape defaults to inch, degree, pound, and three decimal places for units of measure for all documents and encompasses all measurements in Part Studios, Assemblies, and Drawings; all values displayed in sketch dimensions as well as the default input units for all features.
The decimal place settings:
- Are currently available on browser only
- Are currently applied to the feature dialogs, sketch dimensions, and manipulator dialogs
- Work with the Measure tool and Mass properties tool
- The Measure tool will display values in scientific notation when the display precision is not sufficient.
- The Mass properties tool will display error in measurement; see Mass Properties Tool for more information.
- Impacts the display only; values are rounded internally
- Are not used for computation
- Are used internally to determine the number of decimal places to display, regardless of how many places are entered; if more than the specified number are entered, they will be visible when the field is selected for edit.
- Do not affect any external files imported
Overriding default settings
In addition to setting default units for all documents you create (through this Preferences tab), you may also change and specify default units for a specific workspace in a document through the Document Toolbar and Document Menu in a document.
Despite default settings, Onshape allows you to specify a different unit of measure in any numeric field; the value is converted to the default unit automatically. For example, if the default unit is inches, you may still specify a different unit type (for example "10mm") in a numeric field.

You have the option to keep the default settings for mouse mappings, or select a familiar traditional CAD system’s default settings. These settings also control mouse mappings for Drawings.
Onshape supports 3Dconnexion devices including the SpaceMouse. See your SpaceMouse instructions for information on how to set up your mouse with Onshape.

Create device profile preferences here, including rendering at high resolution pixel density. This profile may be used on any device.
Associate the profile and the browser/device by selecting a particular profile on a particular machine or browser through this interface. Select a profile for each machine and each browser used on a machine.
-
Match pixel density:
-
Automatic (default) - Onshape determines the resolution needed for rendering.
-
On - Render at the resolution of the display.
-
Off - Do not render at the resolution of the display. Graphics will be rendered at a lower resolution.
-
Creating a profile:
- Click Create profile.
- Enter a name for the profile and click Create.
- Select the preferred setting for matching pixel density.
- Click Save profile settings.
Deleting a profile:
- Select the profile from the dropdown.
- Click Delete profile.
Note that this action may not be undone.
- Click OK to confirm the deletion, or Cancel.

Customize the shortcut toolbars available for Sketch tools, Feature tools, Assembly tools, and Drawing tools. Select the toolbar to customize; check the tools to include and uncheck the tools to exclude from the menu. If you do not customize the toolbar, each time Onshape is updated, the default toolbar may change. Once customized, your customizations take precedence over any defaults.
- There are no limits to the number of tools you are able to include.
- The order of tools in the toolbar is determined by the order in the list (currently).
- Use the S key to invoke the toolbar; use the Esc key to close the toolbar. The toolbar appears near the mouse pointer.
Toolbars
Click Reset to defaults to restore toolbars to the default settings.

Set background color of model space for imported DWG and DXF files.

Create and add custom material libraries, remove unnecessary libraries, and make libraries available to all users within a company. For more detailed information, see Customizing Parts: Materials

Add custom export rules based on object type, category, and file format to automatically generate metadata-driven file names when exporting objects.
-
Click Add export rule.
-
Select a Scope, that is, the type of part for which this export rule will apply: Part, Assembly, Drawing, or Part Studio.
-
Optionally, select a previously-defined Category. If a category is selected, the export rule applies to all applicable objects within that category. If no category is selected, the export rule applies to all objects in all categories. The category available corresponds to the selected scope.
Only one rule may be created per category.
-
Select a file format (or all file formats).
-
Specify a convention for the file name. This convention is used for all file names for the applicable objects and specified file format. Use expressions in the form of ${<property-name>} to include an active metadata property in the naming convention.
Valid properties display in blue, invalid and inactive properties display in red. For example, ${name} uses the part name as the file name. Special characters may be added to the convention, for example, the hyphen and underscore in:
${department} - $document.name} _${partNumber} [${revision}]
Part Studio properties are accessed with the prefix partStudio. For example, to access the Part Studio name, use:
${partStudio.name}
Rules can also be applied to part faces (when being exported to DXF and DWG), sheet metal flat patterns, and can include sheet reference for a part in a drawing when the property is the part property associated with the drawing on the primary sheet (using reference.<property>).
Rules correspond to the name of the custom properties that are associated with the selected Category. The rules follow a camel-casing rule, so if the rule name is Not revision managed, the convention rule is notRevisionManaged.
Standard yearly users cannot create new custom properties and thus cannot create rules that use user-generated custom properties since users can only create new custom properties if they are associated with companies or enterprises.
In order for custom properties to be used, follow this workflow:
-
Navigate your user menu > Company/Enterprise settings.
-
Click Custom Properties.
-
Click Create custom property:
-
Specify a name for the property. The name should be unique among Onshape and custom properties. When testing for uniqueness, Onshape uses the Company name and the name of the property.
-
Optionally, set a Display name. If a Display name is set, the name is referenced when creating the rule. If no Display name is set, the Name is used.
-
Select a property type: Text, Boolean, Integer, Double, Date, List, User, or Value with units.
When defining lists and values, you can copy/paste values or enter them separately. You can also specify display names (they may not duplicate the Value, however). You can reorder the values with drag/drop, and select whether each is active/inactive at any time.
-
The initial Publish state is Pending (not yet available to users). The Publish state must be Active in order for the custom property to be available for export rules.
-
Under the Categories section, if there is an existing Category to add the property to, add that here. Otherwise, proceed to the next step.
-
-
While in the Company/Enterprise settings, click Categories.
-
Click Create category:
-
Select a Scope (Part, Assembly, Drawing, or Part Studio).
-
Fill out the required fields.
-
Publish State must be Active in order for the Category to be available for the export rules.
-
Optionally, under Parent categories, add a category to act as a parent category (for the child to inherit properties from).
-
Under Properties, add the desired custom property. This may be an existing/default property or a newly created property from the previous steps.
Valid properties include:
-
Document name property
-
Export format property
-
Resolution property
-
Units property
-
STL format property
-
Export timestamp property
-
Properties of the item being exported (depending on its category)
-
Properties of the workspace/version it’s being exported from
-
For drawings, properties of the part/assembly it references
-
-
-
Once created, follow the basic workflow, and select the corresponding Scope, Category, Format and under Convention, add the rule of the custom property just created.

To navigate to your Notifications settings in Onshape, click on your Account user icon in the top right corner of your Onshape window. This opens a drop down menu, from there, click My account.
This brings you to your Onshape profile. From there, click Notifications in the list on the left side of the page.
This brings you to your Onshape Notifications settings, where you have the option to edit details such as your first name, last name, username, nickname, and biography.
In your Notifications settings, there are two sections: Email notifications for shares and comments, and Mobile notifications for shares and comments. Both sections have various radio buttons you may or may not select in order to make notification changes, and a Save notifications button to save your changes.
Email notifications for shares and comments
The top section of your Onshape Notifications page is where you make changes to your Email notifications for shares and comments. In this section, you have three options to choose from:
- All new shares and comments -When selected, you will receive email notifications for all new shares, including to your teams or companies, and comments in documents you have access to.
- Direct shares, mentions, and marked documents -When selected, you will receive email notifications for shares directly to you, comments mentioning you, and documents you have specifically marked to receive comment emails.
- Nothing - When selected, you will not receive any email notifications for shares or comments.
Click the radio button to the left of the option in order to select it. Click the Save email notifications button at the bottom of the section, when you have finished editing your Notifications, to save your changes.
Mobile notifications for shares and comments
The bottom section of your Onshape Notifications page is where you make changes for receiving notifications on mobile devices for shares and comments. Similar to the Email notifications for shares and comments section, in this section you have three options to choose from:
- All new shares and comments - When selected, you will receive mobile notifications for all new shares, including to your teams or companies, and comments in documents you have access to.
- Direct shares, mentions, and marked documents -When selected, you will receive mobile notifications for shares directly to you, comments mentioning you and documents you have specifically marked to receive comment emails.
- Nothing - When selected, you will not receive any mobile notifications for shares or comments.
Click the radio button to the left of the option in order to select it. Click the Save mobile notifications button at the bottom of the section when you have finished editing your Notifications to save your changes.

If you have forgotten your password and need it reset, proceed to the Onshape sign in page and click the "Forgot your password?" link to access a page on which you can request a password reset link via email.
To navigate to your Security settings, click on your Account user icon in the top right corner of your Onshape window. This opens a dropdown menu, from there, click My account.
This brings you to your Onshape profile. From there, click Security in the list on the left side of the page.
This brings you to your Onshape Security settings. Change your Onshape system password, and also enable (or disable) two-factor authentication.

- Expand the menu under your user name and select My account:
- Select the Security tab.
- Click Change password and enter the old password, the new password, and re-enter the new password.
The list of guidelines leads you through creating a password. Each requirement is marked when your password fulfills the requirement.
- Click Update password.

Onshape highly recommends taking advantage of our two-factor authentication functionality. Two-factor authentication (2FA) allows you to configure your Onshape account to require more than a single password to sign in. Using one password to sign into a website makes you more susceptible to security threats because one piece of static information may be easy to guess or acquire. With 2FA, a second piece of information is required, and that second piece of information is generated dynamically during the sign in process, and may be different each time you sign in.
We highly recommend you use 2FA for Onshape and for all websites you use that support it.
How it worksCopy link
Download a two-factor authentication app (like Google Authenticator) to your phone and set it up with Onshape through the Onshape user interface. This enables the app to generate a one-time code that Onshape is able to recognize. Once you enable 2FA in Onshape, Onshape will prompt you for the 2FA code after you sign in with your password.
You can allow the 2FA mechanism to remember the devices on which you sign in so that once you use 2FA authentication to sign in to Onshape from a specific device, you won't need a 2FA code to sign in on that device for 30 days.

- Download a two-factor authentication app to your device.
- Sign in to your Onshape account.
- In the menu under your username, select My account.
- In the list on the left side of the page, click Security.
- To the right of Two-factor Authentication, click Enable.
- Click Set up two-factor authentication.
- Confirm password.
- Click OK.
Google Authenticator is one example.

Continuing from the instructions above:
- Use the Authenticator app on your device to scan the QR code presented in the Onshape user interface.
- Enter either the six-digit code that the 2FA app generates or the code supplied by Onshape.
- Click Enable.
- When the recovery codes are displayed, copy them to a safe place; you need access to them in the event you do not have your phone or the authentication app.
- Click OK.
Once registration is complete, the phone app will list a code for each registration you create. It is these codes that you enter into Onshape when presented with the 2FA sign in page.
If you are not able to use the QR code, click the enter this text code link provided in the Onshape interface to obtain a code.
Onshape provides you with 5 active recovery codes at a time. Keep these codes in a place accessible to you separate from your device or the authentication app.
Onshape will not be able to help you should you delete the app or lose your phone.
You can generate these Recovery codes at any time through the Onshape interface, but only the most recently generated series are active at any one time. Once you use a code it is no longer valid. When you generate a new list of codes, all previous codes (used or unused) become invalid.

When two-factor authentication is enabled, Onshape prompts you for a code upon sign in:
- After you enter the password to your Onshape account, you are prompted for the authentication code.
- Open the two-factor authentication app on your device to view the code; enter the code in Onshape.
- Click Verify.
In the event that you don't have access to the app, click the Enter a two-factor recovery code link to enter one of your current recovery codes.

You may disable (and re-enable) two-factor authentication at any time.
- On the Security tab of the User Profile page in Onshape click Manage, and then Disable:
- Confirm password.
- Click OK.

Should you need to replace a device on which you have 2FA enabled for Onshape:
- Before replacing the device, disable 2FA through the Onshape interface.
- Enable 2FA once the new device is online.
Note that Onshape doesn't support the Replace 2FA option.

To navigate to your Devices settings in Onshape, click on your Account user icon in the top right corner of your Onshape window. This opens a dropdown menu, from there, click My account.
This brings you to your Onshape profile. From there, click Devices in the list on the left side of the page.
This brings you to your Onshape Devices settings, a list of all mobile devices associated with and authorized to use this account. Once you access your Onshape account on a mobile device, that mobile device is listed here.
To remove a device from the list, click Forget on the right of the window.

To navigate to your Onshape Applications settings, click your Account user icon in the top right corner of your Onshape window. This opens a dropdown menu, from there click My account.
This brings you to your Onshape profile. From there, click Applications in the list on the left side of the page.
This brings you to your Onshape Applications settings. Onshape offers third-party applications for use with your Onshape account. To access the Onshape App Store, navigate to http://appstore.onshape.com and sign in with your Onshape account credentials.
Here's a list of frequently asked questions (App Store FAQs).
Once signed in to the App store, you can browse the available apps and make purchases. As the owner of a company or enterprise, you may purchase multiple seats for other users in your company or enterprise and assign users to those seats.

Onshape third-party apps are of the following types:
- Integrated Cloud Application - Accessible from within an Onshape document
- Connected Desktop Application - Downloaded from the third-party website and installed on your physical machine
- Connected Cloud Application - Accessible from a cloud-based service
After purchasing an app, you may have to grant it access to your Onshape documents.
- While in a document, click the
and select Add application. (Select the desired application.)
- Review the permissions you are about to authorize, then click Authorize application (or Deny if you no longer wish to use the app).
- To view the permissions an application has on a document, or to give the application access to another document:
- Click Share to open the Share dialog and settings for that document.
- On the Application tab, select the application from the drop down and click Allow.
- To revoke an application's access, click the x next to the application name at the top of the dialog.
Purchased apps that are authorized to access your Onshape data are listed in three places in your Onshape documents:
- Applications tab in the user profile (My account page) - Shows all apps you have authorized to access your Onshape data.
- Subscriptions tab in the user profile - Shows all apps for which you have a subscription.
- On the Add application command from the
menu at the bottom of your Onshape window.

An owner of a company or enterprise may purchase multiple seats for an application, to make available to users of their organization. An owner may add and remove users at any time for any given application.
Adding seats during purchase
To add seats while purchasing an application:
- Click the app button to purchase or subscribe, as you normally would, in the App store.
- On the confirmation page is a field to enter the number of users you are paying for (include yourself, if appropriate).
- Click the purchase button.
- Enter your Onshape password.
- A confirmation dialog appears, providing more information about your purchase.
- Click Close to dismiss the dialog.
Adding seats and managing users after purchase
Once you purchase multiple seats for an app, you can manage the users who are allowed to use that app. You can change users who may use the app and change the number of seats.
- On the Applications tab of the Company settings page, select the app you wish to manage.
- On the page that appears, increase the number of seats you wish to pay for: enter a value in the field and click Update.
A confirmation dialog appears and your changes take effect immediately.
- In the Add users field, enter the email addresses of the users who should have access to the application, and click Add. Note that these users must already be members of the company.
- To remove a user's access to the application, click the X next to their name in the list.

Through the My account area and Applications tab, users are able to take action on the apps used with their Onshape account.
- Revoke - Remove an app's access to Onshape data. This does not remove the app from Onshape. If you use this app again, you will be prompted to allow access to your Onshape data.
- Authorize Application - Authorize the purchased app to access your Onshape data. You see this option in an Onshape document: Click the
icon > Add Application > application-name. A new tab opens and becomes active in your Onshape document. Conversely, you can also grant access directly on the Applications tab of the My account page, by clicking the Grant button.
- Control application access to my documents individually through the Share dialog? - Some applications prompt you to allow the app access to all your Onshape documents. If you would like to have control on a per document basis, turn this option on.
If you have granted access prior to turning this switch on, that access is still granted. If you turn this switch off, all access previously granted is still granted. When this switch is on, you must use the Share dialog to allow a specific application access to a specific document.

To navigate to your Onshape Integrations settings to set up access to your Dropbox, Google Drive, or Microsoft OneDrive account, click your Account user icon in the top right corner of your Onshape window. This opens a dropdown menu, from there, click My account.
This brings you to your Onshape profile. From there, click Integrations in the list on the left side of the page.
This brings you to your Onshape cloud-source settings. You have the ability to grant Onshape access to your Dropbox, Google Drive, or Microsoft OneDrive account (separately), and also remove that access by clicking the red Remove button on the right side of the page.
To grant access for Onshape to import documents from (and export documents to) a Dropbox, Google Drive, or Microsoft OneDrive account, click the appropriate Add button and follow the steps. You'll need the credentials to your account in order to proceed through the wizard. For example:

To navigate to your Onshape Early visibility settings, click your Account user icon in the top right corner of your Onshape window. This opens a dropdown menu, from there, click My account:
This brings you to your Onshape profile. From there, click Early visibility in the list on the left side of the page:
This brings you to your Onshape Early visibility settings. The Onshape Early Visibility program offers you an opportunity to test functionality that is still under development. Due to the nature of features in development, we recommend you create specific documents for use with any Early Visibility feature. (Feel free to copy existing documents for this purpose.)
Please do not use documents you create under the Early Visibility feature for business critical or production use.

Find the Early Visibility program sign up page under My account:
Once in the Account management area, select the Early visibility tab.

- Click Add to the right of the feature of interest (or features; you are able to request access to multiple features).
When you click Request access, you are directed to an End User license agreement page.
- Read the agreement.
- Click Accept if you agree and wish to continue.
Click Cancel if you are no longer interested.
Clicking Accept sends a message to Onshape that you are interested in a particular feature. Your request is reviewed and when approved, you receive an email confirmation.

To navigate to your Onshape Subscriptions settings, click your Account user icon in the top right corner of your Onshape window. This opens a dropdown menu, from there, click My account:
This brings you to your Onshape profile. From there, click Subscriptions in the list on the left side of the page:
This brings you to your Onshape Subscriptions settings. You may belong to one or many Professional subscriptions, per email address. You can have one set of Onshape credentials per email address.
Professional subscriptions are considered company subscriptions but are appropriate for any professional user, within a company or on their own. Professional subscriptions are billed per user (at an annual rate of $2100), and include all features of Onshape including private documents, Release Management, Custom properties, company-wide material libraries, consolidated billing, and company-based sharing.
On the Subscriptions page and you have the ability to:
- View a list of applications you or the company have subscribed to
- Edit the membership of the company (if you are the owner or an admin of the company), including Managing Your Onshape Professional Company Account; there is a subscription cost for each user
- Update your credit card information
- Cancel a subscription that you own; transitioning all users to Free subscriptions immediately (users with other Professional subscriptions are not transitioned to a Free subscription)
- Click View for a printable invoice

Payment OptionsCopy link
To navigate to your Onshape Payment options settings, click your Account user icon in the top right corner of your Onshape window. This opens a dropdown menu, from there, click My account:
This brings you to your Onshape profile. From there, click Payment options in the list on the left side of the page:
This brings you to your Onshape Payment options settings. If you are the owner of the account, you have the ability to change credit card information, or remove a card from the listing. Note that a credit card may be removed from the account only if it is not associated with a subscription:
To change the credit card, click Change and enter the new card information.
Payment HistoryCopy link
This area lists a chronological history of all payments made for the account. Click View to access a print-friendly invoice.
Only Company account Owners and Admins can see this information.

To navigate to your Onshape Teams settings, click your Account user icon in the top right corner of your Onshape window. This opens a dropdown menu, from there, click My account.
This brings you to your Onshape profile. From there, click Teams in the list on the left side of the page.
This brings you to your Onshape Teams settings. You have the ability to create teams in order to group users together for the purpose of making sharing more efficient; once the team is created, you have the option to select the team name instead of entering many users' individual email addresses during a Share operation.
It is not required that the members of a team have anything in common; not even an Onshape subscription.
One user creates a team (thereby becoming the initial admin of the team) and then adds other users to it, assigning either a user role or an admin role to each team member. Members receive notification emails when they are added and removed from a team, and users can belong to more than one team at a time.
Sharing a document with a team does not give any team member additional permissions on the document than the owner/creator of the document allows during the Share operation.
At any point, the admins of a team can remove any member from the team, thereby removing any Share permissions previously made through the team. Any Shares made on an individual basis remain in place, as well as the permission they grant.
Team members can remove themselves from a team, unless they are the last admin member of the team. (A team must have at least one admin.) When a member is removed from a team, any document shared with that user through the team becomes unshared and removed from their Documents list.
A team admin may delete the team at any time. Upon deletion of the team, all documents shared with the team become unshared from the team members and removed from their Documents lists.
As with all sharing operations, the following permissions can be assigned during the Share operation:
- View - Permission to open for read-only access; no editing allowed
- Edit - Permission to open and edit (make changes)
Following are instructions for:
- Creating teams and adding members
- Removing members and admins
- Deleting a team
- Additionally, see information about Sharing and assigning permissions to documents

- Expand the menu under your user name in the top right corner of the page and select My account.
- On the page that appears, select Teams from the left panel and click Create:
- Enter a name for the team, and a description, or statement of purpose:
- Click Create team:
- Add members by entering individual email addresses (or copy/paste a comma-separated list of addresses), select a role (Member or Admin).
- Click Add.
- When finished adding team members and assigning roles, click the arrow to the left of the team name (at the top of the page) to return to the Accounts page.
- You see the new team listed on the Teams page.
Creating a team also adds a filter for that team in each member's Documents filters on their Documents page. These filters list all documents shared with a particular team.
Use the Search bar to search for team members.
You can return to this page and change a team member's role.

Members have the ability to remove themselves from a team, and any member with an Admin role is able to remove users including themselves as long as they are not the only administrative user left. Users removed from a team receive an email notification and are removed from the Share list of any document shared with the team. Those documents are removed from the user's Documents page.
- Expand the menu under your user name in the top right corner of the page and select My account (for Standard and Free subscriptions) or Company settings (for Professional and Enterprise subscriptions).
- Select Teams in the left panel to access the list of teams of which you are a member.
- Select the team in the list from which you wish to remove yourself or another member.
- To remove yourself (as a member): Click the Leave team button.
- To remove yourself (as an admin): Click the X to the left of your name (Note this only works if there is another admin still on the team).
- To remove another user: Click the X to the left of the user name (Note this only works if you are an admin).

Any Admin of the team has the ability to delete the team at any time. This immediately removes the share permissions for all documents shared with the team and removes the documents from each member's Documents list.

A company is created when a user signs up for the Professional subscription (or upgrades to Professional).
The user who signs up and agrees to pay for the subscription becomes the billing Owner of the company and acting Admin. This user adds more users to the company and assigns roles: Member or Admin. Users receive an email notification upon being added to a company.
Only users with the Owner and Admin roles can add and remove users, and reassign roles.

For all company members, all documents created are owned by the company. If you are a member of more than one company, you should select as the owner of the document at creation time, one of the companies of which you are a member.
Only the company owner, users with the Admin role, and the user who created a company-owned document may delete the document. Users with full permissions to the document can see the document in their Trash and may restore the document or empty the Trash.
All users in a company have the ability to share all company-owned documents they have access to.
At any point, the company Owner and Admins may completely remove all document permissions from the user who created the document and reshare the document with them with a new set of permissions. Permissions may be:
- View - Open for read only access; you have the option to add or remove Copy, Link document, Export, and Comment
- Edit - Open and make changes; you have the option to add or remove Copy, Link document, Export, Share, and Comment
Additional permissions may be added or removed, including:
- Copy - Make a copy of the document.
- Link document - Use features that result in the document being referenced from another document.
- Export - Translate and download parts, Part Studios, Drawings, and Assemblies from a document.
- Share - Give another user permission to access the document.
- Comment - Provide a comment on the document in the Comment flyout.
- Delete - Move the document to Trash.

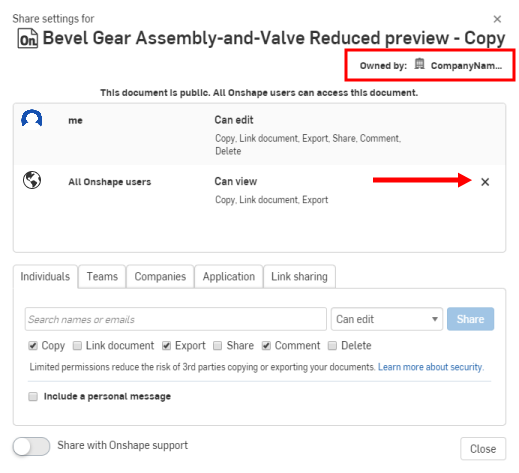
Once your account is upgraded to a professional account, you then have the ability to make all of your previously public documents private by going to the Share settings and clicking the x next to the public entry in the Share dialog (shown below to the right of the blue arrow). These documents are still owned by you after they are made private (company-owned documents are not able to be transferred, documents and folders must be owned by an individual). To use Release management, Custom properties, Items for BOM, and other company-level settings, you must transfer document ownership to the company.
Check the ownership of the document by looking at the top right corner of the Share dialog (shown below outlined in red).
For information on how to transfer ownership, see the Transfer Ownership topic.

To navigate to the company settings, click your Account user icon in the top right corner of your Onshape window. This opens a dropdown menu, from there, select Company settings.
You have the ability to adjust the settings for your company, as described below.

Available to Professional and Enterprise admins only, view and edit user details and roles, add and remove users. Only the company Owner and the Admin have the ability to add users to and remove users from the subscription.
The company owner has the ability to adjust the number of users paid for with the subscription (seats), as well as add and remove users from the subscription.
Adding users takes effect immediately. Removing users removes the users immediately, but billing updates take place on the next renewal cycle.
A company has two types of users:
- Admin
- Member
The company Owner is the initial account used to create the company. This user has full administrative permissions of a company admin, as well as the ability to manage payment information. A company Admin has administrative permissions to manage the company and may access all documents owned by the company and also has the ability to: add, remove, manage users; manage the company details; create and manage properties to be used throughout the company; define company preferences such as custom material libraries; establish the release management workflow. A company Member has an account within the company and all documents created by that user are owned by that company. Company members may access documents shared with the company.
Navigate to Company settings under the User menu, then select Users.

You may add seats to your subscription if you are the owner of the company and your purchase is on a credit card. If you have a purchase order, please contact your Customer Success representative or Onshape Support for assistance.
- Select <your company name> company settings from the User menu:
- Select Users on the left pane:
- Enter the new number of users you are paying for.
- Click Update.
Review and confirm the number of users in the dialog that appears; click OK.
For further assistance on adding users or other purchase-related activities, please contact your Customer Success representative.

To add users to a subscription:
- Under Add users, enter the email address of the user to add and select a role (Member or Admin):
- Click Add.
- Repeat steps 1 and 2 to add additional users.

- Search for the user you wish to remove, if necessary.
- Click the x at the end of the appropriate user row to open the Remove user dialog box:
The options will automatically be selected. Make your preferred changes and click OK to save them and close the dialog box.

- Search for the appropriate user, if necessary.
- Click the current role (in blue, with a dashed underline).
- Use the dropdown to select a new role.
- Click the check to save. (Click the x to cancel.)

You have the ability to create teams in order to group users together for the purpose of increasing the efficiency of sharing; once the team is created, you can select the team name instead of entering many users' individual email addresses during a Share operation.
It is not required that the members of a team have anything in common; not even an Onshape subscription.
One user creates a team (thereby becoming the initial admin of the team) and then adds other users to it, assigning either a user role or an admin role to each team member. Members receive notification emails when they are added and removed from a team, and users may belong to more than one team at a time.
Any user can share a document with a company-owned team, even if they are not a member of the team. However, in order to share a document with a team external to the company or enterprise, the user must be a member of that team.
Sharing a document with a team does not give any team member additional permissions on the document than the owner/creator of the document allows during the Share operation.
At any point, the admins of a team may remove any member from the team, thereby removing any Share permissions previously made through the team. Any Shares made on an individual basis remain in place, as well as the permission they grant.
Team members can remove themselves from a team, unless they are the last admin member of the team. (A team must have at least one admin.) When a member is removed from a team, any document shared with that user through the team becomes unshared and removed from their Documents list.
A team admin may delete the team at any time. Upon deletion of the team, all documents shared with the team become unshared from the team members and removed from their Documents lists.
As with all sharing operations, the following permissions may be assigned during the Share operation:
- Can view - Permission to open for read-only access
- Can edit - Permission to open and edit (make changes)
Following are instructions for:
- Creating teams and adding members
- Removing members and admins
- Deleting a team
- Additionally, see information about Sharing and assigning permissions to documents

- Expand the menu under your user name/Account user icon
in the top right corner of the page and select Company settings:
- On the page that appears, select Teams from the left panel and click Create:
- Enter a name for the team, and a description, or statement of purpose:
- Click Create team:
- Add members by entering individual email addresses (or copy/paste a comma-separated list of addresses), select a role (Member or Admin).
- Click Add.
- When finished adding team members and assigning roles, click the arrow to the left of the team name (at the top of the page) to return to the Accounts page.
- You see the new team listed on the Teams page.
Creating a team also adds a filter for that team in each member's Documents filters on their Documents page. These filters list all documents shared with a particular team.
Use the Search bar to search for team members.
You can return to this page and change a team member's role.

Members may remove themselves from a team, and any member with an Admin role may remove users including themselves as long as they are not the only administrative user left. Users removed from a team receive an email notification and are removed from the Share list of any document shared with the team. Those documents are removed from the user's Documents page.
- Expand the menu under your user name or Account user icon
in the top right corner of the page and select My account (for Standard and Free subscriptions) or Company settings (for Professional and Enterprise subscriptions).
- Select Teams in the left panel to access the list of teams of which you are a member.
- Select the team in the list from which you wish to remove yourself or another member.
- To remove yourself (as a member): Click the Leave team button.
- To remove yourself (as an admin): Click the X to the left of your name (Note this only works if there is another admin still on the team).
- To remove another user: Click the X to the left of the user name (Note this only works if you are an admin).

Any Admin of the team can delete the team at any time. This immediately removes the share permissions for all documents shared with the team and removes the documents from each member's Documents list.

The properties on this page define the metadata available for Onshape entities and apply only to documents that are owned by the company. Company owners and admins can create new properties, activate them for use by users, and also deactivate properties.
To navigate to your Onshape Custom properties settings, click your Account user icon in the top right corner of your Onshape window. This opens a dropdown menu, from there, click Company settings:
This brings you to your Onshape company settings Users page. From there, click Properties in the list on the left side of the page:
This brings you to your Onshape Properties settings. Available for Professional and Enterprise users only, Onshape provides access to the metadata definitions for Onshape objects. These definitions drive the data displayed in the Properties dialogs and bill of materials for Onshape objects. Professional and Enterprise users can view these metadata definitions, and Admins and Owners can create new custom properties for use in company-owned documents, as well as provide Display names for existing Onshape properties.
Owners and users with the Admin role can add, modify and retire custom properties. Onshape metadata definitions may be made Inactive (retired) but may not be edited.
Users with permission to create and edit custom properties see a Create custom property button at the top of this page:
Properties may be associated with these Onshape objects:
- Onshape Part
- Onshape Assembly
- Onshape Drawing
- Onshape Part Studio
- Onshape File
- Onshape Application
- Onshape Item

On the Properties page:
- Click Create custom property.
- Specify a name for the property. The name should be unique among Onshape and custom properties. When testing for uniqueness, Onshape uses the Company name and the name of the property.
- Select a property type:
- Text
- Boolean
- Integer
- Double
- Date
- List
When defining lists and values, you can copy/paste values or enter them separately. You can also specify display names (they may not duplicate the Value, however). You can reorder the values with drag/drop, and select whether each is active/inactive at any time.
- User
- Value with units
- The initial Publish state is Pending (not yet available to users). When you want this property to be available to users, select Active (available to users and values entered are recorded in the database). To retire this property from use, select Inactive. Inactive values are available only through the Onshape API.
- Supply the rest of the property’s attributes, a red asterisk indicates a required field. Depending on the property type you selected above, different attributes may be available.
- Default value - (Available for all types) Enter a default value here, if desired. This value serves as the default if the user doesn’t specify a value.
When entering values for the User property type, it must be a valid Onshape user’s email who already belongs to the company in which the property was created.
- Description - (Available for all types) Enter an optional Description for the property .
- Unit type - Available for Value with units type only. Select from the list of unit types for the custom property, including:
Any Acceleration Angle Angular velocity Area Energy Force Length Mass Moment Pressure Time Volume - Indicate where the property may be edited and whether it is required:
- Required - Indicates that the property value is required.
- Edit value in version - Indicates that this property value may be edited in a document version; allow the user to supply a value for this property in any document version. Also indicate if the value should be edited only through the API and not through the Onshape user interface.
- Edit value in workspace - Indicates that this property may be edited in a workspace; allow a user to supply a value for this property in any document workspace. Also indicate if the value should be edited only through the API and not through the Onshape user interface.
- Default value - (Available for all types) Enter a default value here, if desired. This value serves as the default if the user doesn’t specify a value.
- Enter optional validation criteria for properties, including those that can have a pattern:
- Check Multiline if the value can have multiple lines of text (for example, a Description may require multiple lines of text).
- Enter a minimum length and/or a maximum length, if desired.
- Indicate the pattern in the Pattern field, such as any regular expression including:
- [A-Z]+ which requires 1 or more uppercase alphabetical characters
- [0-9]+ which requires 1 or more numeric characters
- [a-z]+ which requires 1 or more lowercase alphabetical characters
- ONS-[0-9]+ which requires the prefix ‘ONS-’ followed by 1 or more numeric characters. You could put the required prefix in the Default value attribute so it appeared automatically. Users receive an error notification specifying the required pattern if the value is invalid.
- Select a category (or categories) in which the property will be available. The category must already be defined through the Categories tab by an administrator of the company or enterprise. You may select more than one category, and also remove a category by clicking the X to the far right of the category line. For more information on Categories, see below.
- Custom properties assigned to the Part and/or Assembly category can be set to a computed function in order for the property to be a computed property. For more information, see Creating computed properties, below.
- To make the property available to all users in the Company, make sure the Publish state is set to Active.
- Click Create.
- A message appears reminding you that if you make this property active, all users in the company or enterprise will be able to see it. Click Confirm publish to continue to activate the property. You can publish later instead.
Creating computed properties
You can create a custom property that uses FeatureScript to compute a value. Once you have a property like this, you can use it through a custom property in your company/enterprise settings to compute a property. These computed properties can be used with Part categories. Once you have a computed part property defined, you can create another custom property that uses the computed part property to aggregate it for Assemblies and include the information in the Assembly and Drawings bill of materials tables.
The property types that can be aggregated for assemblies are: Boolean, Integer, Double, and Value with units so long as the units are a type other than 'Any.'

-
On the Custom properties page in your Onshape settings (as described above), create the Custom property to use in conjunction with a computed property.
-
In the Categories section of the definition, add a category of Part to indicate to apply the property to Parts, and the Assembly category to apply the property to Assemblies.
-
To create a computed part property, in the Computed part properties section, check the box for Compute part property.
-
Click the Select computed part property function, and then navigate to the document that has the computed property (FeatureScript) you want to use and select it in the dialog.
-
Then select the property from the list displayed.
-
Click Create to create the property (or Cancel to close the page without creating the property). Confirm the Create action when prompted.

Make sure you have the computed Part property defined (as described above) that you want to use to create aggregated data for an Assembly.
-
Add the Assembly category to the computed part property through the Categories field:
-
Notice that a new area appears on the page, at the bottom, called Aggregated assembly properties. (This is available only for types of: Boolean, Integer, Double, and Value with units so long as the units are a type other than 'Any'.)
-
Check the box and the following fields appear with which to define the aggregate data:
-
Define the desired Assembly aggregation method to compute and display:
-
Value with units, Integer, and Double types
-
Sum, Minimum, Maximum, Average, Weighted Sum, or Weighted Average
-
-
Boolean type
-
Any - Return true if at least one item is true
-
All - Return true if all items are true
-
Not any - Return false if at least one item is true
-
Not all - Return false if all items are true
-
-
-
Select the Aggregated property to compute and display:
-
Value with units, Integer, and Double types
-
The same property
-
-
Boolean type
-
The same property (Boolean)
-
Not revision managed
-
Exclude from BOM
-
-
-
In the Missing value handling field, specify how to handle the aggregation when a value is missing:
-
Skip aggregation (ignore and do not aggregate)
- Treat as zero (treat the missing value as a zero)
-
-
In the Error handling field, specify how to handle errors when they occur:
-
Skip aggregation
-
Treat the error as a zero
-
Treat as true/false (for Boolean)
-
Propagate the error into the computation
-
-
Check the Filter aggregation box to filter the aggregation (ignore it using a boolean property as the filter) and then select the method for filtering:
-
Boolean filter property - Select from Not revision managed and Exclude from BOM, or a custom boolean property
-
Filter behavior - Select from Include when true and Exclude when true
-
-
Click Create to create the property (or Cancel to close the page without creating the property).
Example of aggregated assembly property, using Mass
Create the following FeatureScript (or similar), in a Feature Studio named Custom mass:
annotation { "Property Function Name" : "Custom mass"}
export const mass =
defineComputedPartProperty(function(context is Context, part is Query, definition is map) returns ValueWithUnits
{
const volume is ValueWithUnits = evVolume(context, { "entities" : part });
const material is Material = getProperty(context, {
"entity" : part,
"propertyType" : PropertyType.MATERIAL
});
return material.density * volume;
});
Create a custom property in your company settings > Custom properties page, called Custom mass:
Assign the custom property to the Part category and the Assembly category:
Select the FeatureScript under the Compute part property: check the box, click Select computed part property function:
Select the checkbox for Aggregate assembly property, and specify how to include the information in the Bill of materials:
In an assembly, you can add the property to the BOM:
-
Open the BOM.
-
Click Add column and select the custom property you created in the procedure above.
-
The property is added to the BOM:
You can also use FeatureScript to create custom properties. These custom properties are also displayed on the Custom properties page, by name and property ID.

Onshape metadata and custom properties are only able to be edited by Owners and users with the Admin role.
On the Properties page, you have the ability to:
- Search for properties. Use the search box to enter a property name or partial name; check the box to search for inactive properties.
The list presents Onshape metadata properties first, then custom properties in alphabetical order.
- Click a Property name to open it for editing. You may make any changes desired to a property with a Publish state of Pending, including deleting that property. If the property is already set to Active, you can set its state to Inactive and change its display name, but you will not be able to delete the property. Active properties with List type can be reordered and added with additional values/display names. Existing list values can be made inactive and its display names can be edited.
- Inactive properties are not visible in any Properties dialogs, but are still associated with the objects. Any other changes made to an Active property are immediately available and effective upon Save. An Inactive property is able to be made Active again.
See Creating and activating new custom properties for information on modifying fields.

You can access properties and custom properties in different areas in Onshape depending on their attributes.
Right-click on an entity (for example, a Part, Part Studio, Assembly, Drawing, etc.) to access the context menu, then click Properties to open the Properties dialog. If there are custom properties accessible, they will appear listed in the dialog.
You can also access custom properties with the Advanced search feature on the Documents page. Expand the Advanced search dropdown, then expand the Add criteria dropdown:
If there are custom properties accessible, they will appear listed in the dropdown (see Test Property highlighted in the image above).
When using the User custom property type, the current user cannot be searched for. You have to select Current user, located at the top of the list.

When a property becomes obsolete, or an error in the definition is discovered after the property was made Active, you can retire the property. Retiring a property removes it from all Properties dialogs but keeps the property associated with the objects and preserves the data in the database. To retire a property:
On the Properties page:
- Search to locate the property, if necessary.
- Click the property name to open for editing.
- Select the dropdown for Publish state and select Inactive.
- Click Save changes.
Inactive properties may be made Active again.

Creating categories in Onshape provides the ability to extend the properties of the standard Onshape object types in the system to include more targeted and relevant metadata to be applied based on design, engineering, and manufacturing processes.
Before creating categories for the first time, you can prepare by checking your PLM, or other appropriate system, for important metadata you want to be able to represent within Onshape.
Categories work in conjunction with custom properties, to group those custom properties into reasonable and useful information. Once categories are defined, you can see the custom properties within your Properties dialogs for all Onshape objects to which the category is applied.
For an additional Learning center resource, follow the technical briefing article here: Getting Started with Categories (Onshape account required).
An exampleCopy link
A company manufactures a product that is a combination of a part designed and produced in-house and parts ordered from a third party vendor. When working with off-the-shelf parts from a vendor, you may care about only a handful of properties like Vendor name, Vendor part number, and perhaps things like weight and cost.
However, when working with parts manufactured in-house, the list of properties will likely be entirely different. These properties may include information like Start date, Approved date, Manufacturing method, Length, and more.
This is where Onshape categories come into play. With categories, you can assemble the properties you really care about and need, so they are grouped together in all Properties dialogs within Onshape as "newly created category". Once this is selected, the properties within the Category are listed first in the dialog, making them easier to find and fill out.
Creating a categoryCopy link
To create a category:
- Navigate to Company settings.
- Select Categories. Onshape has standard existing categories for Onshape objects, including: Global, Part, Assembly, Drawing, Part Studio, File, Application, Version, Workspace, and Item. The Scope of these (and all) categories are listed in the next column. The Scope refers to the Onshape objects the properties within the categories apply to.
- Click the Create category button at the top of the page.
- Select a Scope, that is, the types of Onshape objects to which this category may be applied. Note that selecting a Scope is not required.
- Assign a Name for the category.
- Select a Publish state: Active = visible by and available to all users; Pending = Saved but unavailable for use; Inactive = No longer available for use. You can mark a category as Pending, then go back later and make it Active.
- Supply a Description of the category, if desired.
- Select any Parent categories, existing categories from which you want this new category to inherit properties. Assigning a parent category to a category carries properties assigned to the parent category over to the category. This is useful when the new category uses all of the properties that are already assigned to the parent category, but requires a few extra properties specific to the new category.
- Select the Properties (custom properties), that you want this category to include. These are the properties that will display whenever Properties of the object are displayed or edited.
- Click Create to create the new category.
The new category is listed on the main Categories page. Categories are also available in the Advanced search dialog, in the Add criteria dropdown.
Sub-categories and inheritanceCopy link
Categories can also inherit from a parent category, if you wish. These nested categories inherit the properties of the parent, and also allow you to add properties that are unique to that sub-category. One example for using inherited properties would be a category for parts that are manufactured in-house. This parent category could have all the common properties across multiple parts like part number, release state, and date approved. You can then create sub-categories under that "in-house" category for each type of part you manufacture, like: sheet metal, injection molded, machined, and welded, and then have those categories contain properties unique to those types of products and their processes.
The only difference when creating a sub-category, is to select a Parent category:
The Parent category of the new category being created, above, is "In-house manufacturing" and its properties are listed as "Inherited properties" under Properties
You would also select specific properties for the sub-category, shown above as Product line and Vendor
Once you click Create, the sub-category is listed on the Categories page. You can view it in the list, just as any other category, and you can also expand the parent category and view it there:
The Welded category shown indented below "In-house manufacturing" is the same category shown last in the list, above
You can select one or the other of the entries for a sub-category and the other entry is also highlighted; this makes subcategories easier to find, as shown below:
To view the list of categories without sub-categories listed, place a check in the Hide sub categories in list checkbox at the top of the interface.

To navigate to your Onshape Company preferences, click your Account user icon in the top right corner of your Onshape window. This opens a dropdown menu, from there, click Company settings.
This brings you to your Onshape company settings Users page. From there, click Preferences in the left pane:
This brings you to your Onshape Preferences settings, where you can supply company-owned material libraries for other users in their own accounts, show a view only toolbar to all users of a document with view only permissions, and set a default BOM template for all Assemblies, and view available BOM templates:
For information on the simplified user interface, see Using the View Only Toolbar.
For more information on custom material libraries, see Customizing Parts: Materials.
For more information on Bill of Materials, see Bill of Materials.
Company-wide export rules
Add custom export rules based on object type, category, and file format to automatically generate metadata-driven file names when exporting objects. To create Company-wide export rules, you must be an administrator.
-
Click Add export rule.
-
Select a Scope, that is, the type of part for which this export rule will apply: Part, Assembly, Drawing, or Part Studio.
-
Optionally, select a previously-defined Category. If a category is selected, the export rule applies to all applicable objects within that category. If no category is selected, the export rule applies to all objects in all categories. The category available corresponds to the selected scope.
-
Select a file format (or all file formats).
-
Specify a convention for the file name. This convention is used for all file names for the applicable objects and specified file format. Use expressions in the form of ${<property-name>} to include an active metadata property in the naming convention.
Valid properties display in blue, invalid and inactive properties display in red. For example, ${name} uses the part name as the file name. Special characters may be added to the convention, for example, the hyphen and underscore in:
${department} - $document.name} _${partNumber} [${revision}]
Part Studio properties are accessed with the prefix partStudio. For example, to access the Part Studio name, use:
${partStudio.name}
Rules can also be applied to part faces (when being exported to DXF and DWG), sheet metal flat patterns, and can include sheet reference for a part in a drawing when the property is the part property associated with the drawing on the primary sheet (using reference.<property>).
Only one rule may be created per category.
Valid properties display in blue, invalid and inactive properties display in red. For example, ${name} uses the part name as the file name. Special characters may be added to the convention, for example, the hyphen and underscore in:
${department} - $document.name} _${partNumber} [${revision}]
Convention rules correspond to the name of the custom properties that are associated with the selected Category. The rules follow a camel-casing rule, so if the rule name is "Not revision managed", the convention rule is "notRevisionManaged".
In order for custom properties to be used, follow this workflow:
-
Navigate your user menu > Company settings.
-
Click Custom Properties.
-
Click Create custom property:
-
Fill out the required fields.
-
Optionally, set a Display name. If a Display name is set, the name is referenced when creating the rule. If no Display name is set, the Name is used.
-
Important: The Publish state must be Active in order for the custom property to be available for export rules.
-
Under the Categories section, if there is an existing Category to add the property to, add that here. Otherwise, proceed to the next step.
-
-
While in the Company/Enterprise settings, click Categories.
-
Click Create category:
-
Select a Scope (Part, Assembly, Drawing, or Part Studio).
-
Fill out the required fields.
-
Publish State must be Active in order for the Category to be available for the export rules.
-
Optionally, under Parent categories, add a category to act as a parent category (for the child to inherit properties from).
-
Under Properties, add the desired custom property. This may be an existing/default property or a newly created property from the previous steps.
-
-
Once created, follow the basic workflow, and select the corresponding Scope, Category, Format, and under Convention, add the rule of the custom property just created.
When multiple rules are set up, the rule with more specificity take precedence. For example, if you have two rules set up: one rule for all categories in the Part scope, and another rule for a specific category in the Part scope, the rule set up for the single category takes precedence. This is valid across all rules set up in the system, whether they are set up by individual users or as company-wide rules.
If a user rule and a company-wide rule are of equal specificity, the user rule will take precedence.
Authoring permissions
Administrators can grant users or teams permission to create, edit, and delete non-geometric items, which are items that can be inserted into the Bill of Materials (BOM). Add users or teams by clicking on the Search field and selecting them from the dropdown list. Administrators can also remove users and teams from the permissions list by clicking the x icon to the right of the user's name.

Here you can add items that you will want to add to your bill of material (see Bill of Materials for information) but that do not require being modeled (non-geometric entities). Adding those items here allows you to make use of them in any company or enterprise-owned documents.
Before creating items for the first time, you can prepare for it by ensuring you have your desired categories of materials or supplies already present in your company settings.
To check your company categories:
- Navigate to Properties under Company settings.
- Find the Classification property, click the name to edit it.
- Under Existing list values you can browse the classifications that have already been added.
- To add new classifications (for example, "Adhesives"), enter the category names in the "Add new list values" text box:
The classification names must be entered one value per line, and each value may contain commas (as seen in the "Existing list values" box, above)
- To save your new Classification values, click Save changes at the bottom of the page.
To create items for company or enterprise-owned documents to make use of:
- Click Create.
- Click Item to create an individual item:
- Enter information for the metadata, such as: Name, Description, Part number, Unit of measure, Category (the Category must have previously been added through the Custom properties for Category; see above).
- Assign a Publish state (Pending= not yet published; no users can access the item, Active = immediately available to users, Inactive = unavailable to users, retired)
- Click Create.
- To import a comma-separated value list (CSV):
- Create the CSV file with column headers to match the fields of the items, pay attention to capitalization (Name, Description, Part number, Unit of measure).
To enter the correct unit of measure, look at the list shown in the dialog above, and enter them as shown.
- Enter a Status. If you leave status out, it defaults to active - if you specify a status of Pending you can check the values once imported into Onshape. Then, when you are satisfied, you can change the status in the CSV and reimport over the old one with a status of Active.
- In Onshape, select Create > Import CSV.
- Select your CSV file and click Open.
- Once imported, the table is displayed in the Onshape interface and color-coded as to whether the fields are valid or invalid (red for invalid, green for valid). Hover over a row for a hint at what could have gone wrong for invalid rows. If the import was successful, the Import button will be active. Click it to finalize the import.
- Create the CSV file with column headers to match the fields of the items, pay attention to capitalization (Name, Description, Part number, Unit of measure).
To export items to an external .csv file:
-
Click the Export button at the top right of the Items list heading:
-
The Items list is exported into a .csv file. Open this file in a spreadsheet program such as Microsoft Excel, with Name, Description, Part number, Unit of measure, and Status columns:

To navigate to your Onshape Applications settings, click your Account user icon in the top right corner of your Onshape window. This opens a dropdown menu, from there, click Company settings.
This brings you to your Company settings page. From there, click Applications in the list on the left side of the page.
This brings you to your Onshape Applications settings. Onshape offers third-party applications for use with your Onshape account. To access the Onshape App Store, navigate to http://appstore.onshape.com and sign in with your Onshape account credentials.
Here's a list of frequently asked questions (App Store FAQs).
Once signed in to the App store, you can browse the available apps and make purchases. As the owner of a company or enterprise, you have the ability to purchase multiple seats for other users in your company or enterprise and assign users to those seats.

Onshape third-party apps are of the following types:
- Integrated Cloud Application - Accessible from within an Onshape document
- Connected Desktop Application - Downloaded from the third-party website and installed on your physical machine
- Connected Cloud Application - Accessible from a cloud-based service
After purchasing an app, you may have to grant it access to your Onshape documents.
- While in a document, click the
and select Add application. (Select the desired application.)
- Review the permissions you are about to authorize, then click Authorize application (or Deny if you no longer wish to use the app).
- To view the permissions an application has on a document, or to give the application access to another document:
- Click Share to open the Share dialog and settings for that document.
- On the Application tab, select the application from the drop down and click Allow.
- To revoke an application's access, click the x next to the application name at the top of the dialog.
Purchased apps that are authorized to access your Onshape data are listed in three places in your Onshape documents:
- Applications tab in the user profile (My account page) - Shows all apps you have authorized to access your Onshape data.
- Subscriptions tab in the user profile - Shows all apps for which you have a subscription.
- On the Add application command from the
menu at the bottom of your Onshape window.

An owner of a company or enterprise is able to purchase multiple seats for an application, to make available to users of their organization. An owner is able to add and remove users at any time for any given application.

To add seats while purchasing an application:
- Click the app button to purchase or subscribe, as you normally would, in the App store.
- On the confirmation page is a field to enter the number of users you are paying for (include yourself, if appropriate).
- Click the purchase button.
- Enter your Onshape password.
- A confirmation dialog appears, providing more information about your purchase.
- Click Close to dismiss the dialog.

Once you purchase multiple seats for an app, you can manage the users who are allowed to use that app. You have the ability to change users who can use the app and change the number of seats.
- On the Applications tab of the Company settings page, select the app you wish to manage.
- On the page that appears, increase the number of seats you wish to pay for: enter a value in the field and click Update.
A confirmation dialog appears and your changes take effect immediately.
- In the Add users field, enter the email addresses of the users who should have access to the application, and click Add. Note that these users must already be members of the company.
- To remove a user's access to the application, click the X next to their name in the list.

Through the My account area and Applications tab, users have the ability to take action on the apps used with their Onshape account.
- Revoke - Remove an app's access to Onshape data. This does not remove the app from Onshape. If you use this app again, you will be prompted to allow access to your Onshape data.
- Authorize Application - Authorize the purchased app to access your Onshape data. You see this option in an Onshape document: Click the
icon > Add Application > application-name. A new tab opens and becomes active in your Onshape document.
- Control application access to my documents individually through the Share dialog? - Some applications prompt you to allow the app access to all your Onshape documents. If you would like to have control on a per document basis, turn this option on.
If you have granted access prior to turning this switch on, that access is still granted. If you turn this switch off, all access previously granted is still granted. When this switch is on, you must use the Share dialog to allow a specific application access to a specific document.

Set up an Onshape release management workflow for your company, including automatic part numbers, if desired. For more information, see Setting Up Release Management.
In this area, you can also use a default revision table template for use with drawings in Onshape. The Revision table template you set up here and designate for use becomes available to all enterprise/company users.
You can edit the Onshape Default revision table, and add/remove columns as well as change the order of columns.

Administrators can use webhooks to check data access integrity, ensuring that a notification was really sent by Onshape, and that it has not been tampered with in transit. Enabling webhook basic authentication populates the Authorization header in all webhook requests. Webhook signatures configures webhooks to use signatures to protect against attacks. Generate primary and secondary keys to rotate keys in your production application. This allows Administrators to deprecate or swap keys without breaking the current connection. If either key matches, it will be accepted as valid by Onshape. Copy to clipboard sends the related key to your clipboard. Reset removes the key from the related field. Once primary keys are generated, click Save changes to accept the entries.
Administrators should ensure that all webhooks are to secured end point locations (https), as this data is not encrypted.
The signature values can be matched by the webhook target using the following structure:
Signature = <Base64<HMAC256-digest<<timestamp header value>.<webhook payload>>>
Onshape webhooks contain the following additional headers:
-
X-onshape-webhook-timestamp - Time stamp signifying when the webhook was sent
-
X-onshape-webhook-signature-primary - Present if the primary signature key is specified in the company settings
-
X-onshape-webhook-signature-secondary - Present if the secondary signature key is specified in the company settings

JAVA
void matchSignatureHeader(String messageBody, String timestamp, String signatureKey, String signature) throws Exception {
String payload = timestamp + "." + messageBody;
String algorithm = "HmacSHA256";
Mac mac = Mac.getInstance(algorithm);
mac.init(new SecretKeySpec(signatureKey.getBytes(), algorithm));
byte[] payloadBytes = mac.doFinal(payload.getBytes());
Assert.assertArrayEquals(payloadBytes, Base64.decodeBase64(signature.getBytes()));
}
NODE.JS
const crypto = require('crypto');
……
var signatureKey; // The primary or secondary key
var message = timestampHeader + "." + rawPayload; // The timestamp header and the webhook payload
var hashValue = crypto.createHmac('SHA256', signatureKey).update(message).digest('base64');
if (hashValue === signatureHeader) { // signatureHeader is the primary or secondary signature header received with the webhook
// Signatures match
}

Available to Professional and Enterprise users only; view and edit a company name, description and address (according to roles). The company Owner and user with the Admin role has the ability to edit these details. Other uses may view only.
StepsCopy link
- Log into your account.
- Click your Account user icon
in the top-right corner.
- Click your company name or Company settings.
- Click Details in the left panel.
- Make desired changes:
- Company name
- Description
- Address
- Click Update.

If you have an existing Onshape account, with existing Onshape documents, you are easily able to upgrade to an Enterprise account. To upgrade your existing account to an Enterprise account, contact us.
Once your account has been upgraded, you receive a Customer Success contact with whom you'll work closely. The following scenarios apply to Professional accounts, specifically with many users, folders, and documents. You may assume the same process with other types of accounts and objects; any differences between account types are noted.
All users are migrated to the new accountCopy link
All existing account users receive an email with the Enterprise URL. When signing in to Onshape using the Enterprise URL, you automatically land in your Enterprise environment. All members are still members and all admins are still admins.
What happensCopy link
All company members, owners, and admins in a Professional plan are moved to the new Enterprise account, and receive assignment of default user permissions. Company owners and admins retain their status in the new Enterprise domain.
Any Free users with whom you have shared documents may be added to the Enterprise as Guest users after the upgrade. These Free users are indicated by an exclamation point beside their names in the Share dialog. Once they are added to the Enterprise, all previous access is reinstated, unless you choose to remove some or all of it. These Share permissions are accessed and modified on a document-basis.
During the upgrade, only documents owned by the company are moved to the Enterprise domain. These documents are now only accessible through the Enterprise domain.
- Any documents owned by individual users (versus owned by the company) must be transferred to company ownership prior to the upgrade in order to be moved to the Enterprise domain.
- Documents not transferred prior to the upgrade will still be accessible via cad.onshape.com and may still be moved to the Enterprise as described in Transfer any non-company owned documents of folders, below.
- Folder structures and sharing permissions are all maintained during the upgrade.
- Folders owned by the company are migrated to the new account.
- Company owned documents are migrated to the new account.

When you sign in from the cad.onshape.com sign in page, however, you are signing in to a personal Professional account; you have access to any privately-owned documents you had previous to upgrading.
To learn how to transfer privately-owned objects to your Enterprise account, see Getting Started as an Enterprise User.
You can switch from the Professional account to the Enterprise account through the User menu > Switch to command.

User account settings remain identical in Enterprise, including emails, preferences, security settings and any custom features added to toolbars. It is the same user account, all the way down to sign in credentials.

All company-owned documents are migrated to the new Enterprise account. The internal shares on those documents remain intact.

If you individually owned any data in your company account, you can transfer that data (documents and folders, for example) to your Enterprise account:
- Navigate to cad.onshape.com.
- Sign in with your Enterprise account information.
- Locate the data you want to transfer.
- If there are multiple documents, place them in a folder.
- Right-click on the document or folder and select “Transfer to <enterprise name>”.
- Return to your Enterprise and move the items to the correct locations.

To cancel the Professional subscription and move to the Free subscription:
- Expand the user menu under your Account user icon
and select My account:
- Select the Subscriptions tab in the list on the left side of the page:
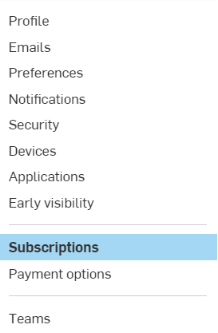
- If you have more than one subscription, click the subscription you want to cancel.
- Follow the instructions for contacting Onshape via email or phone call.
The user can attempt to delete their account. but they must follow up with their administrator to request a downgrade to a Free plan to then delete their account. To initiate this process via the iOS app, navigate to Settings > My account > Delete my account. The user will then be informed to downgrade.
On the date specified that your subscription expires, you are downgraded to the Free subscription and maintain access to your pre-existing data. Your private documents remain private, but you will not be able to edit them. Likewise, any private documents shared with you will be view-only (non-editable). You will still be able to view, export, and download your private documents. You may upgrade to the Professional subscription at any time and once again edit your private Onshape documents.
You may also make your private documents public and have edit access to them again. Right-click on the document on the Documents page and select Make public.
For an additional Learning center resource, follow the technical briefing article here: Company Organization In Onshape (Onshape account required).