Render Studio Interface - Appearance Panel
![]()
Only available for
Located at the right of the page, the Appearance panel displays an editable list of parameters for the appearance of the selected object. The Appearance is material-specific (for example, Fabric, Glass, or Masonry), and the available panel parameters change, depending on the selected Appearance.
-
Select an entity (part, face, Part Studio, Assembly, Render Studio, Appearance) in the Scene list or in the graphics area.
-
Click the Appearance panel icon (
 ) to open the panel:
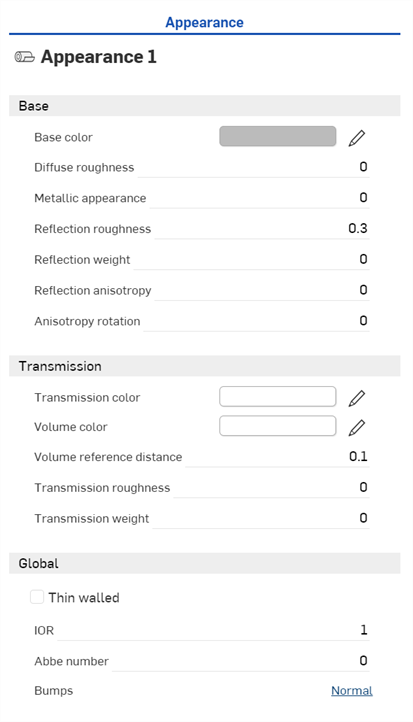
When a Part Studio or Assembly is inserted into a Render Studio, it has a base appearance. The name of the current Appearance is provided at the top of the panel (Appearance 1 in the above example).
The default Appearance parameters are outlined below:
-
Base
-
Base color - The color of the base Appearance.
-
Diffuse roughness - Roughness value of the base Appearance. Higher roughness values lead to a more powdery look.
-
Metallic appearance - The metallic value of the base Appearance. With a value of 1.0, reflection is colored and independent of view direction. With a value of 0.0, reflection is white and direction-dependent. Directional dependence is in this case based on the IOR (Fresnel effect).
-
Reflection roughness - Reflection roughness value of the base Appearance. Higher roughness valued lead to more blurry reflections.
-
Reflection weight - Controls the amount of reflection.
-
Reflection anisotropy - Reflection anisotropy value of the base Appearance. Higher values stretch the highlight.
-
Anisotropy rotation - Changes the orientation of the anisotropy. A value of 1 rotates the orientation 360 degrees.
-
-
Transmission
-
Transmission color - Color effect for transmission independent of thickness of the entity, similar to stained glass.
-
Volume color - If the Appearance is not Thin walled, Volume color is reached at the Volume reference distance (m.).
-
Volume reference distance - If the Appearance is not Thin walled, Volume color is reached a this distance (m.). Enter a typical thickness of entities made of this Appearance here.
-
Transmission roughness - The roughness value of the transmission. Higher values lead to entities seen through the Appearance to appear blurry.
-
Transmission weight - Weighs how much light passes through the entity, compared to its diffuse reflectivity.
-
-
Global
-
Thin walled - Check to enable. Thin walled Appearances do not refract and do not have volume effects. This is good for entities such as soap bubbles or window glass.
-
IOR - Determines refraction in the volume. It also influences the reflectivity for Appearances that are not metallic.
-
Abbe number - Controls dispersion. A value of 0 switches dispersion off. Dispersive Appearances have Abbe numbers between 25 and 85.
-
Bumps - Attach a bump or normal map to the Appearance via one of the Bump functions in the Appearances library.
-
Tips
-
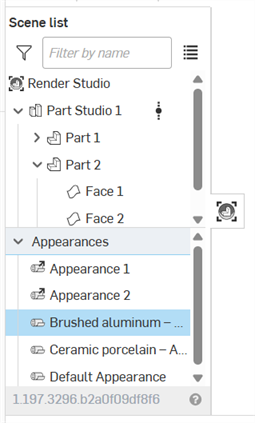
The Default Appearance (and other Appearances used in the scene) is located in the Scene list under the Appearances dropdown:
-
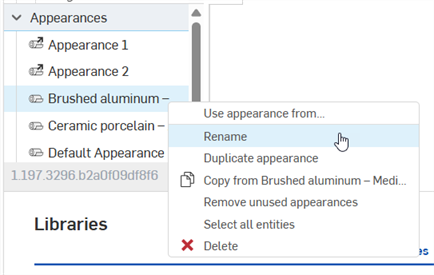
To rename the Appearance, right-click on the Appearance in the Scene list and select Rename. Linked Appearances cannot be renamed.
-
To select all entities that use the current Appearance, right-click on the Appearance in the Scene list and press Select all entities.
-
To assign a Scene list Appearance to a scene list entity, with the Scene list entity selected, right-click on the Appearance in the Scene list and select Assign.
-
To adjust the panel width, hover the cursor over a panel edge. When the cursor turns into a double-sided arrow, click and drag to resize the panel.
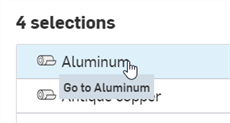
If multiple appearances are selected in the Appearances list (in the Scene list), the Appearance panel lists all Appearances:
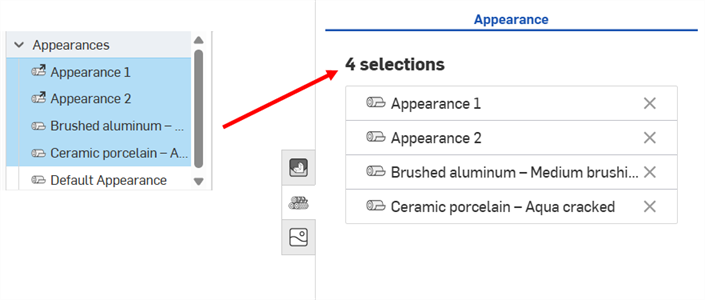
Clicking an Appearance row (shown in the first image below) opens the Appearance in the panel where its parameters can be edited.
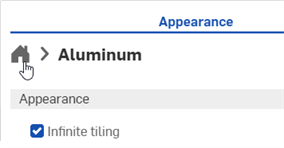
To go back to the selected Appearance list in the Appearance panel click the Home icon (![]() ) shown in the second image below:
) shown in the second image below:
Clicking X to the right of the Appearance name Removes it from the Appearance panel and deselects it in the Appearances list in the Scene list.
Apply a texture to a parameter in the Appearance panel via the Use bitmap file context menu option.
A texture can only be assigned to appearance parameters that accept them. This context menu is not accessible from all parameters.
-
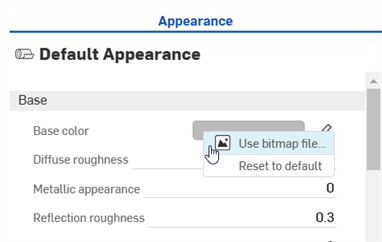
Right-click on the parameter where the texture should be applied.
-
Select Use bitmap file:
-
The Select image dialog opens, where you can access the image from a current or other document, or Import an image. In this case, click Import, and select the texture image from your computer:

-
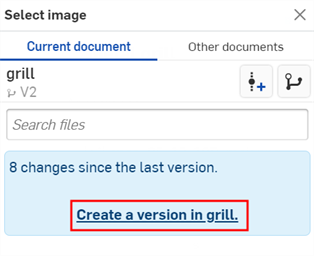
Once the notification indicates the upload is complete, you will not yet see the image in the Select image dialog. This is because the Render Studio scene is a snapshot of the part, Part Studio, or Assembly at the time of import, and this image is brought into the Onshape document post-import. A new version is now required, in order to update the scene. Click the Create a version in [Document name] link in the Select image dialog:
-
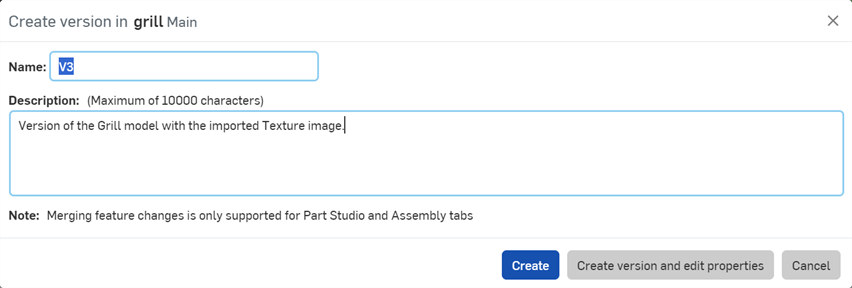
The Create version in [Document] dialog opens. Enter the version information and click the Create button:
-
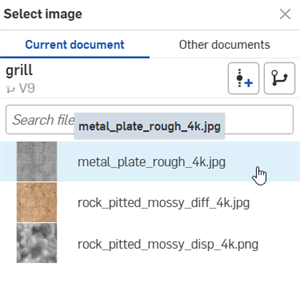
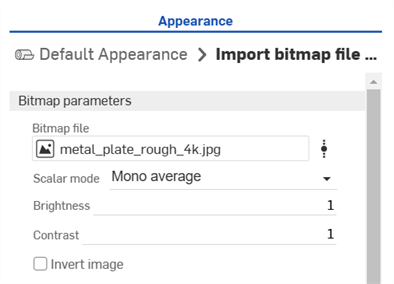
The texture image is now located in the Select image dialog. Click it to apply it to the appearance parameter (first image below). The image is now used for the appearance parameter (second image below):
-
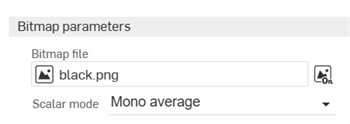
Adjust the Bitmap file's parameters as required (Scalar mode, Brightness, Contrast, Invert image).
If you don't see the Create version link in the Select image dialog, click the Create version button (![]() ) on the Document panel to open the Create version dialog. Create the new version. Close and reopen the Select image dialog. The imported image should now be available.
) on the Document panel to open the Create version dialog. Create the new version. Close and reopen the Select image dialog. The imported image should now be available.
See Importing files for more information about uploading files.
Resetting the parameter to default
To reset the parameter to a default state:
-
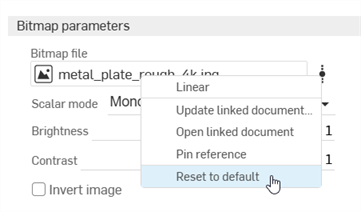
Right-click on the Bitmap file and select Reset to default.
-
The Bitmap file is reset to the default black.png file.
If a Material is assigned to a part in a Part Studio using the standard Onshape Material Library, that material is mapped to a Render Studio Appearance when the part is brought into a new scene. The mapping provides an initial Render Studio Appearance that can be further edited in the scene. Some Render Studio Appearances also use the part's Appearance color (also assigned to a part in the Part Studio), while some do not. For example, ABS material tints the part based on its Appearance color, while Gold material ignores the Appearance color.
If Glass material is applied to the part, the part's transparency is also imported, in addition to its Appearance color.
Tips
-
Scenes saved prior to the Onshape 1.158 release do not have their parts updated with the Material from the Part Studio when the scene is updated or re-saved.
-
If a part's Material is updated in the Part Studio, it is used when the scene is updated in Render Studio, provided the part's Appearance was not previously edited in Render Studio. If the Appearance for the part is edited in Render Studio, the material and appearance mapping connection from the Part Studio is broken.
-
Face Appearances inherit the Material of their part when opened in a Render Studio scene.
-
If 2 parts in a Part Studio have the same Appearance but different Materials, 2 Appearances are created when they are opened in a Render Studio scene.
- If a Material from a Custom library has the exact same name as one from the Onshape Material Library, it is also mapped to its respective Render Studio Appearance.
- Unassign a part's appearance or re-link its original Part Studio appearance using the Scene list context menu.
You can view all scene appearances in the Scene list (under Appearances). See Scene list components.
To view all mappings, see the Part Studio Material to Render Studio Appearance mapping table.
See Render Studio Examples and Resources for more information.