Company/Classroom/Enterprise Settings - Teams
![]()
Only available for
Create teams of users to group users together for the purpose of making sharing more efficient; once the team is created, you can select the team name instead of entering many users' individual email addresses during a Share operation. Team members do not need to be users in the Company/Classroom/Enterprise.
This page is where you set Company/Enterprise-wide Teams. For information on setting your user account Teams, see My account - Teams.
To navigate to your Teams settings in Onshape, click on your Account user icon (![]() ) in the top right corner of your Onshape window. This opens a dropdown menu. Click Company/Classroom/Enterprise settings.
) in the top right corner of your Onshape window. This opens a dropdown menu. Click Company/Classroom/Enterprise settings.
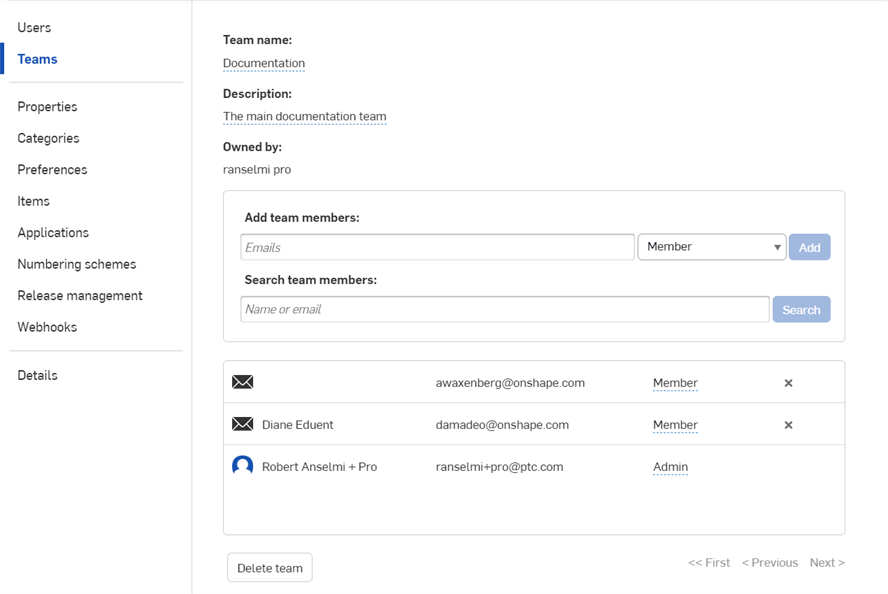
Click Teams in the list on the left side of the page:

Company settings > Teams

Enterprise settings > Teams
You have the ability to create teams in order to group users together for the purpose of increasing the efficiency of sharing; once the team is created, you can select the team name instead of entering many users' individual email addresses during a Share operation.
It is not required that the members of a team have anything in common; not even an Onshape subscription.
One user creates a team (thereby becoming the initial admin of the team) and then adds other users to it, assigning either a user role or an admin role to each team member. Members receive notification emails when they are added and removed from a team, and users may belong to more than one team at a time.
Any user can share a document with a company-owned team, even if they are not a member of the team. However, in order to share a document with a team external to the company or enterprise, the user must be a member of that team.
Sharing a document with a team does not give any team member additional permissions on the document than the owner/creator of the document allows during the Share operation.
At any point, the admins of a team may remove any member from the team, thereby removing any Share permissions previously made through the team. Any Shares made on an individual basis remain in place, as well as the permission they grant.
Team members can remove themselves from a team, unless they are the last admin member of the team. (A team must have at least one admin.) When a member is removed from a team, any document shared with that user through the team becomes unshared and removed from their Documents list.
A team admin may delete the team at any time. Upon deletion of the team, all documents shared with the team become unshared from the team members and removed from their Documents lists.
As with all sharing operations, the following permissions may be assigned during the Share operation:
- Can view - Permission to open for read-only access
- Can edit - Permission to open and edit (make changes)
Following are instructions for:
- Creating teams and adding members
- Removing members and admins
- Deleting a team
- Additionally, see information about Sharing and assigning permissions to documents
-
Expand the menu under your user name/Account user icon
 in the top right corner of the page and select Company/Classroom settings:
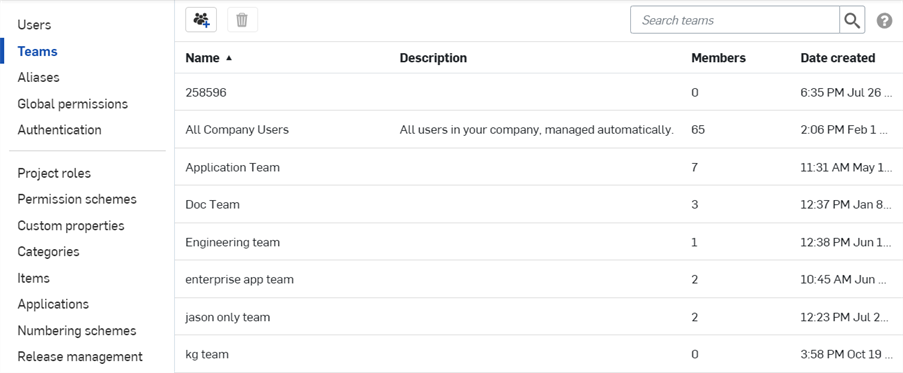
- On the page that appears, select Teams from the left panel and click
Create:

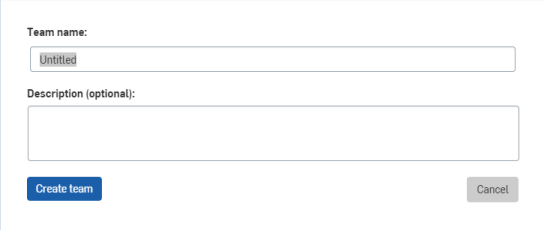
- Enter a name for the team, and a description, or statement of purpose:

- Click Create team:

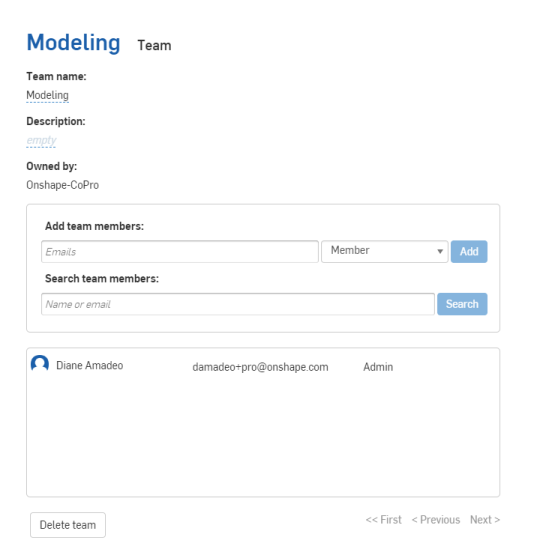
- Add members by entering individual email addresses (or copy/paste a comma-separated list of addresses), select a role (Member or Admin).
- Click Add.
- When finished adding team members and assigning roles, click the arrow to the left of the team name (at the top of the page) to return to the Accounts page.
- You see the new team listed on the Teams page.
Creating a team also adds a filter for that team in each member's Documents filters on their Documents page. These filters list all documents shared with a particular team.
Use the Search bar to search for team members.
You can return to this page and change a team member's role.
Members may remove themselves from a team, and any member with an Admin role may remove users including themselves as long as they are not the only administrative user left. Users removed from a team receive an email notification and are removed from the Share list of any document shared with the team. Those documents are removed from the user's Documents page.
-
Expand the menu under your user name or Account user icon
 in the top right corner of the page and select My account (for Standard and Free subscriptions) or Company settings (for Professional and Enterprise subscriptions).
- Select Teams in the left panel to access the list of teams of which you are a member.
- Select the team in the list from which you wish to remove yourself or another member.
- To remove yourself (as a member): Click the Leave team button.
- To remove yourself (as an admin): Click the X to the left of your name (Note this only works if there is another admin still on the team).
- To remove another user: Click the X to the left of the user name (Note this only works if you are an admin).
Any Admin of the team can delete the team at any time. This immediately removes the share permissions for all documents shared with the team and removes the documents from each member's Documents list.
Teams in Enterprises are defined and managed at the enterprise level only. Users need permission to create teams and assign other users to teams. Specifically, a user needs the Manage users and teams global permission in order to create teams and assign other users to a team. In Professional and Standard subscriptions, by contrast, anyone is able to create teams.
For more information see Understanding Teams.