 Inspection Item
![]()
In Drawing sheets, you can add numerical Inspection items to the desired annotation type (including dimensions, tolerances, tolerances for separate frames, surface symbols, hole callouts, callouts, notes, etc). As inspection items are added, their numbers increase incrementally. Inspection items are not attached to datums.
This page details how to add and edit Inspection items and explains how Inspection items are coordinated with releases. For information on defining default properties for Inspection items, see Properties, Inspection items.
- Click
 to the right-side of the Drawings toolbar.
 - Choose whether you want to manually place inspection items or if you want them to be added automatically.
- To manually place inspection items:
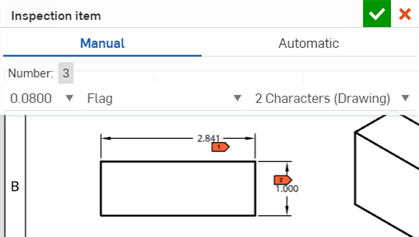
- Ensure Manual is selected in the dialog.
- Make your selections for the appearance of the Inspection item in the dialog:

- Hover over the annotation or callout to which to attach the Inspection item.
- Click to place the Inspection item.
- Continue placing Inspection items in this manner, as necessary.
- To automatically place inspection items:
- Select Automatic in the dialog.
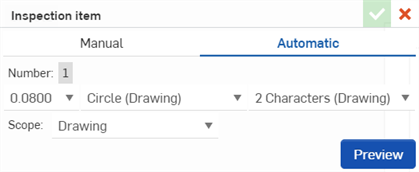
- Make your selections for the appearance of the Inspection items in the dialog.
- Select the Scope from the dropdown; you can choose to add inspection items to the entire drawing, a sheet within the drawing, or only a specific view that you select.
- Click Preview to preview the inspection items, and adjust your selections as necessary.
- Select Automatic in the dialog.
Inspection items will be automatically added to all dimensions, ordinate dimensions, weld symbols, surface finish symbols, geometric tolerance symbols, and callouts. Inspection items will NOT added to basic dimensions or reference dimensions.
- To manually place inspection items:
- When finished placing Inspection items, click the checkmark
 to close the Inspection item pane.
Tips
-
When applying Inspection items to dual dimensions, you should only apply the Inspection item to the primary dimension.
-
Inspection items can also be added to areas in the sheet's title block.
-
To exclude automatic inspection item numbering from being applied to callouts, check Exclude callouts in the Drawing Properties > Inspection menu.
- To edit an Inspection item, double-click the item to open the Inspection item pane in which you can make change to the appearance of the item.
- To move an Inspection item, drag and drop it onto another annotation or callout.
- To change the appearance of all the Inspection items in a drawing, click the Properties icon
 to open the Properties panel and make changes there.
 - To access a context menu for an Inspection item, right-click on the item, then select from the commands:
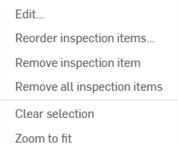
- Edit - Select to open the Inspection item pane, as mentioned above.
- Reorder inspection items - Select to provide a different number for the highlighted Inspection item.
- Remove inspection item - Delete the selected inspection item from the drawing.
- Remove all inspection items - Delete all inspection items from the drawing.
- Clear selection - Select to clear any selected Inspection items.
- Zoom to fit - Select to zoom the window view to center the selected Inspection item.
- Delete - Select to delete the selected Inspection item.
In a released drawing, you can reuse previous Inspection item numbers when reordering the items. You will see a warning box and message that the number has been used in a previous release:

You can continue with the reused item number or choose a new one.
To reorder Inspection items in a released drawing:
- Right-click on an Inspection item icon in the drawing.
- Click Reorder inspection items on the context menu.
- Type a new value in the Number field:
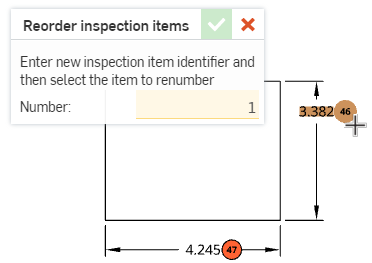
- Click the Inspection item again to apply the new number to it:
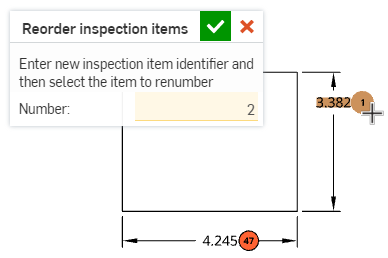
A warning displays to indicate the number may have been used in a previous revision:

- Note: After you apply the new value to the Inspection item, the value in the Number field automatically increments. Continue to click Inspection items in the drawing to apply the incremented values as needed:
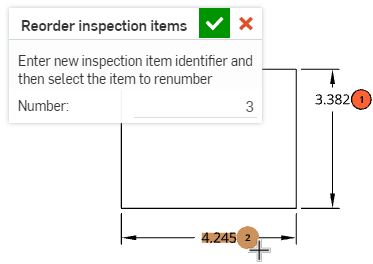
- Note: After you apply the new value to the Inspection item, the value in the Number field automatically increments. Continue to click Inspection items in the drawing to apply the incremented values as needed:
-
Click the checkmark (
 ) to accept the change.
Click the Inspection table icon
![]() on the right side of the drawings area to open the Inspection table.
on the right side of the drawings area to open the Inspection table.
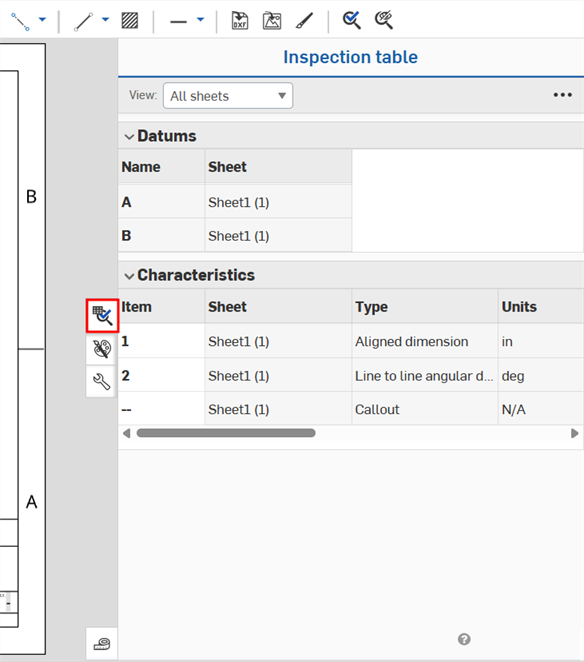
From here, you can view all datums and inspection items in your drawing.
- Use the View dropdown to select All sheets or Current sheet.
- To export the Inspection table to a .csv file, click the three-dot icon in the top-right corner of the table, and then click Export to CSV.
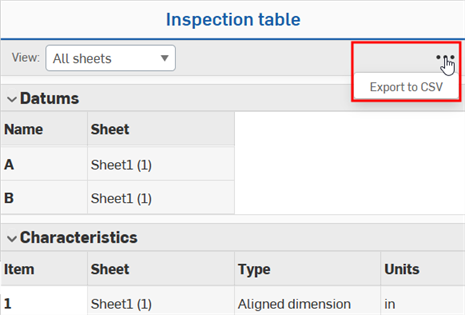
- To assign a number to an inspection item, right-click the empty cell in the Item column, then click Assign number.
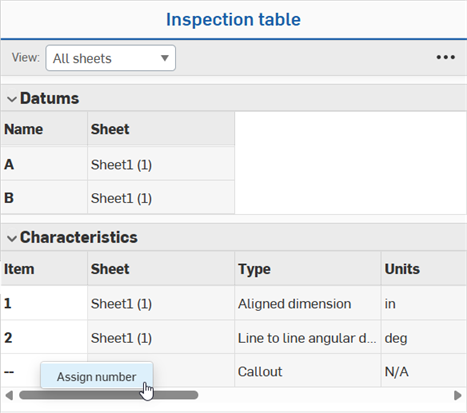
- To delete an inspection item from the drawing, right-click the number in the Item column, then click Remove inspection item. Click Remove all inspection items to delete all inspection items from the drawing.
- To edit an inspection item number, double-the number in the Item column, edit the number, then press Enter.
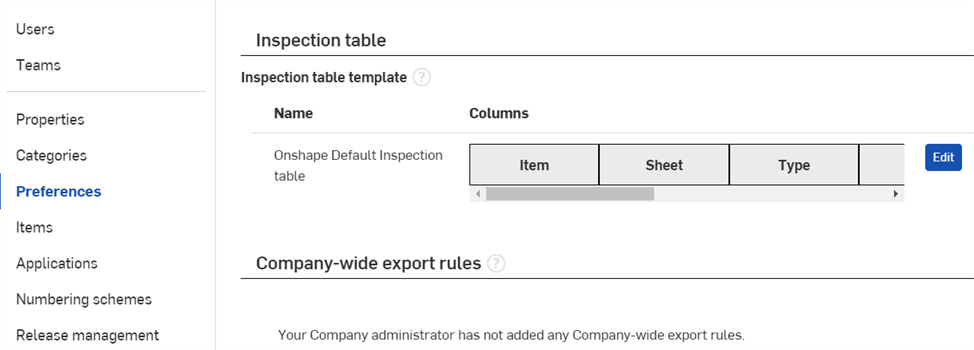
You can edit the columns that appear in the Inspection table.
- Click your Account user icon
 in the top-right corner of your Onshape window, then click Company/Enterprise settings.
 - Click Preferences in the left sidebar.
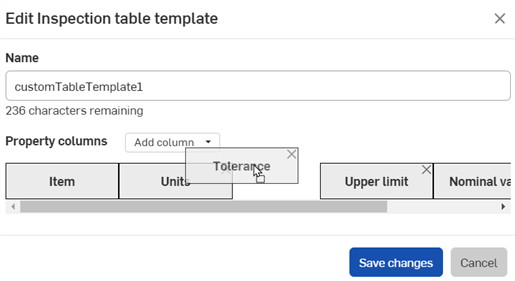
- Scroll to the Inspection table section, and click Edit. The Edit Inspection table template dialog opens.
- Enter a Name for the new template.
- To add a column, click the Add column dropwdown and select the column to add.
- To hide a column, click the X in the top-right corner of the column name.
- To change the column order, click and drag a column to the new location.
- Click Save changes to close the dialog.
- Click Return to document.
To export the Inspection symbol count to an ordered .csv file of all the inspection symbol labels:
-
Click Export on the drawing context menu
OR
click the ellipsis > Export to CSV from within the Inspection table. This opens the Export Drawing dialog.

- Select Inspection list from the Format dropdown field:
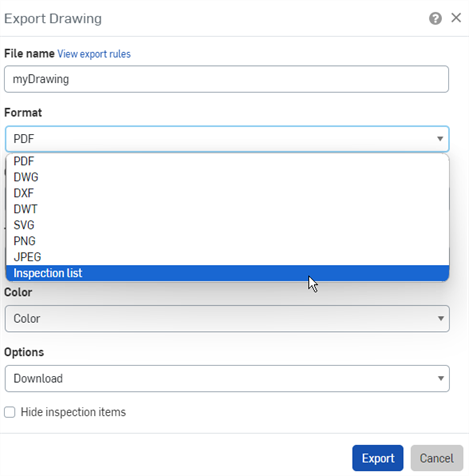
- Specify a File name for the export file:
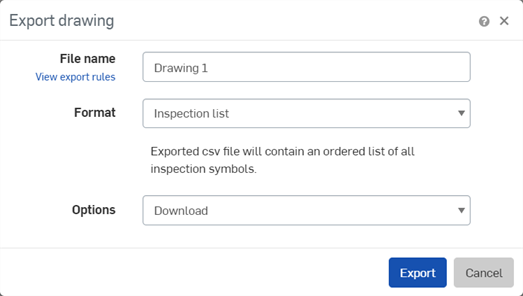
- Select a download option and click Export.
- Open the exported .csv file in a spreadsheet application such as Microsoft Excel (see image below), with Inspection item number, Sheet number, Annotation type, Unit, Nominal value, Tolerance, Upper limit, and Lower limit columns:

Some spreadsheet applications automatically calculate or reformat symbols, including parentheses and positive and negative tolerance symbols. If your expected results are transmuted in the spreadsheet, you may have to reformat the data or use a text editor instead of a spreadsheet editor.
Only assigned inspection items can be exported to a .csv file. If an inspection table contains only unassigned inspection items, the exported file will contain only headers.
Keep in mind that you must have defined an Export rule in your account Preferences for drawing export of inspection symbols in order to have this option when exporting a drawing.
For more information on exporting, see the Exporting a Drawing topic.
The drawing definition list contains all drawing annotations. This can be exported as an ordered .csv file:
-
Click Export on the drawing context menu
OR
click the ellipsis > Export to CSV from within the Inspection table. This opens the Export Drawing dialog.

- Select Drawing definition list from the Format dropdown field:
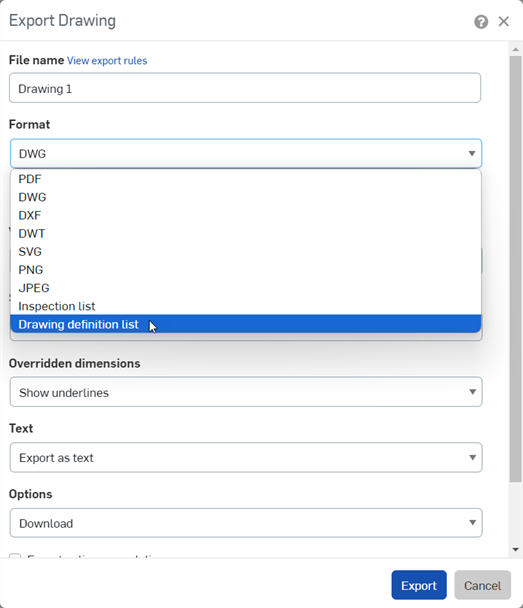
- Specify a File name for the export file:
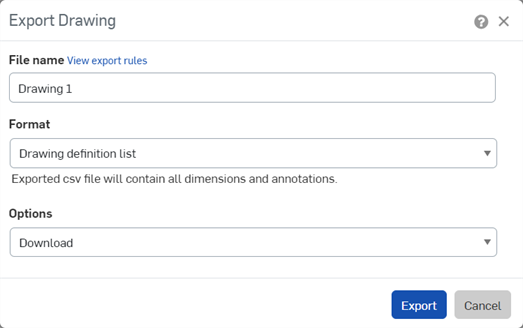
- Select a download option and click Export.
- Open the exported .csv file in a spreadsheet application such as Microsoft Excel. The Drawing definition list is imported into the spreadsheet.
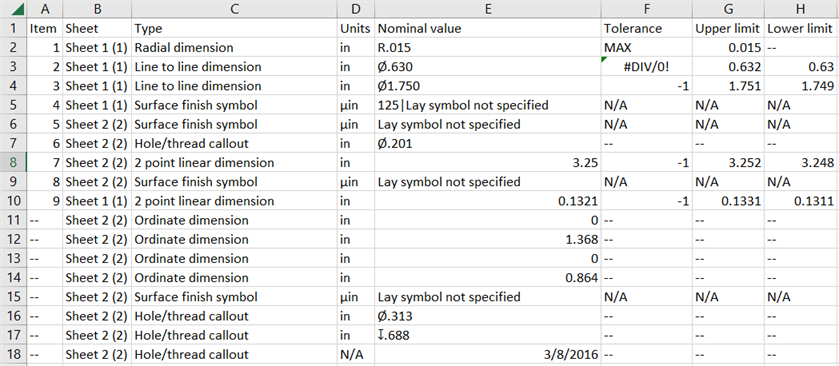
Some spreadsheet applications automatically calculate or reformat symbols, including parentheses and positive and negative tolerance symbols. If your expected results are transmuted in the spreadsheet, you may have to reformat the data or use a text editor instead of a spreadsheet editor.
For more information on exporting, see the Exporting a Drawing topic.
You can also hide all inspection items with one click of the Hide inspection items tool:
![]() . Click this tool to hide all inspection items; click again to show all inspection items.
. Click this tool to hide all inspection items; click again to show all inspection items.