 爆炸視圖
爆炸視圖
![]()
![]()
![]()
使用操控器來將零組件或零組件群從目前位置拖曳到新位置來來手動操控組合件進而建立爆炸視圖。會在「爆炸視圖」面板中記錄這些步驟,並可以將步驟重新排序,或者是編輯視圖。
在組合件分頁圖面中有組合件顯示的情況下:
- 按一下
 來開啟「爆炸視圖」面板。
- 按一下面板上方的「新增爆炸視圖」按鈕。

「爆炸 1」視圖名稱出現在面版中回溯控制棒的上方。

第一個爆炸特徵出現 (「爆炸 1」);爆炸特徵可以包含一或多個爆炸步驟
- 一個金色的訊息方塊出現表示您現在是在爆炸模式中。當在爆炸模式中時,您無法建立一般的組合件特徵 (結合、複製排列、條件關係):

- 按一下您要移動到新 (爆炸) 位置的零件 (或多個零件:您可以使用方塊選取) ;使用出現的操控器來將零件拖曳到爆炸位置:
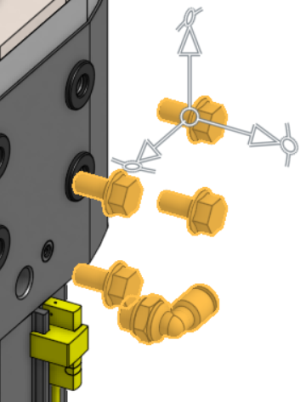
您可以將操控器原點拖曳到新的位置來將操控器重新定位。可允許您從不同的方位拖曳。
- 在放開零件的點按-拖曳之後,會出現一個對話方塊:
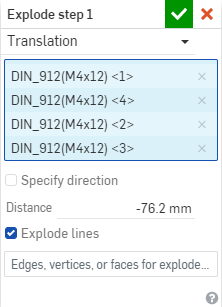
這樣會在「爆炸 1」特徵之下產生第一個爆炸步驟:「爆炸步驟 1」
- 變更或保留選取的實例 (在「實例」欄位中)。
- 在對話方塊中選擇爆炸步驟的移動類型來微調新的位置:平移或旋轉。
- 對於平移的移動,請使用特定的圖元來做為移動的參考。核取「指定方向」,然後選擇一個面或邊線來用做為方向。
- 對於旋轉的移動,使用特定的圖元來做為選取項目要繞著移動的軸。核取「指定軸」,然後選擇一個面或邊線來用做為軸。
請注意,除非已選取「平移」或「旋轉」圖元,否則對移動的參考是零件實例自身。
- 根據預設會核取「爆炸線」方塊,取消核取方塊來隱藏爆炸線。
- 根據預設,系統會將爆炸線定義在所有選取圖元的形心。若要定義不同的爆炸線,請在「爆炸線的邊線、頂點或面」的欄位中按一下,然後為要爆炸線出現處的圖元選擇邊線、頂點或面。爆炸線會在每個圖元所選邊線、頂點或面的形心處出現。
- 您可以使用出現的操控器來拖曳所選的實例,或是在對話方塊中的平移「距離」欄位輸入一個距離 (或是旋轉移動的角度)。如果需要,您可以使用負值來變更方向。
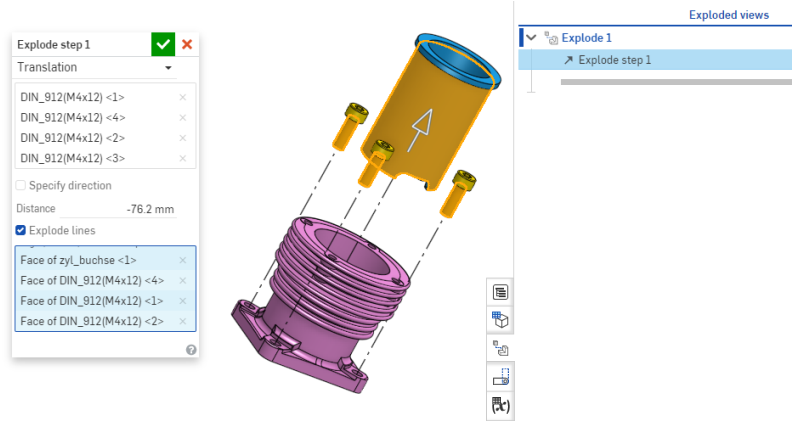
- 按一下核取記號來接受並關閉「爆炸步驟 1」對話方塊。
請注意,在提交爆炸步驟之後,先前選擇的實例仍是選取的。若要繼續以爆炸 Explode 1 的目前選取項目建立更多的步驟,只需將操控器拖曳到另一個位置。
若要建立更多步驟以供不同的選擇,請在圖形區域中點按您要移動到爆炸位置的另一個實例,然後根據上方的步驟操作。在未於最後步驟爆炸的實例上按一下,會清除之前所有的選取項目,並僅選擇新的選取項目。
- 若要完成「爆炸 1」,在金色訊息方塊中按一下 [完成]。
若要建立更多爆炸視圖,按一下面板底部的 [新增爆炸視圖] 按鈕,然後重複上方的步驟來操作。您可以建立任意數量的爆炸視圖。爆炸線會自動接收在上一個爆炸步驟中所定義的選取項目。
可以將爆炸視圖 (個別) 選擇為工程圖中的一個視圖。如果您要在一個工程視圖中顯示所有的爆炸步驟,請建立一個有許多爆炸步驟的爆炸。如果您要為不同的用途或工程視圖選擇不同的爆炸步驟,請建立許多個別的爆炸特徵,然後在建立工程圖時可選擇。關於在工程圖中選擇爆炸視圖的詳細資訊,請參考插入視圖。
請注意,爆炸步驟是列在「爆炸視圖」面板中。請了解您可以編輯爆炸步驟,以及重新命名爆炸步驟,並且在建立更多步驟之後將步驟拖曳到清單中新的位置上,或是拖曳至不同的爆炸視圖中。
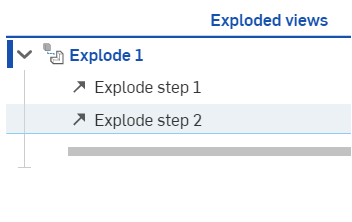
若要編輯爆炸視圖,請在「爆炸視圖」面板中的爆炸實例上連按兩下,或在名稱上按右鍵,使用所提供的環境選單您可以:
- 啟用爆炸視圖,意即使其顯示在圖形區域中並調整以配合空間大小
- 重新命名爆炸視圖
- 為視圖或個別的爆炸步驟顯示或隱藏所有的爆炸線
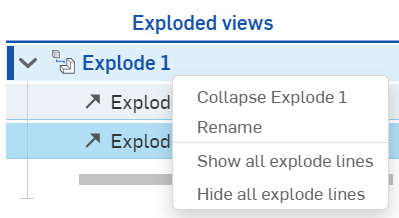
- 重設視圖的開始位置:在您變更了位置的情況下,重設開始位置會變更爆炸的開始位置來參考實例的新位置
- 複製爆炸視圖,建立有所有步驟的原始爆炸視圖的副本
- 刪除爆炸視圖
在跟隨模式中跟隨的使用者可以看到爆炸視圖。包括爆炸視圖的移動、「爆炸視圖」面板與爆炸視圖的啟動。
若要編輯爆炸視圖步驟的名稱或爆炸視圖本身的名稱,請在名稱上按右鍵然後選擇 [重新命名]。若要編輯步驟,請在步驟名稱上按右鍵,然後選擇 [編輯] (或您可以在步驟名稱上連按兩下來開啟對話方塊)。您可以移除或新增零件實例,重新選擇軸,變更平移為旋轉或反向操作,然後指定不同的平移或旋轉距離。
您可以拖曳回溯控制棒來檢視不同階段的爆炸 (如果有多個爆炸步驟的話)。任何在回溯控制棒下方的步驟都會被抑制,直到回溯控制棒回到最下方為止。您也可以在回溯控制棒上按右鍵,然後使用向上或向下的方向鍵來在爆炸步驟間移動。
您可以用組態任何其他特徵的方式來組態爆炸視圖。
-
開始建立一個組態:
- 開啟「組態」面板,然後按一下「組態組合件」。
- 輸入組態的名稱。
- 開啟「爆炸視圖」面板:
- 按一下「新增爆炸視圖」。
- 選擇您要爆炸的零件,然後拖曳操控器。
- 當「爆炸步驟」對話方塊開啟時,在您要組態的欄位上按右鍵,然後選擇 [組態]。
- 以黃色虛線框出的欄位表示是需要組態的欄位。
- 回到「組態」面板中來查看欄位以及表格中的預設值。
當您在組合件中檢視爆炸視圖時,可以使用「實例」清單最上方的「組態」部分來控制您要檢視的已組態爆炸:
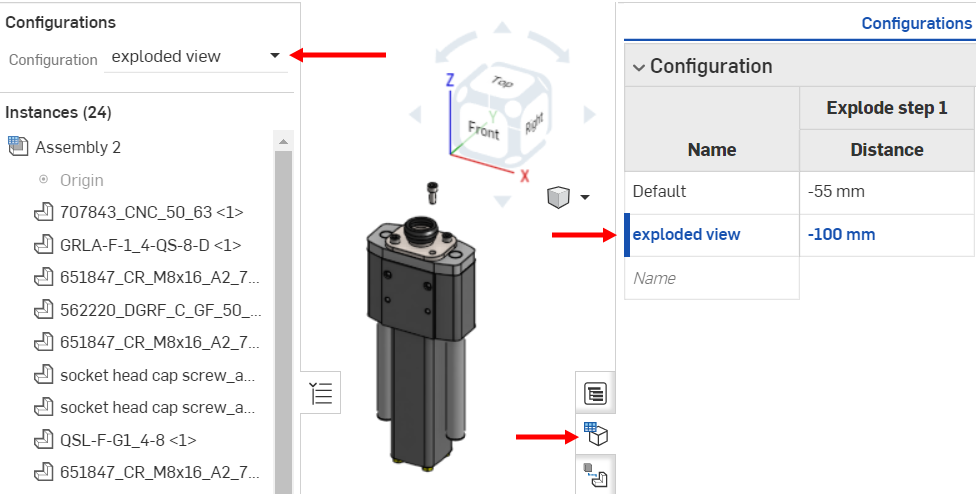
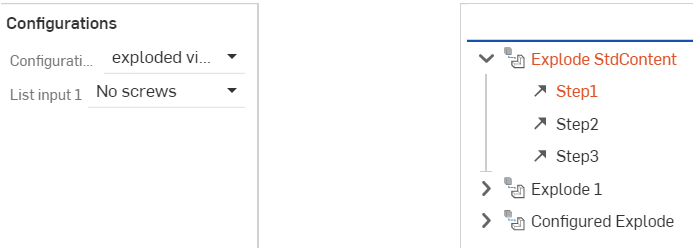
如果您選擇的組態包括未用於爆炸視圖中的零件,則該爆炸視圖會在「爆炸視圖」清單中變為紅色。只有指出遺失零件實例的爆炸步驟會有錯誤。選擇另一個有零件實例的組態即可解出爆炸視圖。
例如,下方的組態並未包含螺釘,但是爆炸的「步驟 1」中包含了螺釘零件的實例,因此這個步驟與 Explode StdContent 特徵都會失敗 (請見下圖):
若要在工程圖中使用爆炸視圖,您僅需要在 Onshape 的組合件中建立一或多個爆炸視圖。在將視圖插入至工程圖之後,不論您建立工程圖時所使用的視圖為何 (如果有的話),您可以選擇一個爆炸視圖。爆炸的工程視圖會永遠顯示在組合件中定義的爆炸線。
只要開啟「插入視圖」對話方塊,為「爆炸/位置」指定一個值:展開下拉清單並選擇命名爆炸視圖之一以用於將插入的特定視圖。
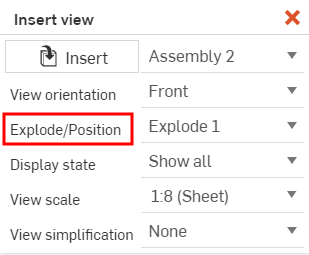
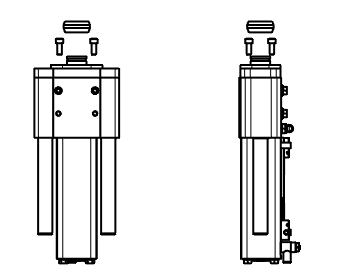
請注意,在爆炸數狀結構的爆炸步驟間移動回溯控制棒並不會影響工程視圖。工程視圖會在爆炸視圖中反映所有爆炸步驟。
關於如何將視圖插入至工程圖的詳細資訊,請參考視圖。
「爆炸視圖」目前在 iOS 與 Android 中是唯檢視的。
關於「學習中心」的其他資源,請參照此處的技術簡報文章:Tips & Tricks for Working with Exploded Views (需要有 Onshape 帳戶)。