 環狀複製排列
![]()
![]()
![]()
相對於一個軸或結合連接器 (隱含或明確的) 仿製所選零件、面或特徵。藉由加入或移除材料,或在路徑上使零件相交來建立新的零件或修改現有的零件。關於建立線性複製排列的資訊,請參考線性複製排列。也可以在啟用的鈑金模型操作中使用環狀複製排列。
Onshape 提供多個複製排列的功能,可讓您在 Part Studio 中建立零件、特徵或面的額外實例。可用的複製排列類型有線性、環狀、鏡射與曲線複製排列。
線性複製排列會沿單一方向產生實例或在兩個方向上建立實例的陣列。
環狀複製排列會繞一個軸產生實例。
鏡射複製排列會相對於一個鏡射平面反射實例。
曲線複製排列會沿一曲線或路徑產生實例。
選擇一個複製排列類型。
零件複製排列會建立所選零件的其他實例。當您選擇一個零件複製排列時,所提供的布林選項可建立新的、加入、移除或相交。
「新建」分頁會為複製排列的每個實例建立新的零件。請謹慎使用此操作,因為在 Part Studio 中的多個相同零件在組合件與材料表中會顯示為個別與獨特的零件,這並不是一種建議的做法。
「加入」分頁會將新材料加入至現有零件中。對於重疊的零件,加入的操作可將多個零件結合為一個零件。
「移除」分頁會移除複製實例與零件相交處的材料。
「相交」分頁會保留複製實例與零件相交處的材料。
布林選項可讓零件用做為工具本體來加入或移除材料,或是保留複製排列實例與現有幾何的相交。
特徵複製排列會仿製從特徵清單中選取的一或多個特徵。
根據預設,特徵複製排列不會考慮種子特徵的終止類型。在有各種不同終止類型的情況中,請選擇重新套用特徵以從所選特徵重新產生零件,包括特徵依存項與終止形態。請僅在需要時使用這個選項,因為會影響效能與重生成的時間。
「面」複製排列會仿製所選的面。面的計算負載遠低於受參數約束的特徵或零件,因此會有最佳的效能。在所產生的幾何是相同的情況下,面複製排列會比特徵或零件複製排列更為理想。
在面是相切連接,或形成像是凹陷或突出的可辨識幾何特徵的情況下,使用建立選取項目以更容易地選擇要複製排列面的子集合。
設定要選取面的類型,選擇一或多個面,然後按一下 [新增選取項目]。
除了鏡射之外,所有的複製排列都包含略過實例的選項。在遇到衝突的幾何或當您要排除特定的實例時,略過實例是非常有用的。Onshape 會為每個實例顯示一個以灰色輪廓線框出的選取點。您可以選擇個別實例的選取點,或使用方塊選取來同時選擇多個實例以略過實例。Onshape 會以淡藍色強調顯示略過實例的選取點。
合併範圍會決定受到複製排列特徵影響的零件。例如,將某些零件包含在合併範圍中可指定複製排列的凹陷應切除的零件。沒有包括在合併範圍中的零件不會受複製排列特徵的影響。
選擇「全部合併」來在合併範圍中包括所有的零件。
「環狀複製排列」特徵會相對於ˋ中心軸複製所選零件、特徵或面。
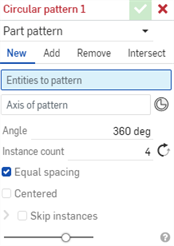
從特徵工具列中開始一個新的「環狀複製排列「特徵。為「複製排列類型」與種子實例選擇適當的選項。在這個範例中要複製排列三個工具本體來從上方與下方鑄件 (Upper and Lower Castings) 中移除幾何。在選取了「複製排列軸」的情況下,選擇一個環狀邊線、圓柱面、結合連接器或草圖圓。會將結合連接器的主軸用做為「複製排列軸」。另一種方式是按一下「選擇結合連接器」按鈕來將隱含的結合連接器定義為複製排列軸。在「複製排列軸」欄位中按一下「結合連接器」圖示來修改結合連接器的對齊、位置或角度。
輸入「角度」與「實例數量」。實例數量包括種子實例。
在核取了「同等間距」的情況下,Onshape 會在複製排列角度內平均分布實例。在這個範例中,全部的三個實例會在 60 度的角度內平均放置。取消核取「同等間距」來在實例之間套用角度。現在實例之間的角度是 60 度,將第一個與最後一個實例間的角度增加到 120 度。切換「反向」箭頭來在原始實例的左或右方向間轉換。在種子特徵會位在複製列中心的情況下,核取「置中」來從種子實例的軸對稱複製排列實例。
- 按一下
 :
:
- 選擇「結果」操作類型:
- 新建 - 建立造成新零件的新材料。
- 加入 - 建立新材料並加入至現有的材料中。
- 移除 - 從現有材料中移除材料。
- 相交 - 僅留下幾何重疊處的材料。
- 選擇複製排列的類型:零件、特徵或面:
- 零件 - 複製排列一個單一的零件
- 特徵 - 複製排列列在「特徵」清單中的一或多個特定特徵。
- 面 - 複製排列特定零件上的特定面
- 在選取了要複製排列圖元欄位的情況下,選擇要仿製的圖元來排列。
當選取「面」來複製排列時,建立選取項目
 可幫助您選擇相關的面。
 - 在選取了複製排列軸欄位的情況下,接著選擇零件的邊線、面、或是圓錐或圓柱面,線性草圖圖元或結合連接器 (隱含或明確的) 來相對其放置複製排列的零件 (按一下
 以選擇隱含的結合連接器)。
在選擇了結合連接器之後,按一下對話方塊欄位中的「結合連結器」圖示 (下圖中以藍色輪廓線框出) 來開啟可於其中編輯結合連接器的對話方塊:
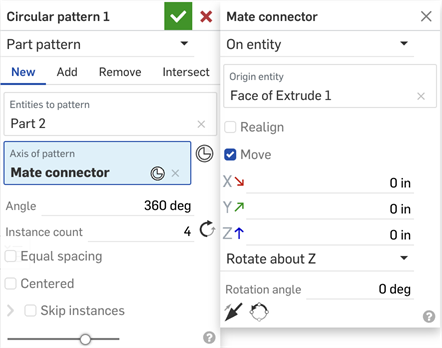
- 輸入每個複製零件間的距離,然後輸入複製的數量,或是實例的數量 (所能使用的最少實例數是 1)。
- 同等間距方塊可讓您在指定的角度內平均放置複製排列的零件。
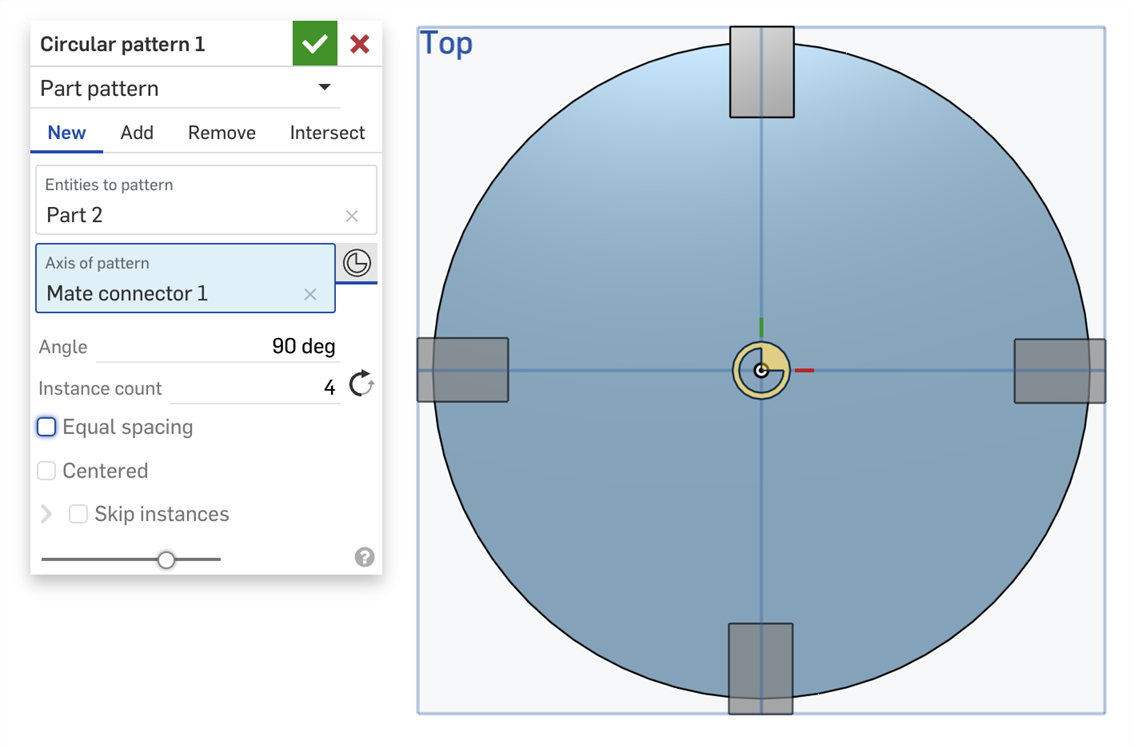
上方未核取「同等間距」的情況下,系統會以 90 度的間隔放置零件。
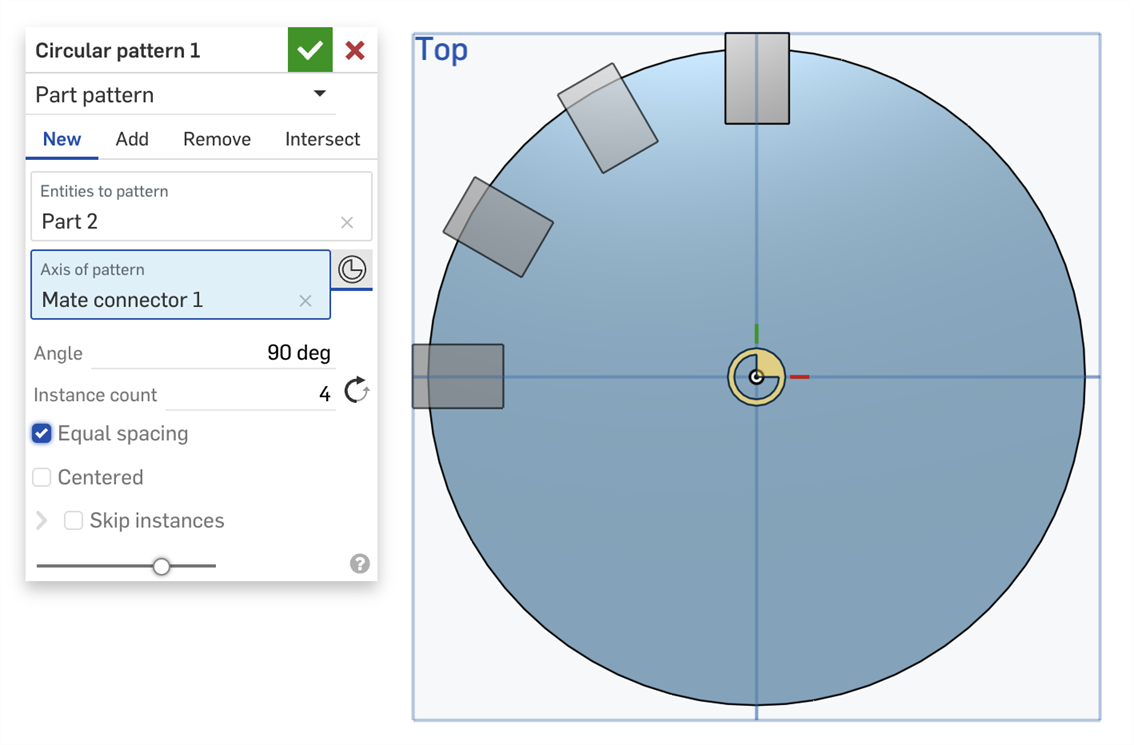
上方已核取「同等間距」的情況下,會在 90 度之內平均放置零件。
- 使用置中來將種子實例/面/特徵設定為複製排列的中心:
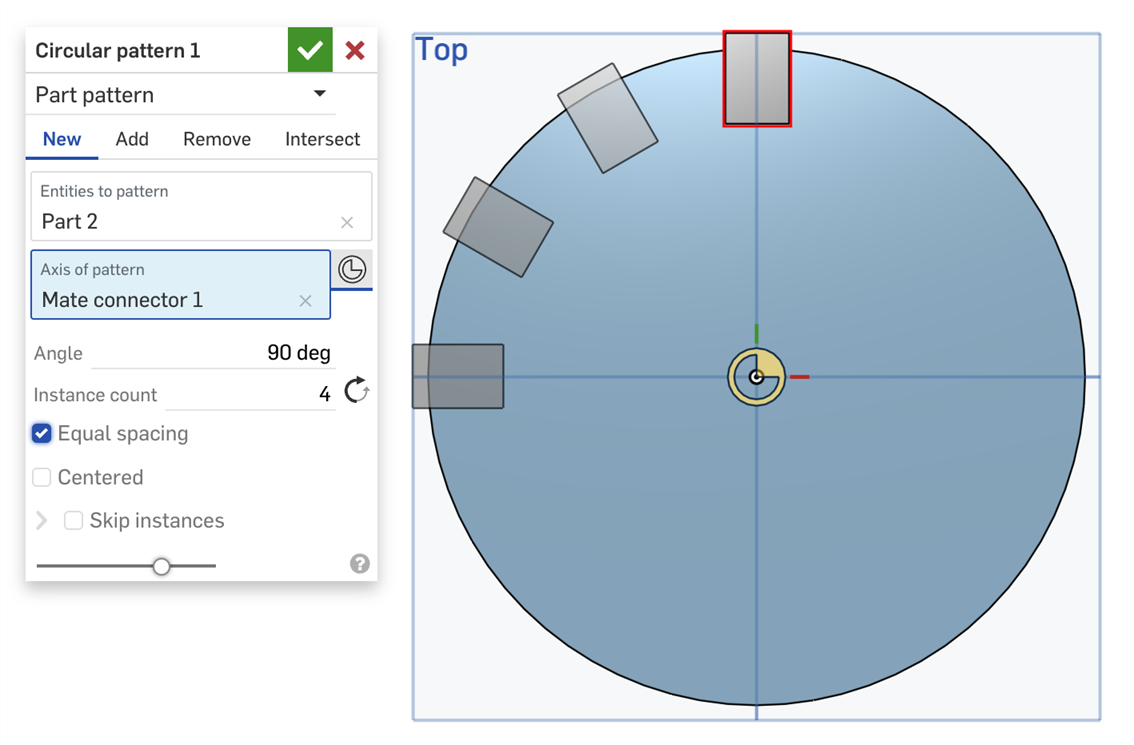
種子實例位在複製排列的上方 (以紅色輪廓線框出),上圖中未核取「置中」核取方塊,複製排列向左環形排列。
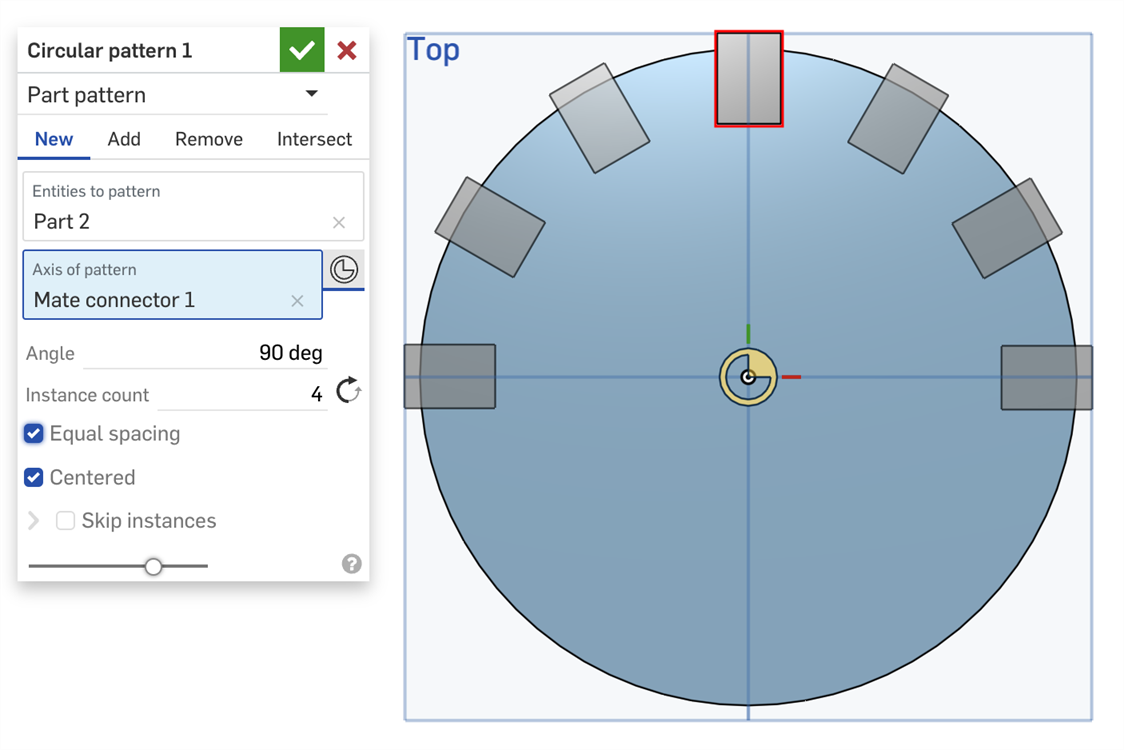
種子實例仍位在上方,以紅色輪廓線框出;在核取了「置中」方塊的情況下,複製排列會從種子實例的兩側向外延伸。
- 核取略過實例選項來指定要跳過的複製排列實例:
- 按一下實例的選擇控制點來將其加入至「要略過的實例」清單中。
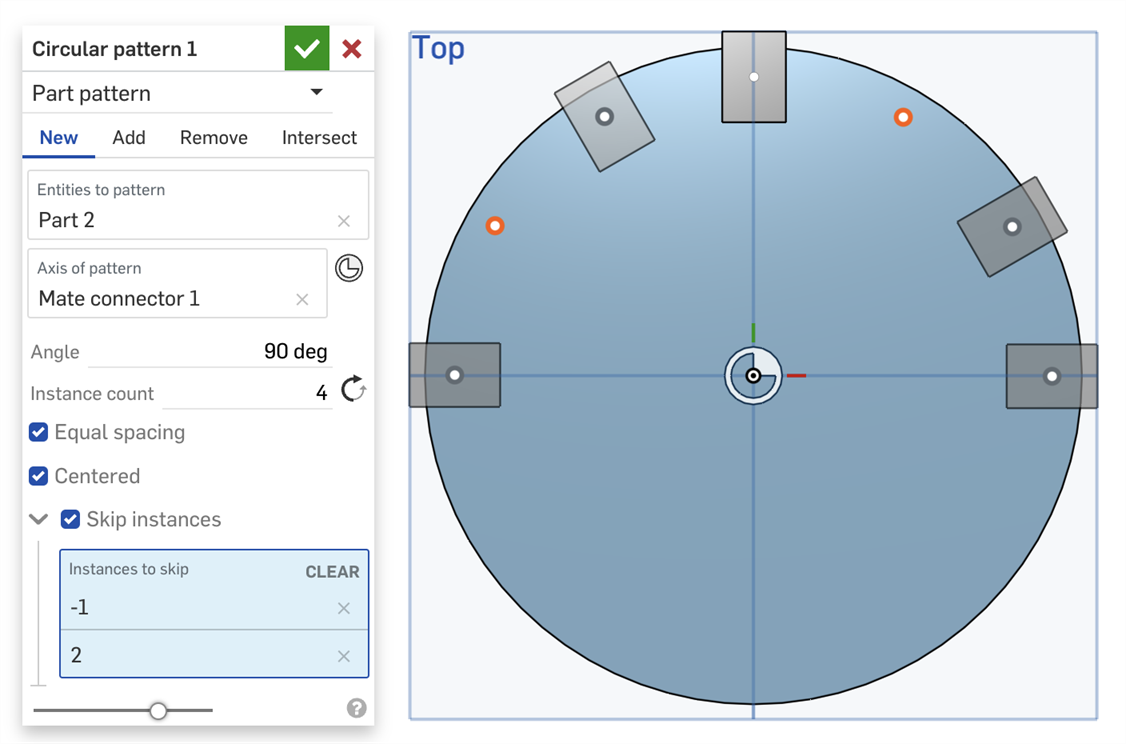
- 按一下清單中實例旁的 X 來將其將加回 Part Studio 中。
- 按一下清除來從「要略過的實例」清單中移除所有實例。
- 按一下實例的選擇控制點來將其加入至「要略過的實例」清單中。
- (僅限「特徵複製排列」類型) 選擇「重新套用特徵」來為每個實例 (「實例數量」中指定的個數) 重新產生特徵,而不只是重新建立最初的複製排列實例。
複製排列一個單一的零件
會建立一個部分,然後以加入的操作類型複製排列來建立此零件:
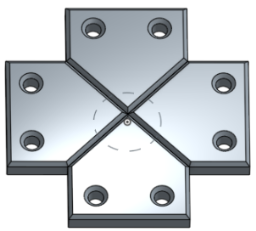
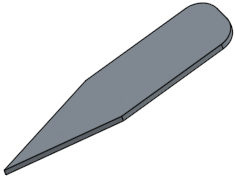
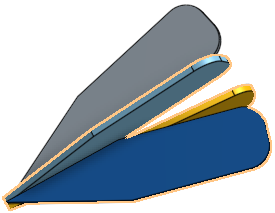
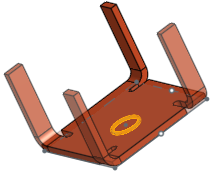
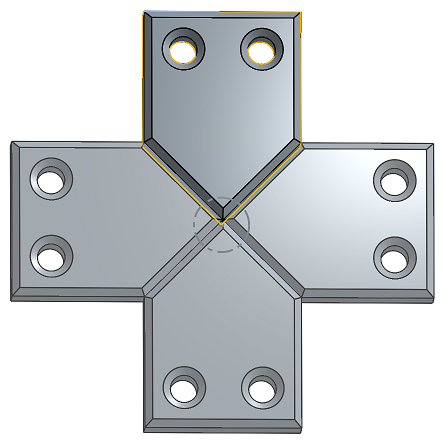
對於鈑金,選擇這個葉身來做為零件,選擇邊線來當做複製排列軸。
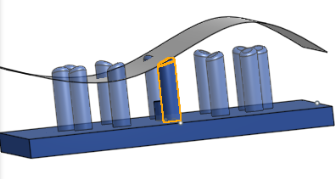
在未選取「重新套用特徵」的情況下(更快速輕量的特徵複製排列) ,系統會複製排列出現在「特徵」清單中的一或多個特定特徵。無法在鈑金中使用此選項。
在下方的範例中,最初的擠出是「成形至下一幾何」(擠出至曲面的面上)。在沒有選取「重新套用特徵」的情況下,會僅在最初的實例上複製特徵 (擠出),並不會在其他實例上重新產生特徵 (不會為複製排列中的每個實例更新「成形至下一幾何」):
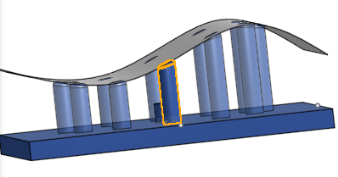
在選取了「重新套用特徵」的情況下,系統會複製排列出現在「特徵」清單 中的一或多個特定特徵。可以在鈑金中使用此選項。
在下方的範例中,最初的擠出是「成形至下一幾何」(擠出至曲面的面上)。在選取了「重新套用特徵」的情況下,會為複製排列中的每個實例重新產生複製的特徵 (擠出),所以會將「成形至下一幾何」套用至複製排列中的各個實例上。
複製排列特定零件的特定面
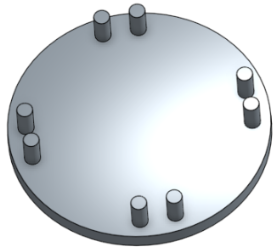
所選的面是圓柱面及圓柱的頂面 (兩個圓柱),然後以 90 度的角度複製 4 個實例。
在這個鈑金件上選取的面是凸緣。軸或結合連接器 (隱含或明確的) 是強調顯示的圓。
新建 - 建立會產生新零件的新材料:
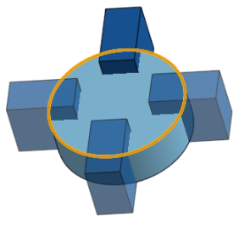
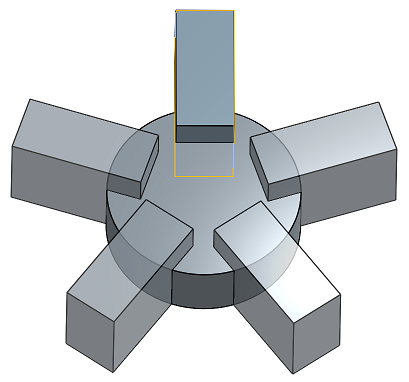
加入 - 建立材料並加入至現有的材料中 (在這個案例中選取了 [全部合併]):
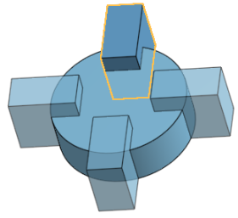
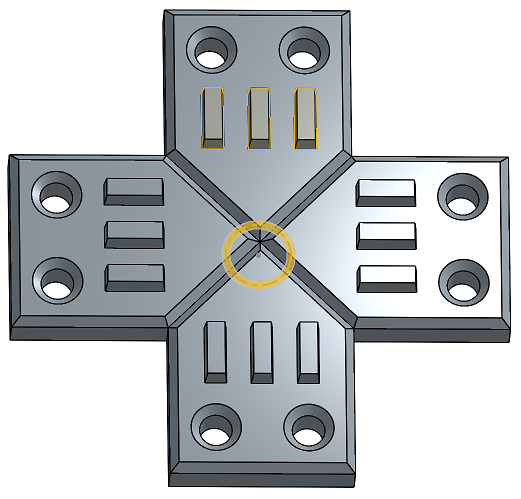
移除材料;選擇要複製排列的零件然後按一下 [移除]:
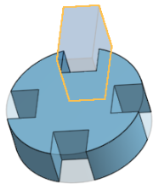
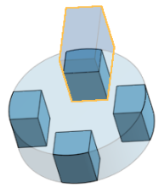
選擇要複製排列的零件,然後選擇 [相交]:
- 當選取一個面或邊線來設定「複製排列軸」時,如果需要,您可以使用「相反方向」箭號
 來反轉結果。
- 當複製排列特徵時,您可以從「特徵」清單中以任何順序選擇。不論選擇的順序為何,會以特徵出現在「特徵」清單中的順序套用。
- 如果您在特徵清單中選擇了一個複製排列,將會複製排列該複製排列,而非種子項目。若要包括種子項目,請同時選擇該項目。
- 當複製排列一個布林特徵時,您必須同時選擇套用布林運算的特徵。
- 當建立特徵複製排列時,會套用特徵的所有面向;例如,「擠出」特徵中的終止形態 (不同的是,面的複製排列不會辨識這類的差異)。
-
If the Reapply features option is enabled when using the feature pattern, external references of the seed features will regenerate automatically on a per-instance basis.
If a sketch is selected, the seed sketch dimensions and constraints to the origin or default plane (Top, Front, or Right) are not reapplied. You can use this behavior to scope which dimensions or constraints are reapplied within a pattern:
- In a sketch, you can dimension and constrain entities to the origin or default planes to prevent these dimensions and constraints from being reapplied on each pattern instance.
- If you need to reapply dimensions and constraints to the origin or default plane, first create auxiliary sketches with lines and points constrained to the origin or default planes. Then, on the seed sketch, use these sketch entities as a proxy for the origin or default plane dimensions and constraints.
- 如果結合連接器是在 Part Studio 中複製排列的零件,在插入 Part Studio 時,會將結合連接器加入到組合件中。如果在將 Part Studio 插入到組合件中時沒有看到您的結合連接器,請確定零件是列為結合連接器的所屬圖元。
- 輕觸「環狀複製排列」工具。

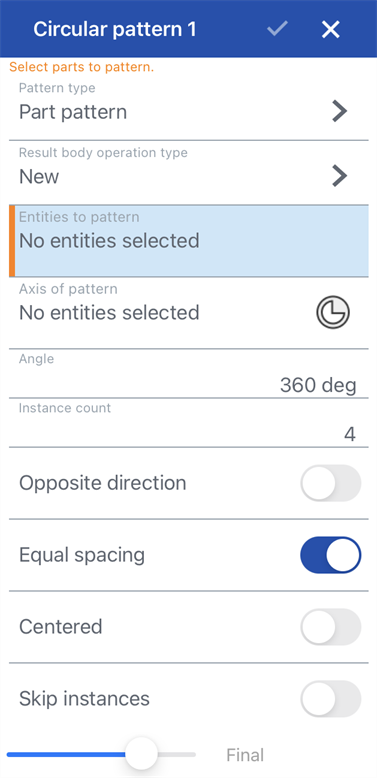
- 指定「複製排列類型」:
- 零件 - 複製排列一個單一的零件
- 特徵 - 複製排列列在「特徵」清單中的一或多個特定特徵
- 面 - 複製排列特定零件上的特定面
- 選擇一個「結果本體操作類型」:
- 新建 - 建立造成新零件的新材料。
- 加入 - 建立新材料並加入至現有的材料中。
- 移除 - 將材料從零件中移除。
- 相交 - 僅留下相交存在處的材料。
- 選擇要複製排列的圖元 (零件、特徵或面)。
- 選擇複製排列軸 (邊線、草圖或圓柱/圓錐面)。
- 選擇性地輕觸「結合連接器」圖示以選擇或建立隱含的結合連接器。
- 指定角度。除非您使用同等間距 (詳細資訊請參考步驟 9 ),否則這個角度將會是每個零件間的距離。
- 指定實例數量。
- 選擇性地切換來轉至相反的方向。
- 選擇性地切換來使用同等間距。同等間距會在指定的角度/度數間放置複製排列的圖元。
- 選擇性地切換置中來將種子實例/面/特徵置於複製排列的中心。
- 選擇性地切換略過實例並選擇要跳過的實例。輕觸兩下實例來將其加回 Part Studio 中。
- 輕觸核取記號。
複製排列一個單一的零件。
使用環狀零件複製排列繞草圖圓的軸將零件複製排列 4 次,以將材料加入至現有零件中。
複製排列列在「特徵」清單中的一或多個特定特徵。
使用環狀特徵複製排列繞草圖圓的軸將擠出特徵複製排列 4 次,以將材料加入至現有零件中。
複製排列特定零件的特定面。
使用環狀面複製排列將強調顯示的零件圓柱面複製排列 4 次,以將材料加入至現有零件中。
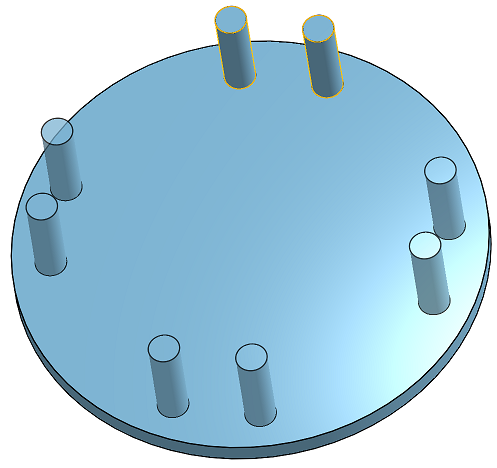
新 - 建立造成新零件的新材料。
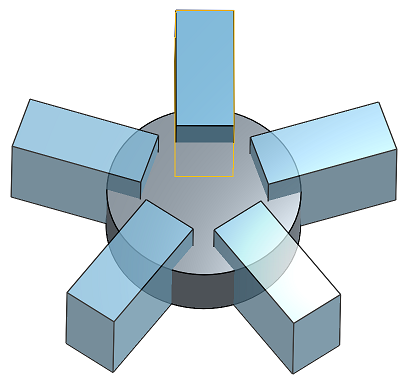
加入 - 建立材料並加入至現有的材料中。
移除材料。
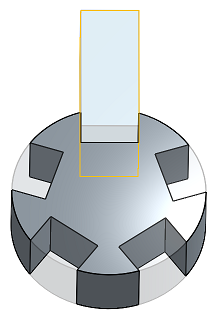
僅留下相交存在處的材料。
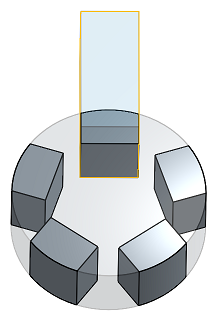
- 輕觸「環狀複製排列」工具圖示 (
 )。
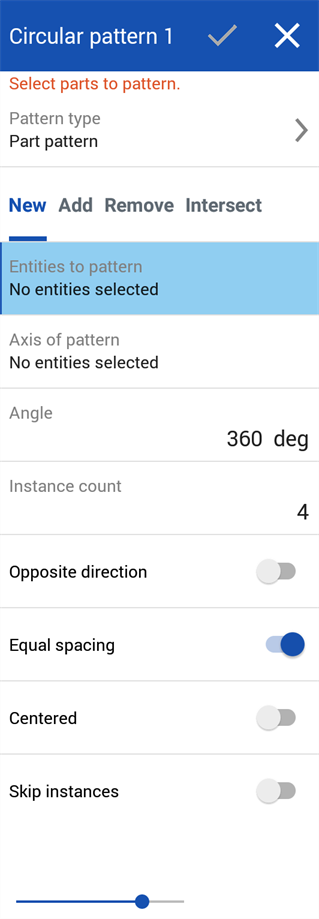
)。
- 指定「複製排列類型」:
- 零件 - 複製排列一個單一的零件
- 特徵 - 複製排列列在「特徵」清單中的一或多個特定特徵。
- 面 - 複製排列特定零件上的特定面
- 選擇一個「結果本體操作類型」:
- 新建 - 建立造成新零件的新材料。
- 加入 - 建立新材料並加入至現有的材料中。
- 移除 - 將材料從零件中移除。
- 相交 - 僅留下相交存在處的材料。
- 選擇要複製排列的圖元 (零件、特徵或面)。
- 選擇複製排列軸 (邊線、草圖或圓柱/圓錐面)。
- 指定角度。除非您使用同等間距 (詳細資訊請參考步驟 9 ),否則這個角度將會是每個零件間的距離。
- 指定實例數量。
- 選擇性地切換來轉至相反的方向。
- 選擇性地切換來使用同等間距。同等間距會在指定的角度/度數間放置複製排列的圖元。
- 選擇性地切換置中來將種子實例/面/特徵置於複製排列的中心。
- 選擇性地切換略過實例並選擇要跳過的實例。輕觸兩下實例來將其加回 Part Studio 中。
- 輕觸核取記號。
複製排列一個單一的零件。
使用環狀零件複製排列繞草圖圓的軸將零件複製排列 4 次,以將材料加入至現有零件中。

複製排列列在「特徵」清單中的一或多個特定特徵。
使用環狀特徵複製排列繞草圖圓的軸將擠出特徵複製排列 4 次,以將材料加入至現有零件中。

複製排列特定零件的特定面。
使用環狀面複製排列將強調顯示的零件圓柱面複製排列 4 次,以將材料加入至現有零件中。

新 - 建立造成新零件的新材料。

加入 - 建立材料並加入至現有的材料中。

移除材料。

僅留下相交存在處的材料。
