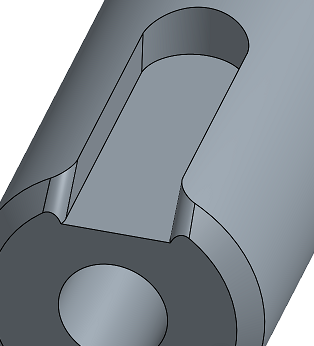
建立選取項目
Onshape 提供「建立選取項目」對話方塊來讓選擇相關的面更為容易,例如像是選擇模型上定義凹陷的面。其中的某些指令特別有用,像是 [刪除面] 與 [取代面]。另一個建立選取項目的方式是透過使用相同環境選單中的 [選擇] 指令:
這個指令可讓您選擇一組類似的項目而無需開啟「建立選取項目」對話方塊。您可以將所選項目的集合填入至下一個開啟的工具對話方塊中。
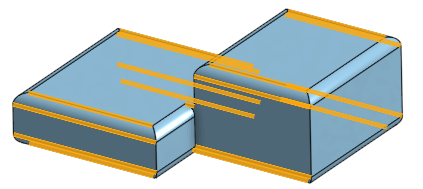
例如,在下方模型中已選取一條邊線的情況下,您可以使用 [選擇] > [平行邊線] 來自動選取所有平行的邊線:
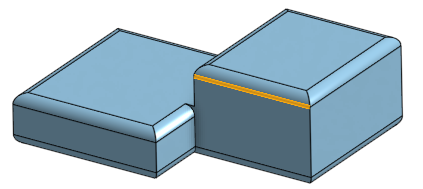
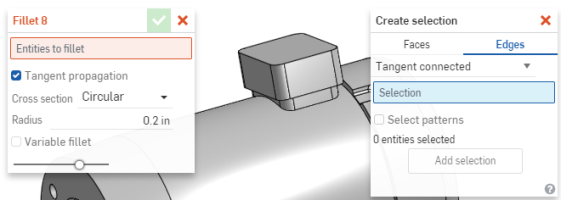
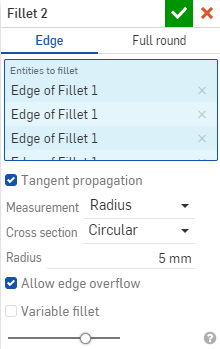
然後在您開啟「圓角」工具對話方塊時,選取項目即已填入選擇欄位中:
若要建立相連邊線的選取項目,請先選擇邊線,然後再按右鍵來開環境選單:
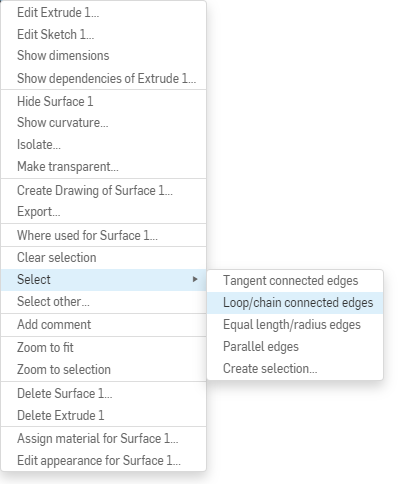
從功能表中按一下 [選擇] > [迴圈/連續相連邊線]。
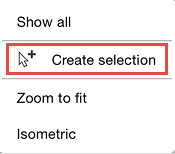
或者,您可以使用來自同一環境選單中的 [建立選取項目] 指令來開啟「建立選取項目」對話方塊:
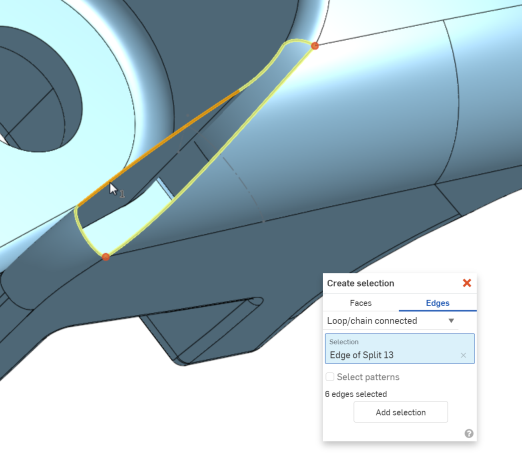
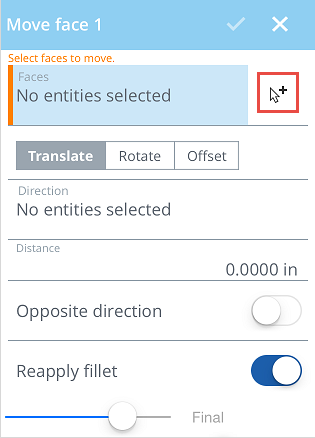
Access this from a Feature tool dialog with this icon , or select Create selection from the context menu.
「建立選取項目」可用於選擇準則為擠出成形、凹陷、鑽孔、圓角、相切連接的面、界限內的面或邊線的項目上。根據選擇準則,系統會使用選擇的一或多個面來衍生選擇其他的面。然後可以將這些選擇加入至工具對話方塊中的值清單上,例如,替換面或刪除面 (請參考下方的範例)。
可用的選擇準則有:
- Protrusion - Selects all faces that are connected to the selected face by a convex edge.
- Pocket - Selects all faces that are connected to the selected face by a concave edge.
- Hole - Selects all faces that are connected to the selected face as part of the same round hole.
- Fillets - Selects all faces on a part which form a constant radius fillet.
- Tangent connected - Select all faces that are connected to the selected face by a tangent edge.
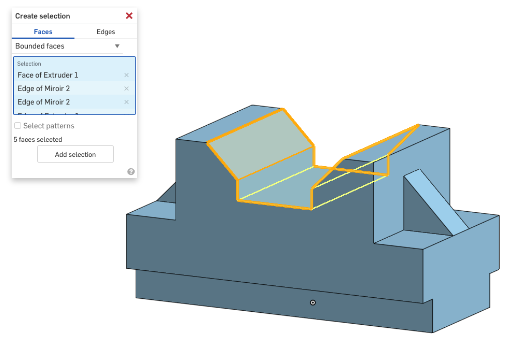
- Bounded faces - Selects all faces between the selected face and the boundary defined by other edges and faces selected. To start, select a seed face that touches the desired region of faces. Then select all edges or faces which bound the desired region of faces:
The second selection defines the boundary. All adjacent faces and edges are captured in this selection set to form a closed boundary. If a close boundary cannot be formed, all adjacent faces and edges are selected.
- Select patterns option - Select all other faces on the part which match the same criteria specified.
例如,選擇「邊線」可讓您為細部圓角或曲面建立特定的邊線選取項目。選取項目的可用細分選項有:
- Tangent connected - Selects all edges tangent to the selected edge. (See example below.)
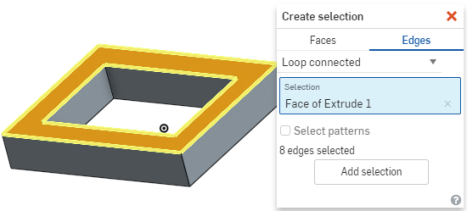
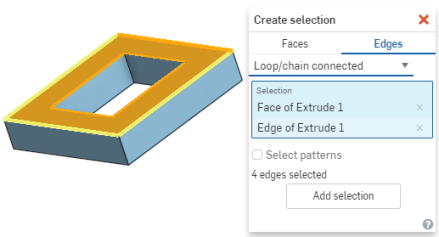
- Loop/chain connected - Select a face (and/or sketch edges) and all edges that form a connected loop on that face (or adjacent to the sketch edge) are selected. Select adjacent faces (or sketch edges) to continue the loop. Unselect a loop if multiple are selected or keep multiple loops if desired.
The face highlighted in orange is the selected face. The edges highlighted in yellow are the automatic selections:
When you select a face, all edges adjacent to that face forming a loop are automatically selected, as shown above.
When you select a face and then an edge, all edges adjacent to the selected edge along the selected face forming a loop are automatically selected, as in:
The orange face is selected as well as the orange edge. The yellow highlighted edges are automatically selected.
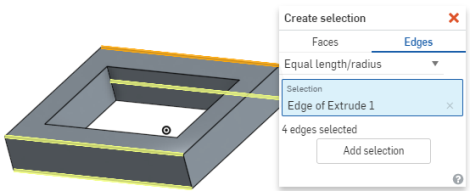
- Equal length/radius - Select one edge and all the other edges that match that in length or radius are automatically selected:
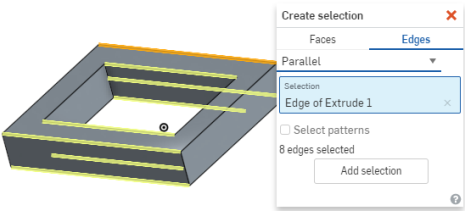
- Parallel - Selects one edge and all other edges parallel to that edge are selected:
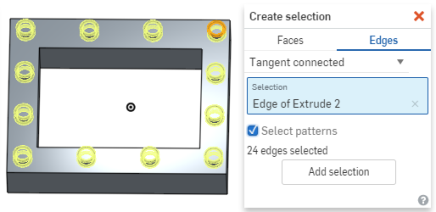
- 選擇複製排列核取方塊 (適用於複製排列中) - 選擇一條邊線,即會自動選擇複製排列中的所有邊線。在此範例中,所選取的邊線是以橘色強調顯示的圓,此圓也是複製排列草圖中的一部分,因此 Onshape 會自動選擇其餘的複製排列特徵 (以黃色強調顯示):
選擇面
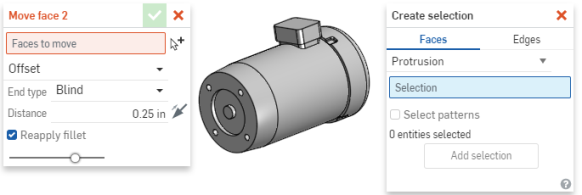
下方的範例示範在「移動面」特徵中選擇面時使用 [建立選取項目]:
- Click the Move face tool.
- Right-click and select Create selection:
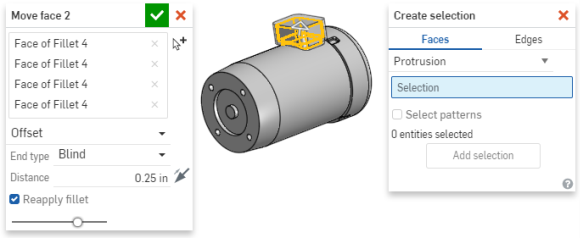
- 選擇選取的類型 (此處是突出),選擇一個面,Onshape 會自動做出適當的選擇:
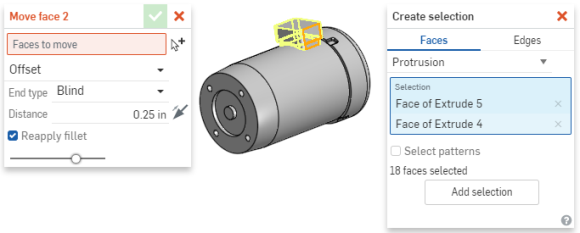
- Click Add selection to transfer the selected components to the Move face dialog:
- 爲「移動面」特徵輸入其他要求的規格資料。
選擇邊線
下方的範例示範在「圓角」特徵中選擇邊線時使用 [建立選取項目]:
- Click the Fillet tool.
- Right-click and select Create selection.
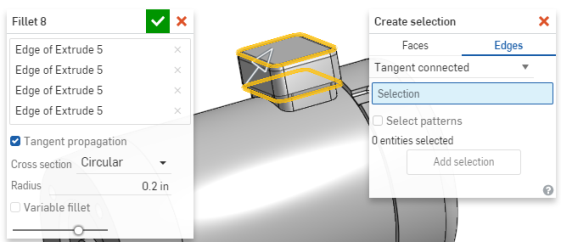
- 選擇選取項目的類型 (此處是「相切連接的」),然後選擇一或多條邊線,Onshape 則會自動做出其他適當的選擇 (原始的選取項目會以橘色強調顯示,黃色的強調顯示則是自動的選取項目):
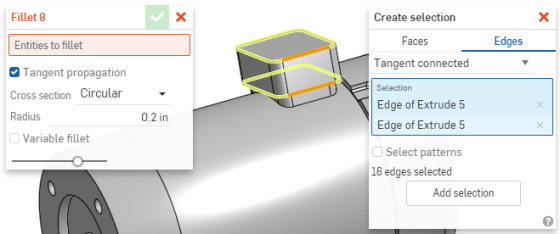
- Click Add selection to transfer the selected components to the Fillet dialog:
- 爲「圓角」特徵輸入其他要求的規格資料。
Onshape provides the Create selection dialog to make selecting related faces, such as faces that define a pocket on a model, easy. This is especially useful in certain commands, such as Delete face and Replace face.
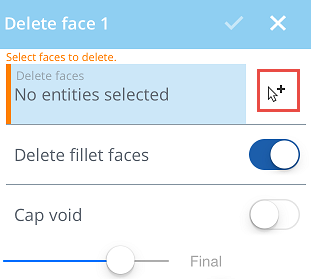
- Access the Create selection dialog either via a Feature tool dialog with the Create selection icon OR via the Create selection option in the Context Menu.
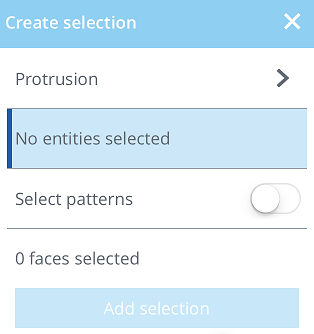
The Create selection dialog opens:
- Chose the Feature type you will be selecting:
- Protrusion - Selects all faces that are connected to the selected face by a convex edge.
- Pocket - Selects all faces that are connected to the selected face by a concave edge.
- Hole - Selects all faces that are connected to the selected face as part of the same round hole.
- Fillets - Selects all faces on a part which form a constant radius fillet.
- Tangent connected - Selects all faces that are connected to the selected face by a tangent edge.
- Bounded faces - Selects all faces between the selected face and the boundary defined by other edges and faces selected. To start, select a seed face that touches the desired region of faces. Then select all edges or faces which bound the desired region of faces.
The second selection defines the boundary. All adjacent faces and edges are captured in this selection set to form a closed boundary. If a close boundary cannot be formed, all adjacent faces and edges are selected.
- 在 Part Studio 中選擇圖元。
- Toggle Select patterns on or off.
- Tap Add selection to create the selection per the specifications you set in the dialog.
The example below demonstrates using Create selection within the Delete face feature.
- With the Delete face tool selected and the dialog open, select the Create selection icon:
The Create selection dialog opens:
- Select the type of feature you want to edit, in this case, a pocket:
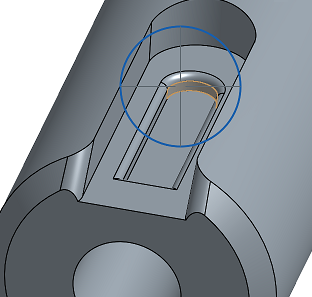
- Select a face of the pocket you want to edit:
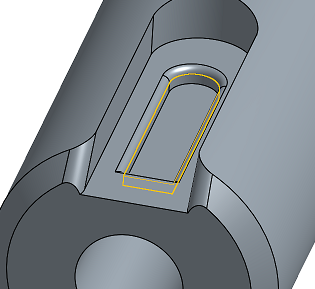
Because you specified that you were creating a selection from a pocket, the other faces that make up the pocket are automatically selected for you:
- Tap Add selection to add the selection of the faces of this pocket as one selection for the Delete face tool to use.
The Create selection dialog clears to allow you to create another selection.
- Tap the left facing chevron in the upper left of the dialog to return to the Delete face dialog.
Note that Delete face now has entities selected:
- Accept the Delete face dialog.
Your selected faces are deleted: