Syncing Release Management
![]()
Only available for
Connecting Onshape's Release management workflow to Arena’s Change management system provides a unified Release/Change management solution for parts, Assemblies, and drawings created in Onshape. This approach guarantees that the Arena item revision always links to the Onshape part, Assembly, and drawing revision and version, allowing management of the iterative development and traceability of conceptual, pre-release, and production release designs.
Release management adds new capabilities in addition to syncing parts, Assemblies, and BOMs. Using the Release Management capabilities does not impact any previous functionality. Continue to Revise a part, Sync a part or Assembly, or Sync a bill of material as it was done prior to the introduction of Release management capabilities. See Syncing Parts, Assemblies, and BOMs for more information.
Required information
| Required item | Source |
| Onshape user | User ID must match Arena user ID |
| Arena user | User ID must match Onshape user ID |
Users and permissions
The required users and their permissions in each product are:
-
Onshape - Enterprise user with Sync to Arena global permission
-
Arena - Arena user
Synchronization process
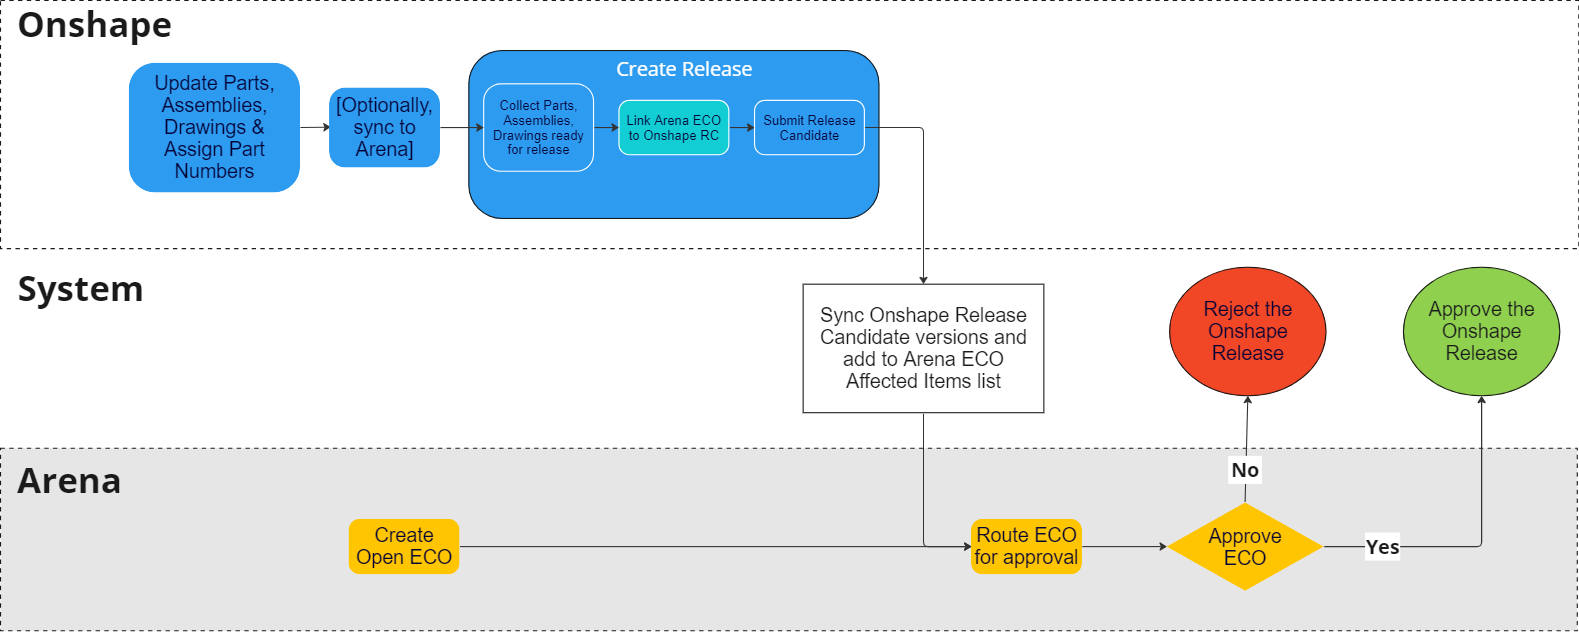
The Onshape Arena recommended workflow when releasing parts, Assemblies, and drawings.
-
In Arena:
-
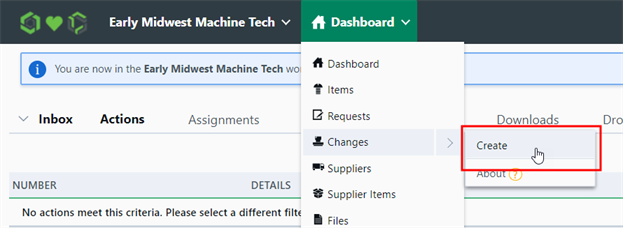
Go to Changes > Changes and click on Create:
-
Enter the Category, Title, Description, and other selections for the change.
-
Click the Create Change button at the bottom right of the screen to initiate the change:
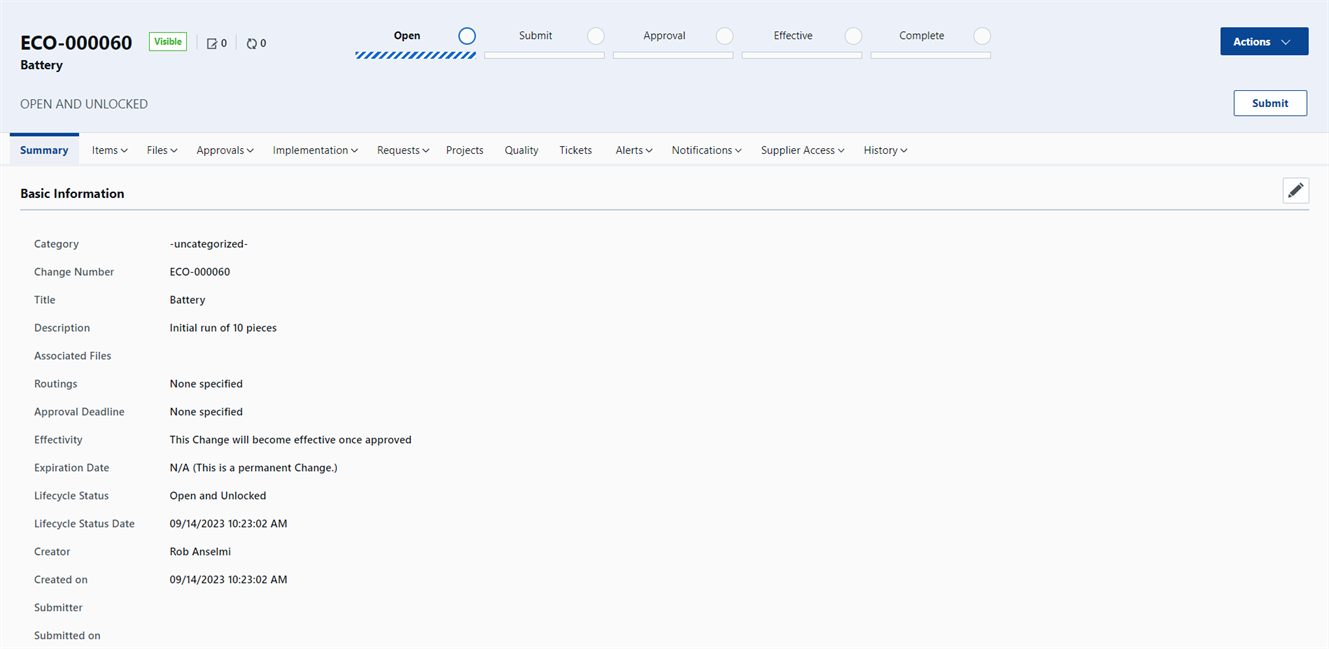
The change must be Open and unlocked to make it available for selection from a Release candidate in Onshape.
-
-
In Onshape:
-
To initiate a release, do one of the following:
-
For parts in a Part Studio, right-click on the part from the parts list and select Release.
-
For an Assembly, right-click on the top level Assembly in the Instances list or right-click on the Assembly tab and select Release.
-
For drawings, right-click on the Drawing tab and select Release.
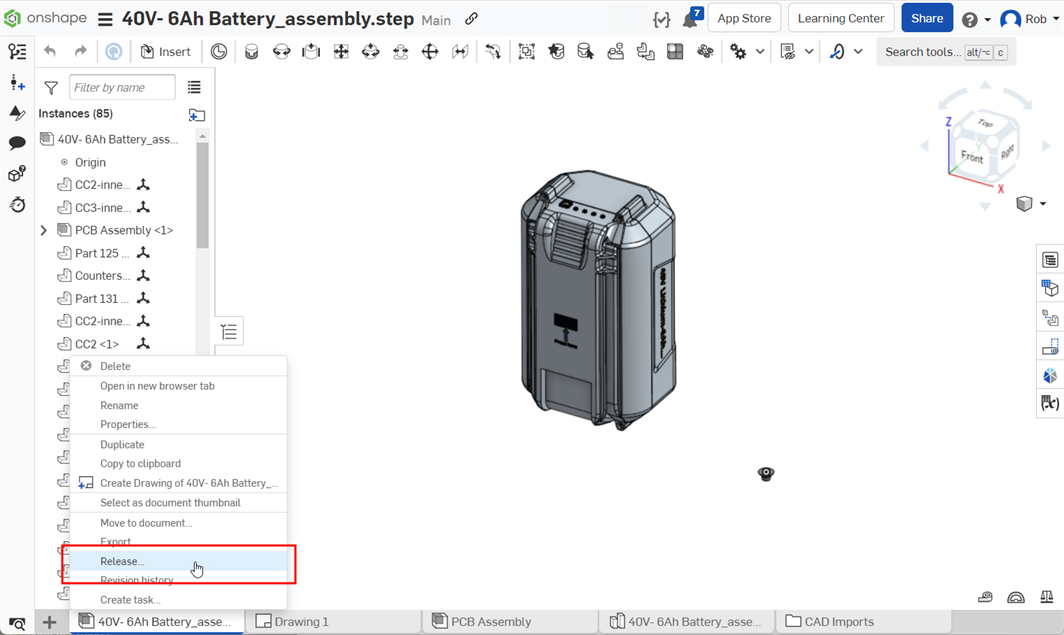
Right-clicking on an Assembly tab and selecting Release
-
-
If multiple release workflows are available, the Select release workflow dialog opens. Select the Onshape Arena release workflow from the dropdown, and click OK.
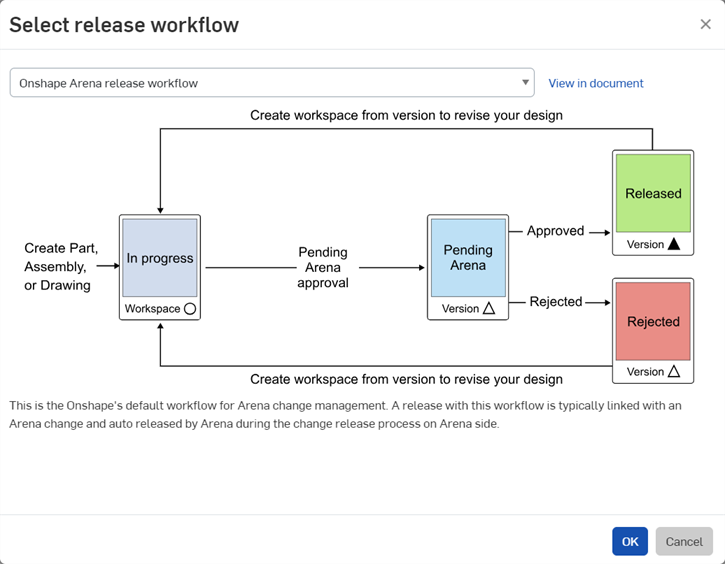
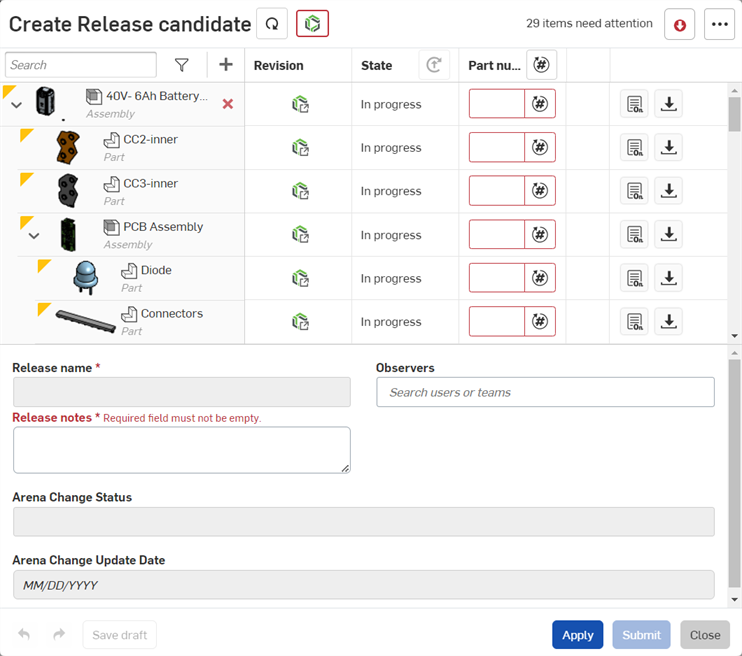
The Create Release candidate dialog opens:
-
Optionally, click the Add to release icon (
 ) to open the Add Items to Release dialog.
Add any additional parts, Assemblies, or Drawings. Then click Add.

-
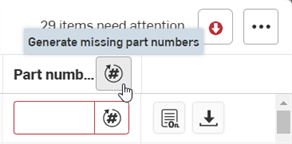
If necessary, click the Generate missing part numbers or Generate next part number buttons to assign any missing part numbers to items.
-
Click the Search for Arena change button:
-
Start typing to locate the open and unlocked Arena Change created in Step 1.

-
Select the Arena Change from the dropdown list:

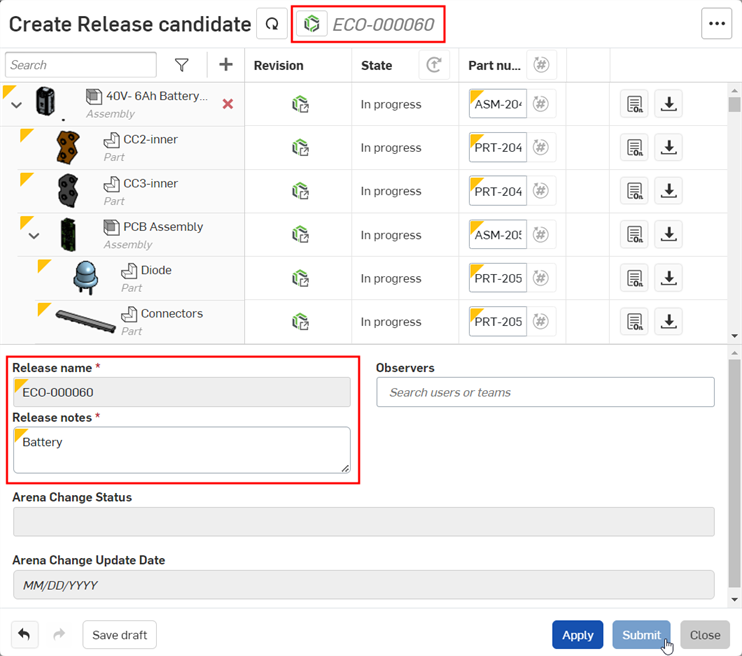
Once the Arena Change is associated with the Onshape Release candidate, the Release name field auto-populates with the Arena Change Number (and becomes read only), and the Release notes field is auto-populated with the Arena Change Title:
-
-
Click Submit. The Onshape release candidate is created and the parts, Assemblies, and Drawings are sent over to Arena to be added to the Arena Change.
-
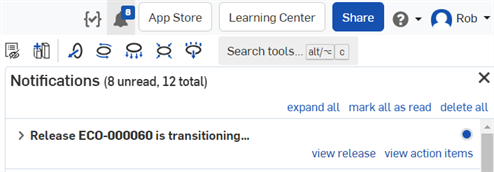
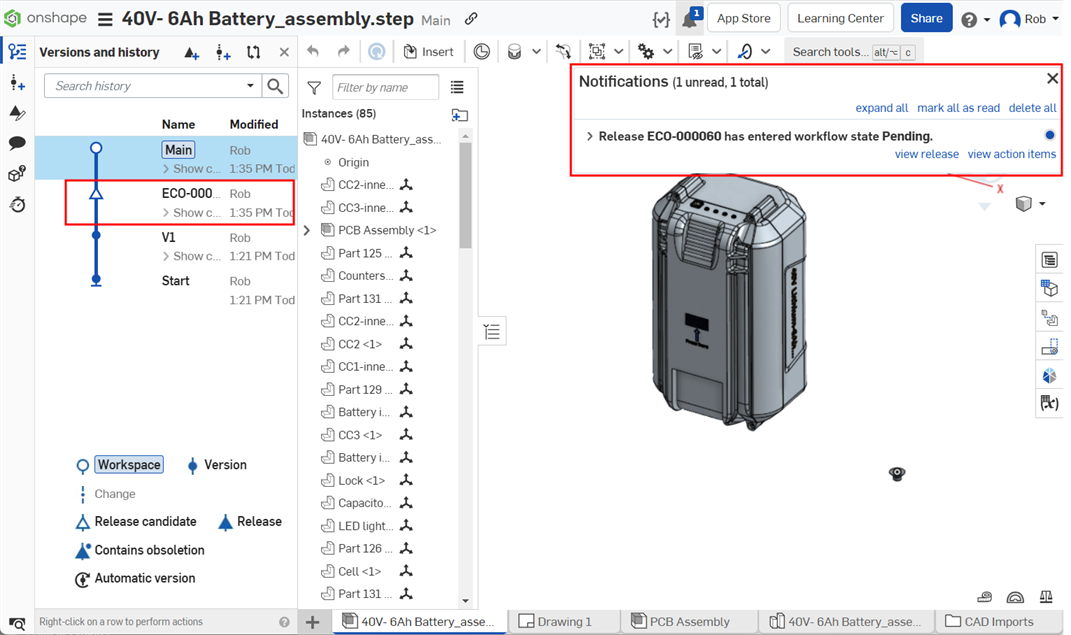
The following 2 notifications display:
-
Release transitioning. During this stage, the Release is sent to Arena:
-
Release enters the workflow Pending state. During this stage, Onshape awaits approval of the Arena Change:
-
The Arena Change needs at least one part or Assembly to be released. If none exist, a red message displays to indicate this is required.
Any items that require attention, such as missing part numbers, are indicated at the top right corner along with a button to filter them. See Filtering items requiring attention for more information:

Auto-population of these two fields is controlled by the Match release candidate name with Arena change and Sync release notes with Arena properties options. See Arena for more information.
Selecting the Arena Change number opens it in a separate browser tab.
-
-
In Arena:
-
Open the Arena Change and select the Items tab. The Onshape Release candidate objects are displayed as Arena Items.
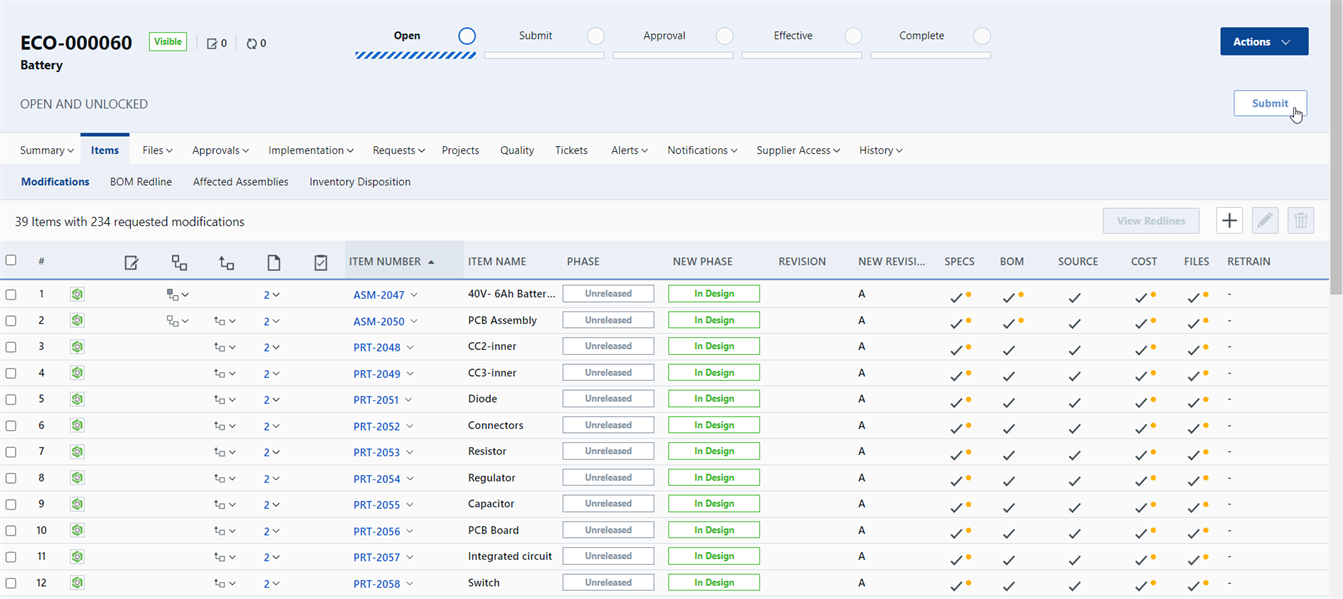
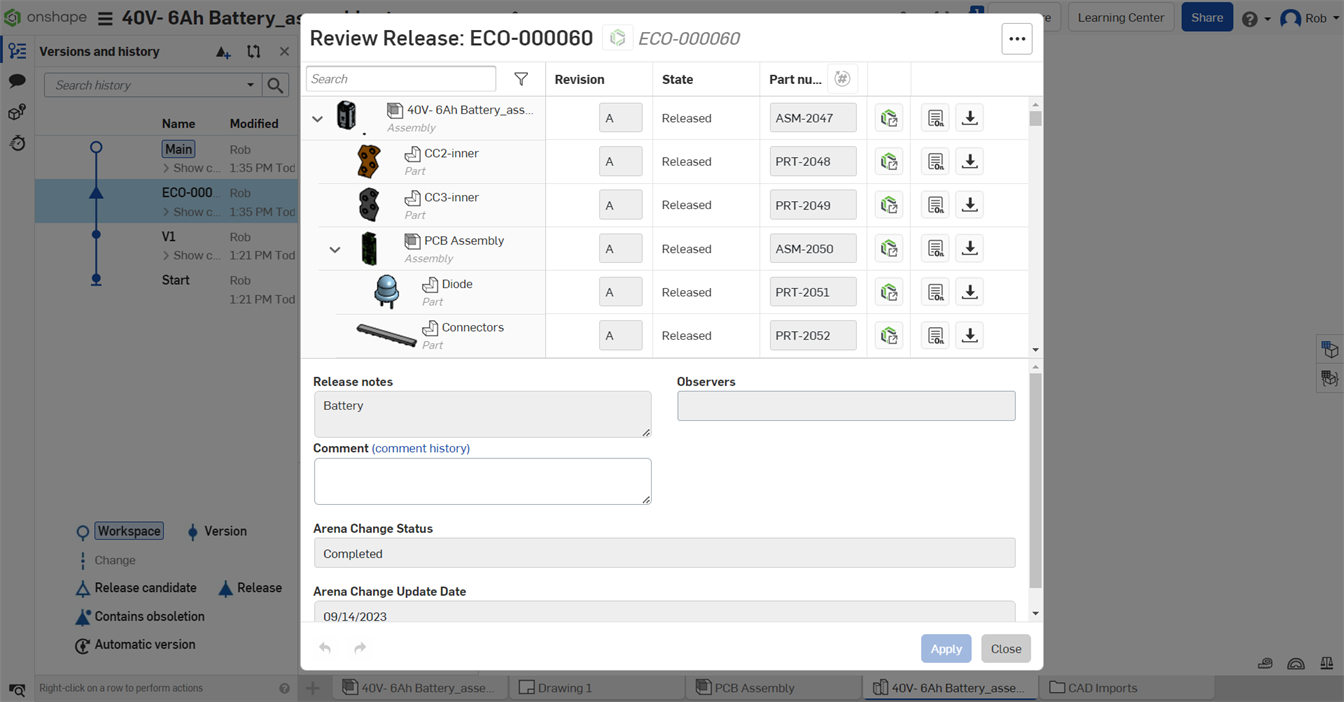
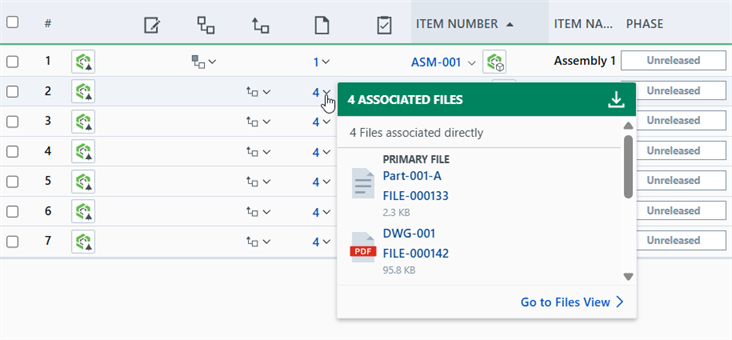
Items added by Onshape show the Onshape logo icon to the right of the row number. Click the icon to open the item in Onshape in a new browser tab. The Review Release dialog also opens in a modal window (shown in the second image below):

-
Any associated files are viewable from the Files column. These are:
-
DXF file of the flat pattern view (if a Sheet metal model is released)
-
PDF file (if a drawing is released)
-
PVZ file
-
STEP file (for made-to-spec parts)
-
GLTF thumbnails (for parts and Assemblies)
Click the GO TO FILES VIEW link to open the files in a table (shown in the second image below):

-
-
Arena’s approval process then drives the release of the Onshape parts, Assemblies, and Drawings. All required Arena sign-offs are needed to approve the Change in order to make the Change and the item revisions effective in Arena.
-
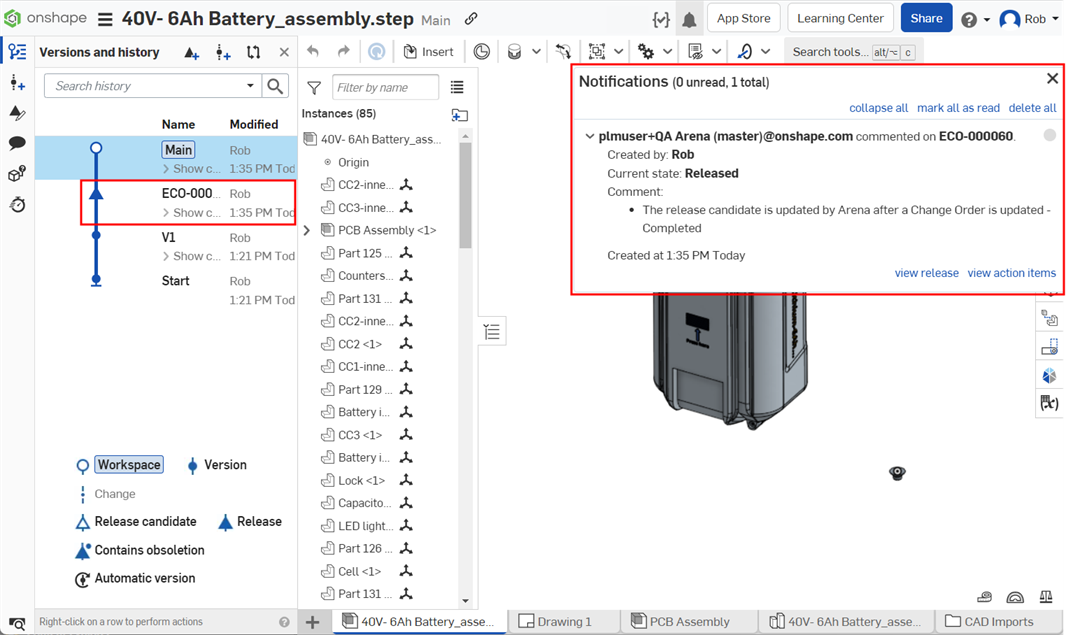
When the change is approved and marked Complete in Arena, this triggers a notification back to Onshape, where the Release candidate is updated to an Approved state. Any Drawings synchronized from Onshape to Arena automatically update with the Arena Change information and watermarks are removed.
You cannot remove an Onshape added item from the Arena Change.
The Arena review is based on the immutable version in the Onshape release. While the Arena review is in process, the workspace versions of the Onshape parts under review can still be modified in Onshape. The modified parts cannot be synced to Arena until the review is complete:

-
-
In Onshape:
-
The Release candidate moves from a Pending state to an Approved state:
-
For any items added to an Onshape Release candidate, sync new revision values from Onshape to an Arena Change.
Preconditions
-
Onshape is configured to control the next revision.
-
There is an existing open and unlocked Change in Arena with no Onshape added parts.
-
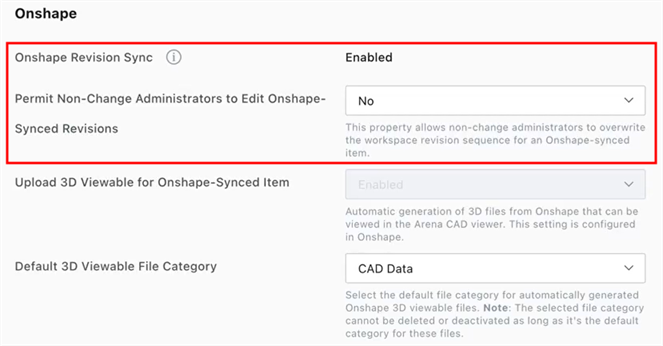
Arena is configured to allow only Change administrators to overwrite the revision set by Onshape:
Users and permissions
The required users and their permissions in each product are:
-
Onshape - Enterprise user
-
Arena - Arena Change administrator (or Non-Change administrator with permission to edit Onshape-synced revisions)
Process
In the sample process below, the parts have already been released in Arena, where the In-Design parts use a numeric rev scheme (for example, REV 03).
-
The Onshape user:
-
Creates a new Release candidate.
-
Searches and selects an Arena Change.
Properties from the selected Arena Change are populated in the Onshape Release candidate.
Alternatively, the selected Arena Change category is set to Do not allow manual revision entry, and an Arena Change cannot be used message is displayed.
-
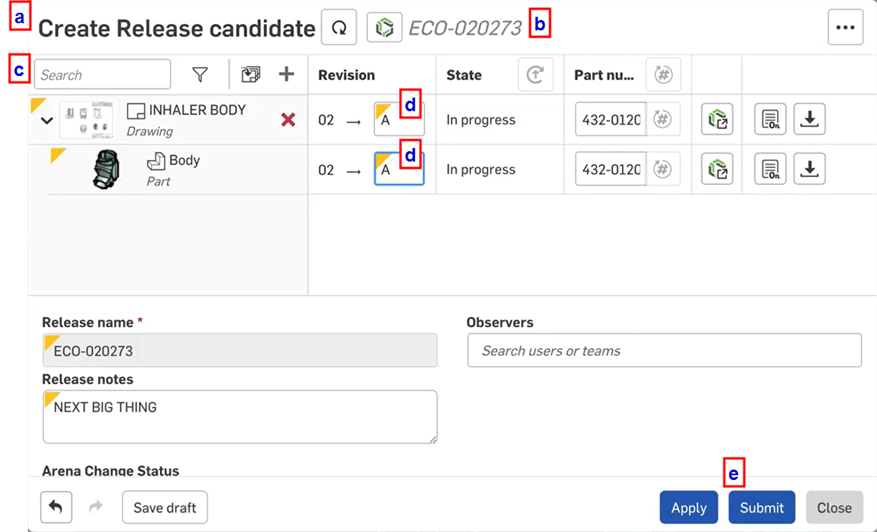
Adds relevant entities (parts, Assemblies, Drawings) included in the Release candidate.
-
Sets the new part revision and drawing revision to A (revision 02 to revision A).
-
Clicks Submit.
-
-
The Onshape Release candidate is transferred to a Pending state and is now synced to Arena.
-
Arena generates the drawing's PDF file and/or step file from the Onshape pending document version, using Onshape's file name export rules.
-
The Arena Change Administrator:
-
Opens the Arena Change and selects the Items tab.
-
Selects an item to edit. This is an item added by the Onshape Release candidate:

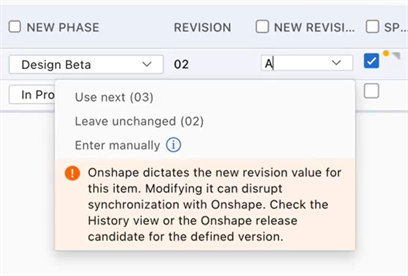
Arena displays an information message on the line item that the New Revision value is set by Onshape.
If a user who is not a Change administrator edits the Change item, the revision field is disabled, and a message is displayed when the user hovers over the item to explain that the user requires Change administrator privileges to edit an item synced to Onshape:

If the Revision is changed manually in Arena, a warning message is displayed indicating this can disrupt synchronization:
-
-
The Arena Change administrator:
-
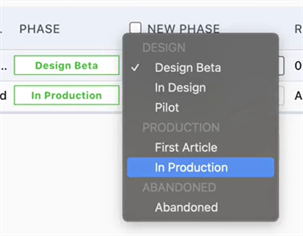
Changes the Phase to In Production:
-
Clicks Save:

-
Clicks Submit:
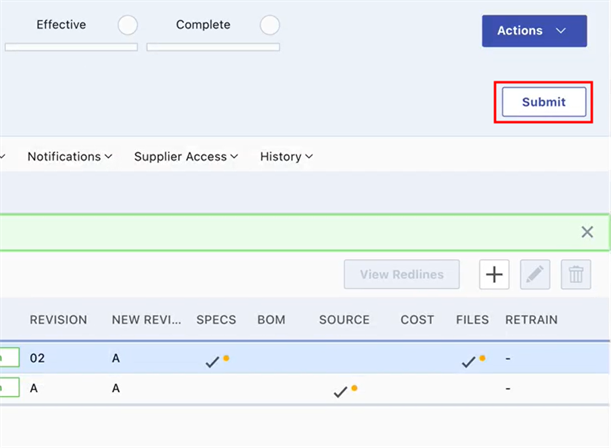
The Arena Change is submitted for release. Arena shows the Change and items as released. The following displays the change through the Open, Submit, Approval, and Effective stages:

-
Navigates to Onshape from Arena via the Onshape icon on the Change line item.
-
Checks that the entities (parts, Assemblies, Drawings) are released in Onshape.
-
There may be a situation in which an Onshape Release candidate becomes separated from the Arena Change. In these cases, the change moves forward while the Release candidate does not. Administrators can release (approve), reject, or discard the Release candidate by force if the following conditions are met:
-
The Onshape Arena release workflow is used
-
The Release candidate is in a Pending Arena approval state
Though a Release candidate can be discarded when the Arena Change is in a state other than Open and unlocked (Effective or Locked, for example), it is not recommended. Arena stores the Release candidate ID, so discarding and adding a new Release candidate creates a situation in which the Release candidate is out of sync with the Arena Change. Instead, first remove the Onshape items manually in the Arena Change, then discard the Release candidate in Onshape.
If the Arena Change is in the Open and unlocked state, the Onshape Release candidate and Arena Change are independent of each other, and overriding the Arena approval process by discarding the Release candidate in Onshape does not remove the Items in Arena.
Releasing and Rejecting a Release candidate does not send any notification to Arena. The Onshape Release candidate and Arena Change are independent of each other.
Forcing an Onshape Release
-
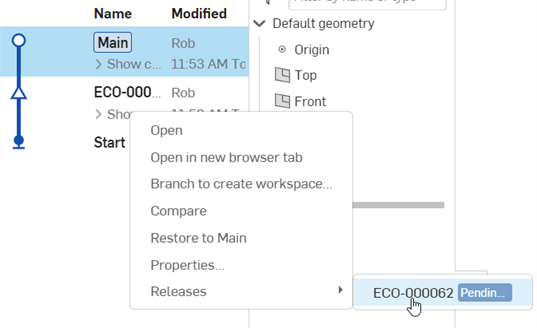
In the Versions and history panel, right-click on the version with the pending Release candidate, select Releases, and then click on the Release candidate to open the Release candidate dialog:
-
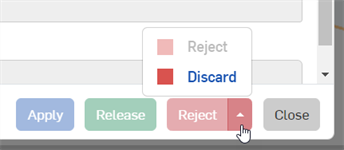
In the Release candidate dialog, click the Release, Discard, or Reject button, depending on the required action:
-
A message prompt opens.
-
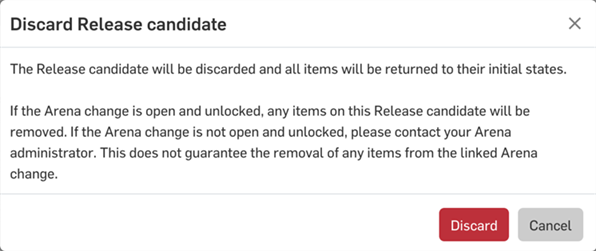
In the example below, the Release candidate Discard button was clicked, and the Discard Release candidate message prompt displayed. Click Discard to discard the Release candidate or Cancel to close the dialog without discarding:
-
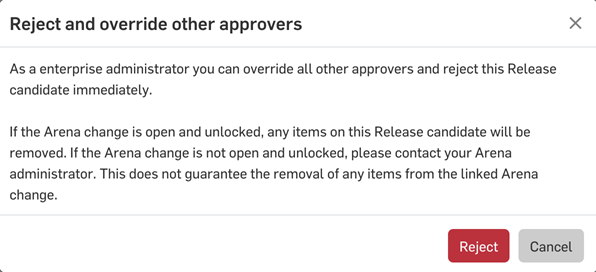
In the example below, the Release candidate Reject button was clicked, and the Reject and override other approvers message prompt displayed. Click Reject to discard the Release candidate or Cancel to close the dialog without rejecting:
-
Note the following:
-
Feedback is not provided to the user about the status of removal of items from the Arena Change.
-
Rejecting a Release candidate does not remove items from the Arena Change.
-
A change rejected in Arena does not automatically reject the Release candidate in Onshape. The Release remains in a Pending state in Onshape. If changes are required to the Onshape items, the Onshape Release candidate must be manually rejected, the items updated, and a new Release candidate created. This new Release candidate is then associated to the existing or new Arena Change. Before associating a new Release candidate to the existing Arena Change, manually remove the items from the Arena Change.