![]()
In addition to allowing the creation of custom templates from scratch, Onshape also provides a number of public drawing templates for you to use and customize. These templates are typical of what most users would need and may be sufficient used as-is by many users. To use a drawing from a different CAD package as a template in Onshape, see Using traditional CAD drawings as templates in Onshape.
You can think of a drawing template as being comprised of the format of a drawing that includes the title block, border, and zones, if desired, as well as the properties that describe the function of the drawing that are found under the drawing Properties panel. A drawing template is nothing more than formatting the desired appearance and defining the drawing properties and behavior, to be available for reuse for every detailed drawing.
For best practices when creating native Onshape drawing templates, see Best practices for creating native onshape drawing templates (Onshape account required) in the Learning Center.
If you need a custom drawing template, to enforce company drawing formats, follow this procedure:
- Create a new Document. This is the Document that is used to store all your Drawing template files.
- Click the Insert new tab icon (
 ) and select Create Drawing.
 - Select Onshape from the Filters list on the left.
- Select the Standard from the horizontal menu along the top:
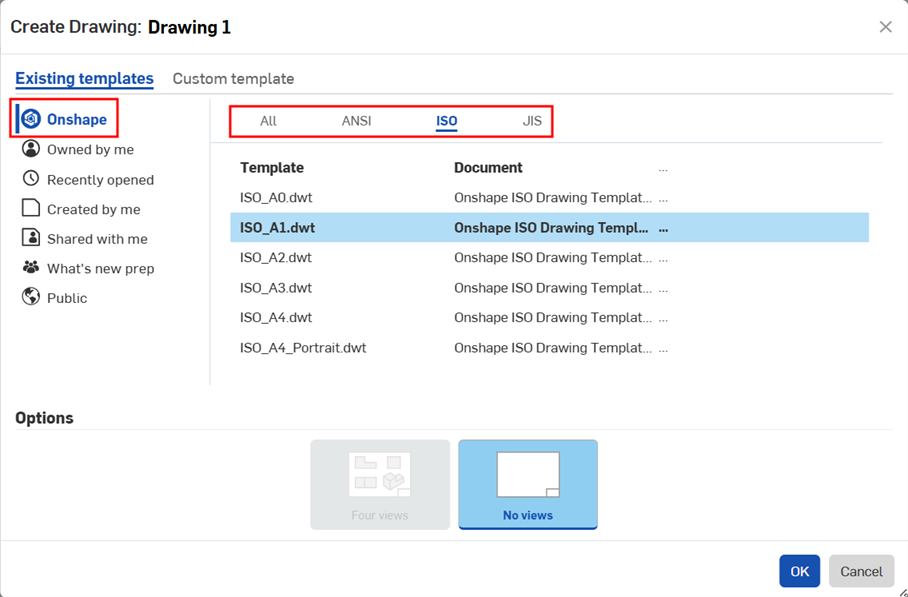
- Select the Template size from the list of available templates
- Click OK.
- Once in the Drawing, customize it to meet your requirements.
- Right-click on the Drawing tab and select Export:
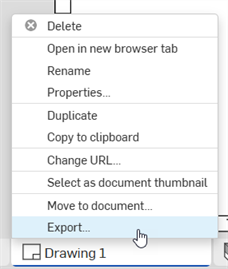
- In the Export Drawing dialog:
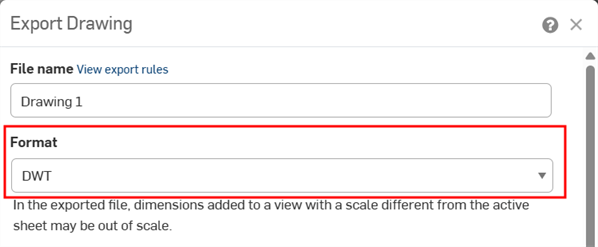
- Under Format, select DWT:
Under Options, select Store file in a new tab:
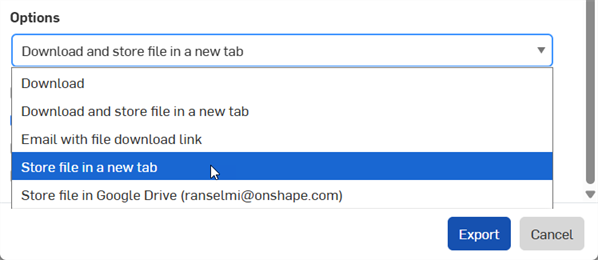
Click Export.
- Under Format, select DWT:
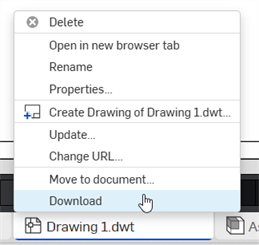
- (Optional) Right-click on the .dwt tab and select Download to save it to your local drive:
To use the template:
-
In a document, use the Insert new tab icon (
 ) and select Import.
- Select the drawing template.
- When creating a drawing, select the Created by me filter.
- Select the template you created.
- Click OK.
As soon as you begin creating a drawing of a part in Onshape, you have the choice to select an existing template, or to create a custom template:
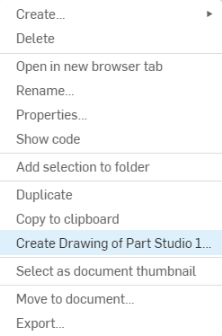
- Select Create a drawing from the part's context menu in a Part Studio to access the Create drawing dialog:
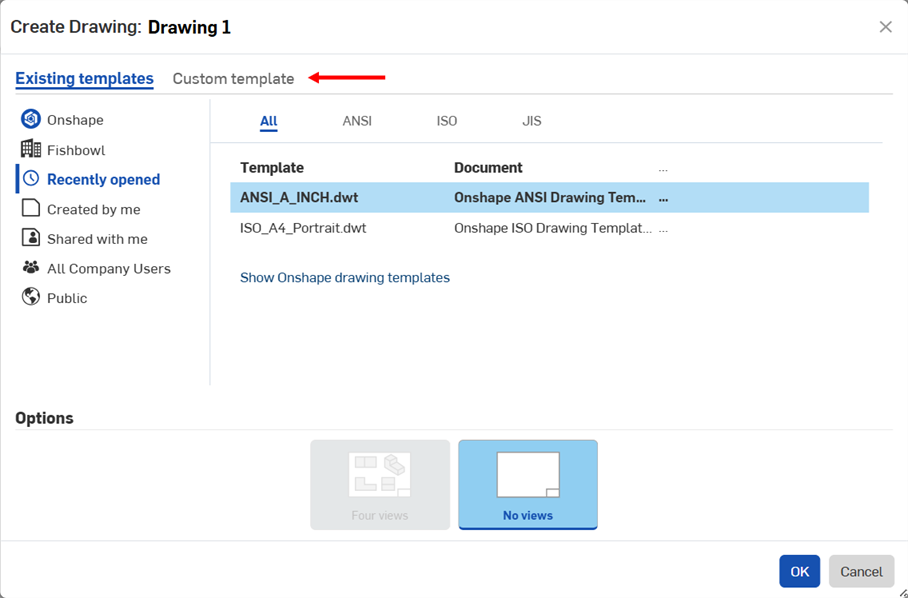
- At the top of the dialog, select Custom template (shown above, to the left of the red arrow) to access the
Custom template dialog:
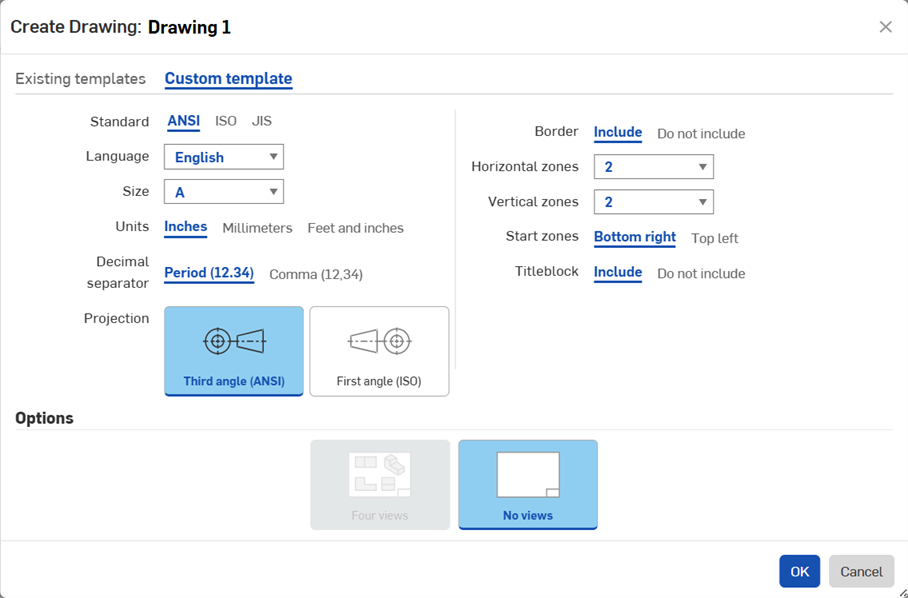
- Design your template:
- Standard - ANSI, ISO, or JIS
- Language - The language in which title box text should be displayed.
- Size - Choices are presented based on the Standard selected
- Units
- Inches, Millimeters, or Feet and inches (defaults are by standard, but you can choose whatever you want).
- Drawing units are managed separately from Workspace units for Part Studios and assemblies
- Feet and inches is only available in drawings; it is not available for workspace units.
- Decimal separator - Period or Comma (defaults are by standard, but you can choose whatever you want)
- Projection - Third angle or First angle (defaults are by standard, but you can choose whatever you want)
- Border - Include a border, or create the drawing without a border at all.
- Horizontal zones - Specify the number of horizontal zones in the border.
- Vertical zones - Specify the number of vertical zones in the border.
- Start zones - Specify in which corner of the drawing to begin labeling the zones.
- Titleblock - Include a title block, or do not include a titleblock (you can still create your own titleblock once in drawing mode)
- Select whether to automatically include 4 standard views or leave the drawing empty (no views)
- Click OK (or Cancel).
When you have a drawing edited the way you want it, you are able to use it to create a template for future drawings.
When exporting a drawing as a DWT file, keep in mind that:
- Only the first and, if present, second sheets are exported to the DWT file. No other sheets are exported.
- All views are deleted, and only non-view geometry and text remain.
- The format will be DWT; the version will be 2013, the primary template will be the first drawing sheet and if present, the second sheet becomes the continuation template.
Steps
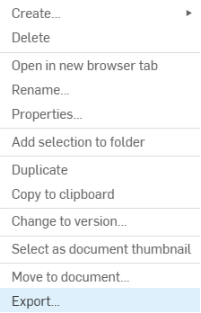
- Right-click the Drawing tab and select Export to open the Export drawing dialog:
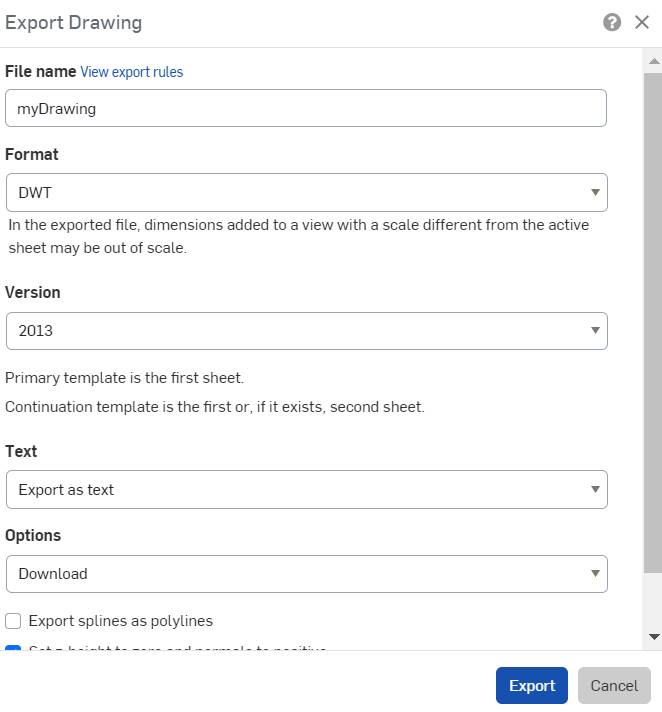
- To create a drawing template, select DWT as the format (as shown above).
- Click Export.
To use the template:
-
In a document, use the Insert new tab icon (
 ) and select Import.
- Select the drawing template.
- When creating a drawing, select the Created by me filter.
- Select the template you created.
- Click OK.
Create an Onshape drawing template as described in the instructions above. Then, in Onshape, create an empty drawing:
- At the template step, select Custom Template.
- Select Do not include the borders.
- Select Do not include the title block.
- Set size, standard, and other characteristics as needed.
- Click OK and close the open dialogs in the drawing.
-
Import your exported traditional CAD drawing (in DWG/DXF format) into Onshape (through the
 menu > Import).
- Open the empty drawing you created.
-
Use Insert DWG/DXF
 tool to insert the file just uploaded.
-
To tweak the fonts, select the text and change the font to an internally supported font of your choice.
- To add Revision Table or Block functions:
- Generate a drawing using the newly uploaded DWG/DXF.
- Place a table where needed (for example, the upper right corner).
- To include a company logo in the drawing template:
- Upload the logo through the Insert Image command.
- Insert the newly uploaded image, properly place and size it in the drawing.
- Insert drawing fields as necessary in the appropriate areas of your drawing:
- Add a note to the drawing.
- Select the Insert field button.
- To add Revision Table or Block functions:
-
Use the Move to command on the View’s context menu (right-click) to add elements to: Title block, Border frame, and Border zones. Nothing on the Drawing layer will be exported; only these three layers.
Elements will be added to the corresponding layer: title block, border frame, or border zones.
- Right-click the drawing tab and select Export.
- Select a Format of DWT.
- Select the Option of Store file in a new tab.
- Click Export.
- When selecting a template for a future drawing, this template will appear in the Created by me and Shared with me filters in the drawing creation dialog.
- Test the drawing template before using.
- During an export, elements are added to the corresponding layer: Title block, Border frame, or Border zones.
- The Drawing layer will not be included on DWT exports of the drawing.
- The Border frame, Border zone, and Title block layers will be locked when the format is set to Locked.
- The Border frame, Border zone, and Title block layers can have different default color and line thickness.
- The content in the Border frame, Border zone, and Title block layers will be located on specific layers (e.g., BORDER_FRAME, BORDER_ZONES, TITLE_BLOCK) when exported to DWG/DXF.
- Please notes that older versions of DWG/DXF formats may not fully support layers.
- The title block is not replaced on drawing sheet size changes. However, the border frames and border zones are redrawn at larger/smaller sizes or more or less zones.
- All content on the Drawing layer is never replaced in sheet size changes or sheet format replacements.