Render Studio Interface - Render Options
![]()
Only available for
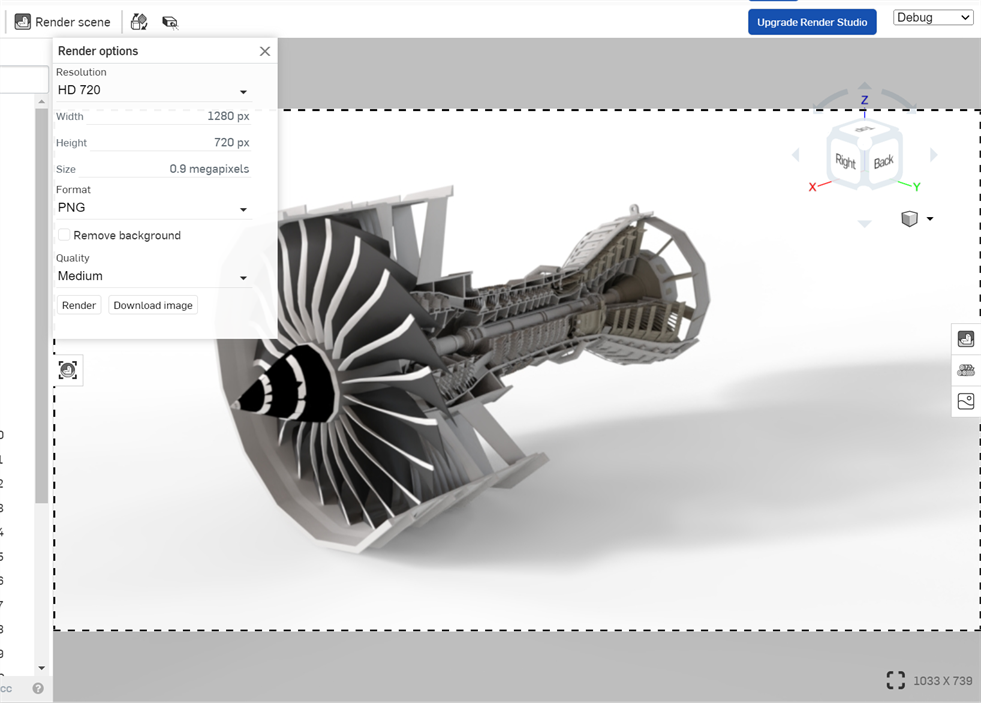
Render options determine how the scene is output to a JPEG or PNG image file. Once scene edits are completed, click the Render scene
button (![]() ) on the toolbar to open the Render options dialog:
) on the toolbar to open the Render options dialog:

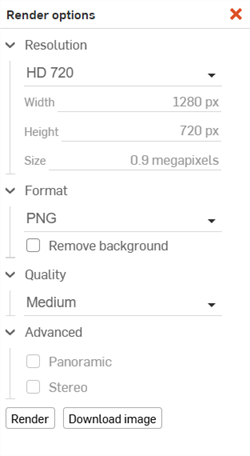
The Render options are outlined below:
-
Resolution - Determine the aspect ratio of the resultant rendering. Resolution options are:
-
Custom
-
Aspect Ratio - Select from the following aspect ratio options:
-
Custom - Enter both the Width and Height pixel values independent of each other.
-
From view - Create a render from the current scene's width and height (as viewed on-screen). Width and Height values are not editable with this selection.
-
4x3 / 16 x 9 - Enter either a Width or Height value below, and the opposing value (width or height) are automatically constrained to either the 4 x 3 or 16 x 9 ratio.
-
Square - Creates a square sized rendering. Entering a Width or height value automatically adjusts the corresponding side to be of equal length.
-
-
From view - Create a render from the current scene's width and height (as viewed on-screen). Width and Height values are not editable with this selection.
-
UHD (8k) - Available only for Advanced Render Studio. Ultra high (8k) definition output.
-
UHD (2160) - Available only for Advanced Render Studio. Ultra high (2160) definition output.
-
HD (1080) - High definition (1920 pixels wide by 1080 pixels high). Width and Height values are not editable with this selection.
-
HD 720 - High definition (1280 pixels wide by 720 pixels high). Width and Height values are not editable with this selection.
-
SD NTSC - Standard definition National Television System Committee encoding format, mainly used in North, Central, and parts of South America (640 pixels wide by 480 pixels high). Width and Height values are not editable with this selection.
-
SD PAL - Standard definition Phase Alternating Line encoding format, mainly used in parts of South America, Europe, Africa, Asia, and Australia (720 pixels wide by 576 pixels high). Width and Height values are not editable with this selection.
-
- Width - If Custom is selected for the Resolution, enter a Width value (in pixels) for the rendered output.
- Height - If Custom is selected for the Resolution, enter a Height value (in pixels) for the rendered output
- Size - Non-editable parameter displaying the resolution value (in megapixels) of the rendered output.
-
-
Format - Select the output format. Options are JPEG, PNG, HDR, and EXR.
-
Remove Background - Check to remove the background. This creates an image with an alpha channel in place of the background, ready for compositing in Photoshop or a similar photo editing application.
-
Disable tone mapping (HDR or EXR options only) - When checked, this renders with full dynamic range (no tone mapping).
-
Quality - Select the quality level of the output. Options are, from best to least quality: Production, Medium, and Preview. Custom selection allows the following adjustments:
-
Max time (s) - Maximum time it takes the Render to complete, in seconds. If none of the other conditions have been met by this time, rendering finishes.
-
Max samples - Maximum iteration count. This limits the number of progressive rendering steps to perform. If none of the other conditions have been met when the limit is reached, rendering finishes. Set the value to -1 to have no limit on the number of steps.
-
Maximum quality - Check to have the render terminate when a given quality level is reached for a high enough percentage of the image. If quality is reached before the Max time or Max samples, rendering finishes early.
-
Quality - The base rendering quality setting. The default 1.0, is a standard value. If quality is insufficient, increase this number. Higher values require improved quality and lower values allow for less quality. Rendering time is roughly linear with the selected quality. So a target quality of 2.0 typically takes twice as long to render.
-
Converged pixel ratio - The ratio of pixels which must have reached the quality specified before rendering finishes. For example, a value of 0.7 means that 70% of the pixels in the image must have reached the right quality before rendering finishes.
-
-
Advanced (Requires an upgrade to Render Studio Advanced) - Advanced Render options.
-
Panoramic (Requires an upgrade to Render Studio Advanced) - Creates a spherical panoramic image in an equirectangular projection. In this way, a sphere can be mapped onto a flat, 2D plane. See Creating a Panoramic output file (EXR/HDR) for an example of how this option is used.
-
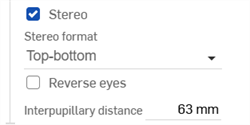
Stereo (Requires an upgrade to Render Studio Advanced) - Creates an image containing views for both the left and right eyes.

-
Stereo format - How the left and right eye images are laid out in the image. Options are Top-bottom or Side-by-side.
-
Reverse eyes - Reverses the location of the left and right eye images in the image.
-
Interpupillary distance - Distance between the left and right eyes (63 mm default).
-
-
-
Render - Press this button to render the scene. When finished, the rendering is located in a new tab to the right of the Render Studio tab.
-
Download image - Press this button to render the scene to a file in the Documents folder on the local computer.
Output is limited to 2.1 megapixels (1920 pixels wide x 1080 pixels high). Advanced limitation is 100 megapixels (10,000 pixels wide x 10,000 pixels high).
Opening the Render options dialog also surrounds the scene in the graphics area with a safe frame represented by a dash-lined box. This defines the area included in the rendered output. If a background image is defined and Scale option set to Fit, the preview fits the image inside the preview box.

Render option settings are remembered from the latest render. Settings are retained after the page is refreshed and after logging out and back in. However, these settings are tab-specific. Each Render Studio tab remembers its own settings.
See Render Studio Examples and Resources for more information.