 Linear Pattern
![]()
![]()
![]()
Replicate selected parts, faces, or features and arrange them in a row or grid pattern. Create new parts or modify existing parts by adding or removing material, or intersecting parts in its path. For information on creating circular patterns, see Circular Pattern. Linear pattern may also be used during an active sheet metal operation.
Onshape offers multiple pattern features, allowing you to create additional instances of parts, features, or faces within a part studio. The pattern types available are linear, circular, mirror, and curve pattern.
A linear pattern generates instances along a single direction or creates an array in two directions.
The circular pattern generates instances around an axis.
Mirror pattern reflects instances about a mirror plane.
A curve pattern generates instances along a curve or path.
Select a pattern type.
A part pattern creates additional instances of selected parts. When you choose a part pattern, Boolean options are available to create new, add, remove, or intersect.
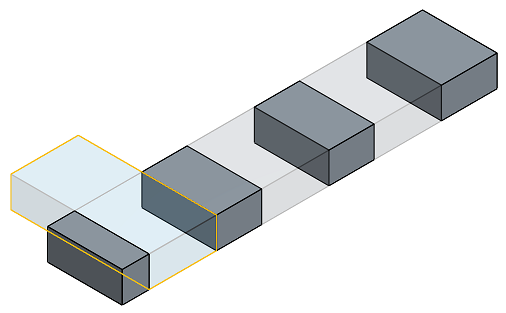
The new tab creates new parts for each instance of the pattern. Use this operation carefully as multiple identical parts within a part studio show as separate and unique parts within an assembly and bill of materials, and this is not a recommended practice.
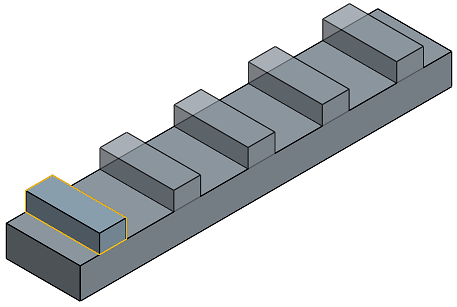
The add tab adds material to existing parts. For overlapping parts, an add operation can join multiple parts into one.
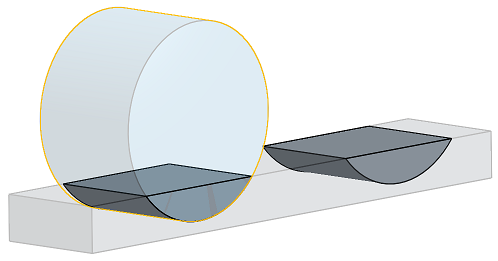
The remove tab removes material where the pattern instance intersects parts.
The intersect tab leaves material where the pattern instance intersects parts.
The Boolean options allow parts to be used as tooling bodies to add or remove material or preserve the intersection of the pattern instances and the existing geometry.
A feature pattern replicates one or more features selected from the features list.
By default, feature patterns do not account for the seed features end type. In cases where the end type varies, select reapply features to regenerate parts from the selected features, including feature dependencies and end conditions. Use this option only when necessary, as it can affect performance and regeneration times.
Face patterns replicate selected faces. They result in the best performance as the computational load is much lower for faces than for parametrically bound features or parts. Therefore, they are preferred over feature or part patterns when the resulting geometry is identical.
In cases where faces are tangentially connected or form a recognizable geometric feature, such as a pocket or protrusion, use create selection to select the subset of faces to be patterned more easily.
Set the type of face selection, select the face or faces and click add selection.
All patterns except mirror contain an option to skip instances. Skipping instances is helpful when encountering conflicting geometry or when you wish to exclude particular instances. Onshape displays a selection point outlined in gray for each instance. You can skip an instance by selecting its respective selection point or using a box selection to select multiple instances simultaneously. Onshape highlights the selection points of skipped instances in light blue.
The merge scope determines which parts are affected by the pattern feature. For example, indicate which parts should be cut by a patterned pocket by including them within the merge scope. Parts not included within the merge scope are unaffected by the pattern feature.
Select merge with all to include all parts in the merge scope.
The Linear pattern feature replicates parts, features, or faces in a Part Studio along a linear path.
Start a new Linear pattern feature from the feature toolbar.
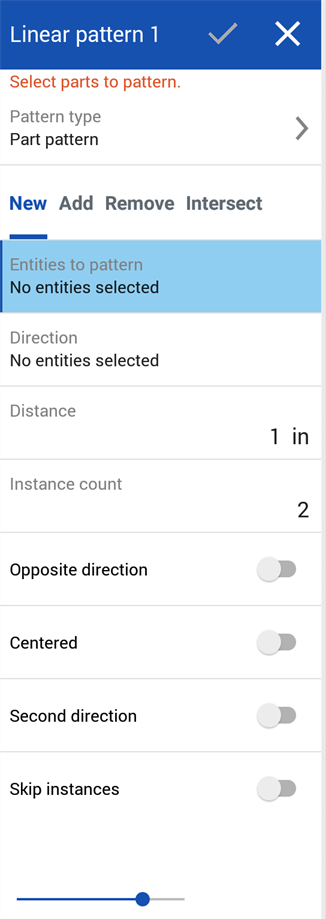
Select the appropriate options for the Pattern type and seed instance. This example patterns three features: the tabs, slot cutouts, and associated fillets. With focus on the Direction to pattern field, select a plane or planar face, linear edge, linear sketch entity, or linear curve. Enter a Distance between instances and set the Instance count. The Instance count includes the original seed instance. Toggle the opposite direction arrow to reverse the pattern direction.
In cases where the seed instance lies at the center of the pattern, check Centered to pattern instances symmetrically along the pattern direction from the seed instance.
Check Second direction to create an array of patterned instances. The Second direction contains its own fields to define Direction, Distance, and Instance count.
- Click
 .
.
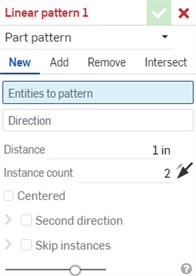
- Select a Result operation type:
- New - Create new material that results in a new part.
- Add - Create new material and add to the existing material.
- Remove - Take material away from existing material.
- Intersect - Leave material only where geometry overlaps.
- Select the pattern type:
- Part - To pattern an individual part
- Feature - To pattern a specific feature (or features) listed in the Feature list (an extrude, fillet, sweep, sketch, etc).
- Face - To pattern a specific face on a specific part
- With focus on the Entities to pattern field, select entities to replicate into a pattern.
When selecting Faces to pattern, the Create Selection
 can be useful to select related faces.
- Set focus in the Direction field, and then select an edge or face of the part or a Mate connector (implicit or explicit) along which to place the replicated pattern entities.
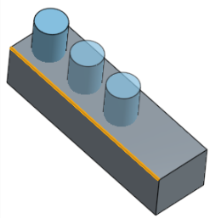
- Enter the distance between each pattern entity, and then the number of repetitions, or Instance count (the minimum number of instances you are able to use is 1). Select a direction for the pattern in the workspace (shown below as the highlighted edge).
- Use Centered to make the seed instance/face/feature as the center of the pattern.
In this case, the instance count is N instances from the seed (inclusive of the seed) in one direction and N instances from the seed (inclusive of the seed) in the other direction. With N being the number you enter in the Instance count field in the dialog:

- Select second direction to extend the pattern in a second direction; select the second direction.
- Check the Skip instances option to specify instances of the pattern to skip:
- Click the instance's selection handle to add it to the list of instances to skip. The Skip instances list displays two numbers to indicate the instance: the first is the position from 0 in the first direction, and the second value is the position from 0 in the second direction.
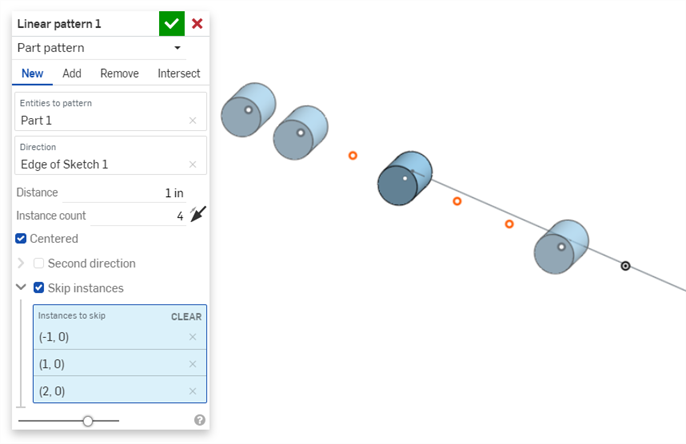
- Click the X next to the instance in the list to add it back to the Part Studio.
- Click CLEAR to remove all instances from the Instances to skip list.
- Click the instance's selection handle to add it to the list of instances to skip. The Skip instances list displays two numbers to indicate the instance: the first is the position from 0 in the first direction, and the second value is the position from 0 in the second direction.
- (Feature pattern type only) Select Reapply features to regenerate the feature for each instance (specified in Instance count), in lieu of simply recreating the initial pattern instance.
-
Click
 .
.
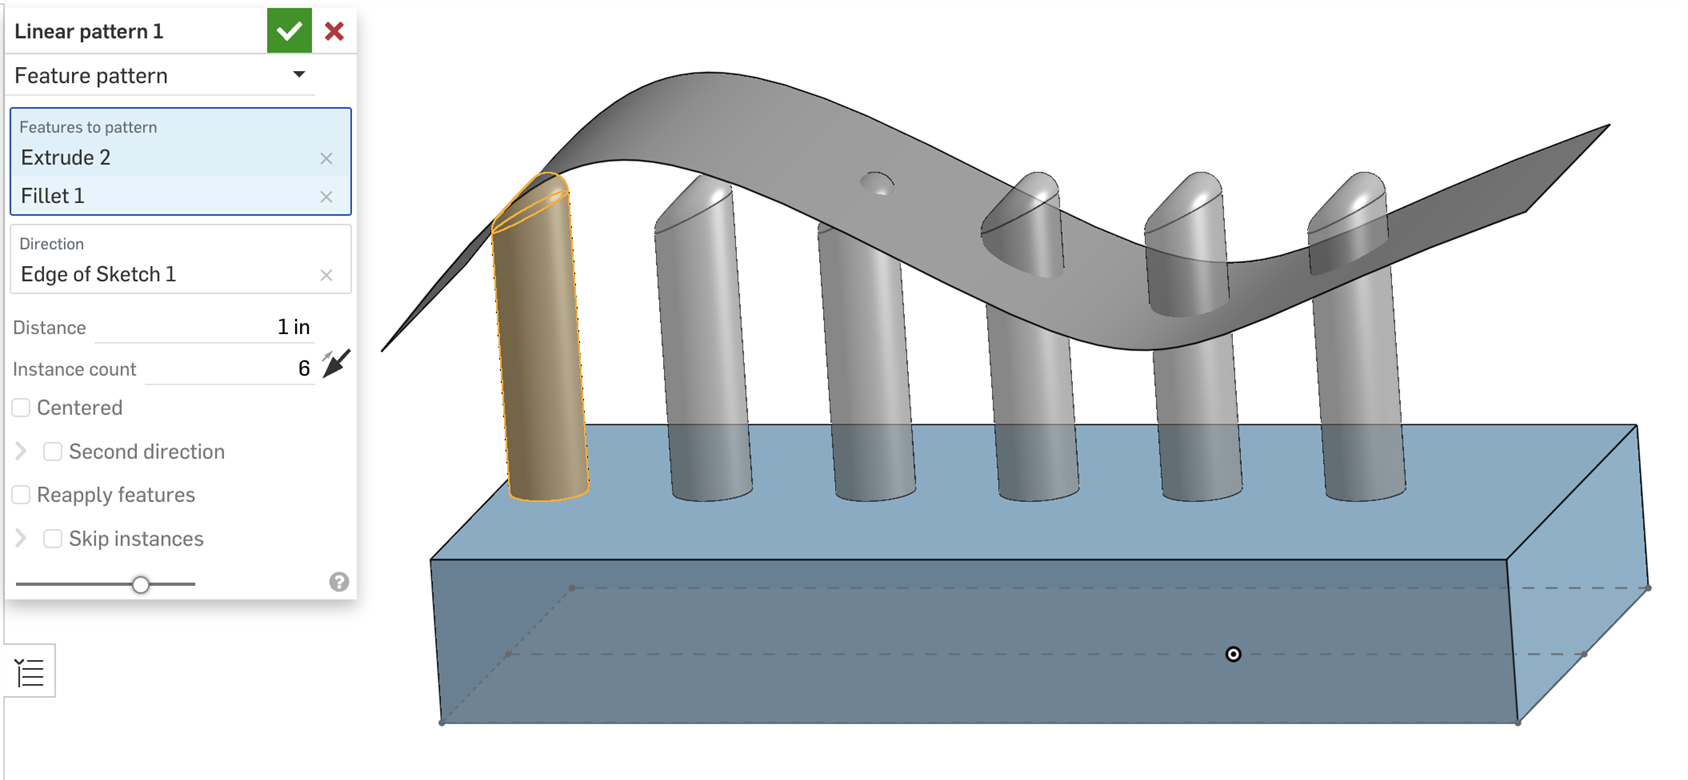
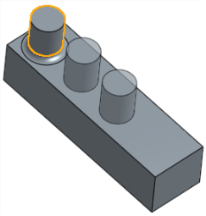
Pattern a specific feature (or features) listed in the Feature list (an extrude, fillet, sweep, sketch, etc) without Reapply features selected (a faster, more lightweight feature pattern). This is not available for sheet metal.
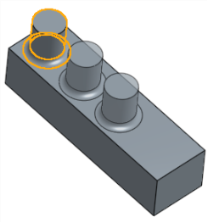
In the following example, the initial extrude was Up to next (bringing the extrude up to the face of the surface). Without Reapply features selected, the features patterned (extrude and fillet) are patterned from the initial features and not regenerated (so the Up to next does not update for each instance of the pattern):
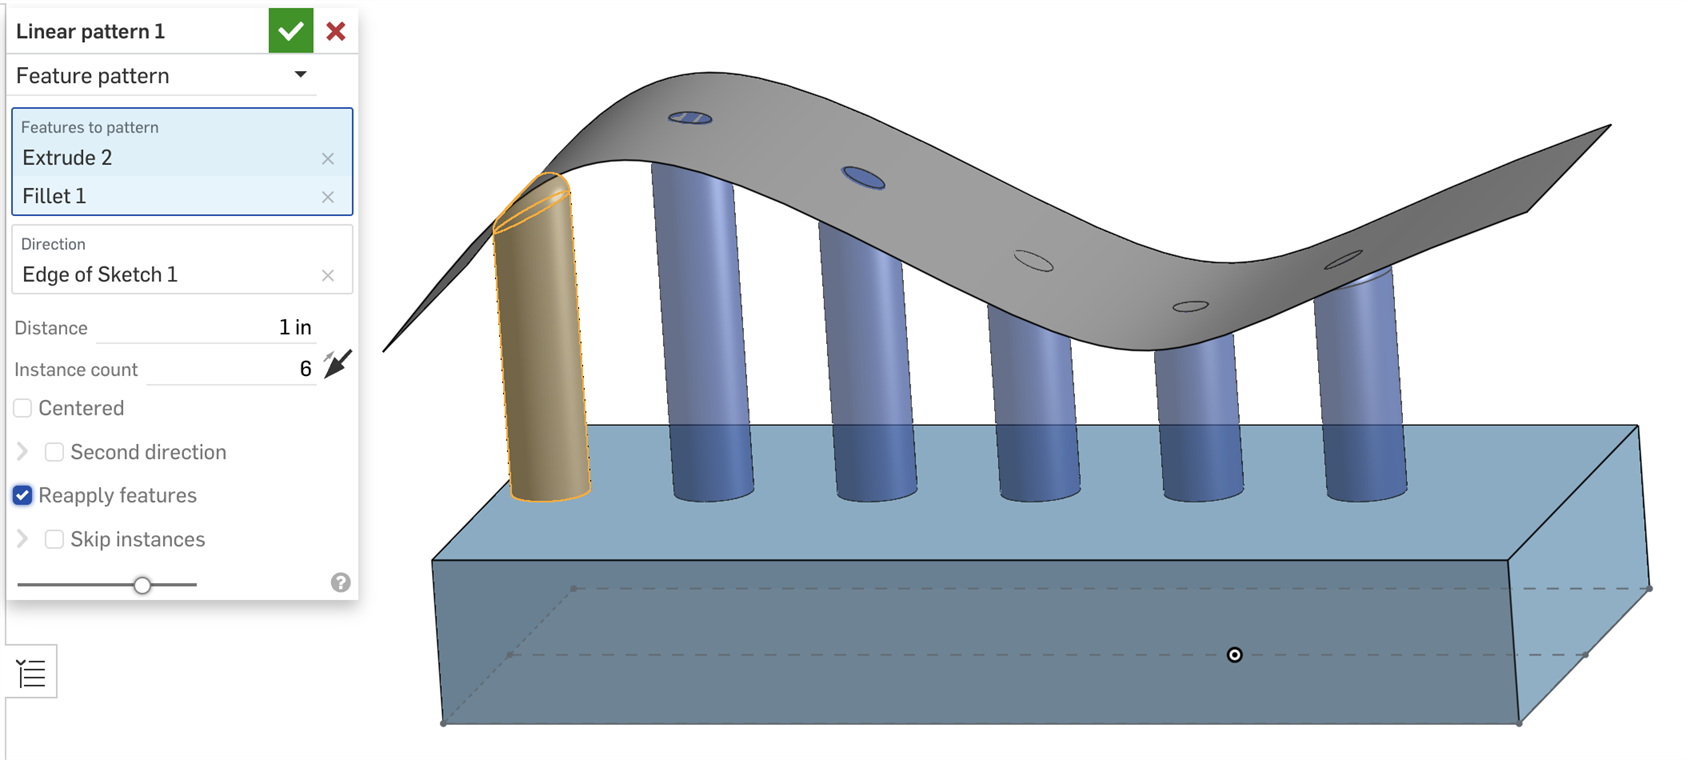
Pattern a specific feature (or features) listed in the Feature list (an extrude, fillet, sweep, sketch, etc) with Reapply features selected. This is available for sheet metal.
In the following example, the initial extrude was Up to next (bringing the extrude up to the face of the surface). With Reapply features selected, the features patterned (extrude and fillet) are regenerated for each instance of the pattern so Up to next is applied to each instance of the pattern.
Pattern a specific face on a specific part:
New - Create new material that results in a new part or sheet metal:
Add - Create material and add to the existing material:
Take material away; select the part to pattern, and then Remove:
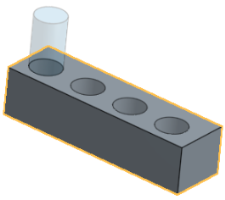
Leave material only where geometry overlaps; select the part to pattern, and then Intersect:
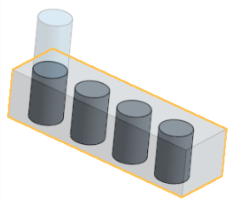
-
When selecting a face, edge, or Mate connector (implicit or explicit) to set the Direction, use the Directional arrows
 to flip the result if necessary.
- When you select a face, edge , or Mate connector (implicit or explicit) for the Direction, you are using the direction that is 'normal to' the face, edge, or Mate connector.
- When patterning a feature, you are able to select anything in the feature list, in any order. Regardless of the order selected, the features are applied in the order listed in the Feature list.
- If you select a pattern in the Feature list, you will pattern that pattern, but not the seed. In order to get the seed included, select it as well.
- When patterning a boolean feature (Boolean, Split, etc), you must also select the features the boolean was applied to.
- When creating Feature patterns, all aspects of a feature are applied; for example, the end conditions in an extrude feature. (By contrast, Face patterns do not recognize these types of modifiers.)
-
If the Reapply features option is enabled when using the feature pattern, external references of the seed features will regenerate automatically on a per-instance basis.
If a sketch is selected, the seed sketch dimensions and constraints to the origin or default plane (Top, Front, or Right) are not reapplied. You can use this behavior to scope which dimensions or constraints are reapplied within a pattern:
- In a sketch, you can dimension and constrain entities to the origin or default planes to prevent these dimensions and constraints from being reapplied on each pattern instance.
- If you need to reapply dimensions and constraints to the origin or default plane, first create auxiliary sketches with lines and points constrained to the origin or default planes. Then, on the seed sketch, use these sketch entities as a proxy for the origin or default plane dimensions and constraints.
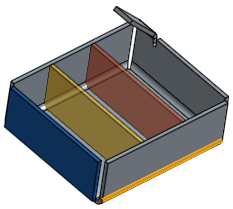
- If Mate connectors are Part patterned in a Part Studio, they will all be added to the Assembly when the Part Studio is inserted. If you don't see your Mate connectors when the Part Studio is inserted into the Assembly, make sure the Part is listed as the Mate connector owner entity.
- Tap the Linear pattern tool icon (
 ).
).
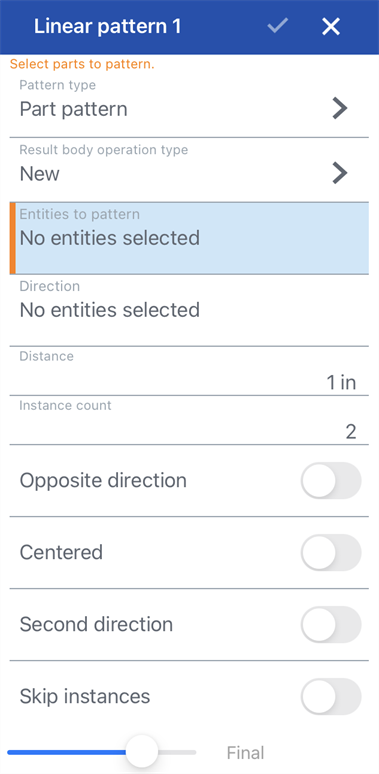
- Select the Pattern type:
- Part - To pattern an individual part
- Feature - To pattern a specific feature (or features) listed in the Feature list (an extrude, fillet, sweep, sketch, etc.)
- Face - To pattern a specific face on a specific part
- Select a Result body operation type:
- New - Create new material that results in a new part.
- Add - Create new material and add to the existing material.
- Remove - Take material away from a part.
- Intersect - Leave material only where intersections exist.
- Select entities (parts, features, or faces) to pattern.
- Specify direction of the pattern using the number pad or drag manipulator.
- Specify the instance count.
- Optionally, toggle to switch to the opposite direction.
- Optionally, toggle Centered to make the seed instance/face/feature as the center of the pattern.
- Optionally, toggle to add a second direction. If so, be sure to complete the steps for the second direction.
- Optionally, toggle Skip instances and select the instances to skip. Double-tap an instance to add it back to the Part Studio.
- Tap the checkmark.
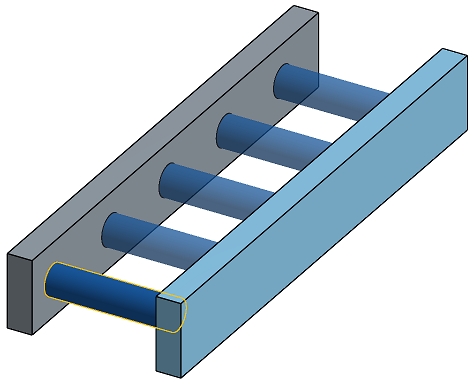
Pattern an individual part.
One cylindrical part is patterned 5 times using Linear part pattern to create new material.
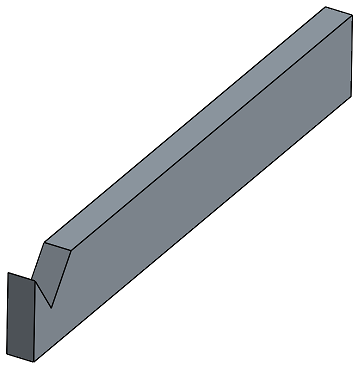
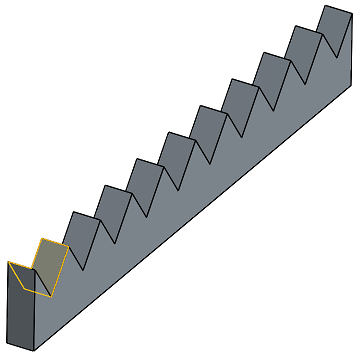
Pattern a specific feature (or features) listed in the Feature list (an extrude, fillet, sweep, sketch, etc.)
An extrude remove feature is patterned 10 times using Linear feature pattern to remove material from the existing part.
Pattern a specific face on a specific part.
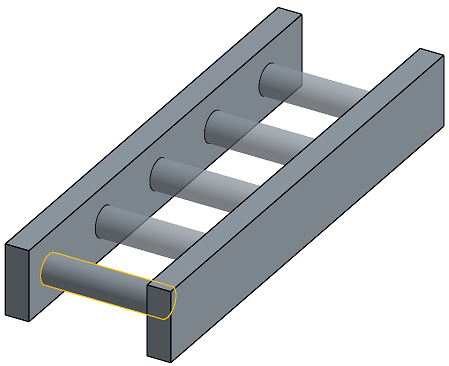
The cylindrical face of the part is patterned 5 times using Linear face pattern to add material to the existing part.
New - Create new material that results in a new part.
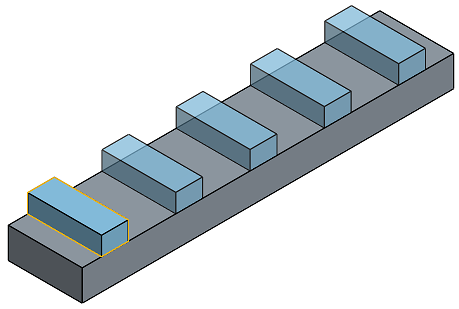
Add - Create material and add to the existing material.
Take material away.
Leave material only where intersections exist.
- Tap Linear pattern tool.

- Select the Pattern type:
- Part - To pattern an individual part
- Feature - To pattern a specific feature (or features) listed in the Feature list (an extrude, fillet, sweep, sketch, etc.)
- Face - To pattern a specific face on a specific part
- Select a Result body operation type:
- New - Create new material that results in a new part.
- Add - Create new material and add to the existing material.
- Remove - Take material away from a part.
- Intersect - Leave material only where intersections exist.
- Select entities (parts, features, or faces) to pattern.
- Specify direction of the pattern using the number pad or drag manipulator.
- Specify the instance count.
- Optionally, toggle to switch to the opposite direction.
- Optionally, toggle Centered to make the seed instance/face/feature as the center of the pattern.
- Optionally, toggle to add a second direction. If so, be sure to complete the steps for the second direction.
- Optionally, toggle Skip instances and select the instances to skip. Double-tap an instance to add it back to the Part Studio.
- Tap the checkmark.
Pattern an individual part.
One cylindrical part is patterned 5 times using Linear part pattern to create new material.

Pattern a specific feature (or features) listed in the Feature list (an extrude, fillet, sweep, sketch, etc.)
An extrude remove feature is patterned 10 times using Linear feature pattern to remove material from the existing part.


Pattern a specific face on a specific part.
The cylindrical face of the part is patterned 5 times using Linear face pattern to add material to the existing part.

New - Create new material that results in a new part.

Add - Create material and add to the existing material.

Take material away.

Leave material only where intersections exist.
