 Hole Table
![]()
![]()
View holes existing in the Part Studio, created through the use of the Hole tool in the Feature toolbar.
This article covers the Part Studio Hole table. Refer to the Drawing hole table article for information on using a hole table in a Drawing.
Hole table: Desktop
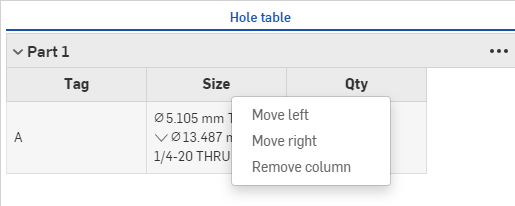
When you create a Hole feature in a Part Studio, a Hole table icon appears on the right side of the graphics area. Click the Hole table icon to open the panel. The table contains a list of all holes in the Part Studio. The table is automatically updated as new holes are created. Hover over a row of the table to highlight the holes on the model in the graphics area. Click the table rows to select the holes in the Graphics area. Click again to de-select. Click the ellipsis icon and select Copy table to copy the table to your computer clipboard, which you can then paste into a spreadsheet. Right-click on a column to access the context menu, where you can move columns right or left, or remove and restore columns, as needed. Click the Hole table icon again to close the panel.
When you have created a Hole feature, a Hole table icon appears on the right side of the graphics area, where the Appearance panel and Configuration panel are located:
![]()
Click the Hole table icon to open the panel:
![]()
Since the Hole table icon appears only after a Hole has been created, the table contains a list of all holes in the Part Studio. The table is updated automatically when Hole features are created.
What you can do with the Hole table
Hover over a row of the table to highlight the holes in the graphics area, on the model.
Click the
![]() icon and select Copy table to copy the table to your computer clipboard, which you can then paste into a spreadsheet, if desired.
icon and select Copy table to copy the table to your computer clipboard, which you can then paste into a spreadsheet, if desired.
Right-click on a column to access the context menu:

Once a column is hidden, you can use the overflow menu ( ![]() ) to Show [Column name].
) to Show [Column name].