 Detail View
![]()
![]()
![]()
Available in: Drawing
Use Detail view to select an area of an existing view to enlarge for more detail.
-
Click
 to open the Detail view dialog:
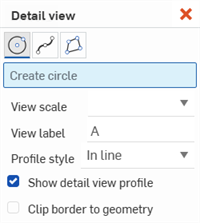
- Select a circle, rectangle, spline, or polygon tool to create your closed region.
- Select a scale for the view in the View scale field.
- Adjust the label in the View label field, if desired.
-
Select an option from the Profile style field:
- In line - Label appears in the source view.
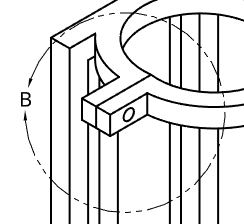
- Connected - Detail view is connected to the source with a dashed line. (Note that the label does not appear when this option is selected.)
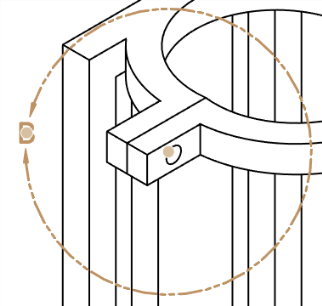
- Leader - Label is connected to the source with a line and arrow.
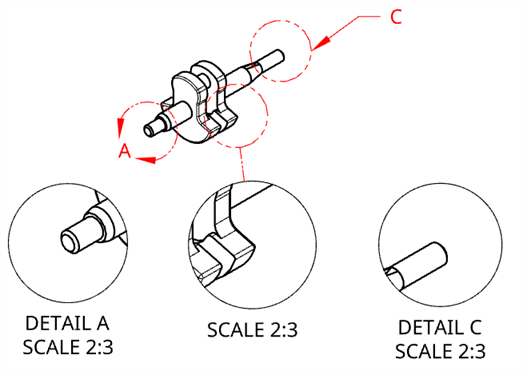
Left: Label A appears in line. Middle: Label B is hidden and the Detail view is connected to the source with a dashed line. Right: Label C is connected to the source with a line and arrow.
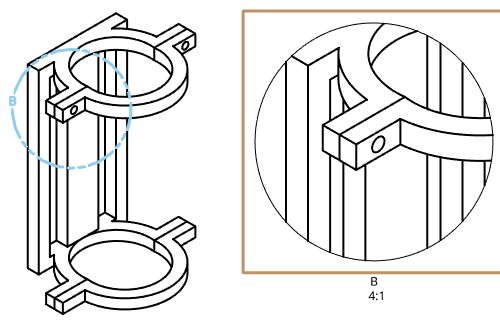
- By default, the detail view is outlined with a circle, rectangle, spline, or polygon to match the outline on the source view. To remove the outline from the Detail view, deselect the Show detail view profile checkbox.
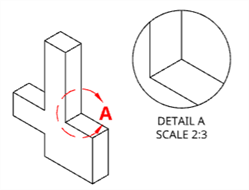
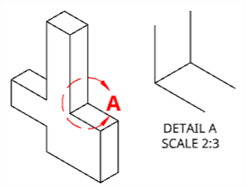
Left: When the Show detail view profile option is selected, the Detail view and source view are both outlined with a circle. Right: When the Show detail view profile option is not selected, the Detail view is not outlined.
- If you would like to display the detail view geometry without the additional view border check the Clip border to geometry option.
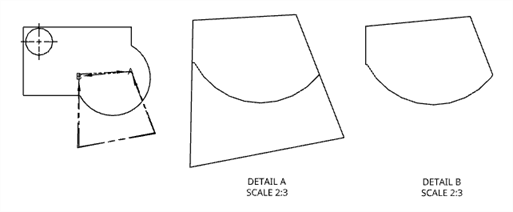
Original Front view (left), Detail A with Clip border to geometry disabled (middle); Detail B with Clip border to geometry enabled (right).
-
Now select area you wish to enlarge.
-
To create your closed region with the circle tool, click in the approximate center of the area you wish to enlarge (on an existing view), then drag and click again to define the circumference of the area:
-
To use the spline or polygon tools, click to place the first point, move your mouse and click again, and repeat until you've created your desired closed region.
-
To select an existing closed region, first press the Esc key, then click the region.
-
-
Drag and click again to place the detail view:
You can edit the scale and labels for detailed views through the View properties dialog. Selecting a Detail view highlights the detail view circle in the parent view.
To resize a Detail view:
- Hover over the view to activate highlighting:
- Select the grip point between the arrows
- Drag in or out to resize the view smaller or larger.
To relocate a Detail view:
- Hover over the view to activate highlighting:
- Select the grip point at the center of the view circle.
- Drag to new location.
To relocate a Detail name:
- Right click on the detail view circle to bring up the context menu.
-
Select Add leader.
-
Drag the leader and Detail name to desired length and location.

This table illustrates the types of views from which the Detail view can be created:
| Detail view | |
| Can be created from: | Cannot be created from: |
|
Crop views Detail views Positions in base views Positions in projected orthographic views Positions in isometric views Position in an auxiliary view Position in a section view Position in an aligned section view Flat pattern views |
|