Folders
![]()
![]()
![]()
Create folders for organizing documents and publications, and also for applying Share permissions on all documents and publications with the folder and within any sub-folders. Note that all Share permissions on a folder are inherited by the documents, publications, and folders within that folder.
To create a folder, on the Documents page:
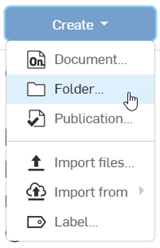
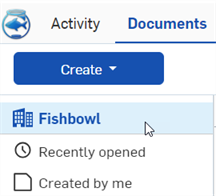
- Select
Create
and then
Folder.
-
Specify a name for the folder.
-
Optionally, you can add the new folder to any of your existing folders:

-
Click Create.
Notice the blue message at the top of the page:
![]() .
.
You can use Share on a folder the same way you use Share for documents and publications.
Folders and projects are listed at the top of the Documents and Publications section view in a horizontal grid. Projects are only available for Enterprise accounts.
This section is collapsible. Click the arrow to the left of the Folders and Projects heading to collapse/expand the section. Hold the bottom of the Folders and Projects section and drag up or down to adjust the height.
To the right are two folder view options:
-
Folder grid view (
 )
- Displays the folder section as a thumbnail grid view (default):
)
- Displays the folder section as a thumbnail grid view (default):
-
Folder list view (
 )
- Displays the folder area as a list view:
)
- Displays the folder area as a list view:
Click a folder or project to select it. The right panel displays the selected folder's details and options for managing the selected folder:
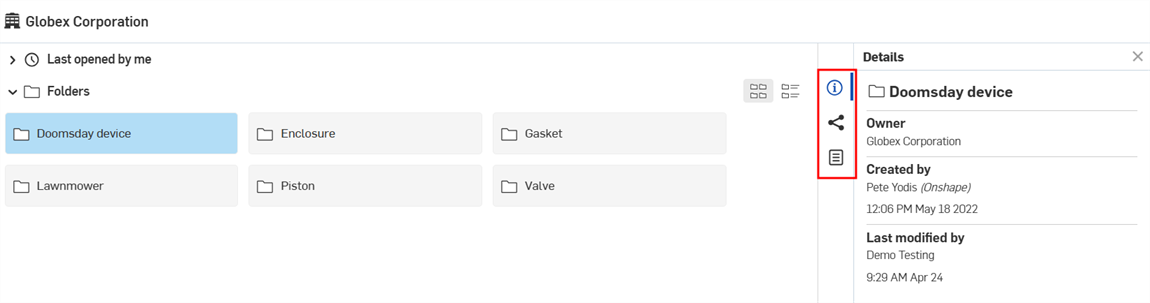
-
Details panel (
 )
- Displays more details about the folder or project.
)
- Displays more details about the folder or project. 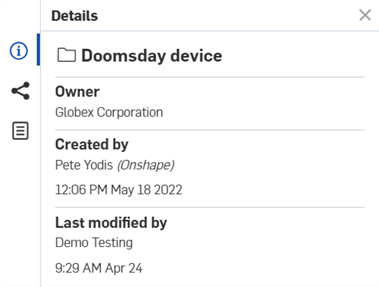
-
Share details (
 )- Displays the share permissions of the selected folder or project.
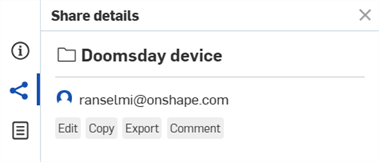
-
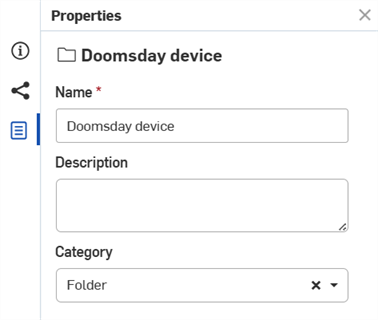
Properties panel (
 )
- Displays the editable and non-editable list of properties for the folder or project. If a property is non-editable, it is grayed out. You can edit all other properties directly from this panel.
)
- Displays the editable and non-editable list of properties for the folder or project. If a property is non-editable, it is grayed out. You can edit all other properties directly from this panel.
Click a folder or project name (or double-click anywhere in its gray box) to open its contents. This can be additional folders, documents, and publications.
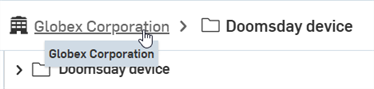
If there are no additional folders inside the folder or project clicked, the Folders and Projects grid collapses. Click the breadcrumb link above the Folders and Projects to jump back to a previous location in the Folders and Projects hierarchy:
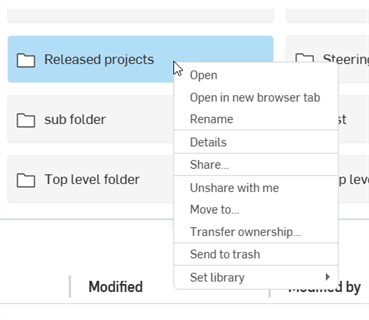
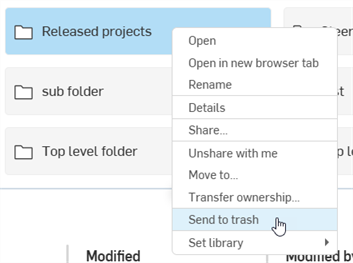
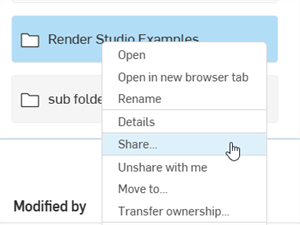
Access the folders context menu in one of the following ways:
-
Right-clicking on the folder on the documents page:
-
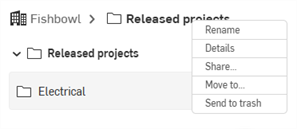
Right-click on the folder breadcrumb:
Access the following context menu options:
-
Open - Opens the folder in the Documents page.
-
Open in a new browser tab - Opens the folder in the documents page in a new browser tab.
-
Rename - Places cursor focus in the Folder's name field so you can rename the folder. You can also click the breadcrumb folder name to access the name field and replace the folder name. See Renaming folders for more information.
-
Details - Opens the folder's Details panel on the right side of the Documents page. See Document page layout for more information.
-
Share - Opens the folder's Share settings dialog where you can update the folder's share settings. See Share documents for more information.
-
Unshare with me - Opens the Unshare with me dialog where you can remove yourself from access to the folder. See Share documents for more information.
-
Move to - Opens the Move documents, publications, and folders dialog where you can move the folder to a new location. See Moving documents and publications among folders for more information.
-
Transfer ownership - Opens the Transfer ownership dialog where you can transfer ownership of the folder to an Individual, Company, or Enterprise. See Transfer ownership for more information.
-
Send to trash - Opens the Send to trash dialog where you can send the folder to trash. See Document page layout for more information.
-
Set library - Sets the folder to either the Company-wide or individual frame, sheet metal forms, or images library.
-
To delete a folder from the Documents page, either:
-
Select the folder and click on the Delete icon:
-
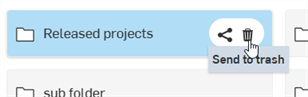
Right-click on the folder entry and select Send to trash from the context menu:
-
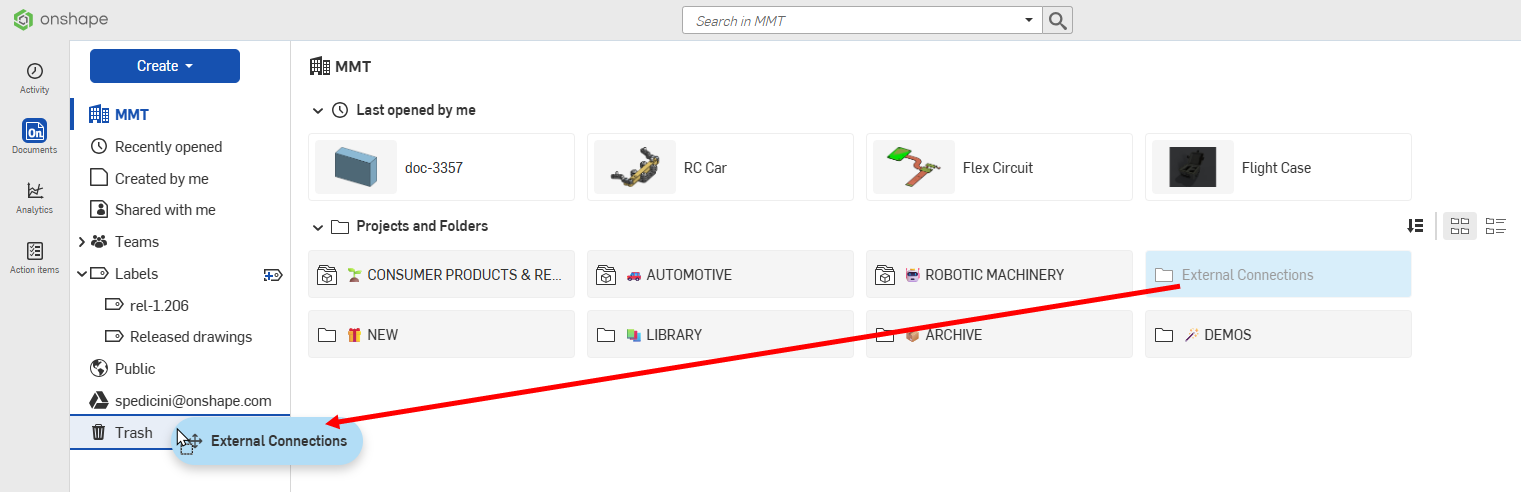
Drag and drop the folder onto
 in the filter panel:
-
-
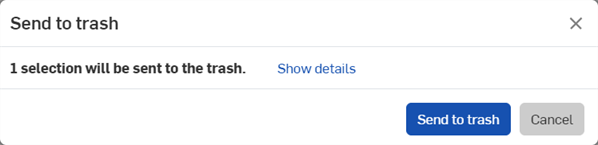
The Send to trash dialog opens. Click the Send to trash button to move the folder into the trash. The contents of the folder are also moved to Trash:
While already in a folder (after opening the folder by clicking it), click Create and select Folder.
Follow the breadcrumbs to verify that you are inside the correct folder. Nested folders inherit the Share permissions applied to the top-level folder.
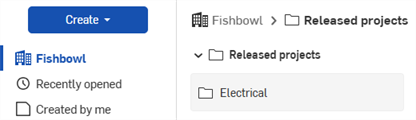
In the above illustration, Released projects is the parent folder and Electrical is the sub-folder.
You can drag and drop a folder into another folder, provided you have permissions on both folders.
You can move documents and publications into and out of folders both from the Documents page, and also from within a document or publication, through the Document menu.
After a document or publication is created inside a folder, you can move it to another folder, or out of a folder altogether:
- Right-click the document, publication, or folder to move (or ctrl+click to select multiple entities, and then right-click the selection), and click Move to on the context menu. This opens the Move to dialog box:
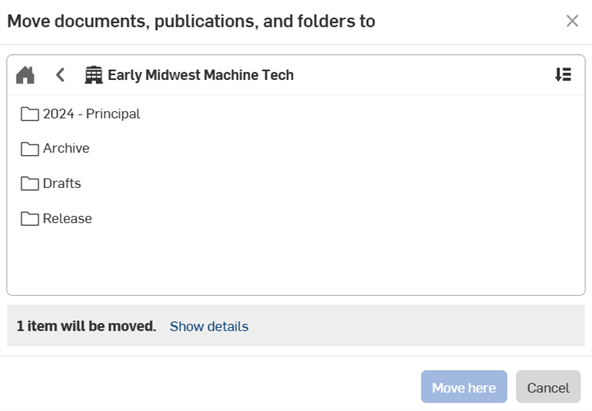
Click Sort
 to reorder the list of folders.
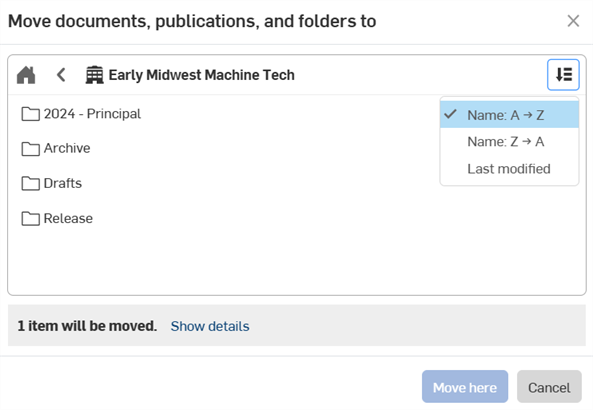
Click Show details to see the list of documents and publications that will be moved.
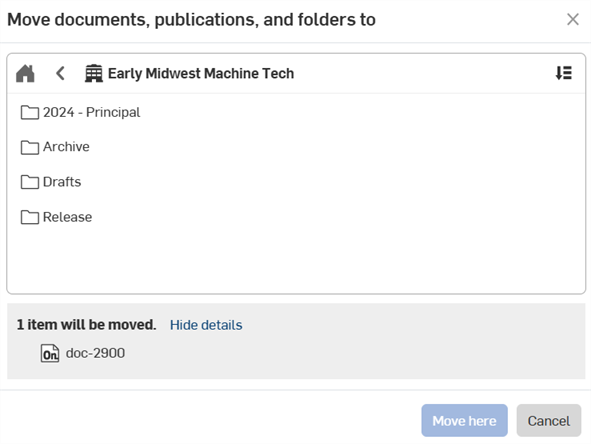
- Double-click a folder in the list (or select the folder and then click Open). Continue to use the folder list and breadcrumbs to navigate to the desired location.
- Click Move here.
To move documents into a folder, you must have Edit permissions to the folder, and all permissions (Edit, Copy, Link document, Export, Share, Comment, and Delete) to the document that is moving.
When moving a document or publication from one root folder to another, the ownership of that document is transferred to the owner of the folder into which it is moved. The Share permissions also change to be inherited from the new root folder.
Navigate to the folder in which you want to create the document or publication. You can also add a document into one of your existing folders without navigating to the folder first. Once the folder name is visible in the breadcrumbs at the top of the Documents page:
- Click the Create button located on the top left side of the page.
-
Select
 Document
or
Document
or
 Publication.
 - Specify a name for the document or publication.
- Click Create to close the dialog and create the document or publication.
When a folder is created, only the creator of the folder has any permissions to that folder. (The exception is if the folder is created within a Professional or Enterprise subscription. In that case, the administrator also has access to, and permissions on the folder.)
The creator/owner of the folder can share the folder with other users and thereby assign Share permissions to the folder. All documents, publications, and sub-folders within the root inherit the permissions of the root folder.
You can specify additional Share permissions on individual documents and publications within folders, but keep in mind that permissions are additive: these additional permissions are added to the folder permissions to create a larger set of permissions and access.
The Onshape best practice is to keep minimal permissions on the root folder and add additional access and permission on individual documents and publications.
To share a folder:
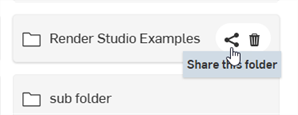
- Select the folder on the Documents page, then either:
- Click the Share this folder icon:
Right-click on the folder and select Share from the context menu:
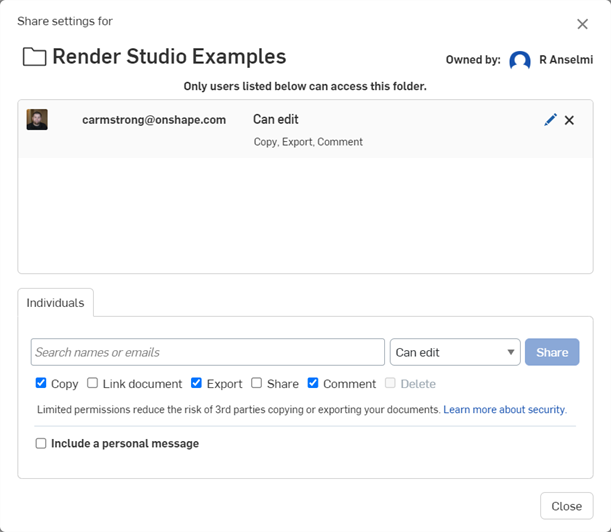
The Share settings dialog opens:
- Click the Share this folder icon:
- Choose a tab:
- Direct - Contains all the entries from the selected folder and its parent folder(s).
- Effective - Contains only one entry for each user/company/team with all the permissions from the current folder and its parent(s).
- Adjust permissions on the Share settings dialog for the folder, and enter the email addresses of the people with whom you wish to share the folder (or select a team or company):
- Click the Share button.
- Click the Close button.
When a folder is shared, the permissions on that folder become the shared users’ permissions on any and all documents, publications, and folders within that folder.
Sub-folders inherit all permissions from the parent folder(s) when shared.
For more information on Sharing, see Share Documents.
An admin of an enterprise or company may also transfer the ownership of a folder to an individual Onshape user who is not a member of the enterprise or company. Right-click on the document or folder (on the Documents page) and select Transfer ownership.
For more information on transferring ownership, see Transfer Ownership.
When copying a workspace in a folder (thereby creating a new document), you need edit permission on the folder in order for the copy to be placed in the same folder as the original document.
If you do not have edit permission on the folder, the copy is placed at the root level of your Onshape account. Upon successful copy, a blue message is shown at the top of the window stating the copy is created in your company's filter (which is located at the top left navigation under the Create button):
To rename the current folder:
- From the Documents page, do one of the following:
- Click the folder name in the breadcrumbs

- Right-click on the breadcrumb and click Rename folder from the context menu:
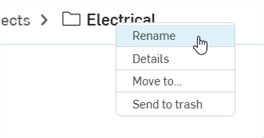
- Right-click on the folder under the Folders section and click Rename folder from the context menu:

- Click the folder name in the breadcrumbs
- Edit the text
- Press Enter or click outside the folder name
To learn more about organizing documents using folders, you can follow the self-paced course here: Creating Folders (Onshape account required). You can also follow the technical briefing article here: Folders FAQ (Onshape account required).