 Insert Image


Available in: Sketch
Use an imported image as a basis for a sketch. Insert an image from the currently active document, other documents, or an image library into your document, then open that image in a sketch. Create sketch geometry using the image as a guide. Supported image types include: PNG, JPEG, GIF, and BMP.
 Steps
Steps
-
Click
 to open the Insert image dialog:
- Choose to insert an image from the current document, other documents, or from an image library. If there are no image files listed, use the Import link at the bottom of the dialog.
Current document - Select an image (or use the Search bar to find one) from the currently active document. You can also Create a version or view the Version graph of the document.
Other documents - Select an image (or use the Search bar to find one) from other documents in your company.
Libraries - Select an image (or use the Search bar to find one) from an image library. Select a library from the dropdown menu, then select an image.
- Click Done at the bottom of the dialog box, then click and drag in the graphics area to position the image. The aspect ratio of the image is maintained and indicated by a dashed line as you drag.
A horizontal constraint is applied to the lower edge of the box by default.
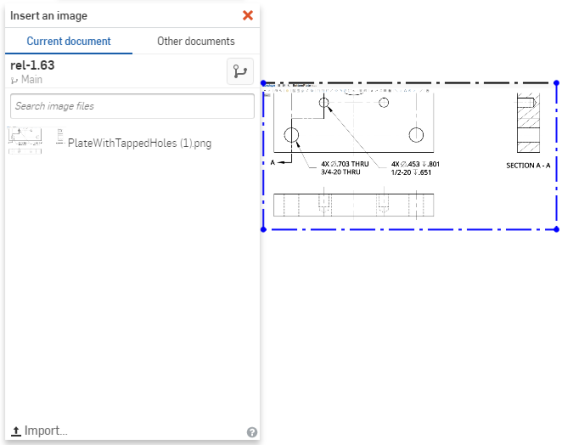
The image becomes semi-transparent as you move it, for better visibility during placement.
To rotate the image, first delete the horizontal constraint applied by default, then fix one corner of the image and drag another.
You can sketch on top of the image. Dimensioning the sketch geometry the first time scales the image as well.
Image libraries
Image libraries are special folders that contain images. Each company can have one image library that is owned by an administrator (with given share permissions for the company). Additionally, individuals can each set up one image library for their own personal use, with no special permissions required.
Creating an image library
Image libraries are created and stored in Onshape folders. From the Documents page:
-
Create a folder. (Company libraries must be created in the root folder.)
-
Right-click on the folder in the Projects and Folders list and hover over Set library in the context menu to access the extended menu options.
-
From the extended menu options, click My images. This sets the folder as your image library.
Once the folder is set as your image library, right-click on the folder and hover over the Image library option to access the following additional context menu options:
-
Update my library - Update your image library. (Useful when changes are made to a document inside the image library.)
-
Unset my library - Unset the selected folder as your image library. (This removes the folder's designation as the user/company library without deleting the folder or its content.)
-
Set as <company> library - Set the selected folder as your company-wide image library.
Supported file formats
-
JPEG
-
PNG
-
GIF
-
BMP
Notes
- Maximum image size is dependent on your device's GPU, which can be checked at https://webglreport.com. Ensure the image's width and height are equal to or lower than the Max Texture Size pixel limit.
- To rotate an image, remove the horizontal constraint, fix one corner and drag another corner.
- To move an image, remove all constraints and click and drag the image to the desired location.
- You can sketch on top of the image.
- Dimensioning sketch geometry scales the image as well, but only the first dimension applied scales the image. To rescale the image, remove additional dimensions and adjust the remaining one dimension.
- When you Show/Hide the sketch, the image is also shown or hidden.
- This feature respects the alpha channel, so if it is transparent, it will remain that way in Onshape.
- You can copy/paste an image (as a sketch entity) within a Part Studio and from one Part Studio to another.
- You can use the context menu and Edit image command to select another image file or upload a new one.
- If the source of the image changes, it may be updated in its tab using the Update option on the tab context menu. This also updates the image wherever it is used in the document.
See the Learning center course Introduction to Sketching (Onshape account required) for more information.