マイアカウント - 開発者

ユーザーは、開発者設定でアプリケーション、App Store エントリ、API キーを登録して管理できます。
このページの手順は個人ユーザーのみに適用されます。Company、Classroom、Enterprise の管理者は、Company/Classroom/Enterprise の設定: 開発者の手順に従ってください。
Company/Classroom/Enterprise 設定で作成されたすべてのアプリケーションは、Company の API 制限にカウントされます。開発者ポータルで作成されたすべてのアプリケーションは、個々のユーザーの API 制限にカウントされます。
Onshape App Store (Onshape Apps) に提出するすべてのアプリケーションは、API ガイド: OAuth2 ページの説明に従って、OAuth2 を使用して認証する必要があります。自動化スクリプト (または Onshape App Store 向けではないアプリケーション) は、OAuth2 または API キーを認証に使用できます。OAuth2 を使用すると、アプリケーションのユーザーの代わりにアプリケーションで Onshape API を呼び出すことができます。API キーは、API キーを生成した Onshape ユーザーの代わりとしてのみ操作を実行します。
Onshape でのアプリケーション開発についての詳細は、次のリソースを参照してください。
* Onshape 開発者ドキュメンテーション
* Glassworks API Explorer
* サンプルコード
Onshape の [開発者] 設定に移動するには、Onshape ウィンドウの右上隅にあるアカウントユーザーアイコン ( ) をクリックします。これにより、ドロップダウンメニューが開くので、[マイアカウント]をクリックします。
ページの左側のリストで [開発者] をクリックします。
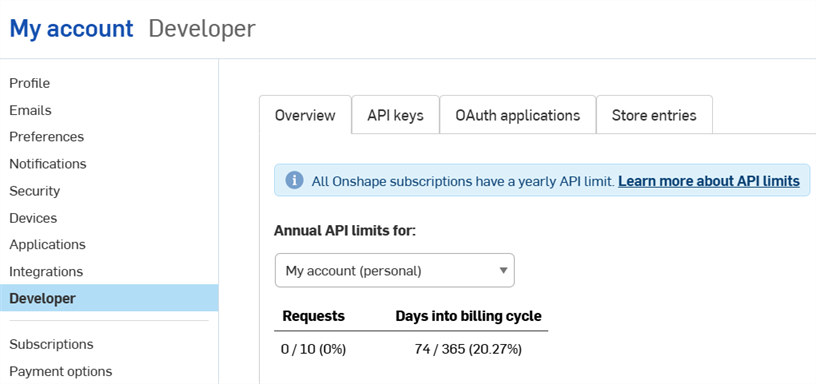
このページでは、次のことができます。
-
Onshape に新しい OAuth アプリケーションを登録する
-
正しく認証されたアプリを Onshape App Store に提出する
-
個人使用のための API キーの表示、作成、削除
-
API の使用状況を表示する
- API の使用量について詳しくは、API の制限を参照してください。
- [API の年間制限] ドロップダウンをクリックして、別のアカウントを選択します。
-
使用量が 25%、50%、75%、100% になると管理者全員に通知メールが送信されます。
 アプリ開発ワークフロー
Onshape UI で内部使用またはテスト用に開くアプリを作成するには、次の操作を行います。
- アプリ Onshape に登録します。
- Onshape UI でアプリの拡張機能を作成します。
- App Store エントリを作成し、サブスクライブします。
エンドユーザーのためにアプリを Onshape App Store に公開するには、次の操作を行います。
- OAuth2 で認証します。
- ローンチのチェックリストに記入します。
API キーの管理
API キーは、個人用の小さなアプリケーションを作成するのに便利な方法です。これにより、開発者は OAuth ワークフローのオーバーヘッドを回避できます。
API キーはアプリケーションの認証に使用され、そのユーザーの認証には使用されません。(OAuth2 は、ユーザーに Onshape へのアクセス権があることを確認することで、アプリケーションおよびアプリケーションのユーザーを認証します。)
API キーを作成すると、そのキーは作成元のスタックでのみ有効です。Company のスタック (companyName.onshape.com など) で作成された API キーは、本番用のスタック (cad.onshape.com) では機能しません。管理者は社内のユーザーの API キーも管理できます。Company/Classroom/Enterprise 設定 - 開発者を参照してください。
個々のアカウントは API キーが 2 つまでに制限されています。必要に応じて API キーを削除してください。Company、Classroom、Enterprise のアカウントには上限がありません。
API キーの表示
- 開発者ページで [APIキー] をクリックします。
- 以前に作成したすべての API キーを表示します。

API キーの作成
- [新しい API キーを作成] をクリックします。
![[新しい API キーを作成] 画面](../Resources/Images/accounts/myacct-developer-keys-create-01.png)
- [名前] フィールドに API キーの名前を入力します。
- キーのアクセス許可を選択します。以下のアクセス許可の範囲を参照してください。
- [API キーを作成] ボタンをクリックします。
-
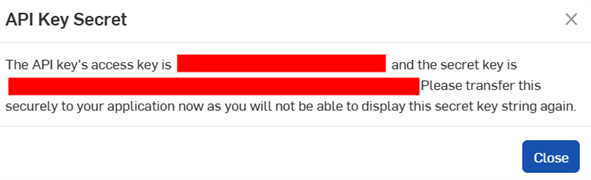
ポップアップウィンドウで、表示される API キーとシークレットキーをコピーしてどこかに保存し、[閉じる] ボタンをクリックします。
シークレットキーは二度と表示されないので、安全な場所に保管してください。
API キーの削除
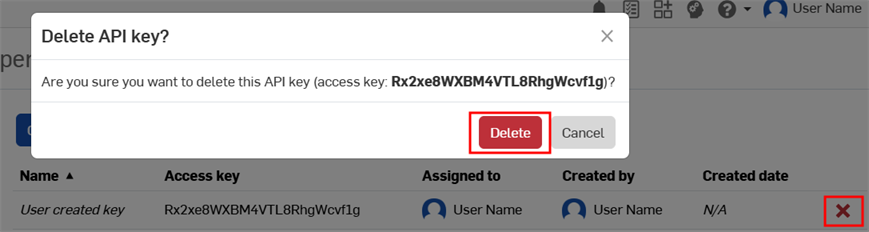
- 削除したい API キーの右にある「X」アイコンをクリックします。
- この API キーを削除する必要があることを確認してください。このアクションは元に戻せません。[削除] をクリックして確定します。
OAuth アプリケーションの管理
OAuth アプリケーションの作成と管理
-
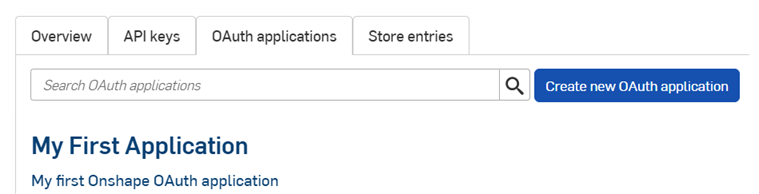
開発者ページの OAuth アプリケーションのリンクをクリックすると、すべてのアプリのリストが表示されます。
-
[新しい OAuth アプリケーションを作成] ボタンをクリックします。
-
フォームの次の項目を記入します。
-
名前 - ユーザーに表示されるアプリケーションの名前。
-
プライマリ形式 - アプリケーションを一意に識別し、Onshape サーバーに保存される可能性のあるデータのマーカーとなる文字列 (例: com.example.example)。アプリケーションの登録後は変更できず、ユーザーには表示されません。
-
概要 - データへのアクセス許可をアプリケーションに付与するよう要求された際にユーザーに表示されるアプリケーションの説明。
-
リダイレクト URL - 認証後にリダイレクトされる URL。アプリケーションランディングページ。
- アプリケーションでは、OAuth プロトコル交換で使用される URL を少なくとも 1 つ指定する必要があります。
-
この URL も SSL (https で始まる URL) を使用する必要があります。ただし、インストールされるデスクトップアプリケーションには http://localhost:<port> と urn:ietf:wg:oauth:2.0:oob という 2 つの例外があります。
-
タイプ - アプリケーションのタイプ: [統合クラウドアプリ]、[接続されたクラウドアプリ]、[接続されたデスクトップアプリ] のいずれかです。
-
OAuth URL - ユーザーを認証するための OAuth2 プロセスの開始に使用される URL。詳細は、開発者ドキュメント: OAuth2 を参照してください。
-
デプロイしたアプリケーションの URL を含める必要があります。
-
これは、Onshape のアプリケーションページから呼び出される最初の URL です。
-
この URL でホストされているページは、OAuth 認証を処理する必要があります。アプリケーションのサーバーがユーザーに代わって認証されると、そのユーザーはアプリケーションのコンテンツにリダイレクトされます。
-
アプリをまだデプロイしていない場合は、ローカルでの作業用にこのフィールドを空白のままにして、後で更新できます。
一般に公開するために Onshape App Store に提出されるすべてのアプリケーションは、OAuth2 で正しく認証する必要があります。詳細は、開発者ドキュメント: OAuth2 を参照してください。
-
-
設定
-
共同作業をサポート - アプリケーションの開発時に、他のユーザーとの共同作業を行う場合はオンにします。
-
- 権限 - 以下のアクセス許可の範囲を参照してください。
-
-
[アプリケーションを作成] をクリックします。
-
ウィンドウから OAuth のシークレットキーをコピーします。
このシークレットキーに再度アクセスすることはできません。このシークレットキーはユーザー個人とそのアプリだけのものです。機密性の高いパスワードと同様に保護し、ソースコードにチェックインしないでください。
-
アプリの OAuth アプリケーションエントリは、[詳細] タブがアクティブな状態で表示されます。[OAuth アプリケーション] タブでアプリ名を選択すると、この画面が表示されます。
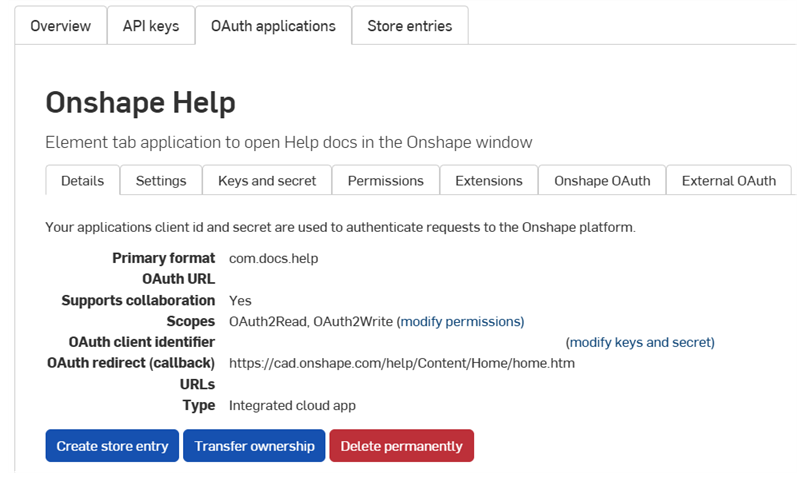
この画面のタブを使って次のことを行います。
-
詳細:
-
設定: アプリの設定を管理する
- キーとシークレット:
- OAuth クライアント識別キーをコピーする
- 新しい OAuth クライアントシークレットキーを再生成する
-
アクセス許可: アプリのアクセス許可の範囲を変更する
-
拡張機能: アプリの拡張機能を管理する
-
Onshape OAuth: Onshape の認証を管理する
-
外部 OAuth: サードパーティの認証を管理する
OAuth2 による適切な認証やローンチのチェックリストの記入について詳しくは、Onshape 開発者向けドキュメントを参照してください。実例については、Hello World のチュートリアルを参照してください。
拡張機能の作成
-
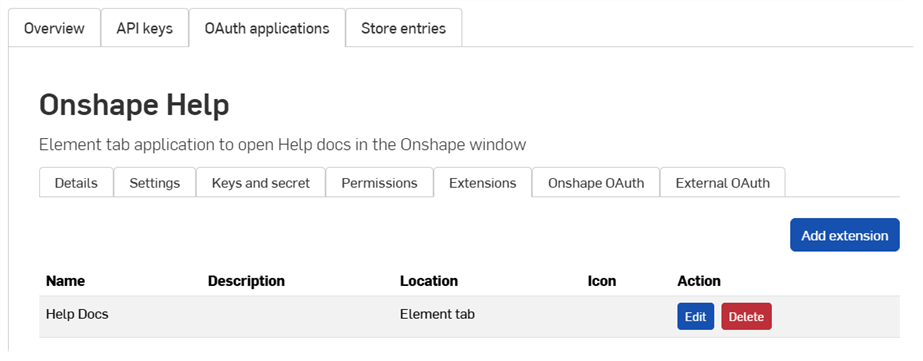
開発者ページで [OAuth アプリケーション] をクリックし、アプリケーションを選択します。
-
[拡張機能] タブをクリックします。
-
[拡張機能を追加] をクリックします。
-
フォームの次の項目を記入します。
-
名前: 長すぎる場合は、UI で切り捨てられます。
-
説明 (オプション): Onshape UI には表示されませんが、認証の許可プロセスでは表示される場合があります。
-
場所: Onshape UI の拡張機能が存在する場所。
-
開発者向けドキュメントのサポートされている場所とコンテキストを参照してください。
-
アプリケーションごとに作成できる要素タブの拡張は 1 つだけです。
-
-
コンテキスト: 一部の場所は、Part Studio の内部など、選択のコンテキストで機能します。
-
開発者向けドキュメントのサポートされている場所とコンテキストを参照してください。
-
-
アクションURL: UI を埋め込む場所では、表示するページのアドレスをアクション URL で定義します。場所がアクション (コンテキストメニュー、ツールバーアイテム、ダイアログ内のアクションなど) で、アクションタイプが GET または POST の場合、アクション URL は REST 終点を指定するために使用されます。場所がアクションで、新しいウィンドウで開くアクションの場合、アクション URL は新しいウィンドウで開く URL です。
-
このフィールドで使用できるパラメータのリストについては、開発者ドキュメントのアクション URL パラメータを参照してください。
-
-
アクションタイプ: UI を埋め込まない場所に適用されます。サポートされているアクションタイプは次のとおりです。
-
GET - アクション URL を使用して GET API を呼び出します。パラメータの置換はアクション URL で行われます。
-
POST - アクション URL とアクションボディを POST ボディとして使用して POST API を呼び出します。パラメータの置換は、アクション URL とアクションボディの両方で行われます。
-
新しいウィンドウで開く - アクション URL が新しいブラウザウィンドウで開きます。パラメータの置換はアクション URL で行われます。
-
-
アクションボディ: POST アクションタイプにのみ適用されます。アクションボディは POST API の呼び出しに渡され、有効な JSON 形式である必要があります。
-
応答を表示: これは、アクションタイプが GET または POST の場合にのみ適用されます。選択すると、UI は応答を待ち、UI のダイアログに応答を表示します。応答は有効な JSON 形式である必要があります。
-
アイコン: アイコンは、拡張子が存在する場所に表示されます。これには、情報パネルのアイコン、コンテキストメニューのアクション、ツールバーボタン、ダイアログのアクションボタン、またはその他のサポートされている場所が含まれます。
-
-
[OK] をクリックします。
Onshape アプリケーションの作成と管理の詳細は、Onshape の開発者向けドキュメントを参照してください。実例については、Hello World のチュートリアルをご覧ください。
アプリの所有権の引き継ぎ
- 開発者の設定で、[OAuth アプリケーション] をクリックします。
- 転送するアプリの名前をクリックします。
- [詳細] タブの [所有権の引き継ぎ] ボタンをクリックし、所有権の引き継ぎダイアログを開きます。
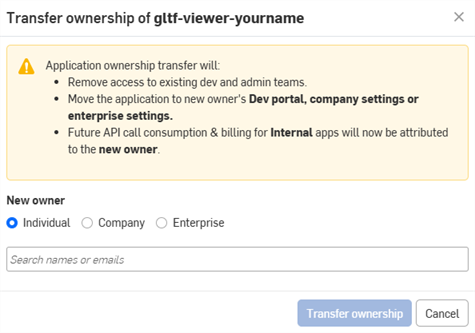
- アプリの引き継ぎ先として個人、Company、または Enterprise のオプションを選択します。
- 個人に引き継ぐには、検索フィールドに新しい所有者の名前またはメールアドレスを入力します。所有権を Company または Enterprise に引き継ぐには、ドロップダウンからオプションを選択します。
- [所有権の引き継ぎ] をクリックします。アプリケーションが OAuth アプリのリストから削除されます。
- アプリを個人のアカウントに引き継いだ場合は、その個人に通知メールが届き、Onshape 開発者ポータルにアプリが表示されます。
- アプリを Company/Classroom/Enterprise のユーザーに引き継いだ場合は、管理者全員に通知メールが届き、それぞれの開発者の設定にアプリが表示されます。
それ以降の API コールの使用量と請求は、新しい所有者に帰属します。詳細は、API の制限を参照してください。
アプリの非推奨と削除
- Company 設定の左側のペインで [開発者] をクリックし、[OAuth アプリケーション] をクリックして、非推奨にするアプリを選択します。
- [ステータス] ボタンをクリックすると、アプリケーションの現在のステータスと、サポートされているステータスの変更が表示されます。サポートされているステータスは次のとおりです。
- アクティブ - アプリケーションは Onshape App Store で購入できます。
- 非推奨 - アプリは App Store では利用できなくなりますが、現在のユーザーは引き続きアクセスできます。
- ごみ箱 - アプリは OAuth アプリケーションページから削除され、ごみ箱タブに移動します。
ごみ箱からの削除は、すべての有料サブスクリプションの有効期限が切れた後にのみ許可されます。
すべての購入と権限が消去されます。
- 削除済み - アプリケーションはごみ箱から完全に削除されます。これは元に戻せません。
![[アクティブ] から [非推奨] のオプションが表示されている OAuth アプリケーションの [ステータス] ボタンのドロップダウン](../Resources/Images/accounts/developer-app-deprecate-01.png)
- 希望するステータス変更を選択します。
- アプリの名前を入力し、もう一度クリックしてダイアログで確認します。
Onshape App Store エントリの管理
Onshape App Store にアプリを提出する前に、Onshape 開発者ドキュメントを参照し、OAuth2 による適切な認証やローンチのチェックリストの記入などの要件を確認してください。
Onshape App Store エントリの作成
OAuth アプリケーションに新しいストアエントリを作成するには、次の操作を実行します。
-
開発者ページで [OAuthアプリケーション] をクリックし、アプリケーションを選択します。
-
アプリの [詳細] タブで [ストアエントリを作成] ボタンをクリックします。
![[ストアエントリを作成] ボタンが表示されている OAuth アプリケーションページ](../Resources/Images/accounts/developer-create-store-button-01.png)
-
フォームの次の項目を記入します。
- 名前 - 登録時に入力したアプリ名から自動的に設定されます。
-
概要 - 登録時に入力した概要から自動的に設定されます。
-
タイプ - アプリケーションのタイプ: 統合クラウドアプリ、接続されたクラウドアプリ、接続されたデスクトップアプリ。これは、OAuth アプリケーションの登録時に選択したタイプと一致する必要があります。
-
カテゴリー - アプリに適したカテゴリーを選択します。
-
チームの可視性 - プライベート App Store のエントリを内部ユーザー以外に表示しない (既定)、すべての内部ユーザーに表示する、または特定のチームに表示することを選択します。
-
説明 - ユーザー向けのアプリケーションの説明。制限付き書式設定が使用できます。
-
サポート URL - アプリのユーザーがヘルプを必要とした場合に送る URL またはメール。これは定期的に監視する必要があります。
-
サポートメール - アプリのサブスクリプション通知を受け取るメール。これは定期的に監視する必要があります。
-
ベンダー - あなたの Company 名。
-
バージョン - このアプリケーション現在のバージョン。
-
画像 - オプションで、概要、ヒーロー、その他の画像をアップロードします。
-
[作成] をクリックします。
アプリケーションは Onshape App Store にプライベートとして表示され、あなたとチームの可視性設定で指定された内部チームだけに表示されます。アプリを公開するには、次のローンチのチェックリストを参照してください。
この画面に戻るには、アプリケーションの [ストアエントリ] タブをクリックします。
![[ストアエントリ] タブが選択されている OAuth アプリケーションページ](../Resources/Images/accounts/developer-store-entry-tab-01.png)
Onshape アプリのサブスクライブ
個人アカウントのユーザーは、Onshape App Store でアプリをサブスクライブできます。
- Onshape App Store にアクセスします: https://cad.onshape.com/appstore
- アプリを選択します。現在のところ表示できるのは、作成者自身のプライベートのアプリのみです。
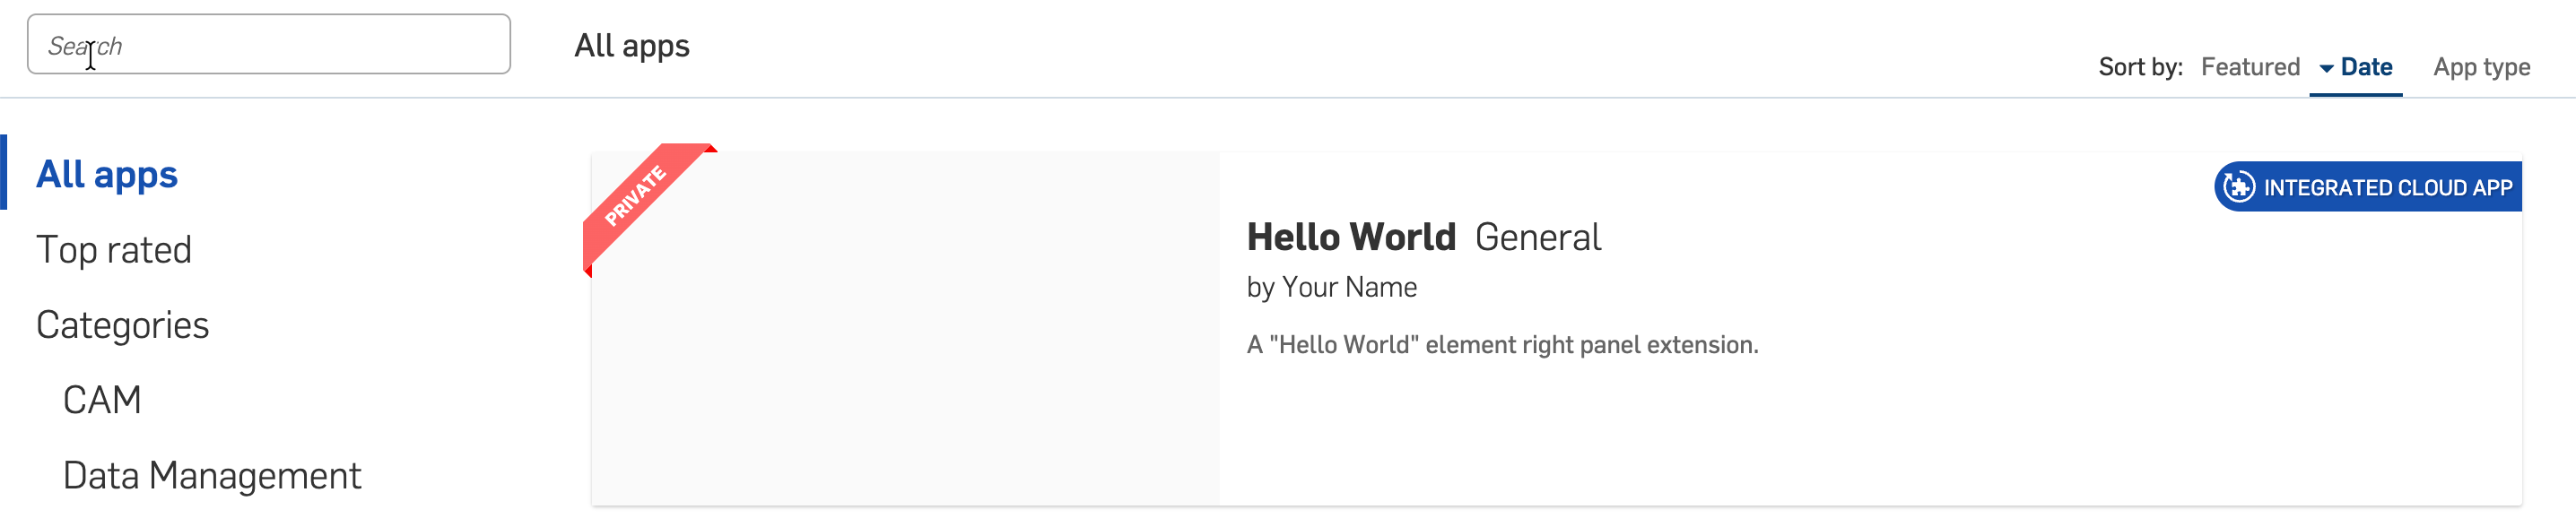
- [サブスクライブ] をクリックします。
![プライベートアプリを購読するには、[サブスクライブ] をクリックします。](../Resources/Images/accounts/developer-store-subscribe-01.png)
- 画面の指示に従ってアプリをサブスクライブします。
- Onshape のブラウザウィンドウを更新し、アプリの拡張機能をテストします。
Onshape App Store エントリの削除
- 開発者ページで [OAuthアプリケーション] をクリックし、アプリケーションを選択します。
- [ストアエントリ] タブをクリックして削除します。
- [詳細] タブで [ストアエントリを削除] をクリックします。
- [削除] をクリックして確定します。
アクセス許可の範囲
OAuth アプリケーションの作成時には、次のアクセス許可の範囲を使用できます。
-
アプリケーションではプロファイル情報を読み取ることができます (OAuth2ReadPII) - これをオンにすると、アプリケーションにプロファイル上の情報へのアクセスを許可します。
-
アプリケーションではドキュメントを読み取ることができます (OAuth2Read) - これをオンにすると、アプリケーションにドキュメントからの読み取りを許可します。
-
アプリケーションではドキュメントに書き込むことができます (OAuth2Write) - これをオンにすると、アプリケーションにドキュメントへの書き込みを許可します。
-
アプリケーションではドキュメントおよびワークスペースを削除できます (OAuth2Delete) - これをオンにすると、アプリケーションにドキュメントとワークスペースの削除を許可します。
-
アプリケーションではあなたの代わりに購入をリクエストできます (OAuth2Purchase) - これをオンにすると、アプリケーションに購入を許可します。
-
アプリケーションではドキュメントを共有および共有解除できます (OAuth2Share) - これをオンにすると、アプリケーションにドキュメントの共有と共有解除を許可します。