![]()
![]()
![]()
Ein Dashboard besteht aus einer oder mehreren Visualisierungen und ist die oberste Ebene der Analyseseite. Alle Daten werden in Dashboards dargestellt, die über ähnliche Funktionen zum Filtern, Speichern, Planen von Berichten, Bearbeiten, Teilen, Löschen und Exportieren verfügen.
So können Dashboard-Daten gefiltert werden:
-
Klicken Sie im Dashboard auf eine beliebige Stelle in der Zeile Steuerungen, um die Filter zu bearbeiten:
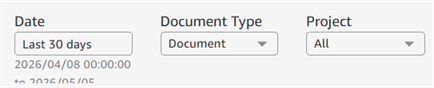
- Klicken Sie auf die Schaltfläche „Filter“, um die Kriterien des entsprechenden Filters aufzurufen und einzugeben, beispielsweise die Filter Datum und Dokumenttyp unten:
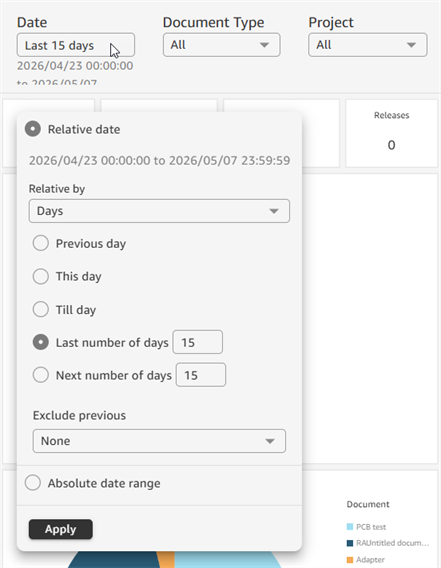
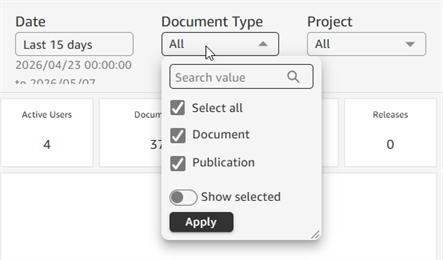
- Sobald Sie die Filterkriterien ausgewählt haben, klicken Sie auf die Schaltfläche Anwenden, um das Dashboard zu aktualisieren, und klicken Sie anschließend außerhalb der Bezeichnung der Schaltfläche, um das Dialogfenster für die Filterkriterien zu schließen:
-
Bewegen Sie den Mauszeiger über die Filterbezeichnung, um das Symbol Überlaufmenü (
 ) rechts davon anzuzeigen. Klicken Sie auf dieses Symbol, um ein Menü aufzurufen, in dem Sie den Filter zurücksetzen oder die Dashboard-Daten aktualisieren können:

Wenn Änderungen an einem Dashboard vorgenommen werden (Filter bearbeitet oder Anpassungen vorgenommen werden), können diese Änderungen in einem neuen Dashboard gespeichert werden.
- Ändern Sie im Dashboard Filterkriterien nach Bedarf. Siehe Ein Dashboard filtern.
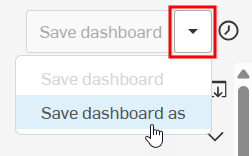
- Klicken Sie oben rechts auf den Dropdown-Pfeil und wählen Sie Dashboard speichern unter aus:
- Das Dialogfenster „Dashboard speichern“ wird geöffnet. Geben Sie einen Dashboard-Namen (erforderlich) und eine Beschreibung (erforderlich) ein:

- Klicken Sie auf Speichern. Das Dashboard ist in der Filterliste Meine Analysen enthalten. Das Dashboard wird auch in dem Filter aufgeführt, aus dem Sie das Dashboard ursprünglich ausgewählt haben (z. B. Aktionsobjekte, Dokumente oder Audit).
Sobald ein Dashboard gespeichert ist, kann es bearbeitet werden:
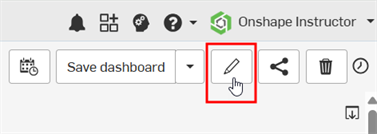
- Klicken Sie oben rechts im Dashboard auf das Symbol Bearbeiten (
 ):
): 
-
Das Dialogfeld Dashboard bearbeiten wird geöffnet. Bearbeiten Sie den Dashboard-Namen und/oder die Beschreibung nach Bedarf.

-
Klicken Sie auf Speichern, um Ihre Änderungen zu speichern, oder auf Abbrechen, um das Dialogfenster ohne Änderungen zu schließen.
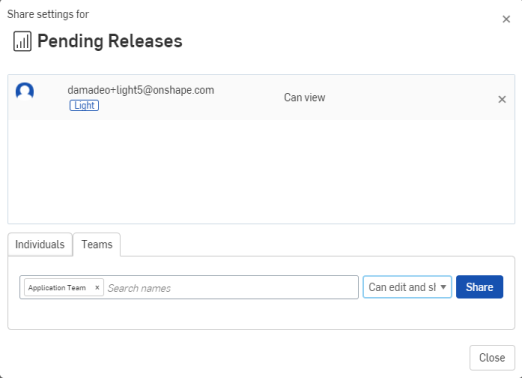
Sobald ein Dashboard gespeichert ist, kann es mit anderen geteilt werden, sofern Sie die Berechtigung dazu haben. Standard-Dashboards können nicht geteilt werden.
- Klicken Sie oben rechts im Dashboard auf das Symbol Teilen (
 ):
):
- Geben Sie die Personen oder Teams an, mit denen Sie das Dashboard teilen möchten, und wählen Sie die gewünschten Berechtigungen aus
- Klicken Sie auf Teilen.
So löschen Sie ein gespeichertes Dashboard:
-
Klicken Sie oben rechts im Dashboard auf das Papierkorb-Symbol(
 ):
):
-
Das Dialogfenster Löschen des Dashboards bestätigen wird geöffnet. Klicken Sie auf Löschen, um das Dashboard dauerhaft zu löschen, oder auf Abbrechen, um das Dashboard zu behalten. Gelöschte Dashboards werden aus allen Filterlisten entfernt.

Exportieren Sie ein Standard-Dashboard oder ein gespeichertes Dashboard in einen Drucker oder eine PDF-Datei und zeigen Sie eine Liste der Exporte in der rechten Palette an.
-
Klicken Sie im Dashboard oben rechts auf das Export-Symbol (
 ) und wählen Sie eine der folgenden Optionen aus:
-
Drucken: sendet das Dashboard an einen angeschlossenen Drucker. Das Dialogfeld „Drucken vorbereiten“ wird geöffnet.
Wählen Sie die Papiergröße und die Ausrichtung aus.
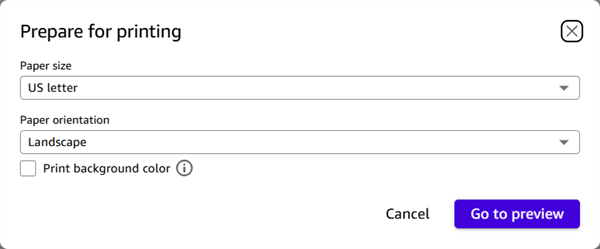
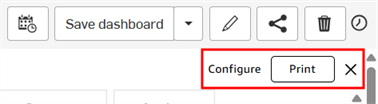
Klicken Sie auf Zur Vorschau. Oben rechts werden 3 neue Optionen angezeigt:
-
Konfigurieren: öffnet das Dialogfeld „Drucken vorbereiten“.
-
Drucken: sendet das Dashboard an den Drucker.
-
X: bricht den Druckauftrag ab.
-
-
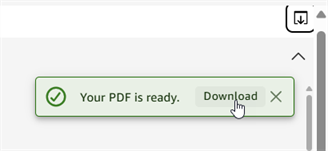
PDF-Datei erstellen: erstellt eine PDF-Datei, die auf Ihr Gerät heruntergeladen werden kann. Wenn Sie darauf klicken, wird die Meldung Ihre PDF-Datei wird bearbeitet angezeigt. Klicken Sie auf X, um die Meldung zu schließen:

Sobald die PDF-Datei fertiggestellt ist, wird die Meldung Ihre PDF-Datei ist fertig mit einem Download-Link angezeigt. Klicken Sie auf Herunterladen. Die PDF-Datei wird auf das verbundene Gerät heruntergeladen.
-
Exporte anzeigen: zeigt in der rechten Palette eine Liste der exportierten PDF-Dateien an. Klicken Sie auf den Link Zum Herunterladen hier klicken, um eine Datei aus dieser Palette herunterzuladen. Dies ist nützlich, wenn Sie die Meldung PDF-Datei erstellen geschlossen haben, ohne auf den Link Herunterladen zu klicken:
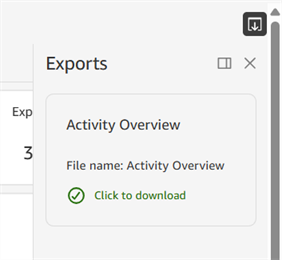
Klicken Sie auf das Symbol Feststecken (
 ), um die Palette am Seitenbereich anzuheften, oder auf X, um die Palette zu schließen.
-
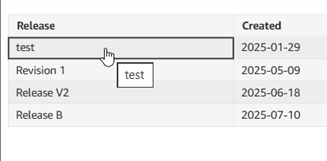
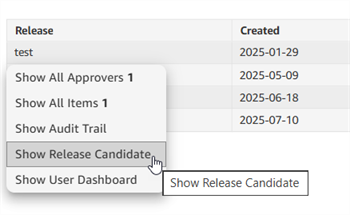
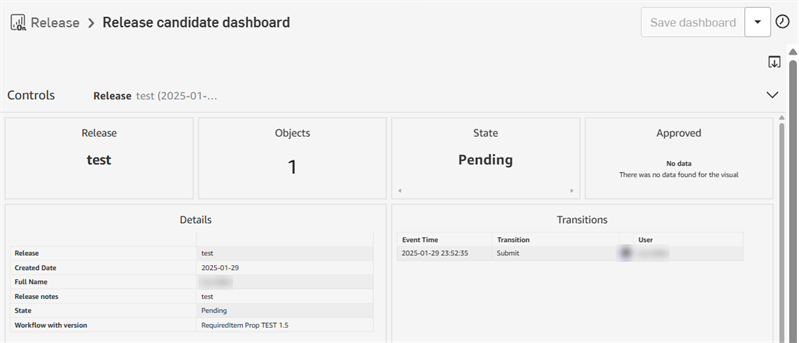
Klicken Sie auf eine Datenzelle (erstes Bild unten), um eine Liste der zu diesen Daten gehörenden Dashboards aufzurufen (zweites Bild unten). Wenn Sie beispielsweise auf eine Datenzeile in der Tabelle Dashboard „Freigabe-Aktivitäten“ > „Ausstehende Freigaben“ (wie unten dargestellt) klicken, werden 5 weitere Dashboards geöffnet, die sich auf die Daten der Tabelle „Ausstehende Freigaben“ beziehen. Ein Klick auf Freigabe-Kandidat anzeigen öffnet das Dashboard Freigabe-Kandidat (drittes Bild unten):