 Wrap
Wrap
![]()
![]()
![]()
Wrap a surface or sketch entity around a cylinder or cone.
The Wrap feature tool allows you to wrap a surface or sketch entity around a cylinder. A practical application is to wrap text around a cylinder. This example assumes you have a sketch of the text to wrap. First, click the Wrap feature tool on the toolbar. Select the Sketch from the Features list or in the graphics area. Then click the Target field in the dialog and select the cylinder in the graphics area. If the text is upside down, click the Position drop-down and rotate it 180 degrees. In addition, use the arrow manipulator to move the text to the specified location. If desired, check the Trim to target to cut the text to the edge of the cylinder. Click Solid to emboss the text as part of the cylinder. Alternatively, click New to create new parts from each letter. Finally, click the green checkmark to accept the wrap.
Steps
- Select
 .
.
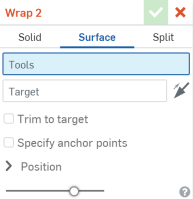
- Select the Tools, which are faces or sketch regions that you are wrapping around the cylinder or cone.
- Select the Target (the cylinder or cone you are wrapping faces or sketch regions around).
- To change the position of the tools:
- Angle - Change the degrees of tilt.
- U shift - Move the result horizontally.
- V shift - Move the result vertically.
- Select the check mark when finished.
- Click Solid at the top of the dialog.
- Adjust the settings in the Wrap dialog box to your preference.
- Choose whether you want to:
- New - Create a new solid
- Add - Add to an existing solid
- Remove - Subtract from an existing solid
- Intersect - Keep the intersection of two (or more) solids
- Choose the thickness of the solid.
- Select the Trim to target option to make the tools not visible when it goes beyond the borders of the target.

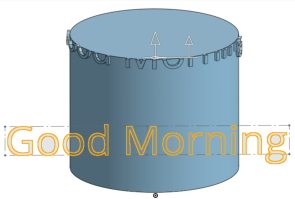
- Select the Specify anchor points option to match one point of the tool to the target, assigning location.
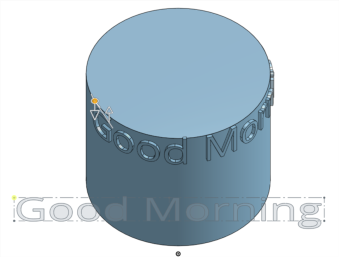
If necessary or desired, select Merge scope (or Merge with all) to select parts with which to merge the new (additional) part.
- Choose whether you want to:
- Select Surface at the top of the dialog if not there already.
- Adjust the settings in the Wrap dialog box to your preference.
- Select the Trim to target option to make the tools not visible when it goes beyond the borders of the target.

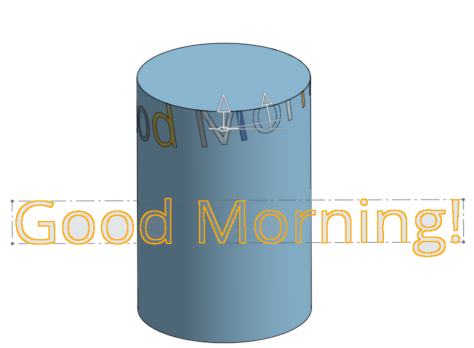
- Select the Specify anchor points option to match one point of the tool to the target, assigning location.
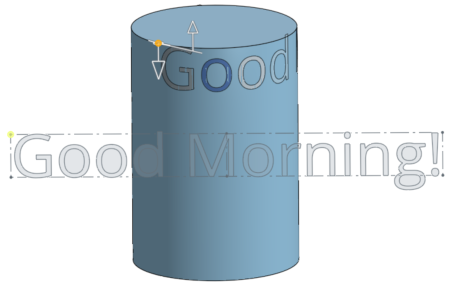
- Select the Trim to target option to make the tools not visible when it goes beyond the borders of the target.
- Select Split at the top of the dialog.
- Adjust the settings in the Wrap dialog box to your preference.
- Select the Specify anchor points option to match one point of the tool to the target, assigning location.
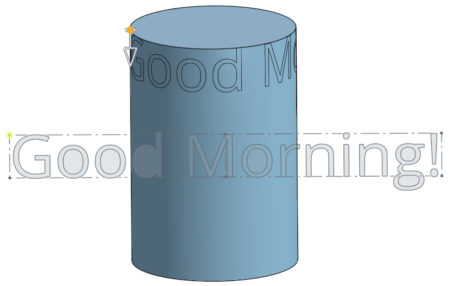
- Select the Specify anchor points option to match one point of the tool to the target, assigning location.
Basic steps
- Tap the Wrap tool icon (
 ).
).
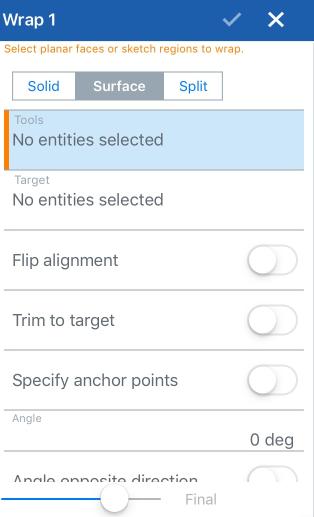
- Select Solid, Surface, or Split.
- Select the Tools, which are the faces or sketch regions that you are wrapping around the cylinder or cone.
- Select the Target (the cylinder or cone you are wrapping faces or sketch regions around).
- To change the position of the tools, select one of the following:
- Angle - Change the degrees of tilt.
- U shift - Move the result horizontally.
- V shift - Move the result vertically.
- Tap the check mark when finished.
- Select Solid at the top of the dialog.
- Adjust the settings in the Wrap dialog box to your preference.
- Choose whether you want to:
- New - Create a new solid
- Add - Add to an existing solid
- Remove - Subtract from an existing solid
- Intersect - Keep the intersection of two (or more) solids
- Enter a figure for the thickness of the solid.
- Toggle flip alignment, if necessary.
- Select the Trim to target option to make the tools not visible when it goes beyond the borders of the target.


- Select the Specify anchor points option to match one point of the tool to the target, assigning location.

Specify an angle measurement to angle the wrap
- Toggle Angle opposite direction, if desired.
- Toggle U shift opposite direction, if desired.
- Enter a measurement for a U shift opposite direction, if desired.
- Toggle V shift opposite direction, if desired.
- Enter a measurement for a V shift, if desired.
- Enter a thickness measurement, if desired.
- Toggle thickness opposite direction, if desired.
- If necessary or desired (for operations that add or remove material to an existing part) select Merge scope (or Merge with all) to select parts with which to merge the new part.
- Choose whether you want to:
- Tap the checkmark to accept and close the dialog.
- Select Surface at the top of the dialog if not there already.
- Adjust the settings in the Wrap dialog box to your preference.
- Select the Trim to target option to make the tools not visible when it goes beyond the borders of the target.


- Select the Specify anchor points option to match one point of the tool to the target, assigning location.

- Select the Trim to target option to make the tools not visible when it goes beyond the borders of the target.
- Tap the checkmark to accept and close the dialog.
- Select Split at the top of the dialog.
- Adjust the settings in the Wrap dialog box to your preference.
- Select the Specify anchor points option to match one point of the tool to the target, assigning location.

- Select the Specify anchor points option to match one point of the tool to the target, assigning location.
- Tap the checkmark to accept and close the dialog.
Basic Steps
- Tap
 .
.
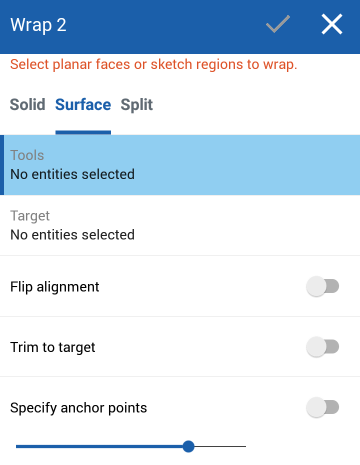
- Select Solid, Surface, or Split.
- Select the Tools, which are the faces or sketch regions that you are wrapping around the cylinder or cone.
- Select the Target (the cylinder or cone you are wrapping faces or sketch regions around).
- To change the position of the tools, select one of the following:
- Angle - Change the degrees of tilt.
- U shift - Move the result horizontally.
- V shift - Move the result vertically.
- Tap the check mark when finished.
- Select Solid at the top of the dialog.
- Adjust the settings in the Wrap dialog box to your preference.
- Choose whether you want to:
- New - Create a new solid
- Add - Add to an existing solid
- Remove - Subtract from an existing solid
- Intersect - Keep the intersection of two (or more) solids
- Enter a figure for the thickness of the solid.
- Toggle flip alignment, if necessary.
- Select the Trim to target option to make the tools not visible when it goes beyond the borders of the target.


- Select the Specify anchor points option to match one point of the tool to the target, assigning location.

Specify an angle measurement to angle the wrap
- Toggle Angle opposite direction, if desired.
- Toggle U shift opposite direction, if desired.
- Enter a measurement for a U shift opposite direction, if desired.
- Toggle V shift opposite direction, if desired.
- Enter a measurement for a V shift, if desired.
- Enter a thickness measurement, if desired.
- Toggle thickness opposite direction, if desired.
- If necessary or desired (for operations that add or remove material to an existing part, select Merge scope (or Merge with all) to select parts with which to merge the new (additional) part.
- Choose whether you want to:
- Tap the checkmark to accept and close the dialog.
- Select Surface at the top of the dialog if not there already.
- Adjust the settings in the Wrap dialog box to your preference.
- Select the Trim to target option to make the tools not visible when it goes beyond the borders of the target.


- Select the Specify anchor points option to match one point of the tool to the target, assigning location.

- Select the Trim to target option to make the tools not visible when it goes beyond the borders of the target.
- Tap the checkmark to accept and close the dialog.
- Select Split at the top of the dialog.
- Adjust the settings in the Wrap dialog box to your preference.
- Select the Specify anchor points option to match one point of the tool to the target, assigning location.

- Select the Specify anchor points option to match one point of the tool to the target, assigning location.
- Tap the checkmark to accept and close the dialog.