 Split
Split
![]()
![]()
![]()
Separate an existing part or face into multiple new parts or faces using a plane, Mate connector, surface or face of a part.
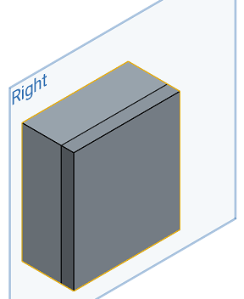
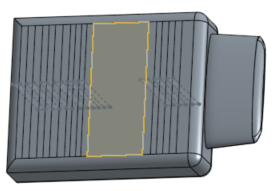
Split allows you to separate an existing part or face into multiple new parts or faces using a plane, Mate connector or implicit Mate connector, surface or face of a part. Click the Split feature tool on the toolbar. Select between the Part or Face split. In this example, a Part is used. Select the part in the graphics area or Parts list. Click the Entity to split with field in the dialog, and then select the Entity to split with in the graphics area. Only one entity can be used to split the part. This can be a plane, surface or face of another part, or a Mate connector. Click the green checkmark to accept the split.
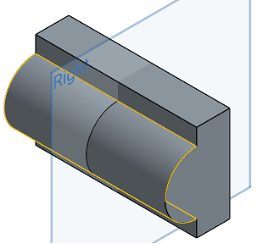
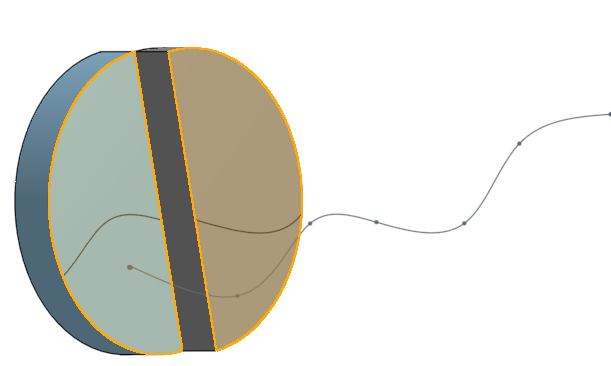
In another example, a curved surface is used to split the part. Check Keep tools to keep the entities with which the split was made; in this case, the curve. Keep in mind that some entities must be kept, such as faces of other parts and Mate connectors. Check Trim to face boundaries to limit the split to the bounding edges of the face selected to perform the split. Otherwise, Onshape extends the edges of the selected face. Uncheck Keep both sides to have only one side of the part kept. Click the Opposite direction arrow to keep the opposing side. When finished, click the green checkmark to accept the split part.
- Click
 .
.
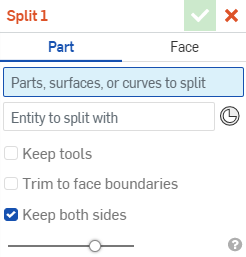
- Select Part as the type of entity to split.
- Select the parts, surfaces, or curves to split.
- Select the entity to split with: a plane, cylinder, Mate connector/implicit Mate connector, surface, or face. Click the Mate connector icon to visualize (on hover) implicit Mate connectors from which to choose. You can also select explicitly created Mate connectors in the Feature list.
- Optionally toggle to Keep tools.
Toggle on Keep tools to keep the entity that the split was made with. Unselect to remove the entity the split was made with when the feature is generated. The exception is when a face is selected, Keep tools defaults to selected face and the face is kept.
- Optionally select
Trim to face boundaries
to limit the split to the bounding edges of the face selected to perform the split. Otherwise, Onshape extends the edges of the selected face. See the example below:
With Trim to face boundaries selected, the arc selected as the entity to split with is limited to bounding edges of the surface selected and splits the part along one corner:
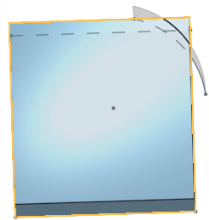
With Trim to face boundaries unselected, Onshape uses the extended edges of the selected arc and splits the part along all intersections of that extended edge:
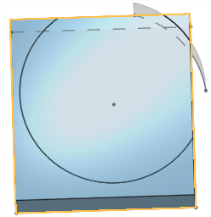
Trim to face boundaries is valid only when a face is selected. When a full surface is selected, this option is ignored.
Keep tools is valid only when a full surface is selected (when using surfaces). When a face is selected, this option defaults to on.
If a multi-face surface is selected as a tool with Trim to face boundaries selected, you must select a single face of the surface as the tool in order to also trim.
-
Optionally toggle Keep both sides to keep the parts on both sides of the tool used to split. Unselect to keep only one side of the split entity (as indicated by the directional arrow).
-
Click
 .
.
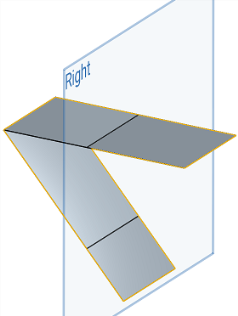
Use Split Face to split faces with a plane, Mate connector or implicit Mate connector, a surface, another face, or a curve.
- Click
 .
.
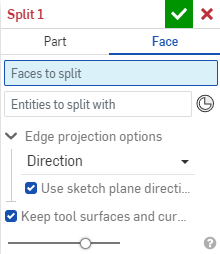
- Select Face as the type of entity to split.
- Select the faces to split.
- Select the entity or entities with which to split: a plane, Mate connector or implicit Mate connector, surface, face, or curve. You can click the Mate connector icon to visualize (on hover) implicit Mate connectors from which to choose. You can also select explicitly created Mate connectors in the Feature list.
- Specify the direction of the curve projection (onto the face you wish to split).
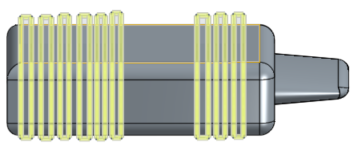
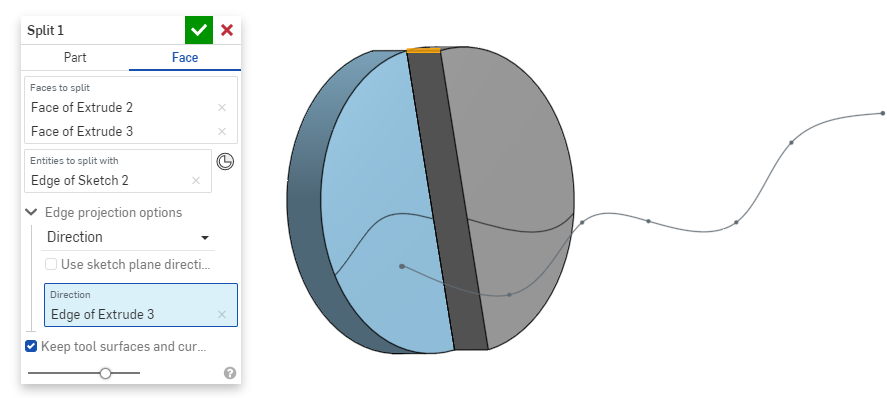
- Direction - You can check the box next to Use sketch plane direction to use normal to the sketch plane as the direction for the projection of the curve. Uncheck Use sketch plane direction to select a specific direction, by selecting an edge on the model:
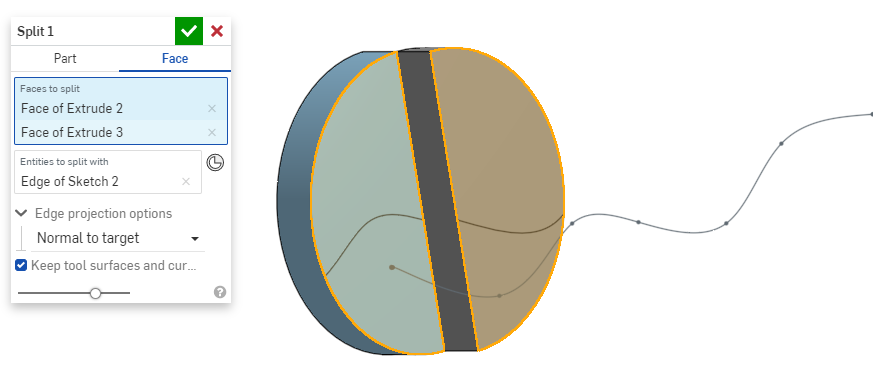
- Normal to target - Use Normal to target to project the curve onto the target face in a normal direction from the face plane:
- Direction - You can check the box next to Use sketch plane direction to use normal to the sketch plane as the direction for the projection of the curve. Uncheck Use sketch plane direction to select a specific direction, by selecting an edge on the model:
- Optionally select Keep tool surfaces and curves, if you wish to keep them.
-
Click
 .
.
Separate an existing part or face into multiple new parts or faces using a plane, surface or face of a part.
- Tap the Split tool icon (
 ).
).
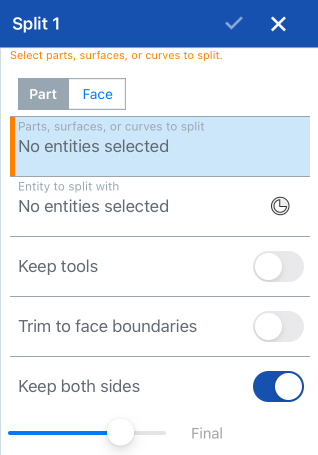
- Select Part as the type of entity to split.
- Select the parts, surfaces, or curves to split.
- Select the entity to split with: a plane, surface, or face.
- Optionally, tap the Mate point connector icon to select or create implicit Mate connectors.
- Optionally, toggle to keep tools.
Toggle on Keep tools to keep the entity that the split was made with. Leave Keep tools toggled off and the entity that the split was made with will be automatically removed when the feature is generated. The exception is when a face is selected as the tool, Keep tools then default to the selected face and the face is kept.
Keep tools is valid only when a full surface is selected (when using surfaces to split with). When a face is selected as the tool, this option defaults to On.
- Optionally select
Trim to face boundaries
to limit the split to the bounding edges of the face selected to perform the split. Otherwise, Onshape extends the edges of the selected face.
If a multi-face surface is selected as a tool with Trim to face boundaries selected, you must select a single face of the surface as the tool in order to also trim.
-
Optionally toggle Keep both sides to keep the parts on both sides of the tool used to split. Unselect to keep only one side of the split entity (as indicated by the directional arrow).
- Tap checkmark.
- Tap the Split tool icon (
 ).
).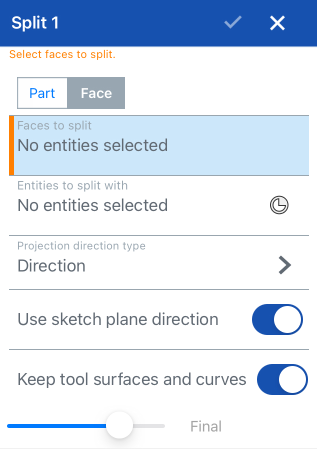
- Select Face as the type of entity to split.
- Select the faces to split.
- Select the entity or entities with which to split: a plane, surface, face, or curve.
- Tap the Mate point connector icon in order to select or create implicit Mate connectors.
- Specify the direction of the curve projection (onto the face you wish to split).
- Direction - You can tap the slider next to Use sketch plane direction to use normal to the sketch plane as the direction for the projection of the curve. Uncheck Use sketch plane direction to select a specific direction, by selecting an edge on the model:
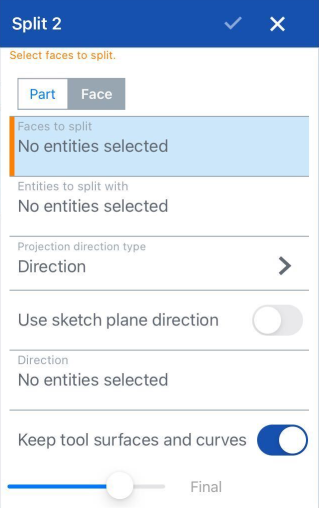
Normal to target - Use Normal to target to project the curve onto the target face in a normal direction from the face plane.
- Direction - You can tap the slider next to Use sketch plane direction to use normal to the sketch plane as the direction for the projection of the curve. Uncheck Use sketch plane direction to select a specific direction, by selecting an edge on the model:
-
When splitting a face with a surface or curve that intersects it, you can elect to keep those entities (check Keep tool surfaces and curves).
- Tap checkmark.
Separate an existing part or face into multiple new parts or faces using a plane, surface or face of a part.
- Tap Split tool.

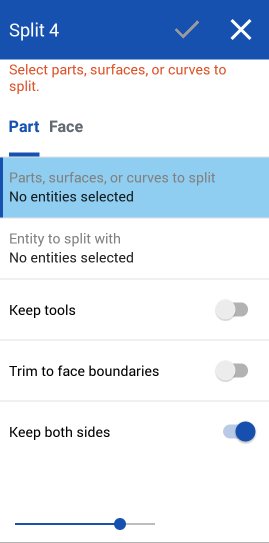
- Select Part as the type of entity to split.
- Select the parts, surfaces, or curves to split.
- Select the entity to split with: a plane, surface, or face.
- Optionally, toggle to keep tools.
Toggle on Keep tools to keep the entity that the split was made with. Leave Keep tools toggled off and the entity that the split was made with will be automatically removed when the feature is generated. The exception is when a face is selected as the tool, Keep tools then default to the selected face and the face is kept.
Keep tools is valid only when a full surface is selected (when using surfaces to split with). When a face is selected as the tool, this option defaults to On.
- Optionally select
Trim to face boundaries
to limit the split to the bounding edges of the face selected to perform the split. Otherwise, Onshape extends the edges of the selected face.
If a multi-face surface is selected as a tool with Trim to face boundaries selected, you must select a single face of the surface as the tool in order to also trim.
-
Optionally toggle Keep both sides to keep the parts on both sides of the tool used to split. Unselect to keep only one side of the split entity (as indicated by the directional arrow).
- Tap checkmark.
- Tap Split tool.

- Select Face as the type of entity to split.
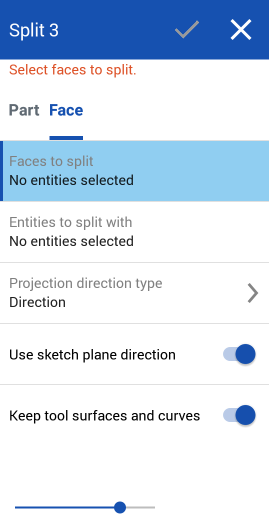
- Select the faces to split.
- Select the entity to split with: a surface, plane, sketch, or curve.
- Specify the direction of the curve projection (onto the face you wish to split).
Direction - You can tap the slider next to Use sketch plane direction to use normal to the sketch plane as the direction for the projection of the curve. Uncheck Use sketch plane direction to select a specific direction, by selecting an edge on the model:
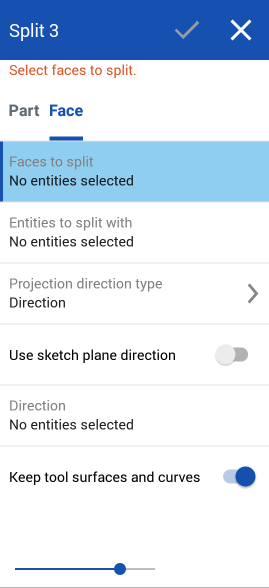
Normal to target - Use Normal to target to project the curve onto the target face in a normal direction from the face plane.
-
When splitting a face with a surface or curve that intersects it, you can elect to keep those entities (check Keep tool surfaces and curves).
- Tap checkmark.
