 Snap Mode
![]()
![]()
Automatically create a Mate when inserting an entity into an Assembly, using explicitly created Mate connectors on the entity being inserted. Also, drag one entity (by a Mate connector) to snap to a Mate connector on another entity. Both methods result in an open Mate dialog so you are able to fine tune the Mate type and alignment. Snap mode is able to be toggled on or off.
Shortcut: Shift+s
Snap mode allows you to automatically mate two parts by dragging one Mate connector over another. To turn on snap mode, select the Snap mode command on the toolbar, then move the cursor over a Mate connector on one instance. Left-click and then drag and drop that Mate connector over another Mate connector on a different instance. The two connectors are automatically mated. In the new Mate dialog, define the Mate type, and then click the green checkmark to accept the new Mate. To exit snap mode, select the icon again from the toolbar.
When inserting an entity
-
Click
 to toggle on (highlighted when on).
- Open the Insert dialog, Insert an entity, and with the Insert dialog still open drag the newly inserted entity to hover over a second entity to activate implicit Mate connectors.
- While inserting a part with more than one explicit Mate connector, use the Ctrl key to cycle through available Mate connectors on the entity being inserted:
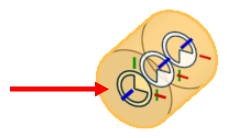
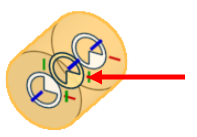
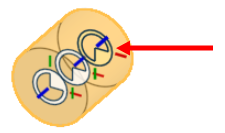
In the images above, the first Mate connector is highlighted upon selecting it to insert, the second Mate connector is selected upon using the Ctrl key, and the third Mate connector is selected upon using the Ctrl key again - repeatedly using the Ctrl key will continue to cycle through the Mate connectors
-
Click when the desired Mate connector is active.
- To tweak the Mate, open the newly created Mate in the Feature list.
Steps with entities already inserted
-
Click
 to toggle on (highlighted when on).
- Click and drag an entity; when you start dragging, the entity becomes transparent (to aid you in seeing the Mate connectors of the second entity).
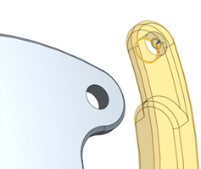
- When you drag to the point of waking up another Mate connector, the cursor changes to show that the entities will snap together at those points when released. Upon release, a Mate dialog opens.
While hovering over an active Mate connector, use the Ctrl key to cycle through available Mate connectors on the entity being inserted.
-
At this point you are able to select a type of Mate (Fastened, Planar, Revolute, etc) and tweak the orientation of the Mate connector itself using the directional arrows
 and secondary axis
 tools. Use the Play button
 to animate the Mate behavior.
Use the ‘A’ and ‘Q’ keys to change alignment during the Snap drag (in place of clicking the Secondary axis icon in the dialog).
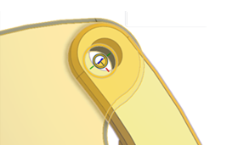
- You are able to use the 'A' and 'Q' keys to change alignment during the Snap drag (in place of clicking secondary axis icon in the dialog).
- You are able to zoom and rotate the graphics area while the entity is selected and in the process of dragging.
- When selected, entities become transparent so you are able to see where you're going with them - when dragging an entity near another entity, the second entity's Mate reference points become active/visible.
- As you are inserting an instance into an assembly, you are able to pan and rotate as usual, even with Snap mode on.
- Use the Ctrl key to cycle through different Mate connectors when using Snap mode while inserting an entity.
-
Tap the Snap mode icon (
 ).
).
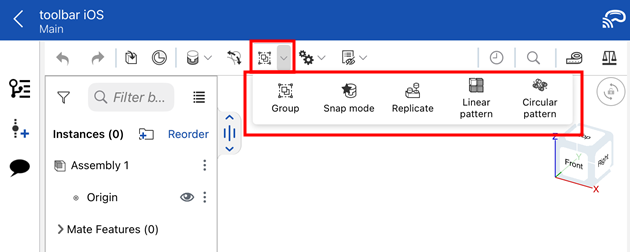
- Tap to select a Mate connector (implicit or explicit).
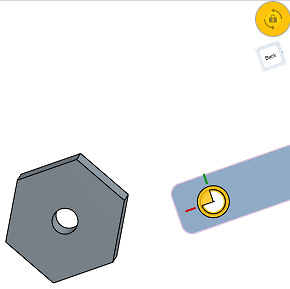
3D Rotate Lock activates once you select a Mate connector (implicit or explicit), allowing you to drag the selected Mate connector without rotating the view.
- Drag the Mate connector to the desired Mate connector (implicit or explicit) that you want to connect to.
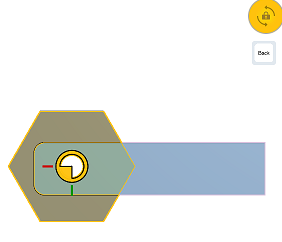
A dialog opens allowing you to fine tune your Mate type and placement using offset and the reorient tools:
- Offset - Tap to set an offset distance for defining a fixed space between the parts being mated.
 -
Flip the primary axis,
Z orientation of the instances.
 -
Reorient the secondary axis;
rotate the quadrant orientation (in the XY plane) of the instances by 90 degrees at a tap.
- Accept the dialog to make and save specifications/changes.
Snap mode remains toggled on until you tap to manually toggle it off.
- Zoom and pan the graphics area while the Mate connector and part is selected.
- Once you have selected a Mate connector, touch and drag anywhere in the graphics area to move the part. Touch and drag with your finger above or below the Mate connector to better see what you are doing.
- Manually toggle 3D Rotate Lock on and off by tapping the icon in the upper right. Try rotating the view if you need a better angle from which to line up your Mate connectors.