 Aligned Rectangle
![]()
Sketch a rectangle starting with a line and ending with the perpendicular distance of the aligned side.
This video explains how to use the Aligned rectangle sketch tool. This tool sketches a rectangle, starting with a line and ending with a perpendicular distance of the aligned side.
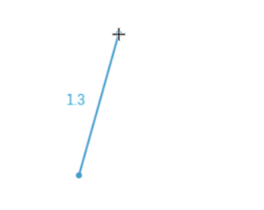
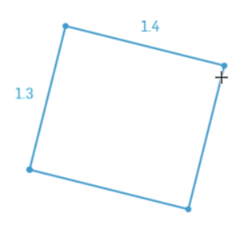
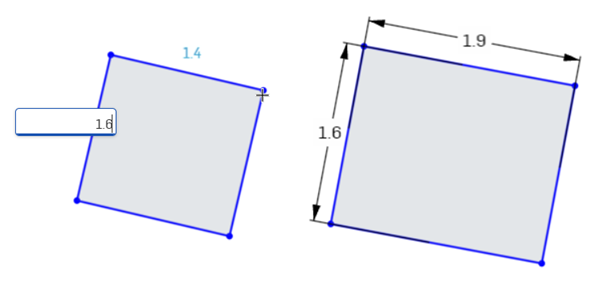
First, click on the Aligned rectangle tool on the sketch toolbar. Second, click a point location to start your line, and click the end point of the line. This creates the first side of the rectangle. Drag perpendicular to the line just created, and click at the desired distance perpendicular to the aligned side. The rectangle is created. Once drawn, focus is placed on the initial line's numerical field. Enter a value on your keyboard and press the Enter key. Focus is then placed on the opposing side value. Enter a value on your keyboard and press the Enter key to accept the new numerical value.
Holding the Alt key while you create your rectangle constrains the sides to a perfect square.
Steps
- Click
 to set start with a line, click again to set the end of the line.

- Drag perpendicular to the line, and click at the desired distance perpendicular to the aligned side. The rectangle is created.

- Optionally, immediately after the rectangle is created, input a numerical value (or type "=#" to input a variable) for the length and press enter, then input a numerical value (or type "=#" to input a variable) for the width and press enter. This dimensions the rectangle without having to use the dimension tool.

To input a variable in any dimension field after the geometry is already sketched, the equal sign (=) is not required. Type "#" to input a variable.
Hold the ALT key while sketching to constrain two rectangle sides to be equal (resulting in a square).