 Rib
Rib
![]()
![]()
![]()
Create ribs in parts at multiple locations based on a sketch.
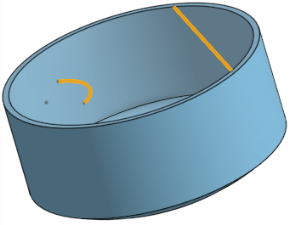
The Rib feature tool allows you to create ribs in parts at multiple locations based on a sketch. Before creating the ribs, create the Sketch lines on which the Ribs are based, Sketch 2 in this example. The sketch uses the front face of the box as the sketch plane.
Click the Rib feature tool on the toolbar. Select the sketch profile. Click the Parts field in the dialog and select the Part to which the ribs are applied.
For the Rib extrusion direction, select Normal to sketch plane. Enter a rib Thickness value in the dialog.
Check Draft to apply a taper to both sides of the rib. Specify the degree in the Draft angle field. Click the Opposite direction icon to reverse the direction of the draft.
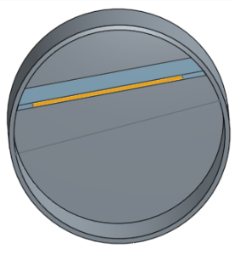
In the case of sketch curves that do not intersect with the part, select Extend profiles to part to extend the sketch curve to the part.
Click the checkmark to accept the new ribs.
- Click the Rib icon (
 ).
).
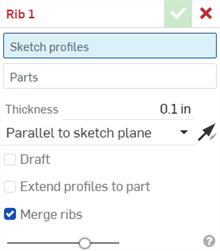
- Select the sketch curves from which to create ribs.
- Select the parts to incorporate the ribs.
- Specify the desired thickness of the rib.
-
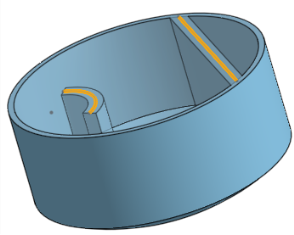
Indicate how to extend the rib: normal (perpendicular) to the rib sketch plane, or parallel to the sketch plane. Use the directional arrows
 to flip the direction, if necessary.
- Check Draft to apply a taper to both sides of the rib. Specify the degree in the Draft angle field. Click the Opposite direction icon (
 ) to reverse the direction of the draft.
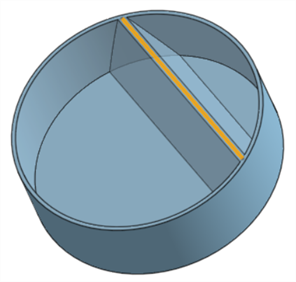
- In the case of sketch curves that do not intersect with the part, select Extend profiles to part to extend the sketch curve to the part. Lines are extended, arcs are extended by straight lines from the ends of the arc:
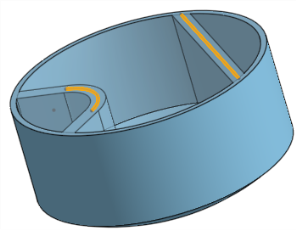
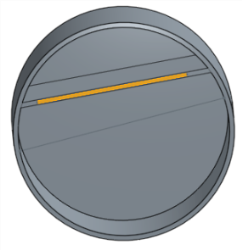
- Use Merge ribs to add the ribs to the existing part. Uncheck this box to create individual new parts of the ribs.
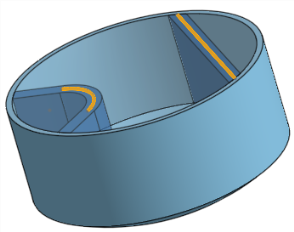
-
Click the Checkmark icon (
 ).
).
The rib must be entirely within the bounds of the part or the operation will fail.
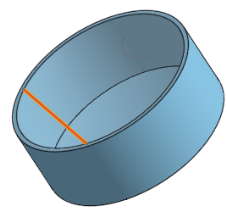
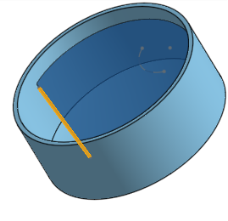
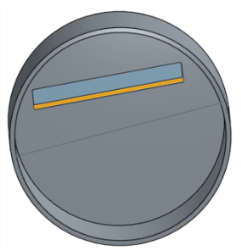
Extend the rib normal to the sketch plane:
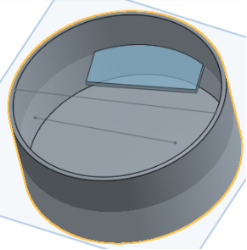
Extend the rib parallel to the sketch plane:
Extends the sketch profile to the part edge:
Merges the ribs with the part and with other intersecting:
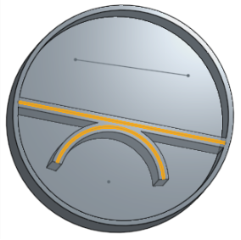
Create ribs in parts at multiple locations based on a sketch.
Steps
- Tap the Rib tool icon (
 ).
).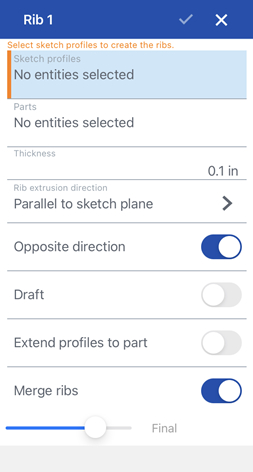
- Select the sketch curves from which to create ribs.
- Select the parts to incorporate ribs.
- Specify the desired thickness of the rib.
- Indicate how to extend the rib:
- Normal to sketch plane - perpendicular to the sketch plane
- Parallel to sketch plane - parallel to the sketch plane
- Optionally toggle Opposite direction to change the direction of the rib.
- Optionally, toggle Draft to apply a taper to both sides of the rib. Specify the degree in the Draft angle field. Toggle Opposite direction to reverse the direction of the draft.
- Optionally toggle Extend profiles to part - in the case of sketch curves that do not intersect with the part, this will extend the sketch curves to the part. Lines are extended, arcs are extended by straight lines from the ends of the arc.
- Optionally toggle Merge ribs to add the ribs to the existing part. Leave Merge ribs off to create individual new parts of the ribs.
Example
- Tap Rib tool.

- Select the sketch curves from which to create ribs.
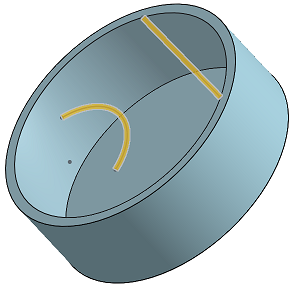
- Select the parts to incorporate ribs.
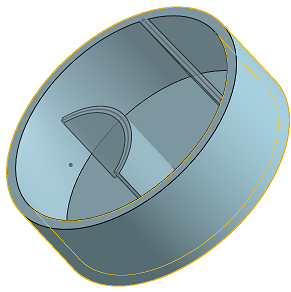
- Specify the desired thickness of the rib.
- Indicate how to extend the rib: normal (perpendicular) to the rib sketch plane, or parallel to the sketch plane. Use the Opposite direction toggle, if necessary.
- Optionally, toggle Draft to apply a taper to both sides of the rib. Specify the degree in the Draft angle field. Toggle Opposite direction to reverse the direction of the draft.

- In the case of sketch curves that do not intersect with the part, select
Extend profiles to part
to extend the sketch curve to the part. Lines are extended, arcs are extended by straight lines from the ends of the arc:
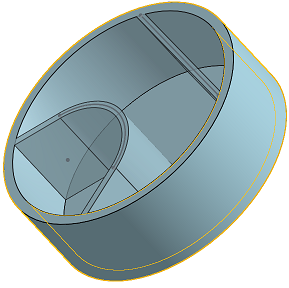
- Toggle on Merge ribs to add the ribs to the existing part.
- Tap checkmark.
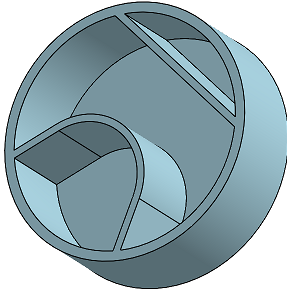
The rib must be entirely within the bounds of the part or the operation will fail.
Create ribs in parts at multiple locations based on a sketch.
Steps
- Tap Rib tool.

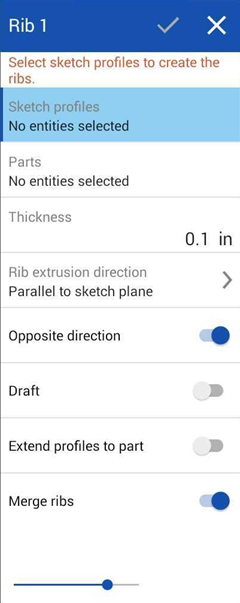
- Select the sketch curves from which to create ribs.
- Select the parts to incorporate ribs.
- Specify the desired thickness of the rib.
- Indicate how to extend the rib:
- Normal to sketch plane - perpendicular to the sketch plane
- Parallel to sketch plane - parallel to the sketch plane
- Optionally toggle Opposite direction to change the direction of the rib.
- Optionally, toggle Draft to apply a taper to both sides of the rib. Specify the degree in the Draft angle field. Toggle Opposite direction to reverse the direction of the draft.
- Optionally toggle Extend profiles to part - in the case of sketch curves that do not intersect with the part, this will extend the sketch curves to the part. Lines are extended, arcs are extended by straight lines from the ends of the arc.
- Optionally toggle Merge ribs to add the ribs to the existing part. Leave Merge ribs off to create individual new parts of the ribs.
Example
- Tap Rib tool.

- Select the sketch curves from which to create ribs.

- Select the parts to incorporate ribs.

- Specify the desired thickness of the rib.
- Indicate how to extend the rib: normal (perpendicular) to the rib sketch plane, or parallel to the sketch plane. Use the Opposite direction toggle, if necessary.
- Optionally, toggle Draft to apply a taper to both sides of the rib. Specify the degree in the Draft angle field. Toggle Opposite direction to reverse the direction of the draft.

- In the case of sketch curves that do not intersect with the part, select
Extend profiles to part
to extend the sketch curve to the part. Lines are extended, arcs are extended by straight lines from the ends of the arc:

- Toggle on Merge ribs to add the ribs to the existing part.
- Tap checkmark.

The rib must be entirely within the bounds of the part or the operation will fail.