![]()
Assign a name to a specific position (that is, the Mate degree of freedom values, and absolute transforms for instances with no Mates) of the assembly and switch to a particular named position easily at any time. Keep in mind that the Mate values are relative and are able to be satisfied even if both sides of the Mate have moved.
All Onshape Assemblies have a Named positions icon on the far right of the graphics area, below the View tools icon . Click this icon
![]() to access the Named positions panel:
to access the Named positions panel:
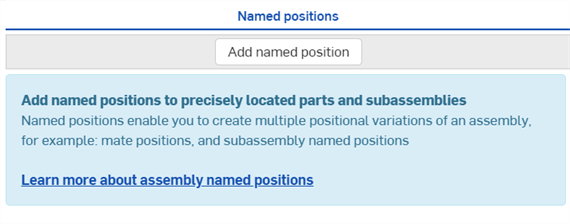
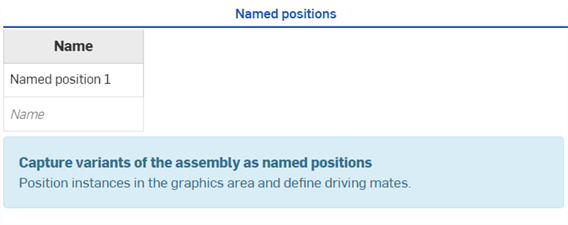
- In the Assembly's Named positions panel, click the Add named position button at the top. A new Named position row is created in the Named positions table (shown in the first image below). A yellow
notification indicates the Assembly is in the named position edit mode (shown in the second image below).

-
Click and drag to move parts to their desired positions in the graphics area.
-
If the part is mated to another part, to add the Mate's degrees of freedom to the named position:
-
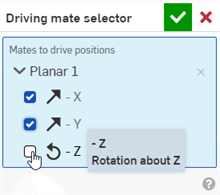
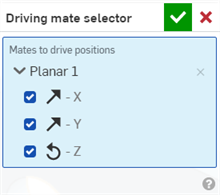
Left-click on the Mate in the Mate Features Instances list or left-click on the Part in the instances list or graphics area. The Driving mate selector dialog opens where degrees of freedom for the Mate are selected:
-
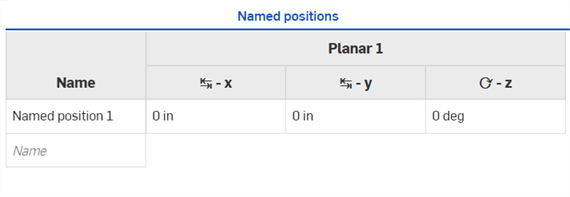
Each degree of freedom selected in this dialog creates a column in the Named positions table:
-
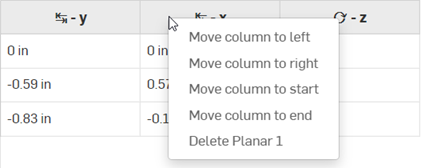
Right-click on a column header to adjust column position or delete columns from the context menu:
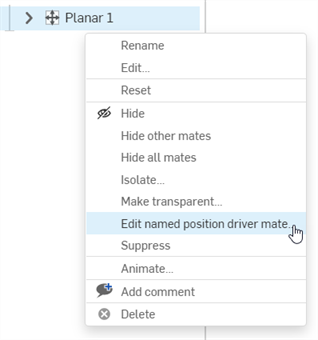
If not in edit mode, an alternate way of adding a mate's degrees of freedom is to right-click on the Mate in the Mate Features Instances list and select Edit named position driver mate (shown in the first image below). The Driving mate selector dialog opens with all the Mate's degrees of freedom pre-selected (shown in the second image below):
-
-
Move column to the right/left - Moves the column one column over, either the right or left column, respectively
-
Move column to start/end - Moves the column to the start (first column on the left) or end (last column on the right), respectively
-
Delete - Deletes the column
After the first Named position is added to the table, the Add named position button is located at the bottom of the panel.
An alternate way of removing columns is to uncheck the Mate positions from the Driving mate selector dialog.
-
Click on the Named position 1 cell and enter a name for the position.
-
Repeat to create more named positions.
-
Click
 .
.
- Right-click on a named position from the table to open the context menu:
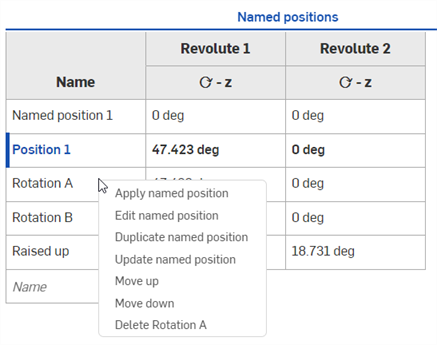
- Apply named position - Applies the named position to the Assembly. Whatever the Mate values are at the time of selecting this option, the Assembly updates to reflect these values.
- Edit named position - Opens edit mode for the named position.
- Duplicate named position - Creates a duplicate from the current named position and places it in a new table row beneath the current row. 'Copy of' is used as a prefix for the new position name.
- Update named position - If parts in the Assembly are edited outside the named position edit mode; for instance, if a part is no longer in the assembly (and the named position), or you want to adjust a part's position, this option updates the current named position with the new Assembly modifications.
- Move up - Moves the named position up one location in the list.
- Move down - Moves the named position down one location in the list.
- Delete named position - Deletes the named position and removes it from the table.
-
Select Apply named position. If the position cannot be loaded, a message that some Mate values could not be applied appears. Reasons a position may fail to load might include:
- Deletion or modification of a part
- Modification of a feature that would cause the Mate to fail
Using Named positions with subassemblies
Use Named positions defined in subassemblies with Named positions defined in the top level Assembly:
-
From the subassembly tab, create one or more Named positions, as outlined in Steps.
-
In the top level Assembly, right-click on the subassembly from the Instances list, and select Add to named positions:
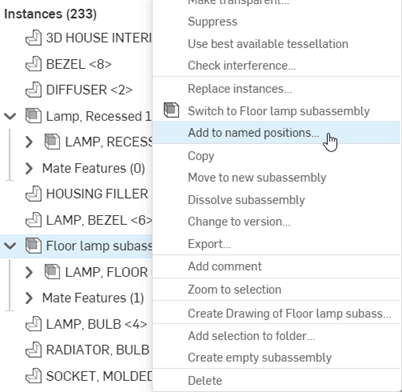
-
If there are no Named positions for the top level Assembly, one is automatically created (Position A in the image below).
Use the Position dropdown to select the desired subassembly Named position to use with the Position A Named position (either Subassembly 1 or Subassembly 2 in the image below):
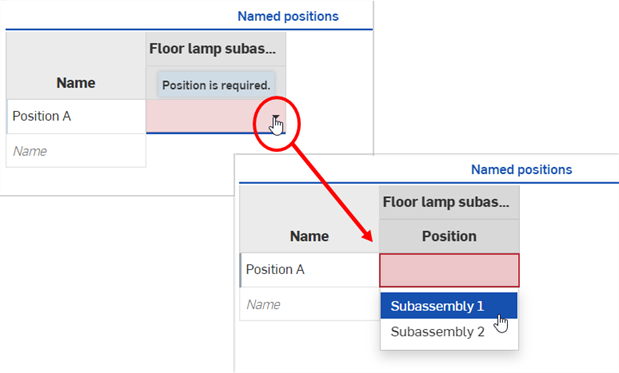
Editing a Mate's degrees of freedom in the table
To edit the Mate's degree of freedom from the Named positions table:
- Enter the Mate's degrees of freedom values numerically next to the named position row where they should be updated.
- Right-click on the named position's Name cell and select Apply named position from the context menu. The Assembly is updated with the new values from the table,
Opening and closing Named positions edit mode
-
To open named positions edit mode, right-click on the named positions Name cell and select Edit named position.
-
To exit named positions edit mode, click Done on the yellow message indicator or click anywhere in the Named positions table.
- A named position references the position of every part in the Assembly.
- Mates are not required in order to create named positions.
- Setting up named positions beforehand may aid in effectively changing positions for modeling in context.
- The positioning of Tangent and Fastened Mates are not impacted in named positions. Fastened Mates always continue to work, however, Tangent Mates may rely on a parameter that has changed and may not work in all cases.
- If a named position fails, you may have made a change with which the named position is unable to render. Revert to an earlier point in the document history, or delete the named position and create a new one.
- A named position will fail if the degree of freedom is outside the limit definition placed on a mate.
- Use a named position in a drawing: once the view is inserted in the drawing, right-click the view to access the context menu. Select Explode/Position > and then the name of the named position you wish to reflect in the view.