![]()
View and filter lists of releases and task activities on the Action items tab.

- Action items - To return to the Action items page from the Activity, Documents, or Analytics page, click Action items at the top of the page.
- Create task - See Creating a general task.
- Filters
- Filter through releases, comments, and tasks. The filter options include:
- Type - Choose between filtering through any combination of comment, general, and release activities, by selecting the check boxes to the left of the filter options.
- Status - Choose to filter tasks by any, open, draft, or complete status, by selecting one of the radio buttons to the left of the filter options.
- Assignee - Choose to filter tasks by those that are assigned to you, created by you, or any role, by selecting one of the radio buttons to the left of the filter options.
- Add filter - Choose additional filters from the dropdown to add to the Action items page.
- Clear all filters - Remove all filters to display all Action items.
- Search - Filter for tasks, comments, or releases that match a search string.
- Sort - Sort your filtered results by Oldest releases and/or tasks first or Newest first by clicking the dropdown arrow under Sort and selecting your preference (Onshape defaults to sorting by Oldest first).
- Action items list - As you select different filters, the results for the corresponding selections appear in the Action items list located in the center of the page.
- Resolve - Click a task or comment check box to resolve it.
Creating a general task
-
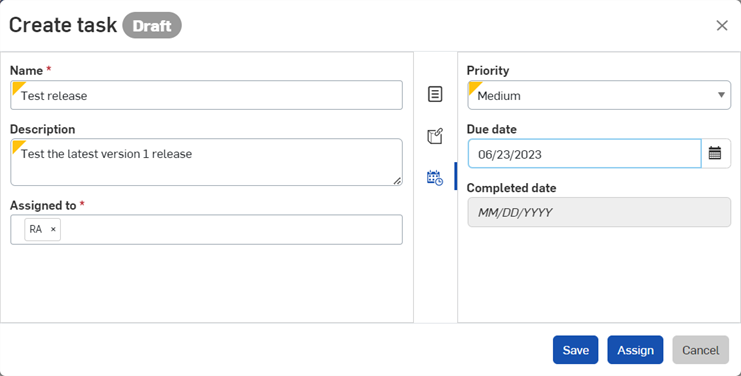
Click Create task.
-
Specify a task Name and optionally, a task Description.
-
Assign the task to someone. You can assign tasks to:
-
On the right side of the dialog, next to the Properties icon (
 ) a default category of Task is assigned. You can keep or delete this category and/or enter another.
-
Click the References icon (
 ) to associate this task with a part, Assembly, Drawing, file, Feature Studio, or application in a particular document or version of a document. When the Reference dialog opens, click the Add reference icon (
 ), search for a reference or paste a URL to a specific reference, or select from the list to find a reference in a particular document of a part, Assembly, Drawing, file, Feature Studio, or application. You can also create a version or view the version graph.
-
Click the Priority & Dates icon (
 ) and enter a due date.
-
Click Save to save the task and assign it later; click Assign to assign it to a particular user now, or click Cancel to abort the creation of the task.

An example task in the Action items list after it is created.
-
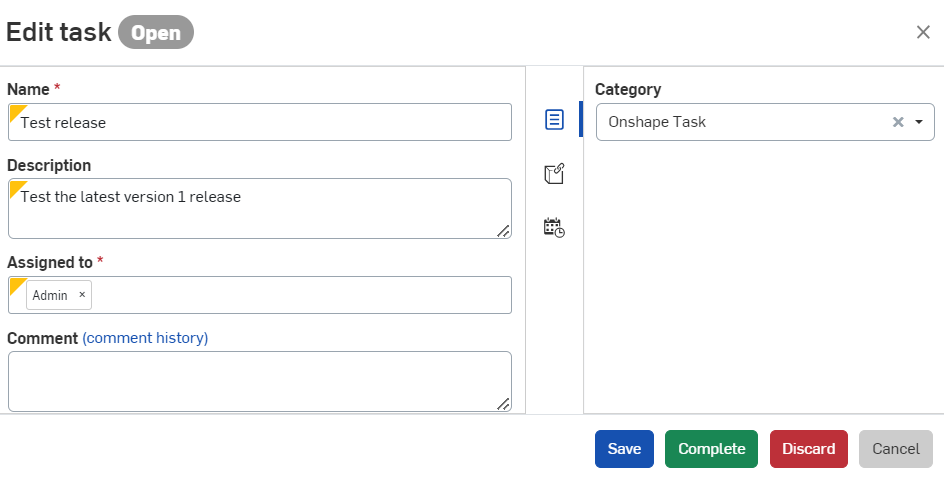
To re-assign a task to a different user after creating the task, select View task to edit. Remove the user in the Assigned to field and select a different user. Click Save to re-assign the task.
Adding URLs in the Task description
URL locations in the Task description are automatically converted into an HTML link once the Task is saved.
If this link targets an Onshape location in this or another document, it opens in a new browser tab. The link is prefaced by the Onshape logo and converted into easily readable text displaying the document, version/worskspace, and/or tab.
If the link is external to Onshape, it opens in a new browser tab. The link is suffixed with an external link icon and a warning message that the target location is outside Onshape (shown below).

An internal Onshape link (top) and an external link (below).
Users should be aware that external links can pose security risks. Only click on links whose source you have first verified.
Tagging entities (adding comments on features) in Feature lists
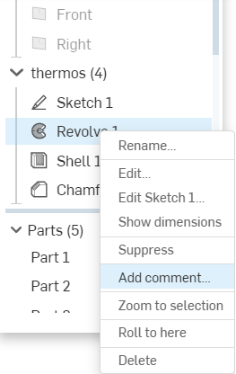
To add a comment on an entity in a Feature list (in Part Studios and Assemblies), select the feature in the list and access the context menu. Select Add comment:
Or you can use the Tag entity icon in the Comments dialog on the Document panel, shown below outlined in blue:
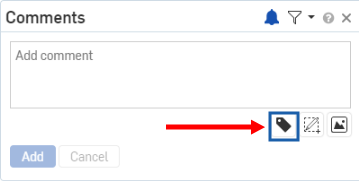
Then select the entity: part, edge, face, etc.
Use the “@” sign to specify that a specific user receive an email directing them to the comment. When you click
Add
in the Comment dialog (above), a comment icon
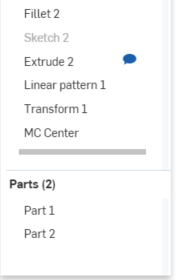
 appears next to the feature in the list (below) or on the entity in the graphics area (both shown below):
![]()
When the Comments panel is closed, the comment icons in the Feature list disappear. The icons are visible only when the Comments panel is open.
Features in the Feature list will not have comment icons in the graphics area. Their comment icons are displayed in the Feature list.
Adding comments on implicit Mate connectors
You can attach a comment directly to an implicit Mate connector.
- Hover to activate implicit Mate connectors, then right-click to access the context menu.
- Select Add comment to open a new comment on the Comment panel.
When you click Add the Comments panel opens, and a comment icon appears on the implicit Mate connector:
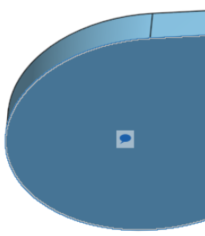
When the Comments panel is closed, the comment icons in the graphics area disappear. The icons are visible only when the Comments are open in the Document panel.
To delete the comment, click
![]() in the upper right corner of the Comments panel; then confirm the action.
in the upper right corner of the Comments panel; then confirm the action.
Working with the Action items list
In the list of action items, there are many tools to interact with and obtain information from:
- The bullet point at each item: when open (white center), it indicates a task you have not yet expanded. When closed (blue bullet), it indicates an item that has been expanded previously.
- Click an item to expand it:
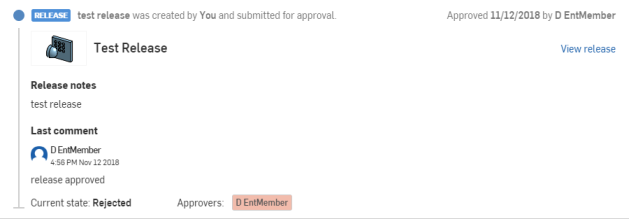
The name of the document associated with the action item is shown along with the document thumbnail. Click the name of the document to open it.
For release tasks, the release notes are included, the last comment made, and the action associated with this workflow notification. The current state of the release is also noted, along with the names of the approvers and a color-coded indication of their action: Red for rejected or discarded, white for pending, and green for approved.
There is also a link to view the release (View release). This does not open the document, but opens the Review release dialog.