 Group
Group
![]()
![]()
![]()
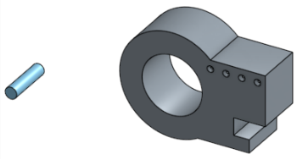
Use Group to fix the position of selected instances relative to one another within the assembly. It is very convenient when the instances were all modeled in the same Part Studio in the correct locations relative to one another. Group enables you to keep that relative positioning without having to create Mates.
Group is a quick way to eliminate all degrees of freedom between selected instances. Group is best used for purchased parts that do not change, or for parts created together in the same Part Studio. It positions parts based only on their origin and ignores changes in geometry.
Start a new Group. Select instances to include in the Group. Accept the group.
The instances stay aligned relative to each other’s origins and move together as a single unit unless constrained. Fix or mate the Group to fully define its degrees of freedom in the assembly.
With parts created in separate Part Studios, their instance positions do not update automatically in the assembly, causing instances to overlap with changes. For this reason, it is best practice to Group only instances created in the same Part Studio.
There is no limit to the number of groups that can be created in an assembly.
-
Click
 .
.
- Select the entities to include in the group; pre-select is available.
You have the ability to click the entity name in the Feature list, click the entity in the graphics area, or click and drag a selection box around entities in the graphics area.
-
Accept
 .
.
Notice that a Group feature is added to the Mate Features list in the Feature list box.
You are able to hide (and show) groups from the context menu:
- Right-click a group in the Feature list.
- Select Hide instances from the context menu.
Follow the same procedure to show the group again, selecting Show instances from the context menu.
- Create the parts you wish to group (in a Part Studio).

- Insert those parts into an Assembly.
- Arrange the parts in the desired relationship to each other.
-
Select Group in the toolbar, and then select the parts to group; click
 .
.
- Open another Assembly, click Insert, select Assemblies and notice that the group is listed there as one entity:
- Select the group and insert it; a Group instance is listed in the Instances list.
- Despite the selection of child entities listed in the Feature list, the group moves and behaves as a group. The child entities cannot be acted upon individually.
- You have the ability to suppress a Group and change the relative position of the entities; when you unsuppress, the Group reflects the new relative positions. (To return to the original group configuration, use Undo.)
- You have the ability to change the relative positions of the entities in a Part Studio, and the Group in the Assembly updates accordingly.
- A single part instance is only able to be selected as a group member if it is not yet contained by a subassembly. If it is contained by a subassembly and selected, then that subassembly is selected automatically instead.
For example, when Part 1 <1> is selected (above), the entire Assembly 1 <1> is selected by default.
- A subassembly must be rigid to be added to the group.
- When members of a group are deleted, they are also deleted from the group. When the last member of a group is deleted the group is also deleted.
-
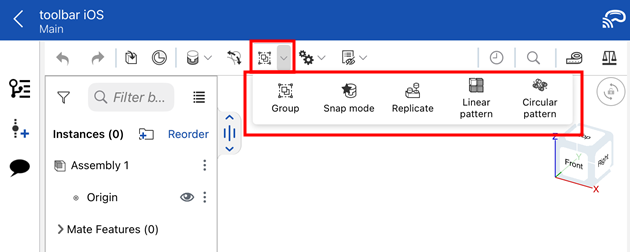
Tap the Group tool icon (
 ).
).

- Tap to select the parts to include in the group. Select the entity name in the Instance list or select the entity in the graphics area; pre-select is available.
- Tap the checkmark.
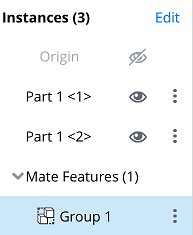
A Group feature is added to the Mate Features list in the Instance list.

Hide (and show) groups from the overflow menu in the Feature list.
- Select a group in the Feature list.
- Open the overflow menu and select Hide (or Show).
The entire group is hidden or shown.
- Despite the selection of child parts listed in the Feature list, the group moves and behaves as a group. The child parts are not able to be acted upon individually.
- You have the ability to suppress a Group and change the relative position of the parts; when you unsuppress, the Group reflects the new relative positions. (To return to the original group configuration, use Undo).
- You have the ability to change the relative positions of the parts in a Part Studio, and the Group in the Assembly updates accordingly.
- Only instances of an assembly are able to be selected as group members.
- A subassembly must be rigid to be added to the group.
-
Tap
 .
.
- Tap to select the parts to include in the group. Select the entity name in the Instance list or select the entity in the graphics area; pre-select is available.
- Tap the checkmark.
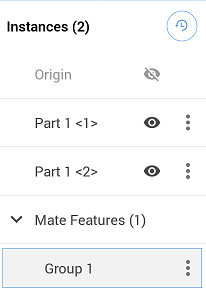
A Group feature is added to the Mate Features list in the Instance list.

You have the ability to hide (and show) groups from the overflow menu in the Feature list.
- Select a group in the Feature list.
- Open the overflow menu and select Hide (or Show).
The entire group is hidden or shown.
- Despite the selection of child parts listed in the Feature list, the group moves and behaves as a group. The child parts are not able to be acted upon individually.
- You have the ability to suppress a Group and change the relative position of the parts; when you unsuppress, the Group reflects the new relative positions. (To return to the original group configuration, use Undo).
- You have the ability to change the relative positions of the parts in a Part Studio, and the Group in the Assembly updates accordingly.
- Only instances of an assembly can be selected as group members.
- A subassembly must be rigid to be added to the group.