Midpoint Line
![]()
![]()
![]()
iOS and Android support for Midpoint line is limited to viewing and editing Midpoint lines inserted from the desktop (browser) platform.
Available in: Sketch
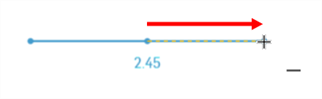
Sketch a line starting symmetrically from its midpoint.
Onshape’s sketch tools include various line and rectangle features.
While in a sketch, start a new Line.
To create a single line segment, left-click and hold the mouse button down, drag the cursor, and release to place the end of the line.
To create connected line segments, left-click to start a line, then move the cursor and click again to place the next point. Each click starts a new segment from the previous endpoint. Double-click the final endpoint or exit the command to finish.
Start a Midpoint line to create two lines that extend in both directions outward from the midpoint.
There are three types of rectangles in the dropdown menu: Corner rectangle, Center point rectangle, and Aligned rectangle.
Start a new Corner rectangle. Click, drag, and release to define two of the rectangle’s corners.
Start a new Center point rectangle. The first click defines the center. Drag and release to define the distance to the rectangle’s corners.
The Corner and Center point rectangles align their sides vertically and horizontally with the sketch plane's X-Y axes.
The Aligned rectangle allows you to create a rectangle at an angle, with sides that are not parallel to the sketch plane axes. Start an Aligned rectangle. The first two clicks define the angle and length of the first side. Drag the cursor out and click a third time to define the perpendicular distance of the second rectangle side.
-
Click the dropdown next to the Line tool and select the Midpoint line tool icon
 to activate the tool.
-
Hover over the sketch on which you want to create a midpoint line.
-
Click to place the mid point of the line.
-
Click again to place the end point of the line.