My Account - Developer

Users can register and manage applications, App Store entries, and API keys in their Developer settings.
The steps on this page apply only to individual users. Company, classroom, and Enterprise admins should follow the steps here: Company/Classroom/Enterprise Settings: Developer..
All applications created in the Company/Classroom/Enterprise Settings count towards the company's API Limits. All applications created in the Developer Portal count toward the individual user's API Limits.
All applications submitted to the Onshape App Store (Onshape Apps) must follow the instructions on the API Guide: OAuth2 page and use OAuth2 for authorization. Automation scripts (or applications not meant for the Onshape App Store) may use either OAuth2 or API Keys for authentication. OAuth2 allows applications to call Onshape APIs on behalf of the users of the application; API keys will only perform operations on behalf of the Onshape user who generated the API keys.
See the following resources for more information on developing applications with Onshape:
* Onshape Developer Documentation
* Glassworks API Explorer
* Sample Code
To navigate to your Developer settings in Onshape, click on your Account user icon ( ) in the top right corner of your Onshape window. This opens a dropdown menu. Click My account.
Click Developer in the list on the left side of the page:
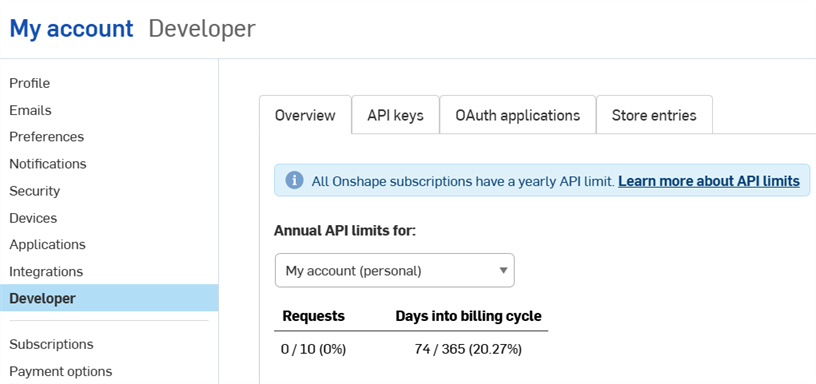
On this page you can:
-
Register a new OAuth application with Onshape
-
Submit properly authenticated apps to the Onshape App Store
-
View, create, and delete API keys for you individual use
-
View your API usage
- See API Limits for more information on API usage.
- Click the Annual API limits for dropdown to select a different account.
-
Notification emails are sent to all admins at 25%, 50%, 75%, and 100% of usage.
 App development workflow
To create an app that opens in the Onshape UI for internal use or testing:
- Register the app with Onshape.
- Create an extension for the app in the Onshape UI.
- Create an app store entry and subscribe to it.
To publish the app to the Onshape App Store for end users:
- Authenticate with OAuth2.
- Complete the Launch Checklist
Managing API keys
API keys are a useful way create small applications meant for personal use, allowing developers to avoid the overhead of the OAuth workflow.
API keys are used to authenticate an application, not its users. (OAuth2 authenticates an application and users of the application by ensuring the users are authorized to access Onshape.)
Once you create an API key, it is valid only in the stack on which it was created. An API key created on your company stack (i.e., companyName.onshape.com) will not function on the production stack (cad.onshape.com). Administrators can also manage API keys for users in their company: see Company/Classroom/Enterprise settings - Developer.
Individual accounts are capped at two (2) API keys. Delete API keys as needed. Company, classroom, and enterprise accounts are not capped.
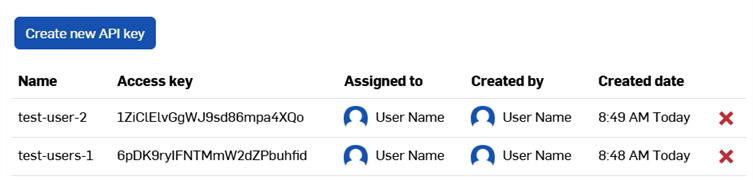
Viewing API keys
- Click API keys on the Developer page.
- View all your previously-created API keys.
Creating API keys
- Click Create new API key.
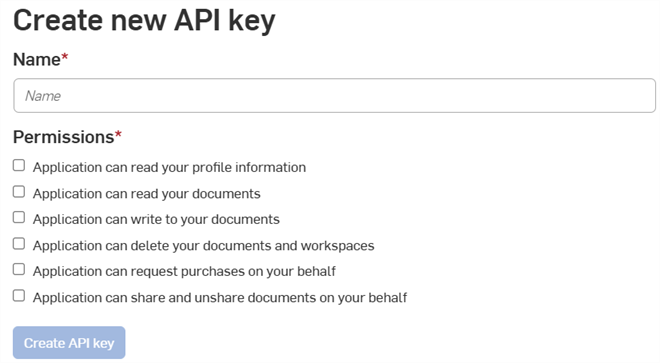
- Provide a name for the API key in the Name field.
- Choose the permissions for the keys. See Permission scopes below.
- (Optional) To choose an expiration date for the API key:
- Toggle on the Enable TTL (Time to live) button.
- Enter or select a date in the date field. You will receive an email notification when the key is about to expire.
- Click the Create API key button.
-
In the pop-up window, copy the API key and secret key shown, save them somewhere, then click the Close button.
You will not be able to find the secret key again, so save it somewhere safe!

Deleting API keys
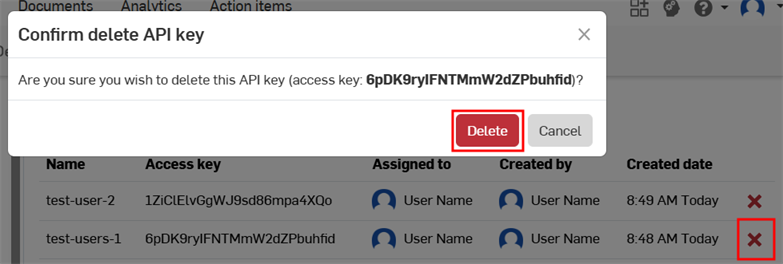
- Click the "X" icon to the right of the API key you wish to delete.
- Confirm that you want to delete this API key. This action cannot be undone. Click Delete to confirm.
Moving API keys
API keys cannot be moved between accounts, nor can they be moved from the user level to the company level or vice versa.
If you created an API key on the wrong account:
-
Create a new API key for the correct account:
-
To create an API key at the user level, see Creating API Keys on this page..
-
To create an API key at the company, classroom, or enterprise level, see the Company Settings - Developer docs..
-
-
Replace all references to the original API key throughout your code, and verify the code works as expected.
-
Delete the original API key.
Managing OAuth applications
Creating and registering an OAuth application
-
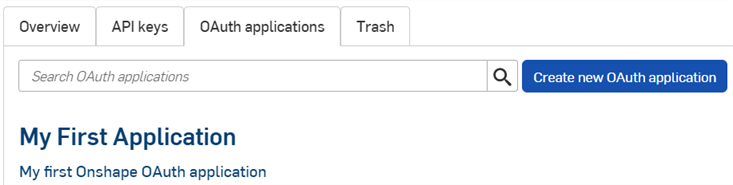
Click the OAuth applications tab on the Developer page to see a list of all your apps:
-
Click the Create new OAuth application button.
-
Fill out the form:
-
Name - Name of the application displayed to users.
-
Primary format - String that uniquely identifies your application and is a marker for the data it might store on Onshape servers (e.g.,com.example.example). Cannot be changed after the application is registered. Not displayed to users.
-
Summary - Description of the application, shown to the user when they’re asked to grant the application permission to access their data.
-
Redirect URLs - URL to which you are redirected after authentication; the landing page of your application.
- Your application must specify at least one URL used in the OAuth protocol exchanges.
-
This URL must also use SSL (a URL that begins with https), with two exceptions applicable for installed desktop applications: http://localhost:<port> and urn:ietf:wg:oauth:2.0:oob.
-
Type - Application type: Integrated Cloud App, Connected Cloud App, or Connected Desktop App.
-
OAuth URL - URL used to start the OAuth2 process to authenticate the user. See Developer Docs: OAuth2 for details.
-
Should contain the URL of your deployed application.
-
This is the first URL called from the Onshape Applications page.
-
The page hosted at this URL should handle the OAuth authentication. Once your application’s server has been authenticated on behalf of the user, that user should be redirected to your applications content.
-
If you have not deployed your app yet, you can leave this field blank for local work and update it later.
All applications submitted to the Onshape App Store for public use must authenticate properly with OAuth2. See Developer Docs: OAuth2 for details.
-
-
Settings
-
Supports collaboration - Check if you wish to collaborate with other users when developing the application.
-
- Permissions - See Permission scopes below.
-
-
Click Create application.
-
Copy the OAuth secret key from the window.
You will not be able to access this secret key again. This secret is unique to you and your app. It should be protected like any sensitive password and never checked into source code.
-
The app's OAuth application entry appears with the Details tab active. Selecting the app name on the OAuth applications tab now brings you to this screen.
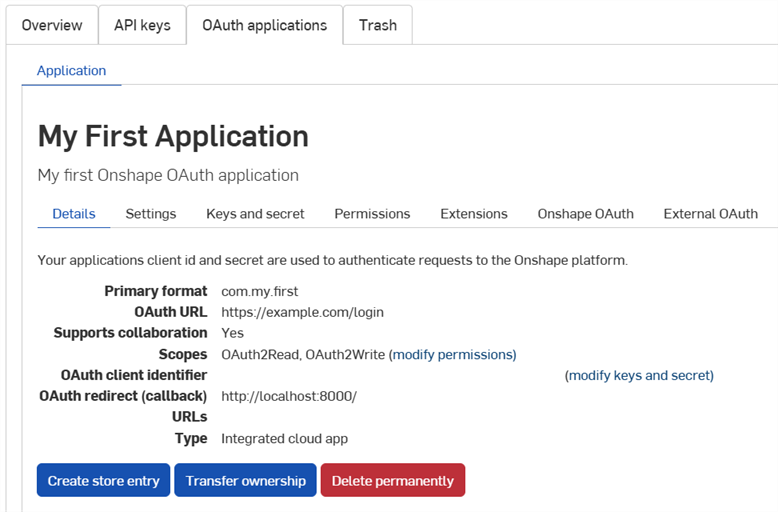
Use the tabs on this screen to:
-
Details:
-
Settings: Manage app settings
- Keys and secret:
- Copy the OAuth client identifier key
- Regenerate a new OAuth client secret key
-
Permissions: Modify app permission scopes
-
Extensions: Manage app extensions
-
Onshape OAuth: Manage Onshape authentication
-
External OAuth: Manage third-party authentication
See the Onshape Developer Documentation for more information, including: properly authenticating with OAuth2 and completing Launch Checklist. See the Hello World tutorial for a working example.
Creating an extension
-
Click the OAuth applications tab on the Developer page, then select your application.
-
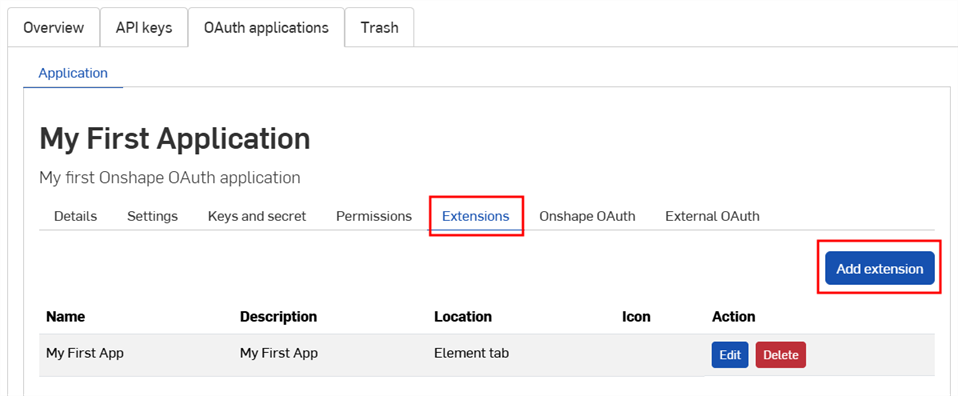
Click the Extensions tab.
-
Click Add extension.
-
Fill out the form:
-
Name: Can be truncated in the UI if it is too long.
-
Description (optional): Does not appear in the Onshape UI, but could appear in the authentication grant process.
-
Location: Where the extension exists in the Onshape UI.
-
See Supported Locations and Contexts in the Developer Docs.
-
You can create only one element tab extension per application.
-
-
Context: Some locations work in the context of a selection, such as inside a Part Studio.
-
See Supported Locations and Contexts in the Developer Docs.
-
-
Action URL: Locations that embed a UI use the action URL to define the address of the page to display. The action URL is used to specify the REST endpoint if the location is an action (context menu, toolbar item, action in dialog etc.) and the action type is GET or POST. If the location is an action and the action is Open in new window, the action URL is the URL to open in the new window.
-
See Action URL parameters in the Developer Docs for a list of parameters that can be used in this field.
-
-
Action type: Applicable for locations that do not embed UIs. Supported action types are:
-
GET - This makes a GET API call using the action URL. Parameter replacement is done on the action URL.
-
POST - This makes a POST API call using the action URL and the action body as the post body. Parameter replacement is done on both the action URL and the action body.
-
Open in new window - This opens the action URL in a new browser window. Parameter replacement is done on the action URL.
-
-
Action body: Only applicable for POST action types. The action body is passed in a POST API call and must be in a valid JSON format.
-
Show response: This is only applicable if the action type is GET or POST. When selected, the UI waits for a response and shows the response in a dialog in the UI. The response must be in a valid JSON format.
-
Icon: The icon is displayed where the extension exist, which can include an icon in an Info panel, context menu action, toolbar button, action button in a dialog, or other supported locations.
-
-
Click OK.
For more information on creating and managing Onshape applications, please see the Onshape Developer Docs. Please see the Hello World tutorial for a working example.
Transferring app ownership
- In your Developer settings, click OAuth applications.
- Click the name of the app to transfer.
- Click the Transfer ownership button on the Details tab. The Transfer ownership dialog opens.
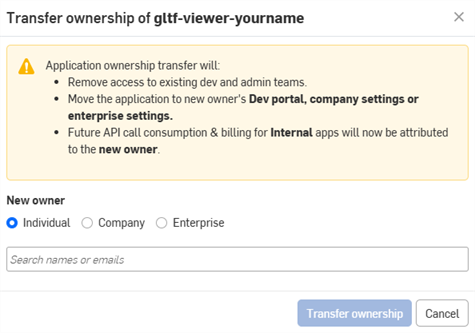
- Select an option to transfer the app to an individual, company, or enterprise.
- To transfer to an individual, enter the name or email of the new owner in the search field. To transfer ownership to a company or enterprise, select an option from the dropdown.
- Click Transfer Ownership. The application is removed from your OAuth apps list.
- If the app is transferred to an individual account, they receive an email notification and the app appears in their Onshape Developer Portal.
- If the app is transferred to someone in a Company/Classroom/Enterprise, all Admins receive an email notification and the app appears in their Developer Settings.
Future API call consumption and billing will be attributed to the new owner. See API Limits for details.
Deprecating and deleting an app
- Click Developer in the left pane of your company settings, click OAuth applications, then select the app to deprecate.
- Click the Status button to view the application's current status and any supported status changes. Supported statuses include:
- Active - Application is available in the Onshape App Store.
- Deprecated - App is no longer available in the app store, but current users keep their access.
- Trashed- App is removed from the OAuth applications tab and into the Trash tab.
Trashing is only allowed once all paid subscriptions expire.
All purchases and grants are cleaned up.
- Deleted: Application is permanently removed from the Trash. This cannot be undone.
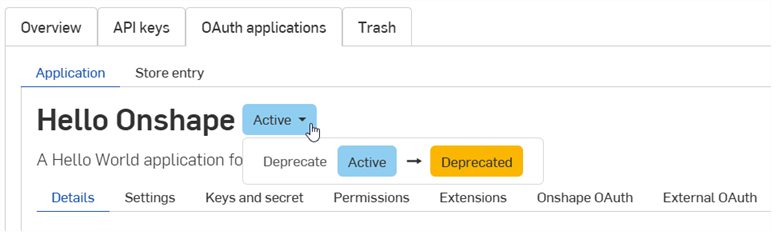
- Select the desired status change.
- Type the app's name and click again to confirm in the dialog.
Managing Onshape App Store entries
Before submitting an app to the Onshape App Store, see the Onshape Developer Documentation for requirements, including properly authenticating with OAuth2 and completing Launch Checklist.
Creating an Onshape App Store entry
To create a new store entry for an OAuth application:
-
Click OAuth applications on the Developer page, then select your application.
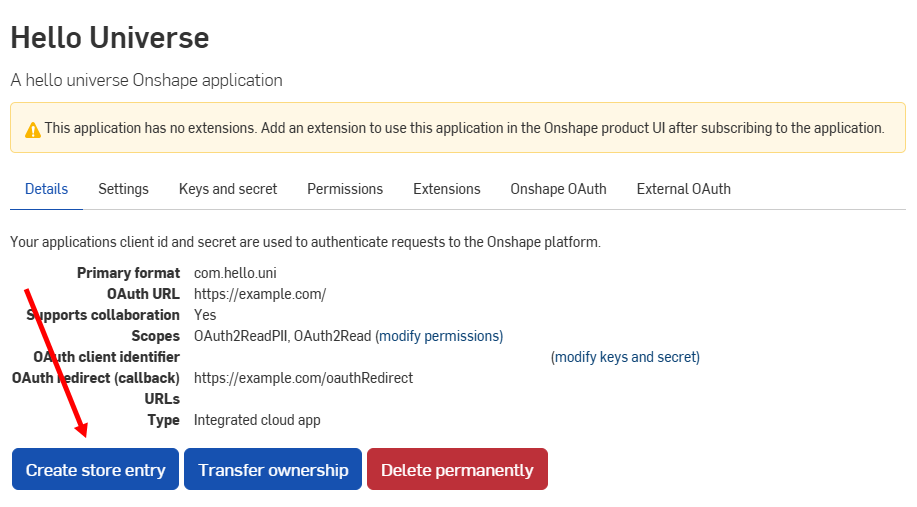
-
Click the Create store entry button on the app's Details tab.
-
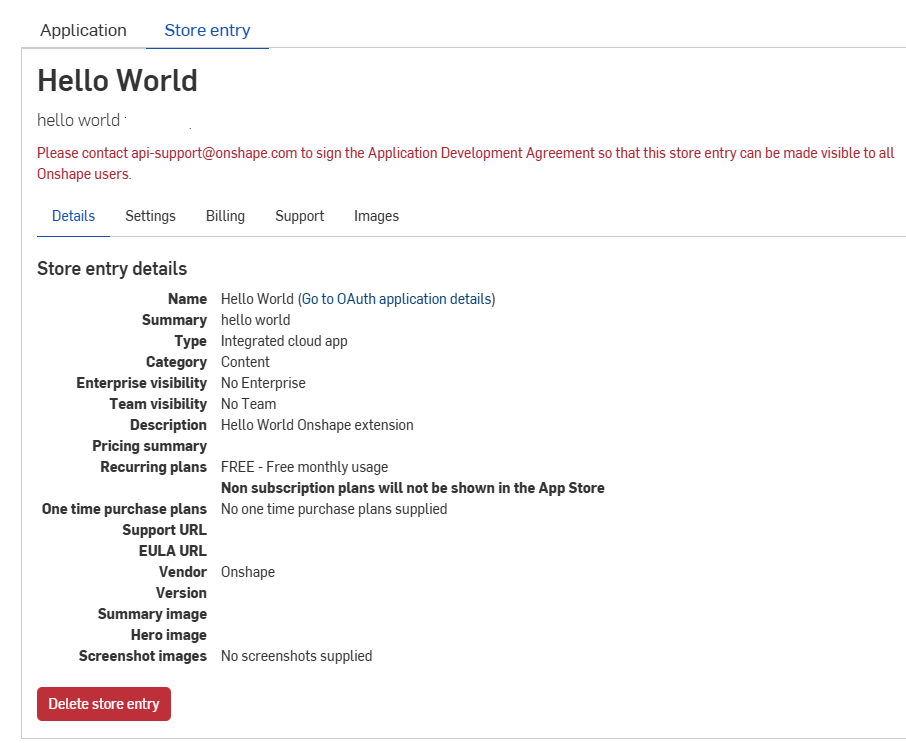
Fill out the form:
- Name - Automatically set from the app name provided during registration.
-
Summary - Automatically set from the summary provided during registration.
-
Type - Application type: Integrated Cloud App, Connected Cloud App, or Connected Desktop App. This should match the Type that was selected when registering the OAuth application.
-
Category - Select the appropriate category for your app.
-
Team Visibility - Choose to make the private app store entry visible to no internal users (default), all internal users, or specific teams.
-
Description - User-facing description of the application. Limited formatting allowed.
-
Support URL - URL or email users of your app should be directed to for assistance. This must be actively monitored.
-
Support Email - Email that should receive app subscription notifications. This must be actively monitored.
-
Vendor - Your company name.
-
Version - Current version of this application.
-
Images - Optionally upload summary, hero, and other images.
-
Click Create.
The application appears in the Onshape App Store as private. It is viewable only to you and any internal teams specified in Team Visibility settings. To make the app public, see the Launch Checklist next.
To return to this screen, click the Store entry tab for the application:
Subscribing to your Onshape app
Individual account users can subscribe to the app in the Onshape App Store:
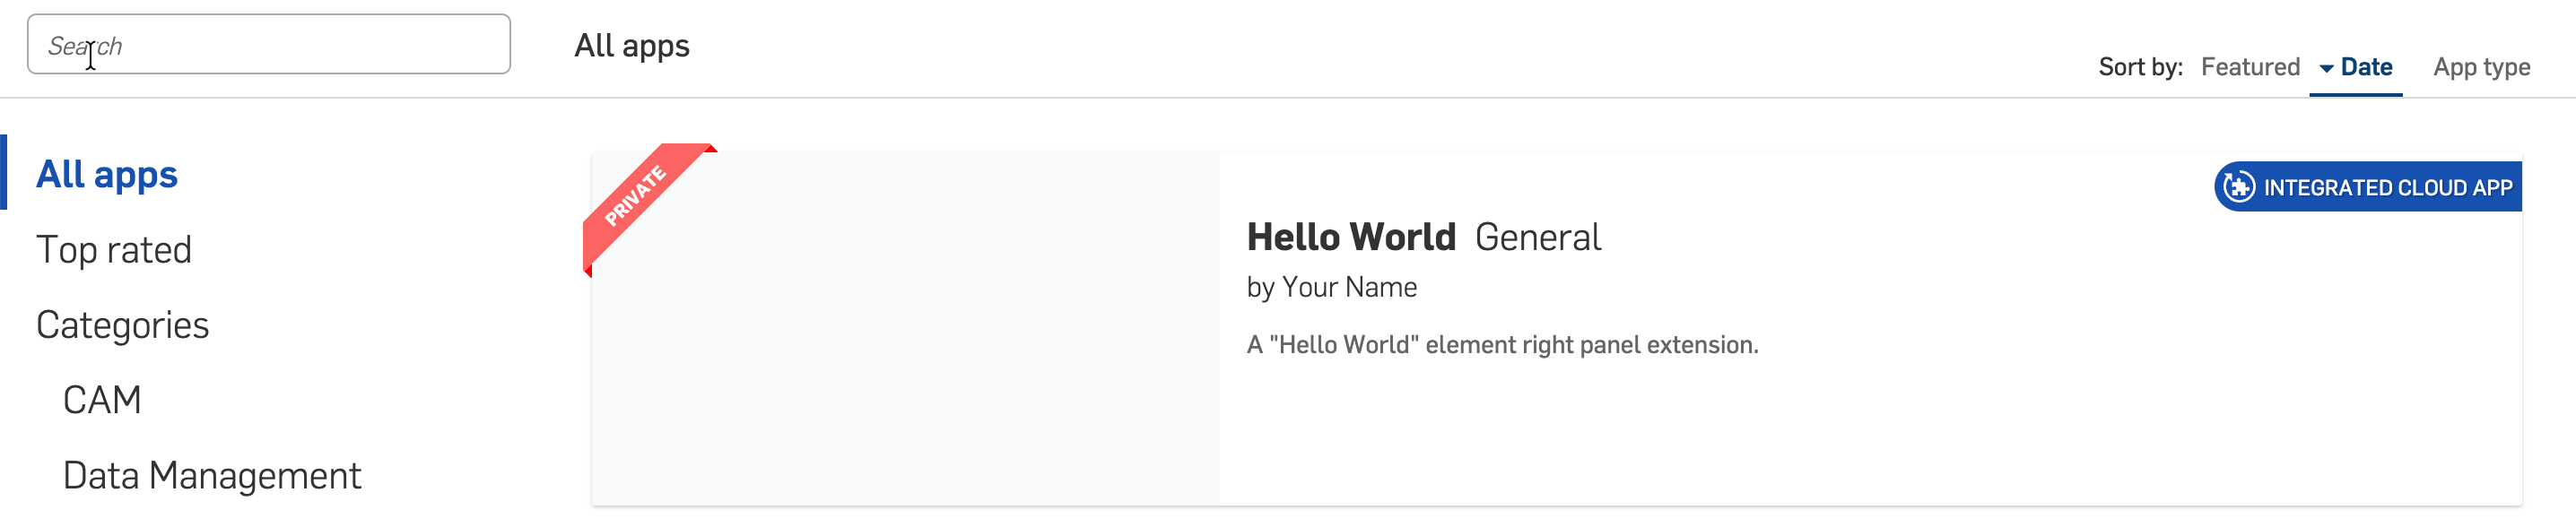
- Go to the Onshape App Store: https://cad.onshape.com/appstore
- Select the app. The app is still private and can only be seen by you as the creator:
- Click Subscribe:
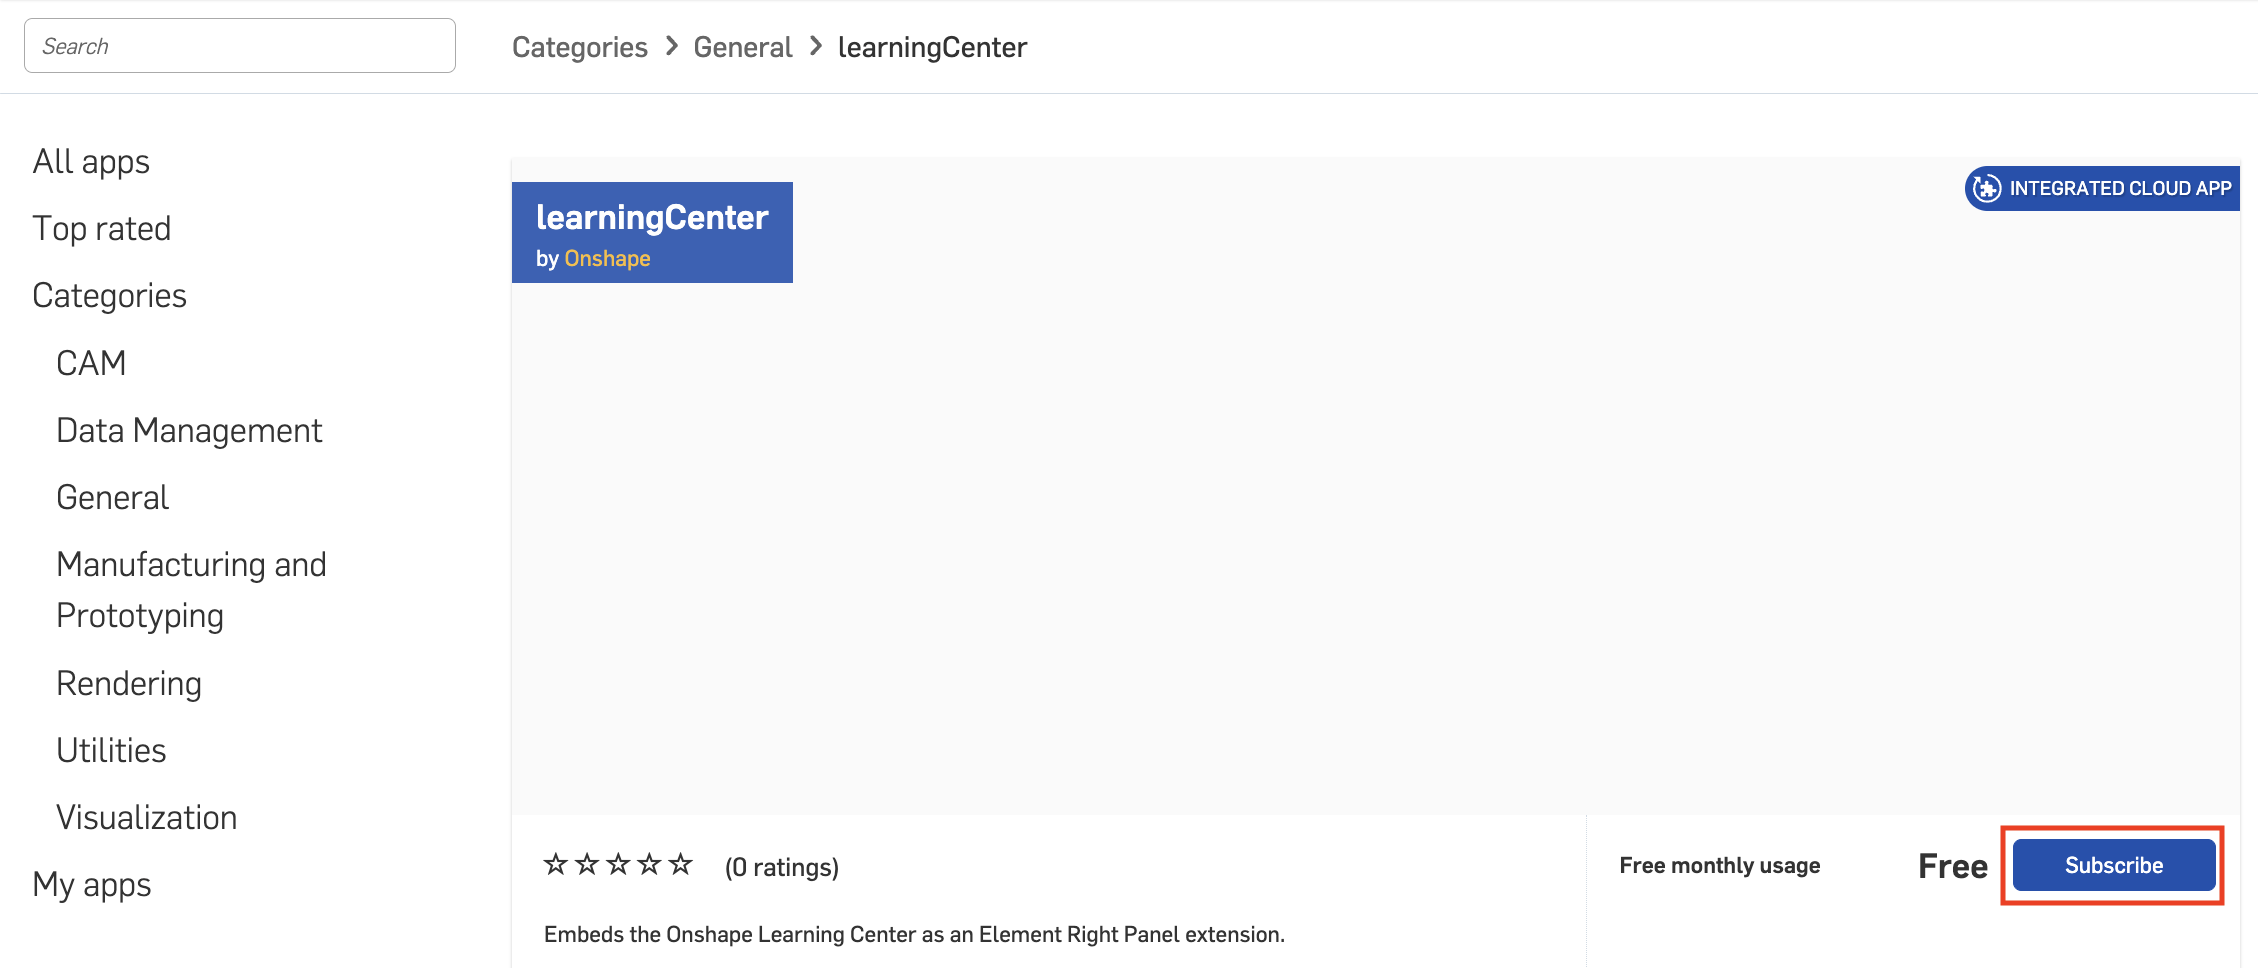
- Follow the on-screen prompts to subscribe to the app.
- Refresh your Onshape browser window to test the app extension.
Deleting an Onshape App Store entry
- Click OAuth applications on the Developer page, then select your application.
- Click the Store entry tab.
- Click Delete store entry on the Details tab.
- Click Delete again to confirm.
Permission scopes
The following permission scopes are available when creating OAuth applications:
-
Application can read your profile information (OAuth2ReadPII) - Check to allow the application access to information on your profile.
-
Application can read your documents (OAuth2Read) - Check to allow the application read access to your documents.
-
Application can write to your documents (OAuth2Write) - Check to allow the application write access to your documents.
-
Application can delete your documents and workspaces (OAuth2Delete) - Check to allow the application access to delete your documents and workspaces.
-
Application can request purchases on your behalf (OAuth2Purchase) - Check to allow the application the ability to make purchase for you.
-
Application can share and unshare documents on your behalf (OAuth2Share) - Check to allow the application the ability to share and unshare your documents.