Educator Assignments
![]()
![]()
![]()
This topic explains how Educators can administer Educator assignments.
Assignments may be created to align one-for-one with units of work to be assigned to students in a class. Assignments are class-specific.
On iOS and Android devices, classes and assignments are currently only available for educators in View only mode.
On the Assignments page for a specific class:
-
Click Create assignment.
-
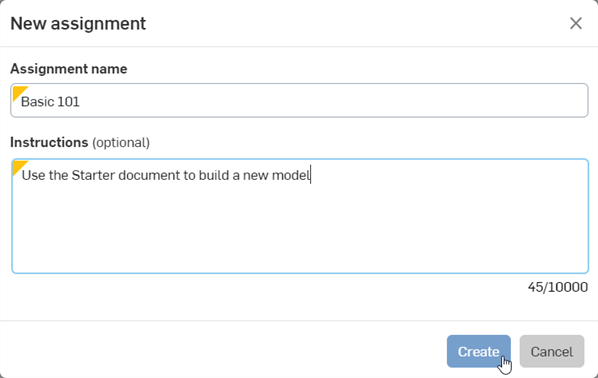
In the New assignment dialog, provide a name for the assignment and include instructions to the Student for completing the assignment.
-
Click Create.
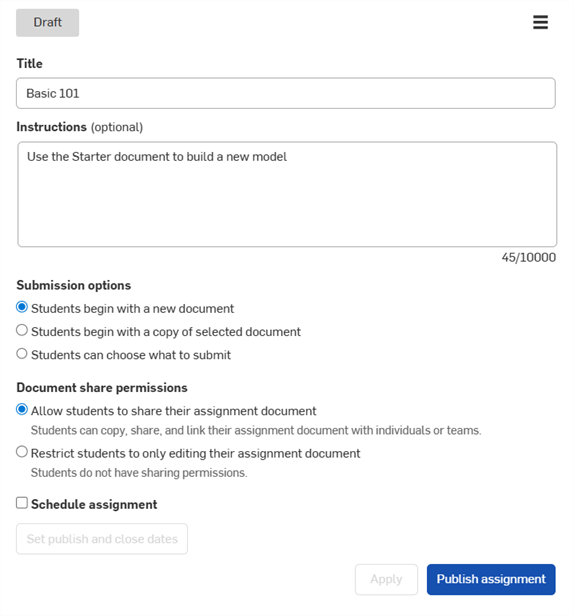
A draft of the assignment is displayed.
-
Specify the details of the assignment:
-
Students begin with a new Document - Students are provided a new, blank Document in which to do the assigned work.
-
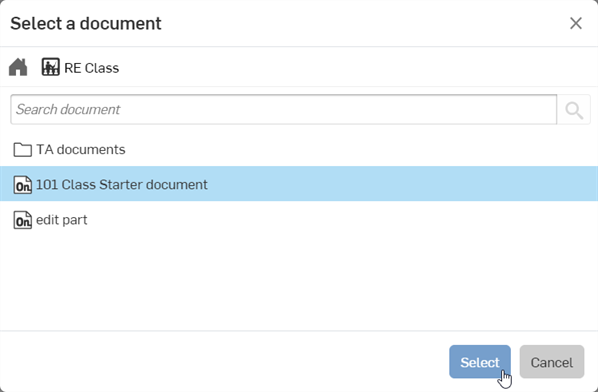
Students begin with a copy of the selected Document - Students begin with a copy of the Document you select after selecting this option. (Click Select document to select an existing Document from the dialog that opens, or use the Search field to find a specific Document).
Once the document is selected, click the Select button:
-
Students can choose what to submit - Students can choose what Document to submit from their assignments page.
-
Document share permissions
-
Allow students to share their assignment document - With this option selected, students can share this assignment document with other students or teams.
-
Restrict students to only editing their assignment document - With this option selected, students cannot share this assignment document with other students or teams.
-
-
Schedule assignment - Optionally, click this checkbox to set up a time at which the assignment is published and closed.
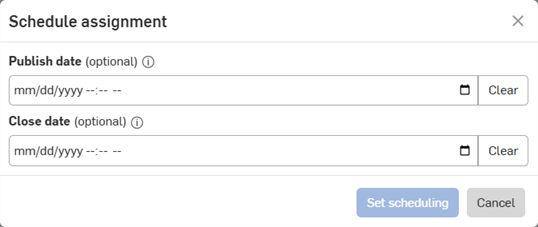
Enter a Publish date and Close date. Both dates are optional. Dates can be entered numerically, or click the Calendar icon (
 ) to select a date and time (shown below). Click the Clear button to remove the date.
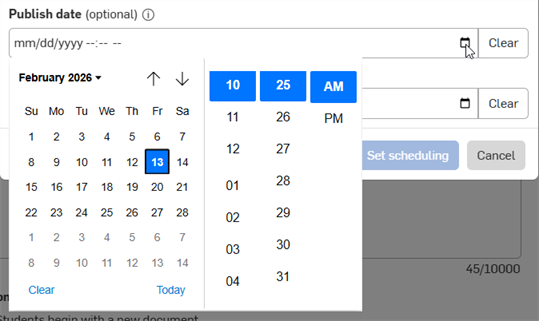
-
Publish date - Upon publishing, the assignment is placed in an In progress state.
-
Close date - Upon closing, the assignment is placed in a Closed state. Students can no longer submit and view this assignment from the assignments list.
When dates are entered, click Set scheduling.
When ready to schedule this assignment, click Schedule assignment. The assignment is published and visible to students at the set published date. If no published date is entered, the assignment is immediately visible to students.
-
-
-
If the assignment is not scheduled, click Publish assignment. The assignment is immediately visible to students.
When a student starts an assignment, a document is created for that student under the root folder, where all submission documents for a class are located (unless Student can choose what to submit is selected). These documents are shared with educators.
You can publish an assignment for a class only if the class itself is published. If the class is not published, the Publish assignment button is inactive, and the assignment is saved in draft form. Click Back to assignments to return to the Class assignments list. Unpublished assignments are listed with a status of Draft.
When a student is in the starter document but has not yet started the assignment, they see a Start assignment button at the bottom of the interface which, upon clicking, does one of the following, depending on how the Educator has set up the assignment:

-
Students begin with a new Document - the Submission type text says Start assignment to create a new document. Clicking Start assignment opens a new document from which the student begins the assignment.
-
Students begin with a copy of the selected Document - The Submission type text says Start assignment to create a copy of the starter document. Clicking Start assignment directs the student to their copy of the starter Document.
-
Students can choose what to submit - The Submission type text says Start assignment and select an existing document. Click Start assignment, then click Select document and locate a document from which to start the assignment:

After a student has completed an assignment, they can click the Submit button at the top of the document to send the document to the Educator for review:

To clone an existing assignment to one or more other published or draft classes:
-
Do one of the following:
-
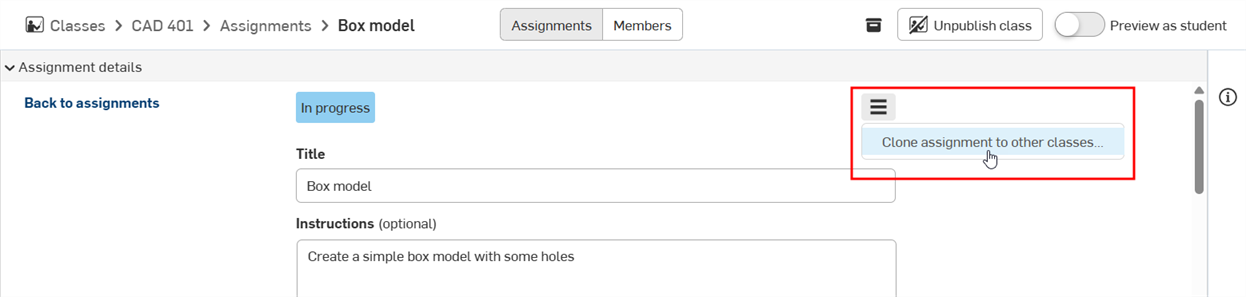
Go to the Assignment details page and click the menu icon, then select Clone assignment to other classes:
-
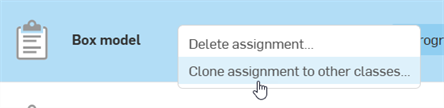
Go to the Class > Assignments page, select the assignment to clone, then right-click on the assignment and select Clone assignment to other classes:
-
-
The Clone assignment to other classes dialog opens. Select from the following options:
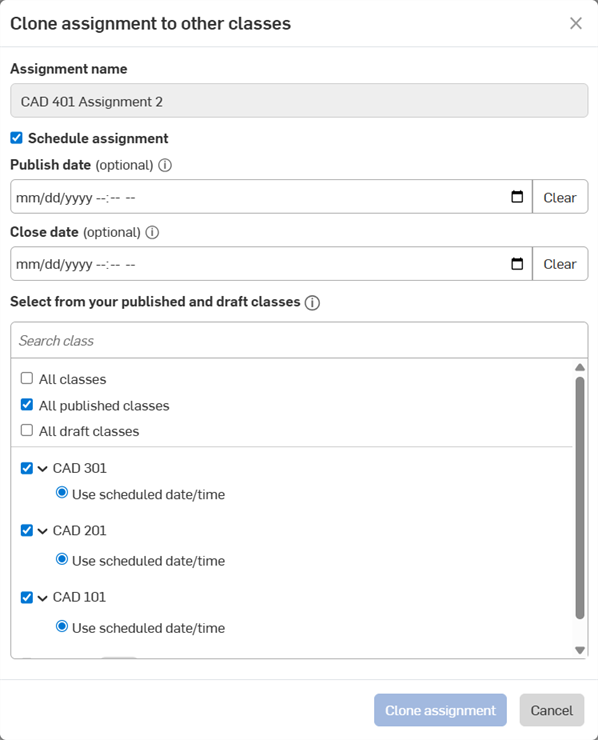
- Schedule assignment - Optionally, click this checkbox to set up a time at which the assignment is published and closed.
Enter a Publish date and Close date. Both dates are optional. Dates can be entered numerically, or click the Calendar icon (
) to select a date and time (shown below). Click the Clear button to remove the date.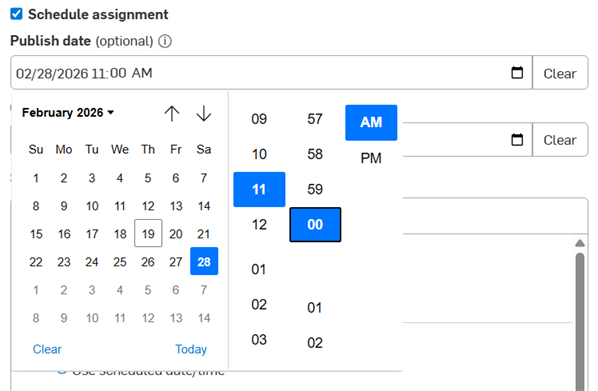
Publish date - Upon publishing, the assignment is placed in an In progress state.
Close date - Upon closing, the assignment is placed in a Closed state. Students can no longer submit and view this assignment from the assignments list.
-
All classes - Check to clone this assignment to all classes. Checking this automatically checks all options and all classes.
-
All published classes - Check to clone this assignment to only all published classes.
-
All draft classes - Check to clone this assignment to only all draft classes.
Below these 3 selection options are all the available classes. Check to select individual classes from this list. If the class is published, you can also select one of the following options:
-
Publish automatically - Clones and publishes the assignment.
-
Create draft - Clones the assignment, but does not publish it. The assignment is kept as a draft.
When cloning a draft assignment, the cloned assignment can only be cloned as a draft. You cannot publish it during its creation.
- Schedule assignment - Optionally, click this checkbox to set up a time at which the assignment is published and closed.
-
Click the Clone assignment button. Alternatively, click the Cancel button to exit the dialog without creating a clone of the assignment.
To review an assignment:
-
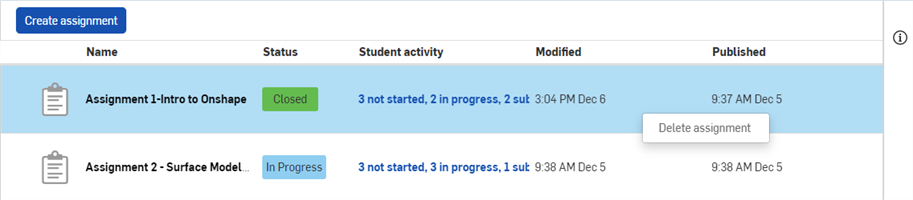
Click on the class in the Class list. The list of Assignments appears.
-
The assignments list can be sorted by most columns. Click on a column heading to sort the list by that column in ascending order. Click again to sort the list in descending order.
-
To see the details of the selected assignment, click the Details icon
 on the far right:
-
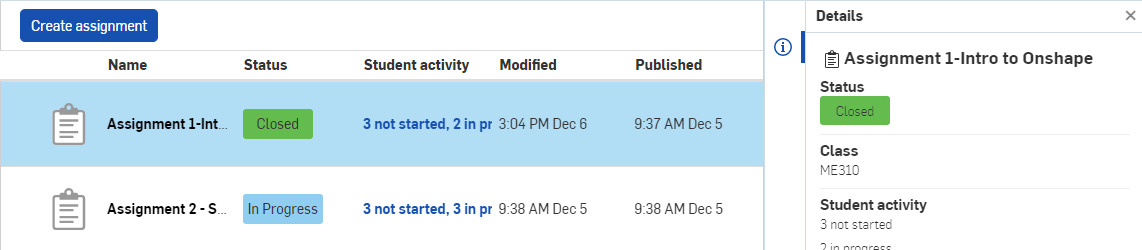
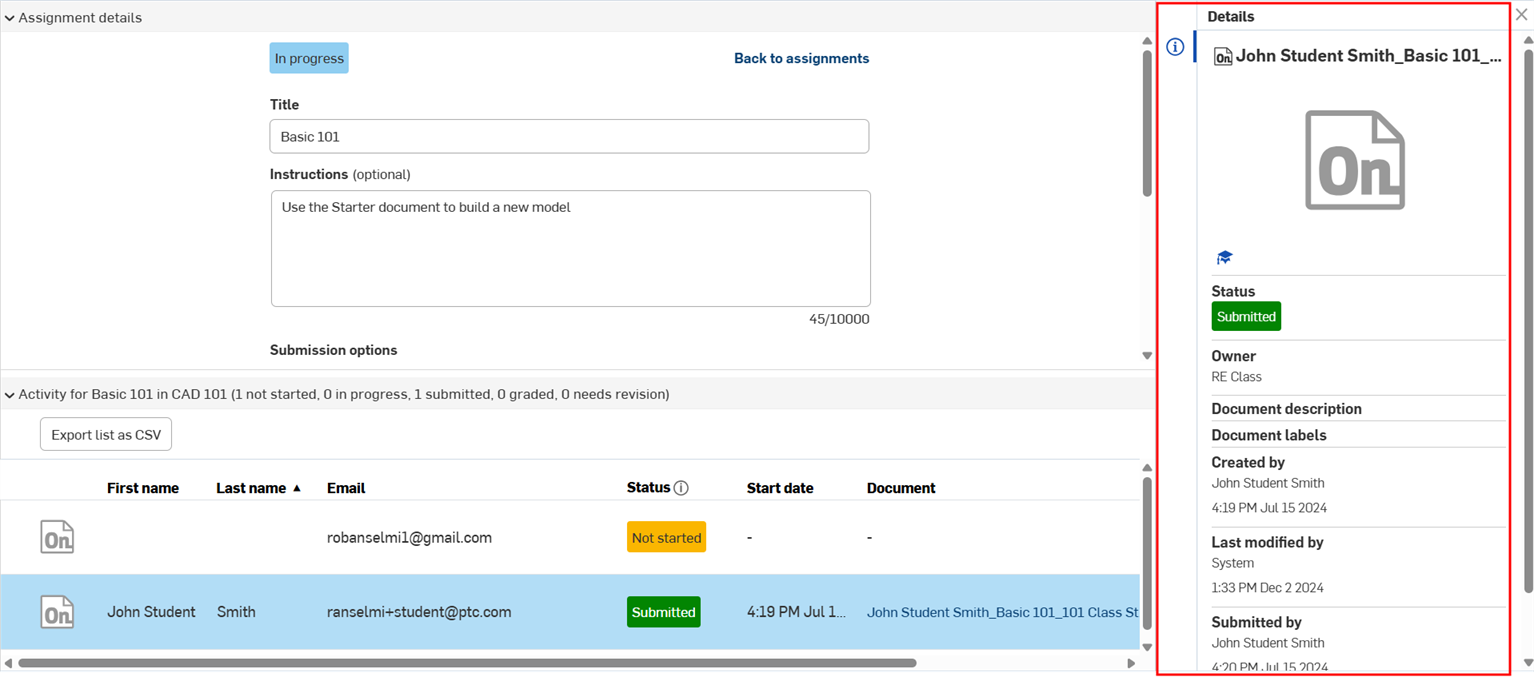
Click on the Assignment title to open the Details for all students for this assignment:
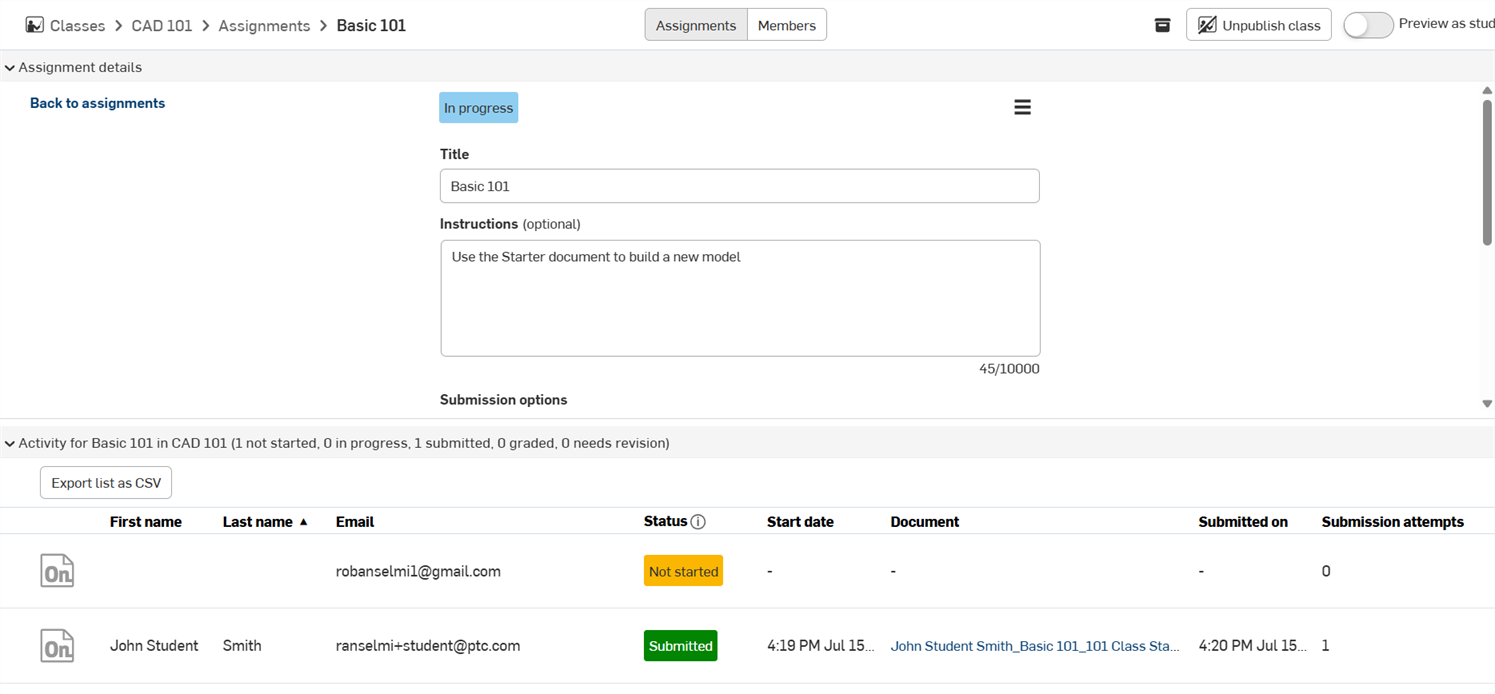
You can click and drag the separator between the Assignment details (top) and student Activity list (bottom) to resize these sections. You can also use the dropdown arrows (
 ) to the left of each section to expand/collapse that section. Work by students are found in the Activity list. Click the Document link to open a student's submitted document and review their work.
The Activity list can be sorted by most columns. Click on a column heading to sort the list by that column in ascending order. Click again to sort the list in descending order.
An icon to the left of the Assignment Status will indicate if there are any comments in the Assignment workspace or version. Hover over the comment icon and click View comment(s) to access the comment details.
-
If the student has started the assignment, the Details panel displays general information about the assignment:
-
If the status of the assignment is In progress, hover over the status to activate the dropdown menu, then click to open the menu. Click the Closed button to change the status from In progress to Closed:

-
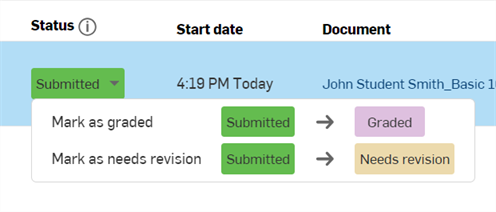
If the status of a student assignment is Submitted, hover over the status to activate the dropdown menu, then click one of the following options:
-
Click Graded to change the status to graded. The student receives a notification that their submission has been marked as graded and can no longer submit this assignment.
-
Click Needs revision if the submission requires a revision by the student. The student receives a notification explaining their submission requires a revision.
-
-
-
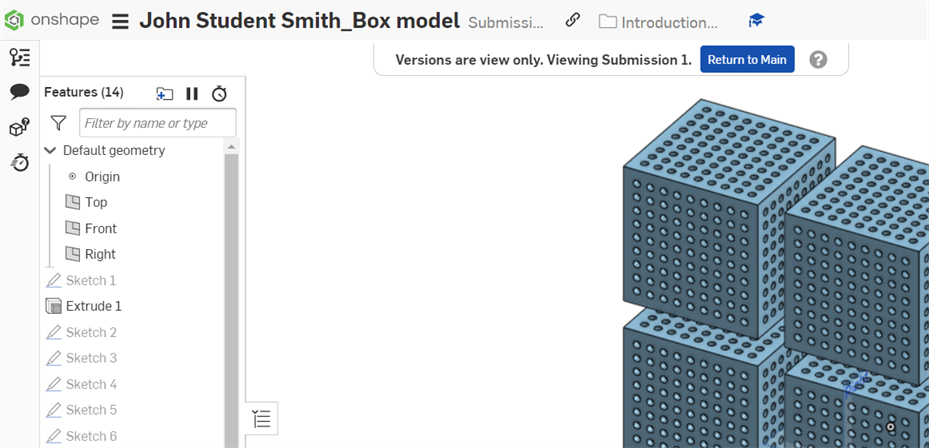
If the status of a student assignment is In progress or Submitted, optionally click the Document link to open a view only (Student) version of the Document in a new tab. Clicking Return to Main link opens the workspace of the Document:
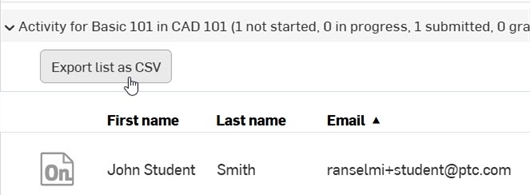
To export the Activity list to a comma-separated value file (CSV) that can be opened by a spreadsheet application like Google Sheets or Microsoft Excel, click the Export list as CSV button at the top left of the Assignment page's Activity list. The list is automatically exported to your device.
To remove an assignment that has been published, right-click the Assignment name on the Class page, and select Delete assignment: