Integrating with Microsoft ADFS
![]()
![]()
![]()
Before starting the integration process, you must have requested, and been approved for, an Onshape Enterprise account or trial, and have an Onshape Enterprise domain name.
An example of an Enterprise domain name might be: MyCompanyName.onshape.com.
Note that you are only able to use one SSO provider at a time.
This configuration process might fail without parameter values customized for your organization. Use your custom SSO identity provider (for example: Okta, PingOne, or ClassLink) dashboard to add Onshape as an application and record the values that are specific for your organization. You need those values for the following procedure.
Onshape signs all outgoing SAML certification requests. You are not required to upload any certificates (for example, a SAML signing certificate), except in the case of ADFS integration because ADFS validates incoming SAML requests. Note that Microsoft also recommends migration from the latest version of ADFS to Microsoft Entra ID. See ADFS Overview for more information.
Typically, an SSO provider is set up for one Enterprise. If setting up a multi-tenant configuration (an SSO provider with multiple Enterprises) using SAML 2.0, the Administrator must use com.onshape.saml2.sp.<domain prefix> as the Onshape Entity ID, and check the Use entityid with company domain prefix box. See the "Configuring the SSO provider in Onshape" section below.
Create "relying party trust" in ADFS management application
- In your ADFS portal, navigate to "Relying Party Trusts" and then "Add Relying Party Trust…"
- Select "Claims aware."
- Select "Enter data about relying party manually."
- Select "Enable support for SAML 2.0 WebSSO protocol."
- Set "Relying party SAML 2.0 SSO service URL" to https://cad.onshape.com/identity/saml2/sso
- Set "Relying party trust identifier" to com.onshape.saml2.sp
Set SP cert and hash algorithm
- Double-click on the RP trust created with the instructions above.
- On the "Signature" tab, add the proper certificate.
- On the "Advanced" tab, set the hash algorithm to SHA-1.
Configure claims
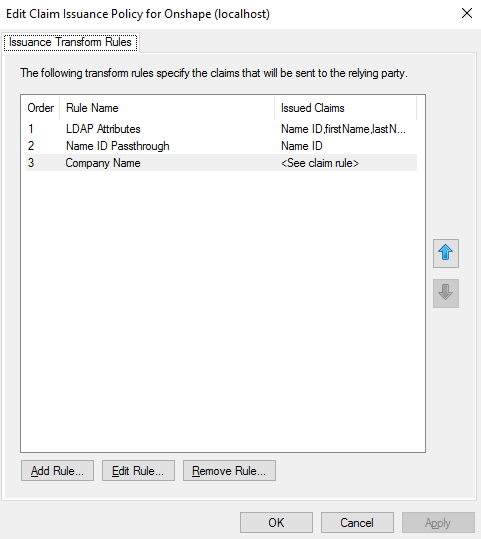
- Right-click on RP trust and select "Edit Claims Issuance Policy."
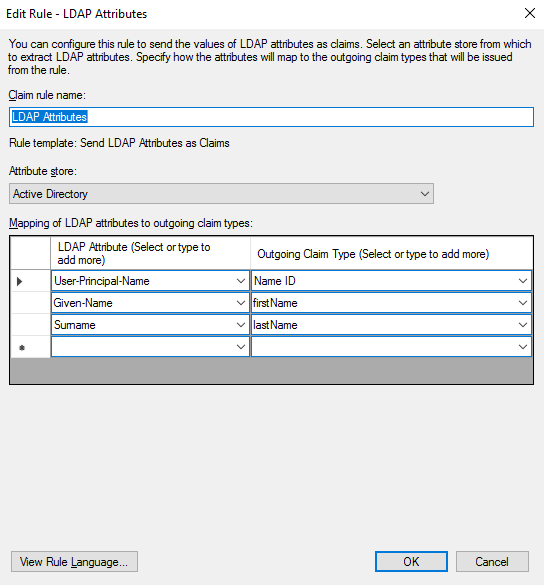
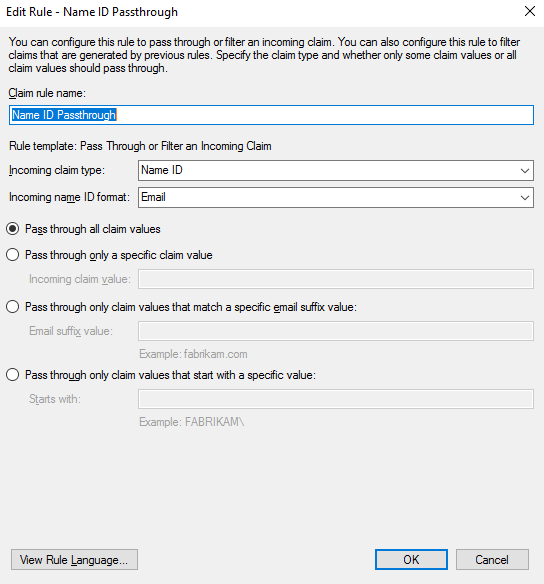
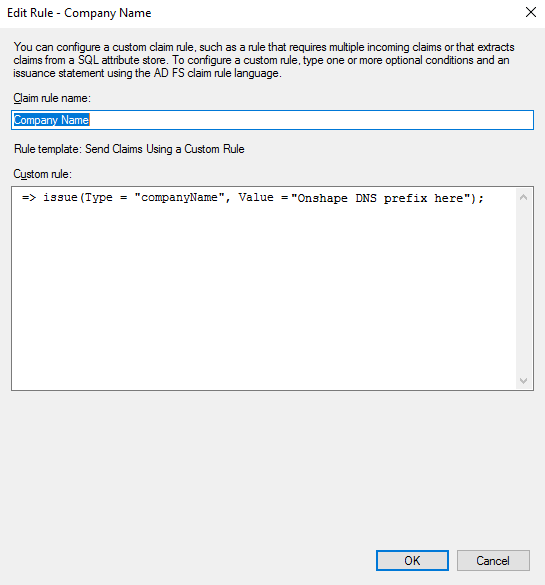
- Add the three rules shown below (using the enterprise's DNS prefix in rule #3)
- Rule #1 template: "Send LDAP Attributes as Claims"
- Rule #2 template: "Pass Through or Filter an Incoming Claim"
- Rule #3 template: "Send Claims Using a Custom Rule"
Download the ADFS metadata file from:
https://<server>/federationmetadata/2007-06/federationmetadata.xml
and upload it to Onshape.
Make sure to replace <server> with the hostname of your ADFS server.
Make sure to replace "Onshape DNS prefix here" as shown above with your companyName value. For example, if your Onshape domain is acme.Onshape.com, use "acme" as the value of this field.
Configure the SSO Provider in Onshape
Once Onshape is configured in the identity provider and you have downloaded the identity provider's metadata file (referred to in Onshape as the configuration file), the SSO provider can be configured in Onshape.
The example images below shows a generic identity provider being configured, but the steps are the same for all identity providers.
- Sign in to your Onshape Enterprise account, using your specialized domain name, as an administrator.
Select
Enterprise settings
from your account:
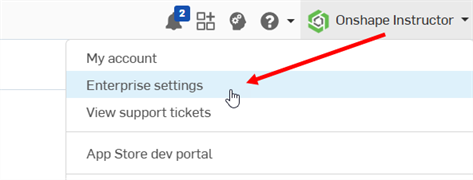
- Select Authentication from the left navigation menu.
-
In the Single sign-on (SSO) subsection, click the Configure SSO provider button:
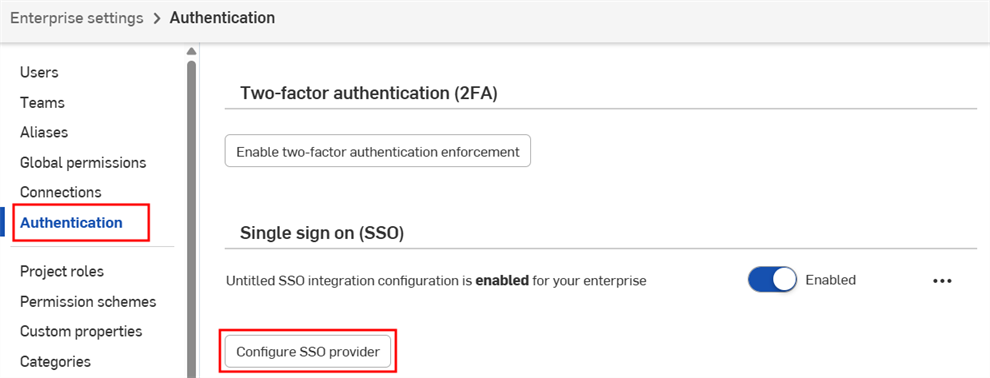
-
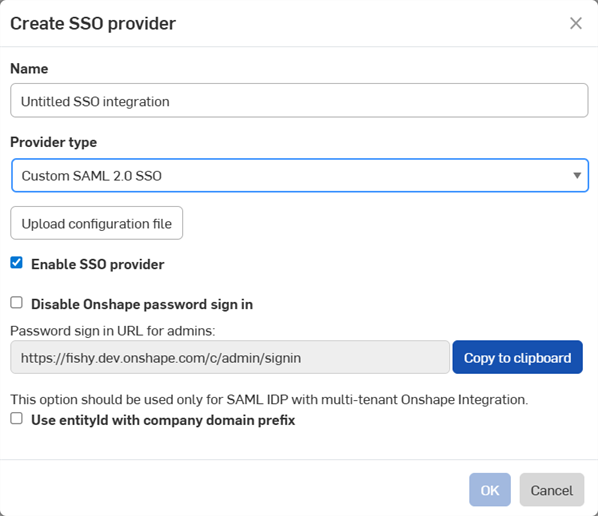
The Create SSO provider dialog opens:
-
In the Name field, enter name, such as Custom SSO
-
In the Provider type dropdown, select your SSO provider from the list.
-
Leave Enable SSO provider checked.
-
Leave Disable Onshape password sign in unchecked for the moment.
-
Check Use entityid with company domain prefix if you have a multi-tenant setup (an SSO provider with multiple Enterprises).
-
Click the Upload configuration file button:
Disable Onshape password sign in disables the typical Onshape password sign in for you and your users. Only the SSO provider sign in prompt is displayed for the Onshape URL. Before checking this option, ensure you can sign in to Onshape yourself (as administrator). You can return here later and enable it once sign in through your SSO provider is verified to work correctly.
Choosing to enforce signing in to Onshape via SSO also results in users not being able to sign in to non-enterprise domains directly, such as cad.onshape.com.
Typically, an SSO provider is set up for one Enterprise. If setting up a multi-tenant configuration (an SSO provider with multiple Enterprises) using SAML 2.0, the Administrator must use com.onshape.saml2.sp.<domain prefix> as the Onshape Entity ID, and check the Use entityid with company domain prefix box.
-
-
Locate and select the metadata configuration file you downloaded previously, and click Open:
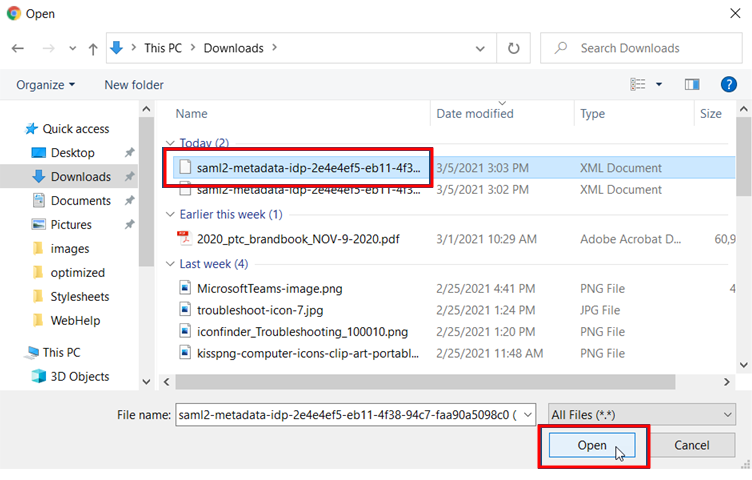
-
Click OK:
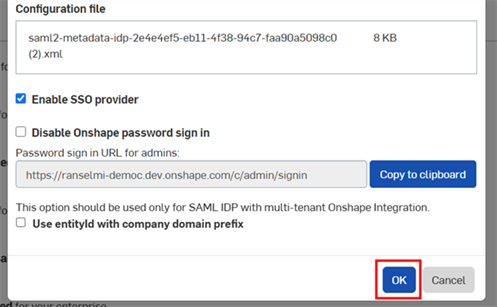
-
The file is uploaded. A notification appears when the upload is completed:
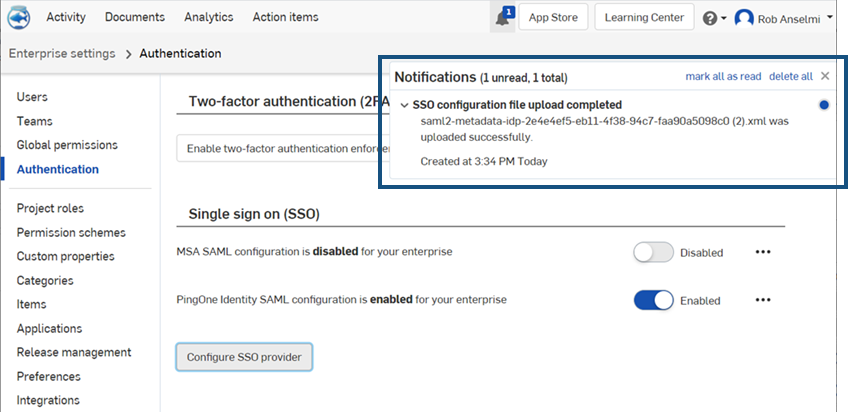
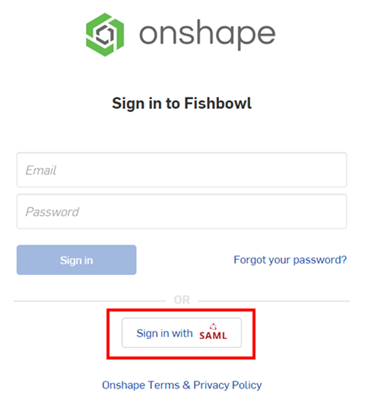
- Sign out of both your Onshape and SSO provider accounts. Be sure to do a hard refresh of both accounts. When you reach the Onshape sign-in page once again, the page has a new
Sign in
link at the bottom, for your SSO provider.
In order to sign in to Onshape, administrators must provision their users (in their single sign on account) to use the Onshape application.