 Drawing Section View
![]()
![]()
![]()
Available in: Drawing
Create a section view, jogged section view, or partial section view of an existing view (including a section view) by placing a cutting plane line (or lines) and specifying a direction and label.
By default, the label is on and the scale is off. To see the scale, double-click the view: the View properties dialog opens to the top left of the drawing.
-
Click
 .
.
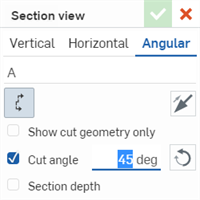
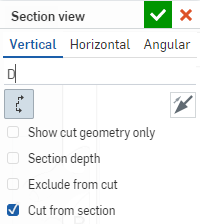
- Select Vertical, Horizontal, or Angular in the dialog:
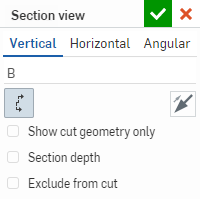
- Optionally supply a label for the view (B, in the example image above).
Labels are automatically applied (you are able to change them) and by default progress from A through Y, omitting I, O, Q, S, X, and Z.
- Choose from the following options:
- Show cut geometry only - Only the cut geometry is visible.
- Cut angle (Angular only)
- Enter a precise angle numerically. You can also flip the angle direction from one side to the other using the Opposite direction icon
 .
.
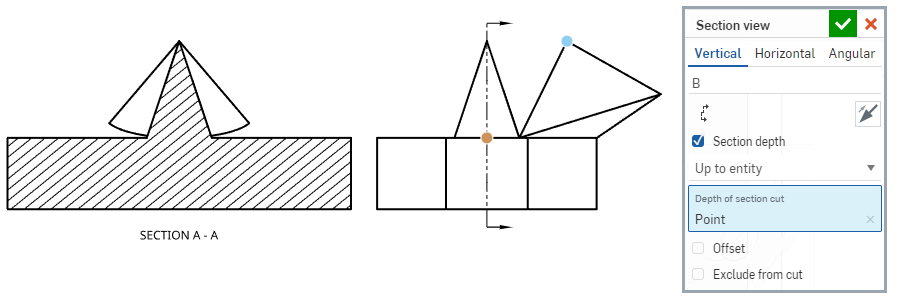
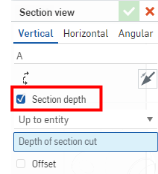
- Section depth
- Controls the depth of the section, either:
- Up to entity
- Use another entity to set the depth (and then select the entity on the drawing):
- Blind
- Specify a depth measurement:
- Up to entity
- Use another entity to set the depth (and then select the entity on the drawing):
Exclude from cut (Assembly views only) - Select parts to not include in the cut:
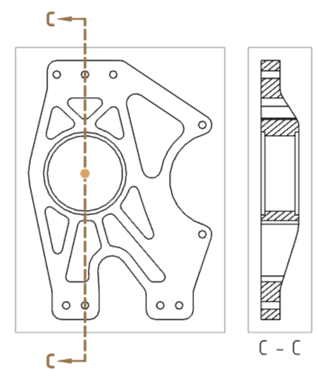
Place the section cut line.
Check Exclude from cut in the dialog.
Click any additional parts to exclude in the drawing.
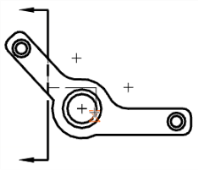
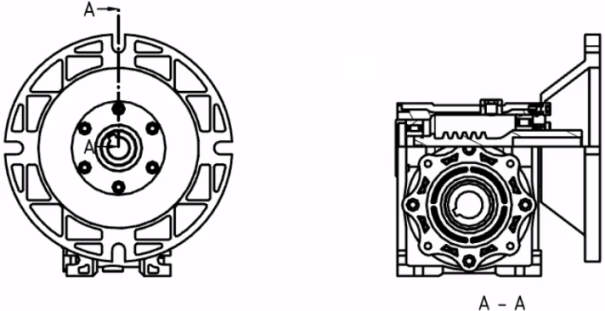
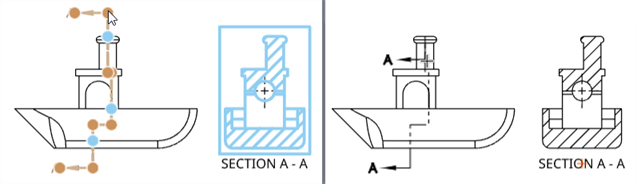
- Move the cursor over the part for which to create a view. Hover to view snap points:

- When the dotted section cutting line is in the desired place, or the snap point is visible, click once to place the line. For angular section views, click a second snap point to set the angle.
- If desired, select more snap points to create a jogged section view (up to 4 points total for an angular jogged view):
- Drag the new section view away from the cutting line and click to place it:
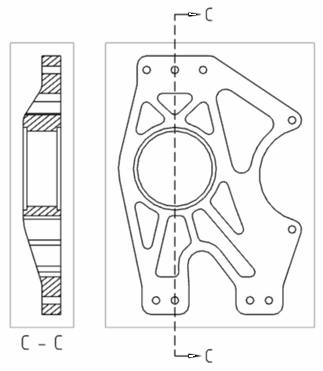
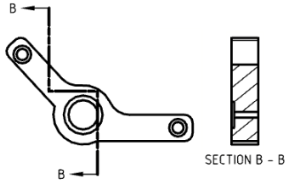
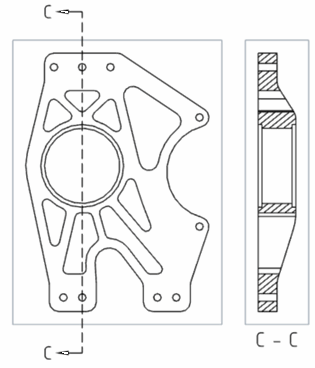
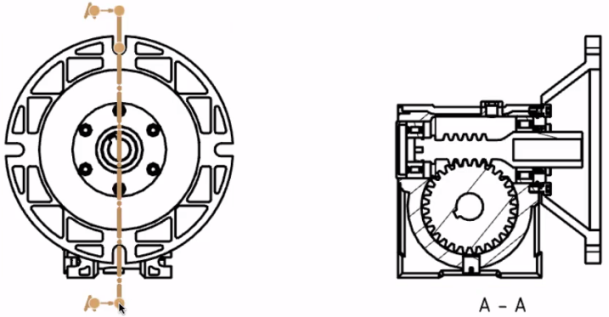
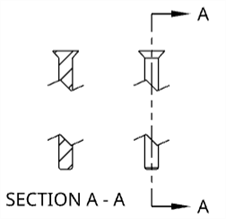
Vertical section view (above)
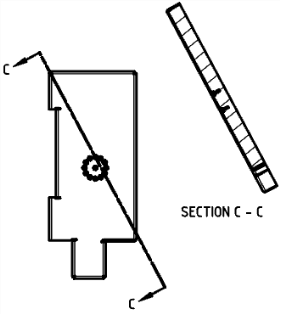
Angular section view (above)
Horizontal section view (above)
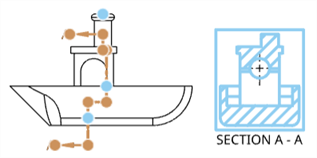
Note that dragging the section view to one side or the other before clicking it into place flips the side of the section:
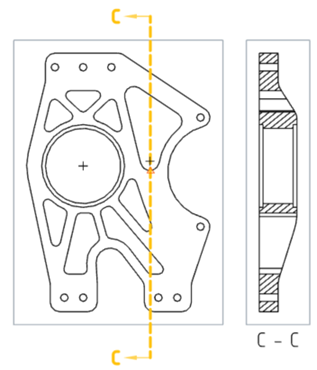
Click to select the section line and use the snap point at the ‘elbow’ of the arrow to drag the line to shorten it or lengthen it:
Adjust the length of the section line to the inside of the part to create a partial section view.
- Double-click the view to open the View properties dialog.
Selecting a Section view highlights the cut line in the parent view.
Scale input is in an N:N or N/N format. For user input values, the second digit or denominator is always set to 1, and can double-click the Scale label to edit it. By default, the scale of a Section view is always set to Parent (the same scale as the parent view).
Once placed, jogged section views may be adjusted by clicking a snap point and dragging to another point on the drawing view. The jogged section view adjusts respectively.
To edit hatch marks: select Edit hatch from the view context menu, or open the Properties dialog for Drawings and select the Views tab. Hatching does not overlap annotations in a section view:
You can use the Section view to create a section view from a section view:
-
Click
.
- Select Vertical, Horizontal, or Angular in the dialog:
- Optionally supply a label for the view.
-
If you wish to cut from the sectioned geometry (the section view already created), select Cut from section:
If you want to create the view from the base geometry, leave Cut from section unchecked.
-
Click the check mark to create the view, or the x to cancel the operation.
You can create a section view from a view that has a broken-out section view applied to it; however, the new section cut is formed from the base geometry, not the broken-out sectioned geometry.
You can add break views to horizontal or vertical section views, even if the sections are jogged. Similarly, you can add horizontal or vertical section views to views with breaks. Changing the break location in one view changes it in all the related views.
Angular section views cannot be created on views with breaks, and breaks cannot be created on views with angular section cutting lines.
Once a section line is placed, if it was placed on a snap point, it is possible to move it to a new placement:
- Select the line:
- Click and drag the snap point to a new location:
- Click to place the section line.
- Notice that the corresponding view changes:
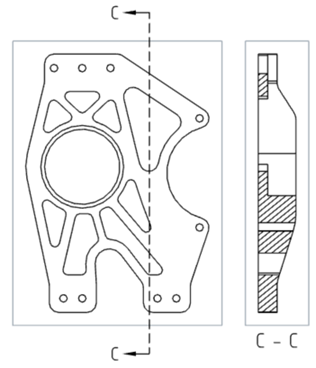
To adjust a section line to make the cut shorter than the association point (blue points):
-
Select one or the other end of the section line and use the snap point at the ‘elbow’ of the arrow to drag the line beneath (or above) the association point:
-
The corresponding section view changes:
To flip a section line after you place it:
- Select the section line.
- Right-click and select
Flip direction.
The section line labels change sides and the view regenerates appropriately.
To edit a section line with Onshape:
- Click on the section line (jogged section line).
- Right-click and select Edit section from the context menu.
- A Section view dialog box appears, edit your preferences and click the checkmark in the top right corner to apply your edits. Click the red x in the top right corner to cancel without applying your edits.
- Select the section line (jogged section line).
- Right-click and select Edit section from the context menu.
- To add a segment:
- Select a snap point and drag it to the desired location on the view.
- Hover over a new snap point at the desired location, click to place the line segment there.
- To remove a segment:
- Hover over the snap point of the segment you want to remove. An orange box appears around the snap point.
- Click on the snap point with the orange box; the snap point disappears.
- End the operation by clicking anywhere away from the view.
- The view updates to reflect the changes in the section line.
This table illustrates the types of views from which the Section view can be created:
| Section view | |
| Can be created from: | Cannot be created from: |
|
Auxiliary views Break views Crop views Detail views Positions in base views Positions in isometric views Positions in projected orthographic views Section views and aligned section views Views with broken-out sections Flat pattern views |
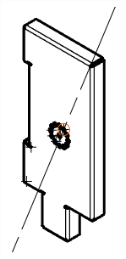
Cut line tangent to cylindrical face |