Drawing - Dimension
![]()
Available in: Drawing
Shortcut: d
Known as the smart dimension tool, this places several types of dimensions on a curve in a drawing. The type of curve selected determines the type of dimension that is placed.
Shortcut: d
The Dimension tool for drawings work much like the Dimension tool for sketches. Activate the tool (click the icon or use the d shortcut), then:
- Click a highlighted drawing entity (circle, arc, circle center, line, centermark, point, or thread).
- Click a second highlighted drawing entity.
- Click to place the dimension in the drawing.
You can edit a dimension after placement by clicking and dragging a grip point. As you move the cursor, drawing entities highlight to indicate you can dimension to them.
It is possible to automatically add a diameter symbol to a linear dimension if the lines selected are on the same edge representing an arc or circle on its edge. This works in projected views only.
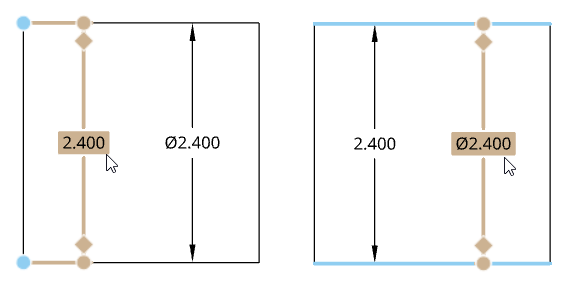
The image below shows a projected side view of a cylinder part. Select the top corner snap point. Then select the bottom corner snap point. This results in a normal linear dimension, as shown below left. However, if you first select the top edge, and then select the bottom edge, this results in the same linear dimension, but with the diameter symbol applied (shown below right).
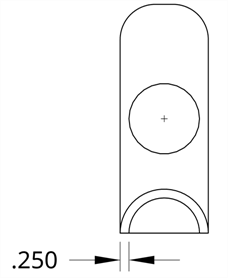
You can use the Line-to-line tool to automatically add a diameter symbol in the same way as with the Dimension tool. The line-to-line tool works on both projected and section views.
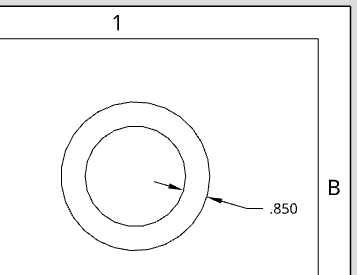
You can automatically dimension the wall thickness of two concentric circles or arcs. After selecting the Dimension tool, click each circle or arc and drag to place the dimension. The tool automatically dimensions the linear distance between the two circles or arcs: