行動項目
![]()
![]()
僅為這個計畫提供
在這個主題中將說明如何巡覽「行動項目」頁面來檢視經由「評論」對話方塊指派給您的工作。
存取「行動項目」
若要巡覽您的「行動項目」,按一下您 Onshape 視窗右上角的「檢視所有行動項目」圖示 ![]() :
:

您也可以在 Onshape 文件內的左側面板中存取「行動項目」圖示 ![]() :
:

這樣會開啟您的 Onshape「行動項目」面板。
從「文件」頁面中,按一下視窗最上方的 [行動項目] 選項。

您也可以在 Onshape 文件內的左側面板中存取「行動項目」圖示 ![]() :
:

這樣會開啟您的 Onshape「行動項目」面板。
若要巡覽您的「行動項目」,按一下您 Onshape 視窗右上角的「行動項目」圖示 (在下圖中以紅色輪廓線框出)。

您也可以在 Onshape 文件內的左側面板中存取「行動項目」圖示 ![]() :
:

這樣會開啟您的 Onshape「行動項目」頁面。
若要在 iOS 裝置上巡覽您的「行動項目」,請先輕觸文件頁面左上角的功能表圖示以開啟側邊欄功能表:

從此處按一下 ![]() 「行動項目」來開啟「行動項目」頁面:
「行動項目」來開啟「行動項目」頁面:
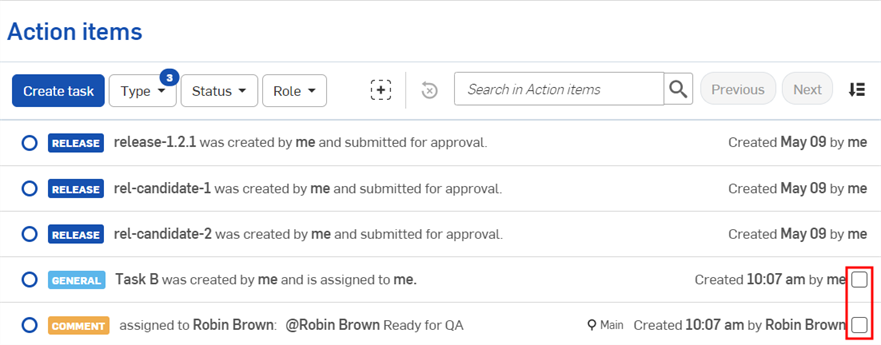
使用「行動項目」
當您在文件中檢視「行動項目」時,系統會在「行動項目」面板顯示這些項目。
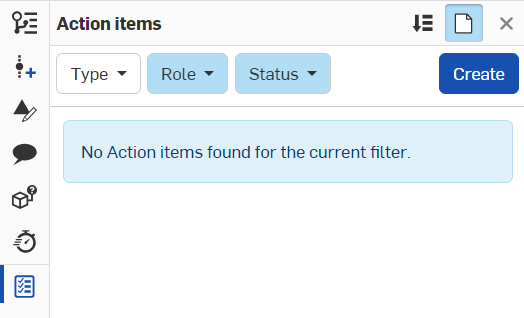
根據預設,「行動項目」面板會顯示目前文件的「行動項目」(包括在「行動項目」中所建立參考目前文件的工作):
-
按一下面板右上方的「建立工作」圖示
 來開啟「建立工作」對話方塊。
 -
按一下「排序工作」圖示
 來從最舊到最新或從最新到最舊來排序工作。
-
按一下面板右上角的「目前文件」圖示
 來取消選取預設的設定,然後顯示所有指派給您的「行動項目」。
 -
使用面板最上方的「搜尋」列和/或「類型」、「狀態」、與「受託者」篩選器來更好地過濾您的搜尋。
-
按一下「加入篩選器」圖示
 來從其餘篩選器選項的清單中選擇。按一下「清除所有篩選器」圖示來清除所有其他額外的篩選器。
目前僅在 Onshape 瀏覽器應用程式上提供位在文件之中的「行動項目」面板。
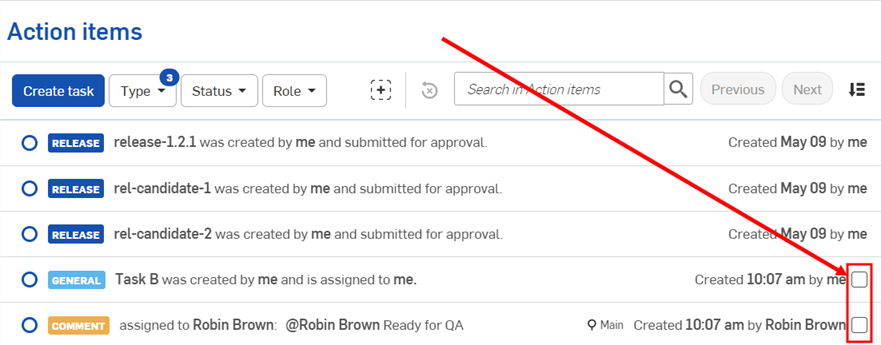
當在您的公司/企業/課堂設定中檢視「行動項目」頁面時 (在 Onshape 瀏覽器應用程式中),您會在螢幕的上方看到下列的工具:
- 篩選器
- 類型 - 選擇下拉清單中的選項來在評論、一般與發行活動的任意組合中篩選。
- 狀態 - 選擇下拉清單中的選項來決定根據開放的發行或工作,或是關閉的發行或工作來篩選。
- 任務角色 - 選擇下拉清單中的選項來決定根據已指派給您的發行或工作,或是由您所建立的發行或工作來篩選。
- 加入篩選器
 - 按一下加入篩選器按鈕然後從下拉清單中選擇篩選器的類型。新的篩選器會出現在螢幕上方預設的篩選器旁。
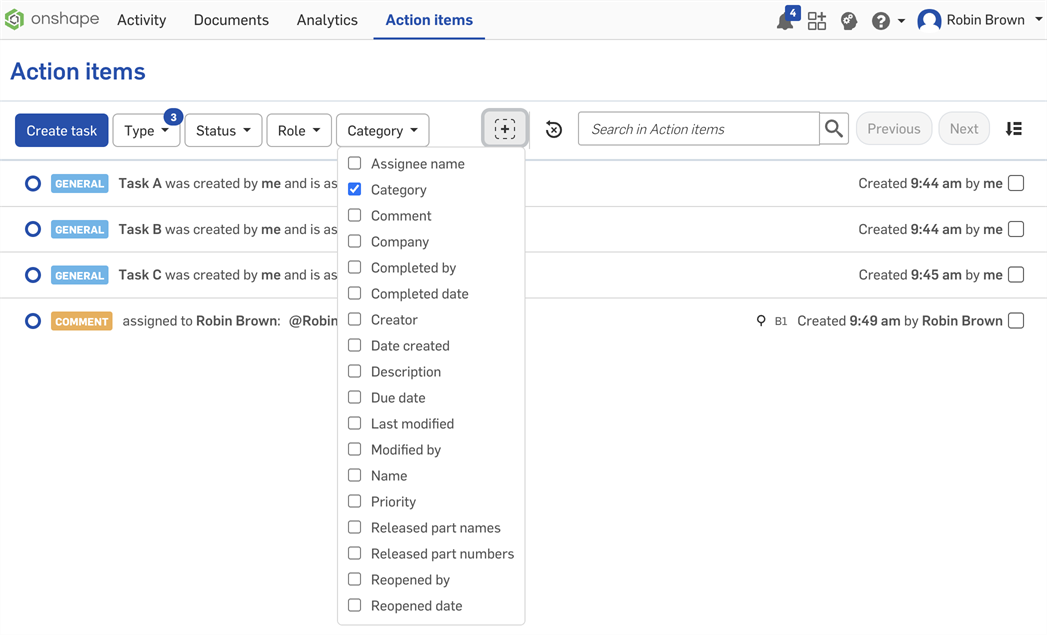
- 清除所有篩選器 - 移除所有套用的篩選器,然後顯示指派給您或由您所建立的所有「行動項目」。
- 搜尋 - 篩選符合搜尋字串的「行動項目」。

- 排序
 - 按一下「排序」下的下拉箭頭並選擇您的偏好來將篩選結果根據最舊發行和/或工作,或是從最新到最舊排序 (Onshape 的預設是先「從最舊到最新」)。
當您選擇不同的篩選器時,對應於選擇的結果會出現在面板中。
「行動項目」頁面:iOS
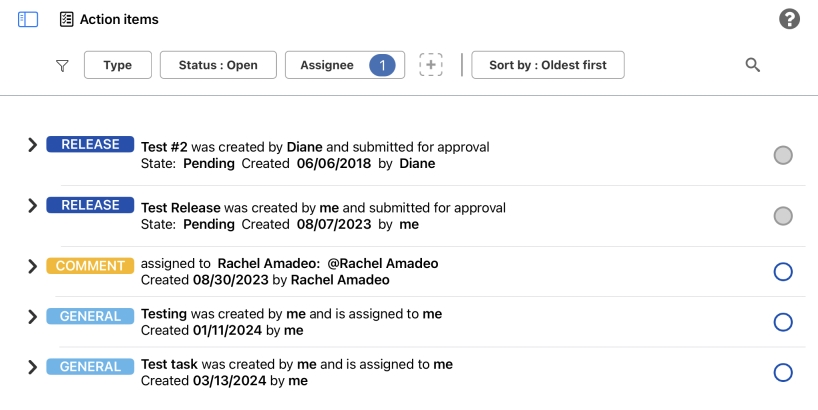
當您在 iOS 裝置上檢視您的「行動項目」頁面時,您會在螢幕上方看到下列的工具:

輕觸頁面上方的任何「行動項目」篩選器類型來開啟「所有篩選器」對話方塊,您可於其ˋ中根據喜好編輯每個參數:
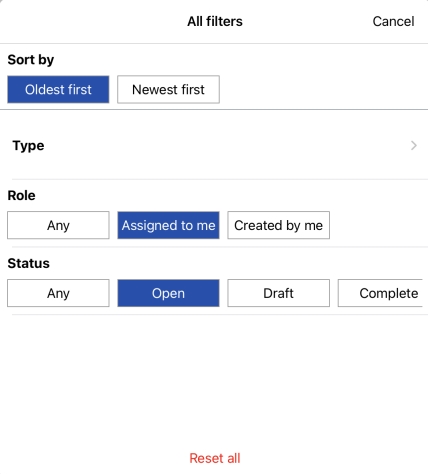
「行動項目」篩選器的選項包括:
-
類型 - 切換以開啟/關閉選項來在評論、一般與發行活動的任意組合中篩選。
-
狀態 - 切換以開啟/關閉選項來在開放、草稿或完成的發行或工作間篩選。
- 受託者 - 輕觸所需使用者旁的切換來在指派給您或是其他人的發行或工作間篩選。
- 加入篩選器
 - 按一下加入篩選器按鈕並根據您的喜好切換開啟/關閉選項。新的篩選器會出現在螢幕上方預設的篩選器旁。
 - 排序依據 - 根據從最舊發行/工作或從最新發行/工作來排序篩選的結果。
若要開啟建立工作對話方塊,按一下「行動項目」面板中的建立按鈕,或是按一下「行動項目」螢幕中的建立工作按鈕。
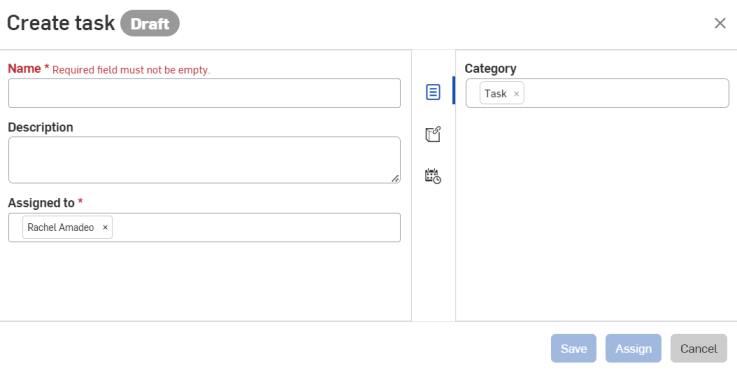
填寫必填的欄位然後按一下儲存來儲存您的變更,接著按一下指派來將工作分配給使用者並關閉對話方塊。
按一下取消來關閉對話方塊而不儲存任何變更或指派工作。
