與 PingOne 的整合
![]()
![]()
![]()
在開始整合的過程之前,您必須先要求且經核准使用或試用 Onshape Enterprise 帳戶,並且有 Onshape Enterprise 網域名稱。
Enterprise 網域名稱的範例會像是:MyCompanyName.onshape.com。
請注意,您一次僅能使用一個 SSO 提供者。
如果沒有為您組織自訂的參數值,這個組態設定的過程可能會失敗。請使用您自訂的 SSO 識別提供者 (例如:Okta、PingOne、或 ClassLink) 儀表板來將 Onshape 加入為應用程式,並記下給您組織的特定值。您在下列的步驟中將會需要這些值。
Onshape 會簽署所有傳出的 SAML 憑證要求。您不需要上傳任何的憑證 (例如,SAML 簽署憑證)。ADFS 的整合會是例外的情況,因為 ADFS 會驗證連入的 SAML 要求。請注意,Microsoft 同時建議從 ADFS 的最新版本移轉到 Microsoft Entra ID。詳細資訊請參考 ADFS 概要。
通常是為一個 Enterprise 設定一個 SSO 提供者。如果使用 SAML 2.0 來設定多租戶的組態 (有多個 Enterprise 的 SSO 提供者),則管理員必須使用 com.onshape.saml2.sp.<網域前置碼>來做為 Onshape Entity ID,並核取 使用有公司網域前置碼的 entityId方塊。請見下方「在 Onshape 中設定 SSO 提供者」的部分。
將 Onshape 加入至您 PingOne 單一登入帳戶中
若要啟用您公司的單一登入,必須先將 Onshape 應用程式加入至您 PingOne 單一登入帳戶中:
-
以管理員的身分登入至 PingOne 入口網站。按一下瀏覽窗格左側的 Connections 圖示。
-
按一下 Add Application。
![PingIdentity Applications 頁面,以輪廓線框出 [Add Application] 按鈕](Resources/Images/SSO/PingOne-Step-003.png)
-
按一下 [Web App] 方塊,然後點按 SAML 連線類型旁的 Configure 按鈕。
![按一下 [Web App] 方塊,然後在 SAML Connection type 方塊中點按 [Configure] 按鈕](Resources/Images/SSO/PingOne-Step-006.png)
-
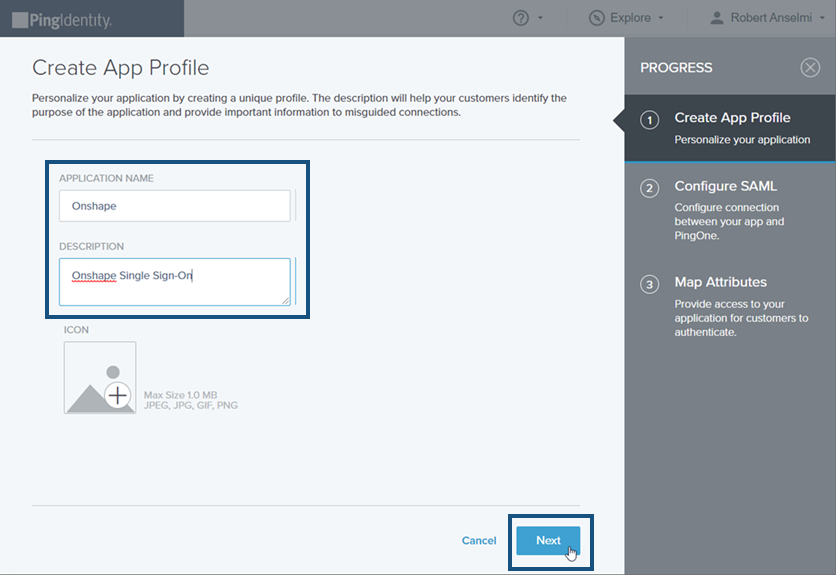
在開啟的 Create App Profile 分頁中輸入 Application Name 與 Description,然後點按窗格底部的 Next 按鈕。
-
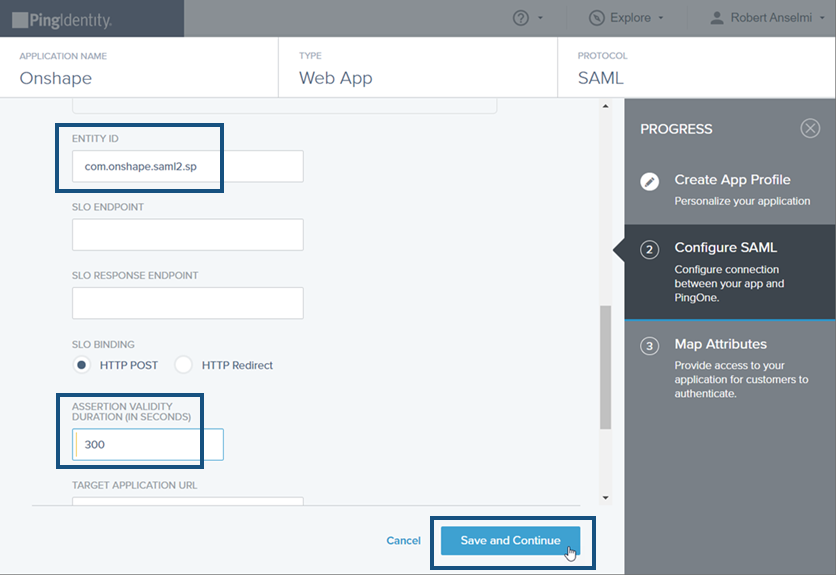
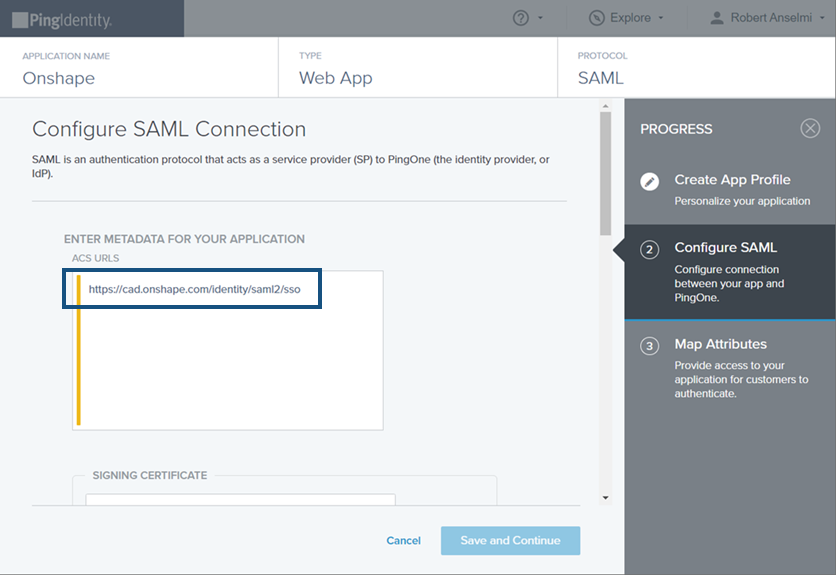
在開啟的 Configure SAML 分頁中,於 ACS URL 欄位輸入 https://cad.onshape.com/identity/saml2/sso。
-
在同樣的分頁中向下捲動,於 Entity ID 欄位中輸入 com.onshape.saml2.sp,再於Assertion Validity Duration in Seconds 欄位中輸入 300,最後按一下 Save and Continue 按鈕。
-
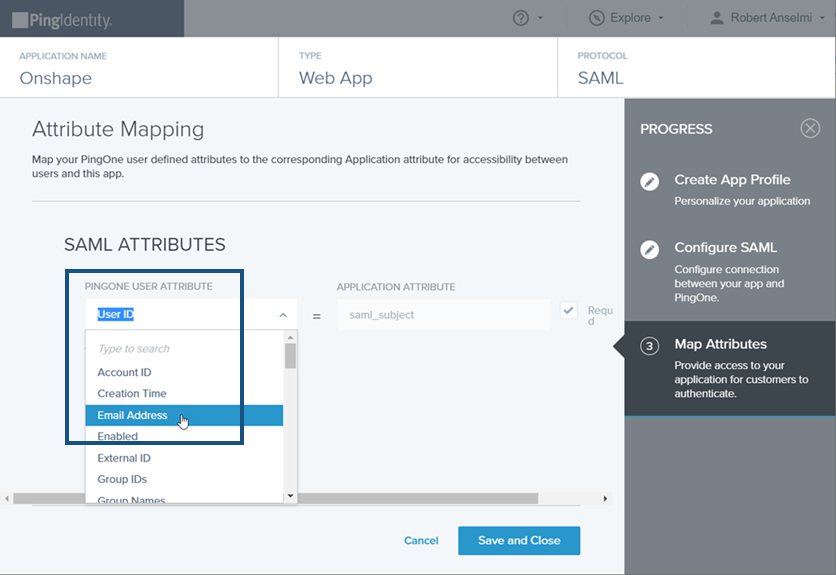
在 Map Attributes 分頁中從 PingOne User Attribute 下拉清單中選擇 Email Address。
-
在同樣的分頁中建立下列的三個 SAML Attributes:
-
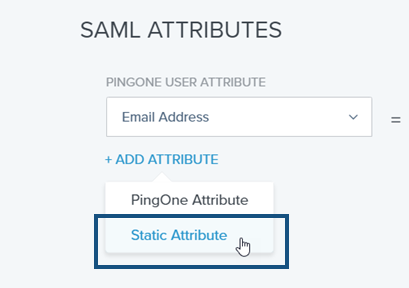
按一下 Add Attribute 連結然後從下拉清單中選取 Static Attribute。這樣會建立第一個 Static Attribute。在 Static Key 欄位中輸入 firstName,再於 Static Value 欄位中輸入 First Name。
-
再次點按 [Add Attribute] 連結然後從下拉清單中選取 Static Attribute。這樣會建立第二個 Static Attribute。在 Static Key 欄位中輸入 lastName,再於 Static Value 欄位中輸入 Last Name。
-
再次點按 [Add Attribute] 連結然後從下拉清單中選取 Static Attribute。這樣會建立第三個 Static Attribute。在 Static Key 欄位中輸入 companyName,再於 Static Value 欄位中輸入您網域名稱的前置碼。例如,如果您的 Onshape Enterprise 名稱是 Fishbowl.onshape.com,則請在欄位中輸入 Fishbowl。
-
-
在輸入全部三個 SAML Attributes 之後,應該看起來與下方的圖片類似。按一下 Save and Close 按鈕。
![在「SAML Attributes」頁面中 [Mapping Attributes]](Resources/Images/SSO/PingOne-Step-012.png)
-
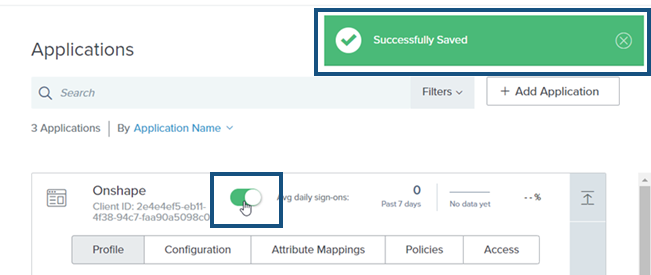
「Applications」視窗開啟,按一下 Avg daily sign-ons 切換按鈕來啟用對應用程式的登入。會在右上角出現一個通知說明已「Successfully Saved」應用程式。
-
按一下 Configuration 分項,然後點按 Download 按鈕來下載中繼資料檔案。成功下載這個檔案之後會在右上角出現一個訊息。按一下 X 來關閉訊息。
![應用程式頁面,按一下 [Configuration],然後按一下 [Downloading Metadata] 檔案](Resources/Images/SSO/PingOne-Step-016.png)
![PingIdentity 頁面,按一下左側導覽列中的 [Connections]](Resources/Images/SSO/PingOne-Step-002.png)
上方的 ACS URL 必須是 "cad.onshape.com",而不是您 Onshape 企業的 URL。
在 Onshape 中設定 SSO 提供者
一旦在識別提供者中設定了 Onshape,且您也下載了識別提供者的中繼資料檔案 (在 Onshape 中稱為組態設定檔案) ,就可以在 Onshape 中設定 SSO 提供者。
下方的影像範例顯示對一個通用識別提供者的設定, 但這些步驟對所有的識別提供者都是一樣的。
- 以管理員的身分使用您特定的網域名稱登入至 Onshape Enterprise 帳戶。從您的帳戶中選擇 Enterprise 設定:
![前往至我的帳戶功能表,然後按一下 [Enterprise 設定]](Resources/Images/SSO/azure-sso-025-02-01.png)
- Select Authentication from the left navigation menu.
-
在 單一登入 (SSO) 的分區中,按一下設定 SSO 提供者按鈕:
![按一下「單一登入 (SSO)」設定之下的 [設定 SSO 提供者]](Resources/Images/SSO/azure-sso-027-02.png)
-
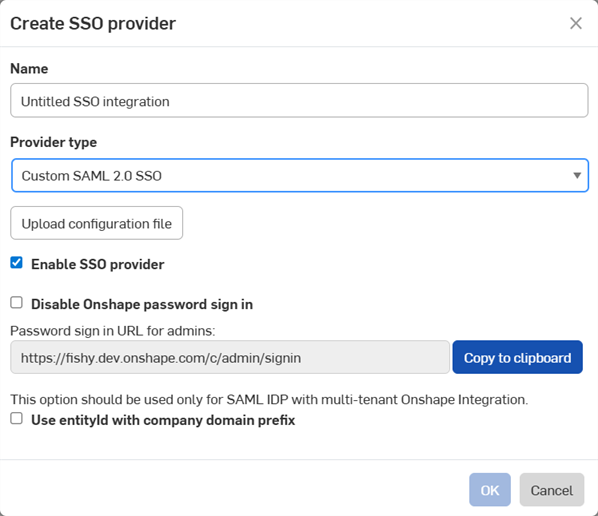
建立 SSO 提供者對話方塊開啟:
-
在名稱欄位中輸入像是 Custom SSO 之類的名稱。
-
在提供者類型下拉清單中選擇您的 SSO 提供者。
-
將啟用 SSO 提供者保留為核取。
-
目前先將停用 Onshape 密碼登入保留為不核取。
-
如果您有多租戶的設定 (有多個 Enterprise 的 SSO 提供者),請核取使用有公司網域前置碼的 entityId。
-
按一下上傳組態檔案按鈕:
停用 Onshape 密碼登入會為您與您的使用者停用一般的 Onshape 密碼登入。僅會為 Onshape URL 顯示 SSO 提供者的登入提示。在核取這個選項ˊ之前,請確定您自己可以登入至 Onshape (以管理員的身份)。在確認可透過您的 SSO 提供者正常登入之後,您可以於稍後回到此處並再次啟用這個選項。
選擇強制經單一登入 (SSO) 來登入 Onshape 同時會導致使用者無法直接登入至非 Enterprise 網域中,例如 cad.onshape.com。
通常是為一個 Enterprise 設定一個 SSO 提供者。如果使用 SAML 2.0 來設定多租戶的組態 (有多個 Enterprise 的 SSO 提供者),則管理員必須使用 com.onshape.saml2.sp.<網域前置碼> 來做為 Onshape Entity ID,並核取 使用有公司網域前置碼的 entityId 方塊。
-
-
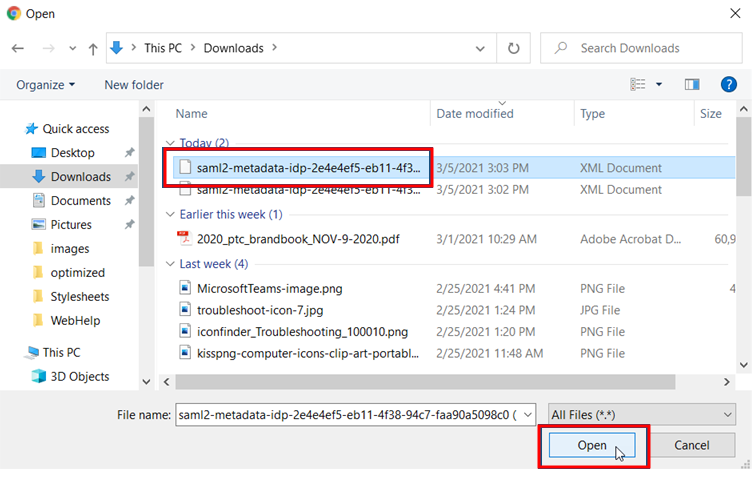
找出並選擇您先前下載的中繼資料組態檔案,然後按一下開啟:
-
按一下確定:
![按一下 [確定] 來完成建立 SSO 提供者](Resources/Images/SSO/custom-sso-03-02.png)
-
檔案隨即上傳。上傳完成時會有通知出現:

- 同時登出您的 Onshape 與 SSO 提供者的帳戶,並請確定強制重新整理這兩個帳戶。當您再次抵達 Onshape 登入頁面時,會在底部有您 SSO 提供者的新登入連結。
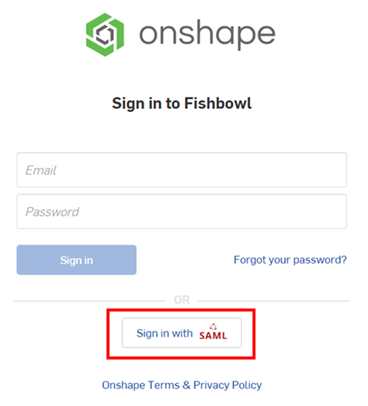
若要登入至 Onshape 中,管理員必須佈建使用者 (在其單一登入帳戶中) 才能使用 Onshape 應用程式。