 变换草图
变换草图
![]()
![]()
![]()
可用于:草图
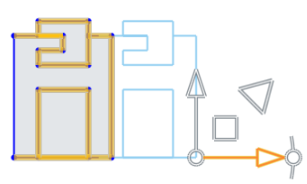
变换可调整草图的位置、方向和比例。
本视频将为您介绍如何使用“变换”草图工具。“变换”会调整草图的位置和方向。您可以先选择所有图元,然后再选择“变换”工具,也可以先选择“变换”工具,然后再选择图元。在本例中,我们先选择草图工具栏中的“变换”工具,然后再选择要移动或定向的图元。为了移动它们,您可以使用箭头,这会将它们移至新位置。对位置感到满意后,单击鼠标左键,图元即会移动。您还可以向上、向下、向左或向右以任意方向移动图元。
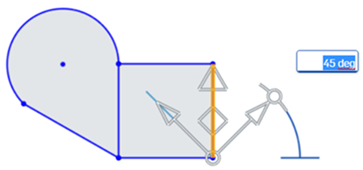
要更改任何图元的方向角度,请先选择图元。然后,选择草图工具栏中的“变换”工具,接下来即可使用角度操纵器以负向或正向调整旋转角度。如果要输入精确测量值,您可以使用键盘来输入,然后按 Enter 键,再按鼠标左键以接受更改。
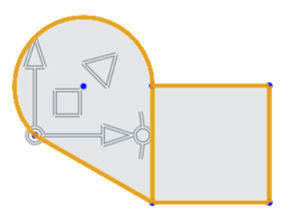
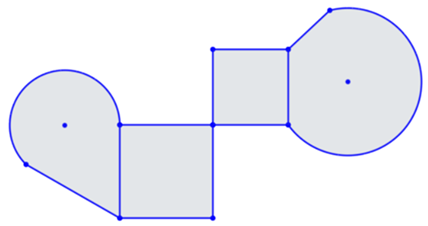
您还可以使用“变换”工具将两个闭合图元形状连接在一起。首先,单击“变换”工具。选择第一个闭合形状中的图元。放置操纵器的球点以定向草图的捕捉点,在此例中为方形的右上角捕捉点。接下来,使用平面将草图球点拖动到另一草图上的捕捉点,在此例中为方形左下角的点。单击鼠标左键以接受更改。
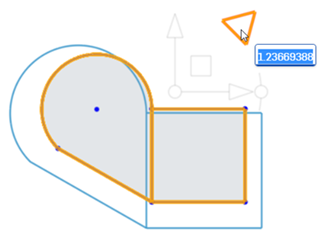
变换工具也可用于放大或缩小图元。为此,首先选择草图工具栏中的变换工具。选择要缩放的图元,然后使用比例操纵器向上拖动以创建更大的比例,或向下拖动以创建更小的比例。当您有了想要的比例大小时,单击鼠标左键以接受更改。
- 单击
 。
。 - 选择要移动的草图图元。
- 使用操纵器拖动并定向草图。
- 根据需要放置并定向草图后,在空白处单击。
通过操纵器旋转时,会激活角度输入框。输入一个角度,按 Enter 键,在空白处单击以设置角度:
放置操纵器的球点以定向草图的捕捉点:
- 在草图上将球点拖动到您希望用作捕捉点的点:
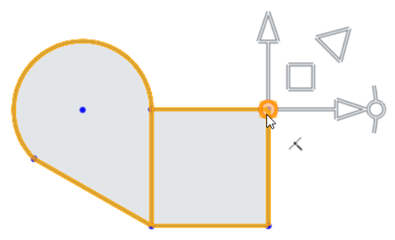
- 使用平面将草图球点拖动到另一个草图上的捕捉点(在本例中是正方形左下角的点):
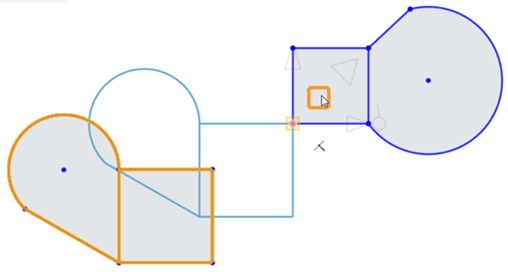
- 单击关闭草图以设置变换:
要缩放草图图元,请单击比例(三角形)操纵器并将其向外或向内拖动,以分别放大或缩小。拖动操作会激活比例输入框。输入一个用数字表示的比例,按 Enter 键,然后在空白处单击以设置比例:
有关更多信息,请参阅变换草图。
- 支持预选和后选,可以在操作期间添加和移除图元。
- 单击关闭草图或按 Enter 键可提交变换并退出操作。按 Esc 键可取消操作。
- 如果不旋转或旋转 180 度,内部约束保持不变。
- 如果旋转 90 度或 270 度,水平约束和竖直约束会互换。
- 在某些情况下,可能会添加构造几何图元来保持自由度。
- Directed dimensions are deleted, and may be replaced with construction geometry and minimum dimensions.
- 图像、文本、DWG 和 DXF 也支持变换。