插入图像
可用于:草图
使用导入的图像作为草图的基础。将图像上传到文档,然后在草图中打开该图像。使用图像作为导向来创建草图几何图元。支持的图像类型包括:PNG、JPEG 和 BMP。
“插入”图像草图工具可让您使用导入的图像作为草图的基础。将图像上传到文档,然后在草图中打开该图像。使用图像作为导向来创建草图几何图元。支持的图像类型包括:PNG、JPEG 和 BMP。
在特征工具栏上单击“草图”特征以创建新草图。在图形区域中选择一个平面。
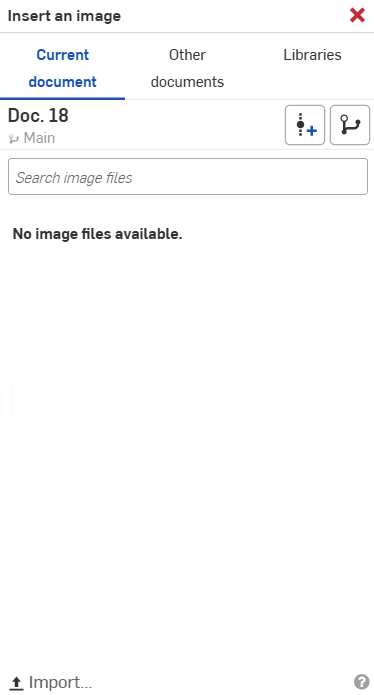
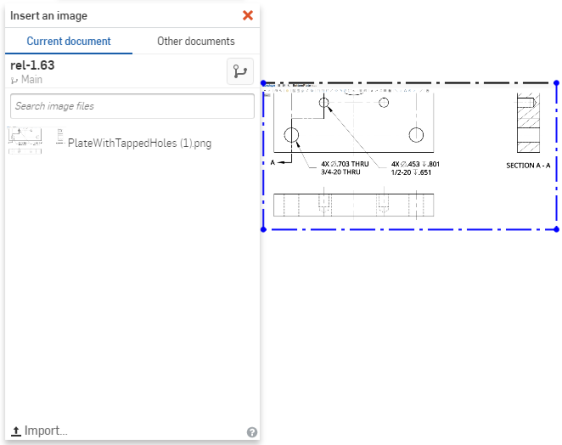
在草图工具栏上单击“插入图像”草图工具。这将打开“插入图像”对话框。在此处,您可以使用搜索图像文件输入框来搜索图像文件。您也可以选择列表中已经存在的图像,也可以单击“导入”按钮。
在“打开”对话框中搜索并选择图像,然后单击“打开”按钮。这会将图像导入到对话框中。图像进入对话框后,单击它。光标变为加号。单击并从左上角拖动到右下角。当您松开时,图像会被放置在草图中。
- Click
to open the Insert image dialog:
- Choose to insert an image from the current document, other documents, or from an image library. If there are no image files listed, use the Import link at the bottom of the dialog.
Current document - Select an image (or use the Search bar to find one) from the currently active document. You can also Create a version or view the Version graph of the document.
Other documents - Select an image (or use the Search bar to find one) from other documents in your company.
Libraries - Select an image (or use the Search bar to find one) from an image library. Select a library from the dropdown menu, then select an image.
- Click Done at the bottom of the dialog box, then click and drag in the graphics area to position the image. The aspect ratio of the image is maintained and indicated by a dashed line as you drag.
A horizontal constraint is applied to the lower edge of the box by default.

The image becomes semi-transparent as you move it, for better visibility during placement.
To rotate the image, first delete the horizontal constraint applied by default, then fix one corner of the image and drag another.
您可以在图像上绘制草图。首次标注草图几何图元的尺寸也会缩放图像。
Image libraries are special folders that contain images. Each company can have one image library that is owned by an administrator (with given share permissions for the company). Additionally, individuals can each set up one image library for their own personal use, with no special permissions required.
Creating an image library
Image libraries are created and stored in Onshape folders. From the Documents page:
-
Create a folder. (Company libraries must be created in the root folder.)
-
Right-click on the folder in the Projects and Folders list and hover over Set library in the context menu to access the extended menu options.
-
From the extended menu options, click My images. This sets the folder as your image library.
Once the folder is set as your image library, right-click on the folder and hover over the Image library option to access the following additional context menu options:
-
Update my library - Update your image library. (Useful when changes are made to a document inside the image library.)
-
Unset my library - Unset the selected folder as your image library. (This removes the folder's designation as the user/company library without deleting the folder or its content.)
-
Export my library - Export your image library via download.
-
Validate library thumbnails - Check and update your image thumbnails.
-
Set as <company> library - Set the selected folder as your company-wide image library.
Supported file formats
-
JPEG
-
PNG
-
GIF
-
BMP
- 最大图像大小取决于设备的 GPU,可以在 https://webglreport.com 上查看。确保图像的宽度和高度等于或小于“最大纹理大小”像素限制。
- 要旋转图像,请移除水平约束,固定一个角并拖动另一个角。
- 要移动图像,请移除所有约束,然后单击图像并将其拖动到所需位置。
- 您可以在图像上绘制草图。
- 标注草图几何图元的尺寸也会缩放图像,但是只有应用的第一个尺寸会缩放图像。要重新缩放图像,请移除额外的尺寸,调整剩余的一个尺寸。
- 当您显示/隐藏草图时,图像也会显示或隐藏。
- 此特征遵循 Alpha 通道,所以如果它是透明的,将在 Onshape 中保持这种状态。
- 您可以在一个 Part Studio 中复制/粘贴图像(作为草图图元) ,也可以在 Part Studio 之间进行复制/粘贴。
- 您可以使用环境菜单和“编辑图像”命令来再选择一个图像文件或上传一个新文件。
- 如果图像来源改变,则可以使用选项卡环境菜单中的“更新”选项在其选项卡中进行更新。这也会更新文档中使用的任何位置的图像。